


- bhavya gada
- No Comments
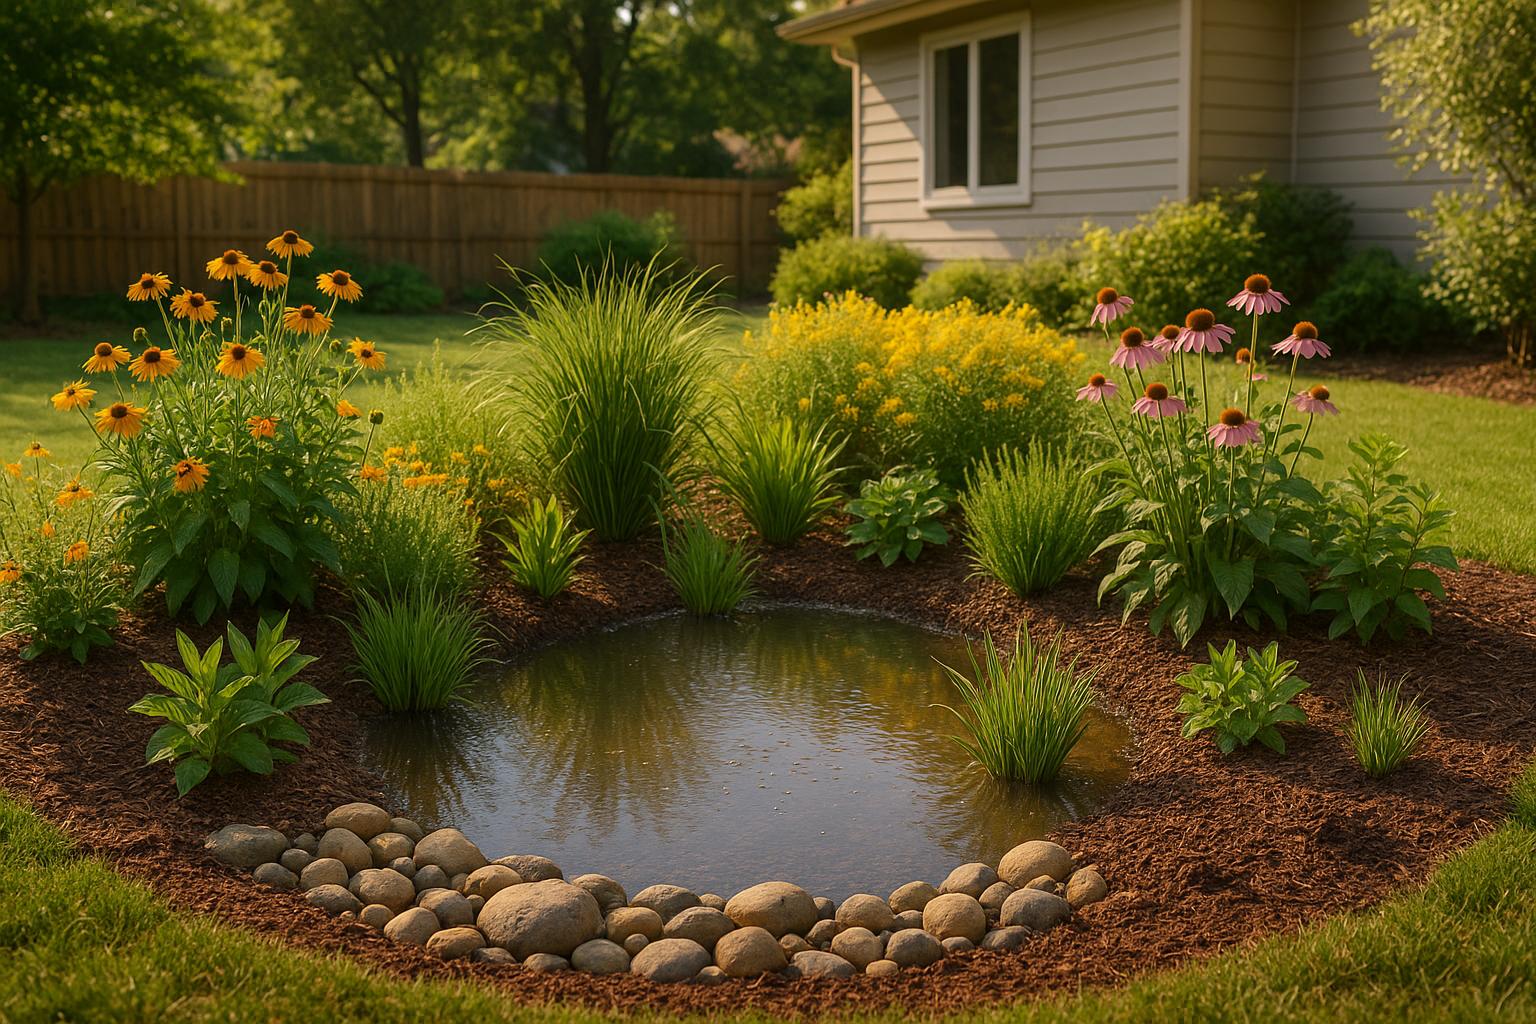
Rain gardens are a simple, effective way to manage stormwater runoff while beautifying your yard. These gardens collect rainwater from roofs, driveways, and other surfaces, allowing it to seep into the ground instead of causing pollution or flooding. They’re planted with native species that thrive in both wet and dry conditions, making them low-maintenance and eco-friendly.
Here’s how you can create a rain garden in just five steps:
- Pick the Right Spot: Choose a location that naturally collects water, at least 10–15 feet from your home, and test the soil drainage.
- Design the Garden: Calculate the size based on the runoff area and plan a layout that complements your yard.
- Prepare the Site: Dig to the proper depth, shape the garden, and amend the soil if needed.
- Plant Native Vegetation: Select plants that handle wet and dry conditions, such as sedges, irises, and grasses.
- Maintain the Garden: Weed, mulch, and water during the first few years to establish healthy growth.
Rain gardens can reduce runoff by 30%, filter out up to 90% of chemicals, and provide habitats for pollinators and wildlife. With minimal upkeep, they’re a practical and attractive addition to your property.
How to Build a Native Plant Rain Garden – A Step-by-Step Tutorial
Step 1: Choose the Right Location
The first step in creating a rain garden is picking the best spot – one that naturally collects runoff from hard surfaces while staying far enough from your home to avoid foundation issues.
Start by observing how water moves through your yard. Take a walk during or right after a rainstorm to see where water naturally flows and pools. Rain gardens thrive in lower areas that naturally collect water.
Maintain a safe distance from your home – ideally 10 to 15 feet away from the foundation [2][4]. This ensures water won’t seep into your basement or crawl space. Avoid placing the garden over septic systems, leach fields, or utility lines. Before digging, call 811 to have utility lines marked for free [3].
Look for a sunny or partially sunny spot, as too much shade can limit your plant choices and slow water absorption [4]. Avoid placing the garden under large trees. Also, flatter areas are much easier to work with compared to steep slopes [4].
Don’t forget practical considerations like existing tree roots, retaining walls, or property setbacks. You’ll also need a clear path to direct runoff into the rain garden. This could be through a downspout extension, drainage pipe, or by grading the land [3]. Once you’ve identified a spot, test the soil’s drainage to ensure it’s suitable for a rain garden.
Test Your Soil Drainage
Before committing to a location, it’s essential to check how well the soil absorbs water. A simple percolation test will help determine if the site is suitable. Rain gardens need soil that drains at a rate of 1 to 3 inches per hour for optimal performance [5].
Here’s how to test: Dig a hole about 12–18 inches deep and 4–12 inches wide. Fill it with water and let it drain overnight. The next day, refill the hole and measure how much the water level drops after 15 minutes.
Multiply the 15-minute drop by four to calculate the hourly drainage rate [5]. For instance, if the water drops 0.5 inches in 15 minutes, your soil drains at 2 inches per hour – perfect for a rain garden.
If your soil drains slower than 1 inch per hour, it may need amendments like compost or sand [5]. On the other hand, soil that drains faster than 4 inches per hour might require organic matter to help it retain water [5]. If water doesn’t drain completely within 24 hours, it’s best to choose another location [3].
Keep in mind that clay soils typically drain slowly, while sandy soils drain too quickly and may not filter pollutants effectively [5]. Compacted soil, often caused by foot traffic or construction, can also create drainage issues [5]. Once you’ve confirmed the soil’s drainage, the next step is to evaluate the slope to ensure your garden captures runoff effectively.
Check Slope and Water Flow
Rain gardens perform best on gentle slopes, where they can intercept water without being overwhelmed [6]. Ideally, place your garden on the lower side of a mild slope to capture runoff as it flows downhill [1][6].
Design the garden as a long, narrow bed positioned perpendicular to the slope [1]. This layout helps trap the most water as it moves downhill, acting like a speed bump that slows and collects runoff.
If your yard has a steep slope, try to avoid it. But if that’s not an option, you can use the soil you excavate to build a berm on the downhill side to help contain the water [6][7].
Finally, think about how your rain garden will handle overflow during heavy storms. Plan for an overflow area where excess water can exit safely without causing erosion or flooding [6]. This could be a swale leading to the street, a lower part of your yard, or even a connection to an existing storm drain system.
Step 2: Plan Your Rain Garden Design
After choosing the perfect spot for your rain garden, it’s time to focus on its size and design. Proper planning ensures your garden not only manages runoff effectively from surfaces like roofs, driveways, and walkways but also enhances the overall look of your yard.
Calculate Size and Depth
As a general rule, the rain garden should be about 10% of the impervious surface area that drains into it[8]. For instance, if your roof covers 2,000 square feet, aim for a rain garden of roughly 200 square feet.
Start by measuring the hard surfaces that contribute runoff – rooftops, patios, driveways, and walkways. You can use tools like Google Earth for larger areas or a tape measure for smaller spaces[8]. Use the "10/20 rule" to estimate the garden’s surface area: divide the total runoff area by 10 for a 3-inch depth or by 20 for a 6-inch depth[8].
The depth of your rain garden depends on how well your soil drains. Soil with faster drainage requires a shallower garden, while slower-draining soil benefits from greater depth. Here’s a quick guide to help you decide:
| Drainage Rate | Suggested Rain Garden Depth |
|---|---|
| 1/2 to 1 inch per hour | 12 to 24 inches |
| 1 to 2 inches per hour | 6 to 8 inches |
| Faster than 2 inches per hour | 6 inches |
Once you’ve calculated the size and depth, you can move on to designing a layout that works with your yard’s natural features while efficiently capturing runoff.
Plan the Layout
Choose a shape that complements your yard’s aesthetics. Curved shapes like crescents, ovals, teardrops, or kidney forms often look more natural than straight-edged rectangles[9]. Ideally, the garden’s length should be at least twice its width, with the longer side positioned perpendicular to the flow of water. On steeper slopes (8% or more), keep the width under 15 feet to minimize erosion[9].
To make the rain garden feel like a natural part of your yard, integrate it with existing features. For example, placing it within a perennial bed or along a shrub border can help it blend seamlessly into your landscape, especially if space is limited[10].
When designing, focus on three key areas:
- Inflow: The point where water enters, typically from a downspout or swale.
- Basin: The central area where plants and soil absorb and filter the water.
- Overflow: A designated spot for excess water to exit during heavy rain, redirecting it safely away from your home – perhaps toward the street, a lower section of your yard, or an existing storm drain[6].
Add some finishing touches to make your rain garden visually appealing. Consider edging it with decorative stones, creating pathways, or even adding seating areas for a welcoming touch[10]. If space allows, you might install multiple smaller rain gardens to cover more ground and create a cohesive, dynamic landscape[10].
With your design finalized, you’re ready to move on to preparing the site for excavation and planting.
Step 3: Prepare the Site
Now that your rain garden design is mapped out, it’s time to roll up your sleeves and prepare the site. This step includes clearing the area, digging to the right depth, and setting up soil conditions that encourage water absorption and healthy plant growth.
Dig and Shape the Garden
Before you start digging, double-check that utility lines are marked. Once that’s done, outline the garden’s perimeter with stakes and string. This step helps you stick to your planned dimensions and gives you a clear visual guide.
"Start by marking your garden’s perimeter using stakes and string. Create an outline that follows natural contours for a more organic look. Remove grass and dig to a depth of 4-6 inches, creating a flat bottom and sloped sides. The sides should have a gentle grade to prevent erosion." – Arborist Now [11]
To prepare the area, remove grass and weeds using a shovel, sod cutter, or sheet mulching. For sandy soils, dig to a depth of 4–6 inches, and for clay soils, aim for 6–8 inches. Make sure the bottom is level and the sides slope gently to avoid erosion [11][12][13]. If you prefer, you can suppress grass by using sheet mulching with black plastic [13].
If your garden is on a slope, use some of the excavated soil to build a berm on the downhill side. This small raised barrier helps hold water in the garden instead of letting it run off. Compact the berm firmly, ensuring the base is at least 2 feet wide and the top about 1 foot wide for stability. Don’t forget to plan an overflow pathway to safely channel excess water during heavy rains [12][11].
Once the garden’s shape is complete, the next step is to fine-tune the soil to ensure it supports both water absorption and plant growth.
Improve the Soil
After digging, the soil might need some adjustments to work effectively. Start by testing how well it drains. Dig a hole about 12 inches deep, fill it with water, and monitor how long it takes to drain [11][13]. If it takes more than 24 hours, you’ll need to amend the soil to improve its drainage capacity [11].
Here’s how to amend based on your soil type:
| Soil Type | Amendment |
|---|---|
| Clay Soils | Add coarse sand and compost in a 1:1 ratio |
| Sandy Soils | Add compost to improve water retention |
For clay soils, which tend to drain poorly, mix in coarse sand and compost. The sand helps break up the dense structure, while compost adds organic matter that boosts soil health over time [11]. On the other hand, sandy soils drain too quickly and struggle to retain moisture. Adding compost helps these soils hold water longer and provides essential nutrients [11].
Incorporate these amendments into the top 6 inches of soil. This creates a consistent, nutrient-rich layer that supports plant growth while managing water flow effectively.
Although soil preparation can feel like a lot of work, it’s a critical step for ensuring your rain garden thrives. Properly prepared soil not only improves drainage but also creates the perfect foundation for the native plants you’ll add next.
sbb-itb-843f8be
Step 4: Choose and Plant Native Plants
After preparing your site, the next step is selecting plants that not only enhance water filtration but also blend seamlessly with your landscape. Opting for native Maryland plants is a smart choice – they’re well-suited to the local climate and can handle the alternating wet and dry conditions common in rain gardens.
Pick Native Maryland Plants
Native plants are a win-win for stormwater management and the environment. Their deep root systems improve water absorption, prevent soil erosion, and provide essential habitats for local wildlife.
"Creating a dense groundcover layer in a RainScape garden is important for erosion control – providing a tapestry of root systems knitting together to hold soil in place." – My Green Montgomery [14]
Sedges are particularly well-suited for rain gardens, thriving in soils that alternate between wet and dry. Here are a few Maryland natives that excel in such conditions:
| Plant Name | Key Characteristics |
|---|---|
| Social Sedge (Carex socialis) | Tolerates periodic flooding; thrives in moist, partly shaded areas; deer resistant and low maintenance |
| Cherokee Sedge (Carex cherokeensis) | Adapts to wet or average soils and varying light conditions; drought- and heat-tolerant once established |
| Eastern Narrow Leaved Sedge (Carex amphibola) | Prefers consistently moist to wet soil with partial to full shade; great for erosion control |
For areas exposed to runoff containing de-icing chemicals, consider salt-tolerant plants like Seaside Goldenrod or New York Aster. On the drier edges of your garden, Blue Flag Iris and Switchgrass are excellent choices, as they perform well in both wet and dry conditions.
Once you’ve chosen your plants, it’s time to focus on proper planting and mulching techniques to ensure their success.
Plant and Mulch Properly
Timing is everything – plant in the fall or early spring to give roots a chance to grow strong before summer heat sets in.
Start by sketching a scaled plan that shows where each plant will go. Place moisture-loving plants like sedges in the lowest, wettest spots, while drought-tolerant species should occupy higher berms and edges. Arranging plants in irregular groupings can help replicate a natural look.
To add depth and variety, include a mix of shrubs, perennials, and medium-sized trees. This layering not only boosts visual appeal but also increases the ecological benefits of your rain garden. Select plants that match your soil type to avoid unnecessary soil modifications.
Water your plants deeply and slowly to encourage strong root growth. Add a 2–3 inch layer of organic mulch around the base of each plant, but avoid direct contact with stems to prevent rot. Mulch options like wood chips, bark, straw, or shredded leaves help retain moisture, suppress weeds, and regulate soil temperature. Plant densely to establish groundcover quickly and reduce maintenance needs.
Step 5: Maintain Your Rain Garden
Taking care of your rain garden is especially important during the first three years while plants are establishing themselves. A well-thought-out design and proper planting can make this process easier, turning maintenance into more of a fine-tuning task rather than a major chore.
"A properly designed rain garden should not be much different than maintaining any other garden on your property – weekly watering and weeding when the garden is first planted, followed by annual mulching, pruning, and replacing any dead or diseased plants." – Rhode Island Department of Environmental Management [15]
During the initial years, your rain garden will demand more attention, but this effort pays off. Once established, it becomes a low-maintenance feature that not only manages stormwater efficiently but also enhances your yard’s overall aesthetic.
Regular Upkeep Tasks
Once your garden is up and running, a little regular care will keep it in top shape.
- Hand-pull weeds during the early stages. As plants grow and fill in, they’ll naturally crowd out most weeds, reducing the need for weeding over time. Avoid using tools that could harm roots or compact the soil.
- Check after storms for signs of erosion, sediment buildup, or debris. Clear any blockages to maintain proper water flow. Ideally, your rain garden should drain within 30 hours after a typical storm and no more than 72 hours after a heavy one [16]. If water lingers too long, loosen compacted soil with a rake to improve drainage.
- Water deeply and slowly during the first two years, especially in dry periods, to help plants develop strong roots. After that, most native plants should thrive with little to no extra watering.
- Reapply mulch (2-3 inches) as it breaks down. Mulch helps retain soil moisture, suppress weeds, and regulate temperature. Depending on the material, you may need to refresh it once or twice a year.
- Skip the fertilizers. Rain gardens rarely need them, and excess nutrients can lead to unwanted plant growth or disrupt the ecosystem.
Seasonal Care
Adapting your care routine to the seasons ensures your rain garden stays healthy year-round.
- Spring: Clear out dead plant material and add a fresh layer of mulch. This is also a good time to replace any plants that didn’t survive the winter or to fill in bare spots.
- Summer: Keep weeds under control and water during dry periods to support your plants through hot weather.
- Fall: Cut back perennials to about 6 inches above the ground, but leave ornamental grasses and seed heads intact for winter interest and wildlife habitat. Remove fallen leaves to prevent them from smothering plants or clogging drainage.
- Winter: Watch for erosion during snowmelt or winter storms. Take note of any damage so you can address it when spring arrives.
Throughout the year, encourage beneficial insects and avoid using pesticides, which can harm the delicate ecosystem your rain garden supports. If you need to remove invasive plants, bag them and dispose of them properly – don’t compost them, as this could spread the problem. By staying consistent with these practices, your rain garden will thrive and continue to be a functional and beautiful part of your landscape.
When to Get Professional Help
While many homeowners can tackle smaller rain garden projects on their own, there are situations where bringing in a professional makes sense. If your property features steep slopes, large drainage areas, or challenging soil conditions, professional expertise and specialized tools might be necessary. Projects involving significant regrading or advanced drainage installations also benefit from a professional assessment to ensure everything works properly and meets local regulations.
Selecting the right plants for Maryland’s climate can be tricky without expert knowledge. This is where professional guidance can make a big difference, especially for more intricate projects.
Pro Landscapes MD provides comprehensive stormwater management solutions across central Maryland, serving areas like Howard County, Montgomery County, Carroll County, Frederick County, Prince George’s County, and Baltimore County. Their services include drainage solutions such as French drains, dry riverbeds, and advanced stormwater systems.
Beyond just design, their expertise extends to plant selection and integration. This combination ensures that your rain garden not only manages stormwater effectively but also enhances the overall appearance of your landscape.
"At Pro Landscapes MD, we specialize in creating outdoor environments that blend beauty, function, and sustainability." [17]
Professional installation is particularly valuable in communities like Ellicott City, Columbia, Gaithersburg, and Bethesda. Here, thoughtful design and seamless integration with existing landscaping can significantly boost the long-term value of your property.
Additionally, ongoing maintenance from professionals helps to address any new challenges and keep your rain garden functioning at its best. For homeowners exploring professional help, Pro Landscapes MD offers free consultations and proposals, giving you a clear understanding of the project’s scope and investment. This expertise perfectly complements the step-by-step process outlined earlier.
Conclusion
By following these five steps, you can create a rain garden that not only helps manage stormwater runoff but also protects local waterways. On average, a home rain garden filters an impressive 30,000 gallons of water each year, removing 90% of chemicals and 80% of sediments from stormwater runoff [18][19]. Plus, it absorbs 30% more water than a traditional lawn, significantly lowering the risk of flooding [18][20].
Beyond water management, a rain garden adds beauty and purpose to your outdoor space. Using native Maryland plants attracts pollinators and wildlife, transforming your yard into a vibrant, self-sustaining ecosystem. This blend of ecological impact and visual appeal makes a rain garden a worthwhile addition to any property.
"Rain gardens are a natural way to combat man-made problems by saving neighborhoods and protecting local waterways." – Coalition for the Delaware River Watershed [19]
While many homeowners can successfully design and build their own rain gardens, some situations – like steep slopes or tricky drainage – may call for professional assistance. In such cases, experts like Pro Landscapes MD can provide tailored stormwater management solutions, ensuring your rain garden is designed, installed, and maintained to perform at its best for years to come.
With a well-designed rain garden, you’ll not only safeguard your property but also contribute to a healthier, more sustainable local ecosystem.
FAQs
How can I figure out the right size and depth for my rain garden to handle yard runoff?
To determine the size of your rain garden, start by measuring the impervious surfaces in your yard – like your roof, driveway, or patio – that contribute to water runoff. Calculate the total area of these surfaces and estimate how much water they generate during a typical rainstorm. A helpful rule of thumb is to design your rain garden to handle about 1 inch of runoff from these areas.
When it comes to depth, most rain gardens range from 4 to 8 inches deep, with 6 inches being a common choice. This depth strikes a good balance for water absorption and maintaining healthy plants. To figure out the garden’s surface area, divide the total drainage area by 6 if you’re going with a 6-inch depth. You can adjust this calculation based on your yard’s specific conditions and how much runoff you aim to manage.
What are the best native plants for a rain garden that combine beauty and effective water absorption?
When planning a rain garden, opting for native plants is a win-win: they’re great for the environment and look amazing. In the U.S., some standout choices include swamp milkweed (Asclepias incarnata), loved for its bright pink blooms; blue flag iris (Iris versicolor), which flourishes in wet soil and brings a splash of purple; and big bluestem (Andropogon gerardii), a resilient grass with eye-catching foliage. These plants don’t just soak up extra water – they also draw in pollinators, adding even more charm to your garden.
What maintenance is needed in the first few years to keep a rain garden thriving?
To help your rain garden thrive during its early stages, prioritize regular care and observation. Water the plants once a week or more often if conditions are particularly dry. Stay on top of weed removal to reduce competition for resources, and keep an eye out for signs of erosion or sediment buildup – tackle these issues as soon as they appear. Make sure inlets and outlets are free of debris to allow water to flow as it should. Once a year, trim or prune the plants to support their growth and keep the garden looking neat. By sticking to these straightforward steps, your rain garden will grow strong and function as intended.
Chat with Us