


- bhavya gada
- No Comments
Rain gardens are an effective way to manage stormwater runoff, reduce flooding, and promote groundwater absorption. However, poor drainage can lead to standing water, plant stress, and mosquito problems. To prevent these issues, focus on three key areas:
- Proper Site Selection: Place the garden at least 10 feet from your home, away from septic systems, and in areas with good sunlight and soil conditions.
- Grading and Soil Preparation: Ensure a gentle slope (1–5%) directs water into the garden. Use a soil mix of 60% sand, 20% compost, and 20% topsoil for optimal drainage.
- Maintenance and Overflow Systems: Regularly clear debris, check water flow after storms, and add overflow features like berms or bioswales to handle excess water.
Consistent care, soil testing, and professional help when needed can ensure your rain garden works efficiently while protecting your property.
Transforming a poorly drained area into a rain garden | DIY Garden Projects | Gardening Australia

How Drainage Works in Rain Gardens
Rain gardens are more than just a pretty addition to your yard – they’re a powerful tool for managing stormwater. At their core, they rely on a system of interconnected parts to handle water efficiently while protecting the environment.
What is a Rain Garden?
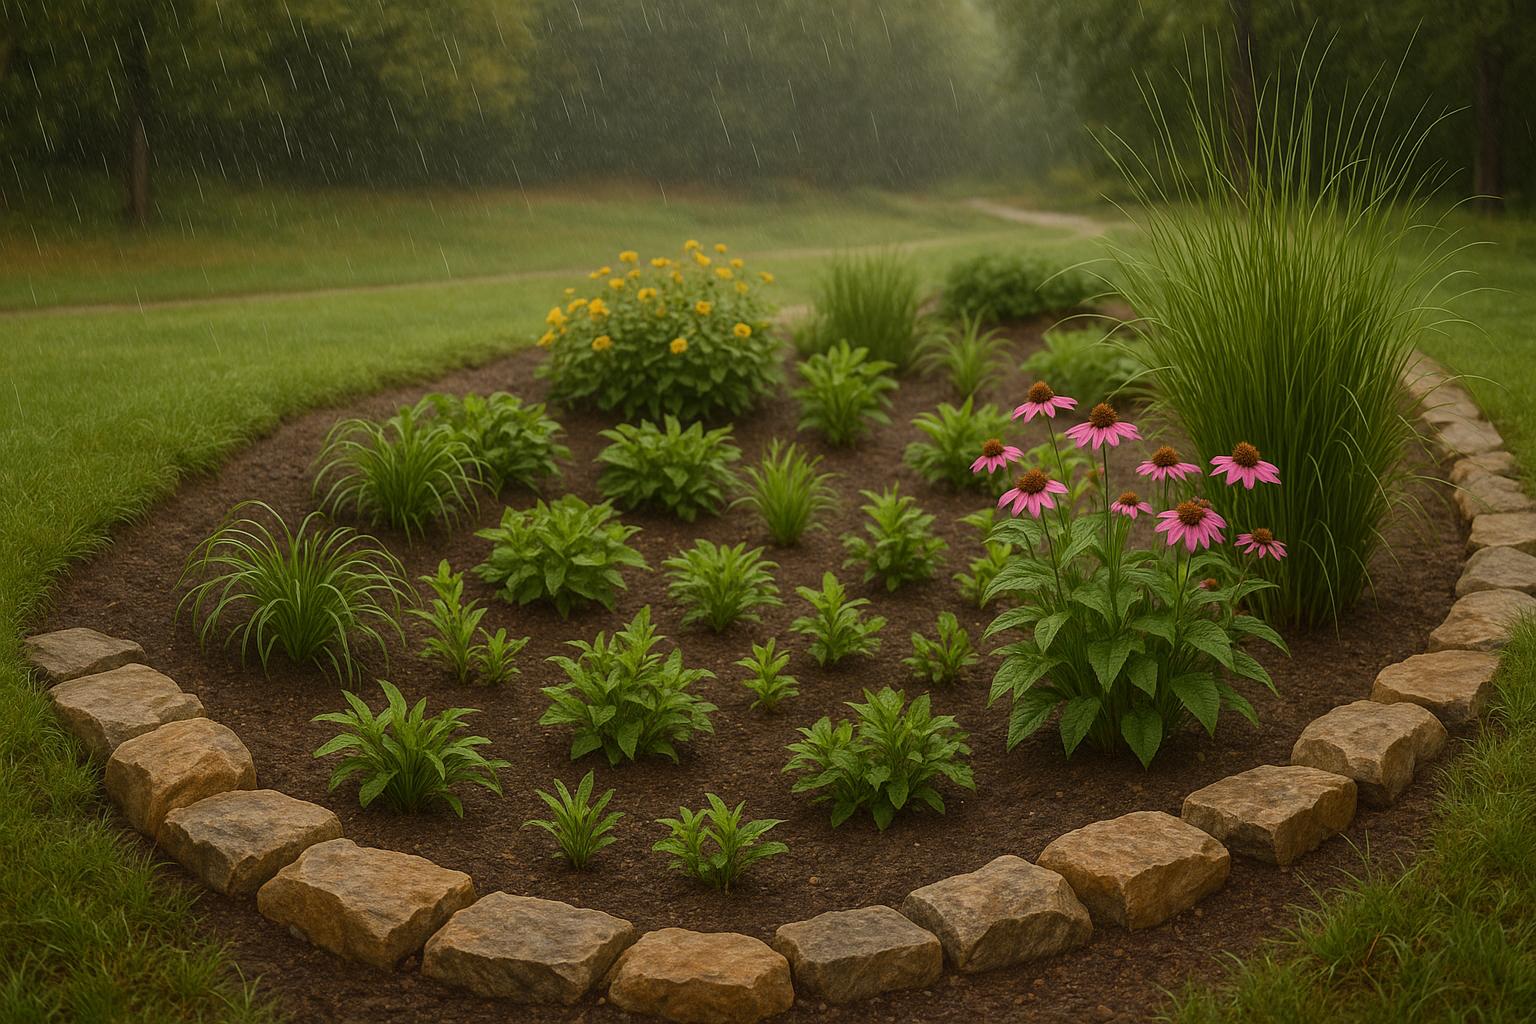
A rain garden is essentially a shallow, planted depression designed to collect and absorb rainwater runoff from hard surfaces like roofs, driveways, and streets [2][11]. Unlike your typical flower bed, these gardens are built to handle large amounts of water during storms while also filtering out harmful pollutants.
Here’s how it works: as rainwater pools in the garden, it seeps into the soil layers below. These layers, often a mix of soil, sand, and compost, work alongside plant roots to filter out contaminants like fertilizers, pesticides, and sediments [11][5]. The result? Cleaner water and a healthier environment.
But rain gardens don’t just filter water – they also help replenish underground water supplies. Instead of sending runoff straight to storm drains, they allow water to soak into the ground, naturally recharging groundwater. This dual purpose makes them an effective tool for reducing flooding and protecting local ecosystems.
Main Parts of Rain Garden Drainage
Rain garden drainage systems are made up of three main components: inflow, basin, and outflow.
- Inflow System: This is where water enters the garden. It might include channels, downspouts, or swales that guide runoff from your roof or driveway into the garden [11]. To prevent erosion, entry points are often reinforced with rocks or baffles to slow down fast-moving water [12][7].
- Basin: The basin is the central area where water temporarily collects and infiltrates into the soil [2][5]. This part of the garden is carefully designed with layers of sand, compost, and mulch to ensure proper drainage and pollutant removal [12][7][8]. The basin’s size is critical – it’s typically designed to handle 20-30% of the area draining into it [6].
- Outflow or Overflow System: During heavy storms, the outflow system acts as a safety valve. Features like berms, overflow pipes, or spillways direct excess water away from the garden to prevent flooding and protect nearby property [11]. Properly designed outflow systems are essential for avoiding water damage.
Common Drainage Problems
Even the best-designed rain gardens can run into drainage issues. Here are some common challenges and how to spot them:
- Standing Water: If water pools for more than 48 hours, it’s a problem. Stagnant water can attract mosquitoes and harm plants that aren’t suited to soggy conditions [10][6].
- Soil Erosion: Fast-moving water or poor stabilization can lead to erosion. Signs include exposed roots, channels carved into the garden bed, or sediment deposits in the wrong places [2][11]. This often happens when slopes are too steep.
- Plant Damage: Prolonged wet conditions can stress even water-tolerant plants. If you notice yellowing leaves, wilting despite wet soil, or dying plants in the wettest parts of your garden, drainage might be the issue [10].
- Blocked Inflow or Outflow: Debris, sediment, or leaves can clog critical areas, slowing water movement and causing backups [10]. Regular maintenance is key to preventing these blockages, but they often go unnoticed until a heavy storm exposes the problem.
Site Selection and Grading for Good Drainage
To make the most of your rain garden, selecting the right location and ensuring proper grading are essential. These steps lay the groundwork for a rain garden that effectively manages water. A poorly chosen site can lead to drainage issues, while thoughtful grading ensures water flows exactly where it should.
Picking the Right Location
When deciding where to place your rain garden, location matters. Keep it at least 10 feet away from your home’s foundation and over 25 feet from septic systems or well heads to avoid water damage or contamination risks [2].
Look for a spot that gets partial to full sunlight and has a water table at least 2 feet below the garden’s base [2]. Ideally, the garden should be positioned downslope from impervious surfaces like rooftops, driveways, or patios. This allows runoff to flow naturally into the garden. However, take care not to create runoff problems for your neighbors – your rain garden should only manage water from your property.
Avoid areas with compacted soil, such as old driveways or heavily trafficked sections of your yard. Compacted soil acts like a barrier, preventing water from soaking in and defeating the purpose of the garden [13][2].
Grading and Slope Requirements
Grading is what transforms a simple depression into an efficient water management system. The trick is to create a gentle slope of about 1 inch per foot leading from your house to the rain garden [13]. This ensures water flows smoothly without causing erosion or skipping over the garden entirely.
"Our leveling and grading services create a smooth, usable surface for construction projects or improved drainage." – Pro Landscapes MD [1]
The rain garden itself should sit at a lower elevation than its water sources, but not so low that it becomes a stagnant pond. A slope between 1-5% is ideal for guiding water into the garden while avoiding runoff issues that could lead to erosion [15][4].
Improper grading can lead to costly repairs. If water doesn’t naturally flow toward the garden, it won’t work effectively during heavy rains. On the flip side, a slope that’s too steep can cause water to rush through, washing away soil and plants. Professional grading services can help ensure your rain garden has the right slope for optimal performance. Pro Landscapes MD specializes in grading and land leveling throughout central Maryland, helping homeowners achieve the perfect setup for water flow and drainage.
Once the grading is complete, it’s time to test your soil’s drainage capacity.
Testing Soil Drainage Speed
Before starting construction, it’s crucial to check how well your soil drains. A quick drainage test can save you from future headaches.
How to test soil drainage: Dig a hole about 12 inches deep and 6-8 inches wide in the planned rain garden spot. Fill it with water and let it drain completely. Then, refill the hole and start timing. Ideally, the water should drain within 24-48 hours [13][14].
If water remains after 48 hours, your soil drains too slowly and will need adjustments. Clay-heavy soils are often the culprit, as they hold water like a bowl. On the other hand, sandy or loamy soils are ideal because they allow water to filter through quickly while still removing pollutants [3].
For poorly draining soil, amend it before building your rain garden. A good mix includes 60% sand, 20% compost, and 20% topsoil [14]. This blend ensures proper drainage and supports healthy plant growth.
If you’re considering multiple locations, test each one. Soil conditions can vary significantly, even within small areas, and you might find a better spot nearby.
For more detailed insights, a professional soil assessment can be invaluable. Experts like those at Pro Landscapes MD can evaluate your site’s drainage rates, soil composition, and amendment needs, ensuring your rain garden is set up for success.
Preparing Soil for Better Drainage
Once you’ve graded your site, the next step is to prepare the soil to ensure it absorbs water efficiently. Proper soil preparation is key to avoiding the drainage issues that often trouble rain gardens.
Testing Your Soil Type
Double-check your earlier drainage test results to confirm the soil’s condition. If water drains slowly, you’ll need to make adjustments. A simple percolation test can provide clarity: dig a 12-inch hole, fill it with water, and monitor how long it takes to drain. If the water remains after 48 hours, your soil likely contains too much clay.
You can also test for compaction by trying to push a screwdriver into the soil. If it’s tough to penetrate, the soil is compacted and will need loosening. These tests will help you figure out how much work your soil needs.
Improving Soil for Better Water Flow
To create a soil mix that balances water flow and nutrient retention, combine 60% sand, 20% compost, and 20% topsoil [14][9]. This mixture allows water to seep through at a steady rate while keeping essential nutrients in place and preventing the formation of dense, impermeable layers.
If your soil is clay-heavy, consider removing up to 18 inches of it and replacing it with the amended mix. Alternatively, you can thoroughly till sand and organic matter into the existing soil. Be sure to mix amendments to a depth of at least 12 inches to ensure even distribution [14][9].
On the other hand, sandy soils may drain too quickly and struggle to hold moisture. In this case, increase the amounts of compost and topsoil in your mix to improve water retention while maintaining proper drainage.
Once you’ve amended the soil, repeat the drainage test. The goal is for water to infiltrate within 24–36 hours, ensuring the system will work as intended.
Adding Mulch and Gravel Layers
After improving the soil, you can enhance drainage further by layering materials. Start with a base layer of washed gravel to encourage water movement. On top of that, add a 2–3 inch layer of organic mulch to help suppress weeds and minimize erosion [5]. When choosing gravel, opt for appropriately sized pieces that won’t clog with sediment but still provide a stable foundation.
Be cautious with mulch placement – keep it away from plant stems to prevent rot. Avoid lightweight mulches that could be swept away during heavy rain.
This three-layer system – gravel at the bottom, amended soil in the middle, and mulch on top – creates an effective setup for managing water flow. It also supports healthy plant growth by preventing standing water and erosion, common issues in poorly designed rain gardens.
If your soil conditions are particularly challenging or you’re dealing with complex drainage problems, seeking professional help might be worth considering. Companies like Pro Landscapes MD offer expert soil amendment and drainage solutions in central Maryland, ensuring your rain garden is built to last.
sbb-itb-843f8be
Building Overflow Systems
Even the most carefully planned rain gardens can struggle to keep up during heavy storms. That’s where overflow systems come in – they act as a critical backup to prevent flooding and safeguard your property. These systems ensure that excess water is safely redirected when your rain garden reaches its limit, helping it stay functional and effective over the long haul [12].
Setting Up Water Entry Points
How water enters your rain garden plays a big role in how well it handles heavy rainfall. A good starting point is to use downspout extensions or drainage pipes. These should be installed in a trench with a gentle downward slope, leading into the garden basin. Surround the outlet with rocks to reduce erosion [6].
For properties with runoff from paved surfaces like driveways or walkways, infiltration trenches are a smart solution. These trenches guide water into the rain garden and work well when you’re dealing with runoff from multiple sources. If your area has high sediment loads, adding catch basins or structured inlets can help manage debris and prevent clogging. Vegetation and rough surfaces can slow down water flow and curb erosion, but they require regular upkeep to avoid blockages. Features like check dams and baffles are useful for spreading water flow and settling out solids, making maintenance easier while protecting your garden’s capacity to store water [12].
Once you’ve handled water entry, the next step is to create areas specifically designed to manage overflow.
Creating Overflow Areas
When your rain garden fills up, overflow features step in to manage the extra water. Structures like drainage ditches, bioswales, and dry riverbeds are excellent options for redirecting surplus water away from your garden and the surrounding landscape [3]. To design effective overflow areas, consider the expected runoff volume and how much water the soil can absorb. These zones should be placed at the lowest edge of the garden and built with enough width and depth to handle peak flows. Local rainfall data and soil percolation tests can help you fine-tune these designs [10].
Dry riverbeds are a practical and attractive choice – they not only manage stormwater but also enhance your landscape’s visual appeal. Similarly, bioswales guide and filter overflow water through planted channels that blend seamlessly into your yard. If your property deals with large amounts of stormwater, box and pipe drain systems provide a dependable way to handle high volumes of runoff.
Protecting Overflow Zones
To keep overflow areas working effectively, they need protection from erosion. Berms made of compacted soil, stones, and gravel are great for stabilizing these zones [6]. Adding deep-rooted native plants, like switchgrass, black-eyed Susan, or blue flag iris, helps anchor the soil and absorb excess water – these plants are especially suited for rain gardens in Maryland [2].
Placing riprap or stones at inlets and overflow points can break up the energy of flowing water, reducing erosion. Lining overflow channels with gravel or grass adds stability and improves water absorption [12][15]. For instance, the City of Portland recommends using a layer of ¼- to ¾-inch washed, crushed rock between soil layers to prevent mixing and clogging – an important detail for maintaining functionality [12].
Like the rest of your rain garden, overflow areas need regular care. After major storms and at least once each season, inspect these systems for blockages, debris, or damage. Maintenance tasks include clearing debris, checking that berms and plantings are intact, and addressing any signs of erosion [10]. If you’re dealing with complex drainage issues or heavy runoff, consulting a professional can save you from costly mistakes. Pro Landscapes MD offers tailored drainage solutions throughout central Maryland, including French drains, dry riverbeds, and custom overflow systems that fit seamlessly into your rain garden design.
Maintenance Tips to Prevent Drainage Issues
Keeping your rain garden in top shape requires regular maintenance. Without it, even the best-designed garden can run into drainage problems like standing water, stressed plants, or even flooding around your property.
Clearing Debris and Blockages
One of the most important tasks is keeping the drainage pathways clear. Check for debris at least once a month, and more often during the fall when leaves pile up quickly. Focus on three main areas: the water entry points, the garden basin, and the overflow outlets.
Use simple tools like rakes and trowels to clear leaves, twigs, and sediment from these areas. Gravel or rock inlets, which act as natural filters, should also be cleaned regularly to stay effective. After storms, remove any sediment buildup to prevent compaction and blockages.
If you notice debris piling up in certain spots repeatedly, it might be time to adjust the grading or add gravel barriers to improve water flow. Once you’ve cleared everything, monitor how the garden handles rain to ensure water moves smoothly without creating stagnant areas.
Checking After Rain Events
After heavy rain, inspect your rain garden within 24 to 48 hours to see how it’s performing. If water is still standing after 48 hours, that’s a sign something’s wrong [10]. A properly functioning rain garden should absorb most of the water within that timeframe.
You can test the soil’s drainage by digging a 12-inch hole, filling it with water, and seeing how long it takes to drain. If it’s still there after 24 hours, the soil may need to be amended.
Also, look for signs of erosion, like small channels or bare patches around entry points and slopes. These could mean water is flowing too fast and washing away the soil. Adding mulch, repositioning rocks, or planting more vegetation can help slow down the water. Keep an eye on your plants, too – yellowing or wilting could indicate drainage problems. Take photos and notes during these inspections to track patterns over time, which can help you decide if bigger fixes are needed.
Seasonal Care Tasks
In addition to regular debris clearing and rain checks, seasonal maintenance is key to keeping your rain garden’s drainage working smoothly. Each season brings its own challenges.
In spring, clean out any leftover winter debris, check that overflow features are stable, and add a fresh 2-3 inch layer of mulch. Mulch helps prevent soil compaction, reduces erosion, and encourages steady water absorption.
Fall requires managing the influx of leaves. While a thin layer of leaf litter can enrich the soil, too much can cause blockages. Clear excess leaves from the basin and entry points, but leave just enough to naturally condition the soil over winter. Replenish mulch as needed, and make sure overflow areas are ready for heavy rains.
Before major storms, clear visible debris and double-check that overflow outlets are clear. This simple step can save you from bigger headaches later.
During winter, especially in freezing regions, keep an eye out for ice blockages at entry points and outlets. Ice dams can redirect water in unexpected ways, leading to erosion or flooding when temperatures rise.
The Crescent Farm demonstration rain garden at the Los Angeles Arboretum is a great example of how consistent seasonal care – like debris removal, mulch replenishment, and overflow checks – can keep a rain garden thriving across all seasons [11].
Lastly, make soil testing an annual habit. Check how well your soil drains and amend it with sand, compost, or organic matter if needed. If you’re dealing with ongoing problems like severe erosion or persistent standing water, it might be time to call in a drainage expert for professional advice.
When to Call Drainage Professionals
Routine maintenance can handle most drainage issues, but when problems keep coming back, it’s a clear sign that expert help is needed. Bringing in professionals early can save you from expensive repairs down the road.
Why Professional Services Make a Difference
Drainage professionals bring the kind of expertise that goes beyond basic fixes. For example, they can perform percolation tests to analyze how well your soil drains and suggest specific improvements. If your soil isn’t draining properly, they might recommend replacing it with an engineered rain garden mix designed to improve water flow and prevent pooling.
They also offer advanced drainage solutions like French drains, dry riverbeds, and engineered overflow zones to manage heavy runoff effectively [14][5]. For properties with uneven terrain or clay-heavy soil, professional grading ensures water flows where it should. Homes with basements or septic systems particularly benefit from these advanced techniques, as they help avoid costly water damage or system failures.
Pro Landscapes MD: Experts You Can Trust

If you’ve tried regular maintenance but still face drainage issues, Pro Landscapes MD can step in with tailored solutions. Specializing in stormwater management, they offer a range of services to address even the most stubborn rain garden challenges.
Their offerings include grading and land leveling to promote proper water flow, installing French drains for persistent drainage problems, and creating dry riverbeds to naturally channel excess water. They also design stormwater systems customized to Maryland’s unique soil types and weather patterns.
What makes Pro Landscapes MD stand out is their combination of expertise in horticulture and landscape design. This means your rain garden won’t just work efficiently – it’ll also look stunning and blend seamlessly into your overall landscape.
Signs that you might need their help include standing water in your rain garden for more than 48 hours after rain, visible soil erosion, or areas that stay soggy between storms. Water pooling near your home’s foundation or recurring blockages that basic maintenance can’t fix are also strong indicators that it’s time for a professional assessment [10][14].
Pro Landscapes MD serves central Maryland communities, including Annapolis, Baltimore, Bethesda, and Columbia. Their local knowledge allows them to tackle challenges like heavy clay soils and intense summer storms with solutions that work for your specific needs.
Conclusion: Building a Working Rain Garden
Creating a rain garden that works effectively involves careful attention to site selection, grading, soil preparation, and overflow management. Start by choosing a low-lying area at least 10 feet away from buildings to ensure runoff flows safely and naturally [14].
Once the site is chosen, proper grading is key. A gentle slope of 1–5% leading toward the garden helps capture water efficiently while preventing erosion. For the soil, a blend of 60% sand, 20% compost, and 20% topsoil allows water to absorb quickly while providing the nutrients plants need to thrive [14].
Overflow zones are just as important. Use materials like rock or gravel to channel excess water safely and avoid erosion [14].
Keeping your rain garden in good shape requires regular maintenance. Remove debris, inspect water entry points, and check drainage performance after heavy rain. Seasonal tasks, such as clearing fallen leaves and addressing sediment buildup, ensure the garden continues to function properly [10].
Sometimes, basic maintenance isn’t enough. If you encounter issues like complex grading challenges, poor soil quality, or persistent water problems, it’s worth consulting a professional. Companies like Pro Landscapes MD specialize in stormwater management and can provide tailored solutions that suit Maryland’s specific soil and weather conditions.
A well-designed rain garden doesn’t just manage runoff – it also filters pollutants, replenishes groundwater, and adds natural beauty to your property [16]. By following these steps and knowing when to seek expert help, you can create a rain garden that protects your landscape and contributes to a healthier environment.
FAQs
What are the signs that my rain garden might have drainage problems?
If your rain garden seems to hold water for more than 48 hours after it rains, it’s a sign it’s not draining as it should. You might also notice compacted soil, plants that look like they’re struggling to grow, or even erosion around the edges. To avoid these problems, make sure the garden is graded correctly when you set it up and use soil that drains well, ideally mixed with organic matter. Routine upkeep, like removing debris and inspecting for blockages, can go a long way in keeping your rain garden working as intended.
How do I choose the right spot for a rain garden in my yard?
To find the ideal spot for a rain garden, focus on areas where water tends to gather naturally, like low-lying spots or near downspouts. However, steer clear of locations close to your home’s foundation or over septic systems, as these can lead to structural or maintenance problems. Good grading and soil preparation are key to ensuring proper drainage and avoiding water pooling.
If you’re not confident about handling it yourself, expert services like Pro Landscapes MD can guide you through the process. They can design and install a rain garden customized to your yard, combining effective stormwater management with a visually appealing outdoor feature.
Why is there still standing water in my rain garden after two days?
If your rain garden holds standing water for more than 48 hours, it might signal a problem with drainage or the soil’s ability to absorb water. Take a closer look to see if the soil is compacted or if the garden’s grading is disrupting the natural flow of water. Enhancing soil permeability or tweaking the garden’s slope could help address the issue.
If the problem persists, you may want to seek professional drainage solutions to ensure your rain garden operates efficiently and avoids water pooling. A well-installed and regularly maintained rain garden is essential for keeping it in top shape.
Chat with Us