


- bhavya gada
- No Comments
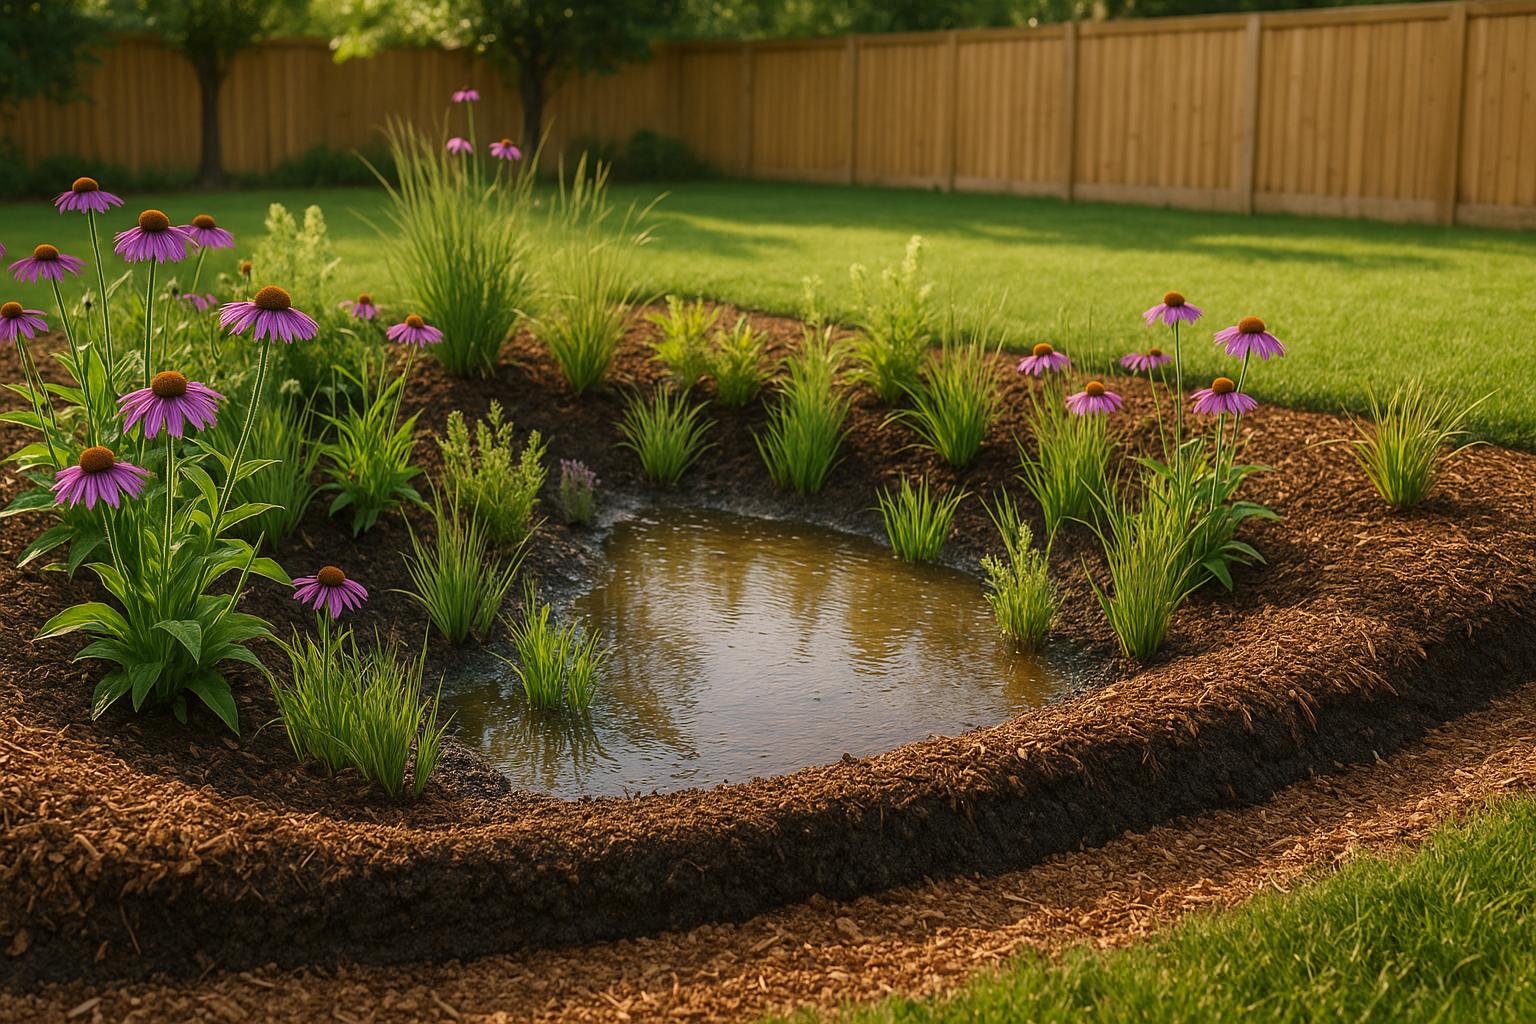
Rain gardens are designed to handle stormwater runoff effectively, reducing flooding, filtering pollutants, and supporting local wildlife. To build a successful rain garden, you need to focus on three key material categories: soil, mulch, and plants. Here’s what you need to know:
- Soil Mix: Use a blend of 50% sand, 25% topsoil, and 25% compost to ensure proper drainage and plant health. Avoid clay-heavy soils as they impede water infiltration.
- Mulch and Stones: Hardwood mulch retains moisture and prevents weeds, while washed stones like pea gravel or river rock manage water flow and reduce erosion.
- Plants: Opt for native species that handle both wet and dry conditions. Maryland-specific plants like Black-eyed Susan and coreopsis are great options.
Evaluate your site’s slope, drainage, and soil type before starting. For steep slopes or challenging soil, professional assistance may be helpful. Proper planning and material selection ensure your rain garden functions efficiently and lasts long-term.
Basics of Rain Gardens with Eco-Landscaping Expert Sean James
Assessing Site Conditions and Sizing Your Rain Garden
Before diving into your rain garden project, it’s essential to evaluate your yard’s slope, drainage patterns, and soil type. These factors will guide your decisions on materials and construction, ensuring your rain garden is both effective and long-lasting.
Evaluating Yard Slope and Drainage Patterns
Your yard’s slope plays a big role in determining the best location and depth for your rain garden. Steeper slopes may call for deeper gardens and influence where they should be placed. To get this right, you’ll need to measure your yard’s slope.
Here’s a simple method: Place two stakes 12–15 feet apart and tie a level string between them. Measure the vertical difference in height between the stakes, then divide this by the horizontal distance between them. Multiply that number by 100 to calculate the slope percentage. For example, if your stakes are 15 feet apart and the string is 11 inches higher on the downhill stake, the slope is about 6% [1].
Additionally, take a walk around your yard during or right after a rainstorm. Observe where water flows, pools, or causes erosion. This will help you pinpoint areas where a rain garden can capture water effectively. Locations that receive runoff from downspouts, driveways, or rooftops are often ideal, while spots with persistent pooling might indicate deeper drainage problems.
Determining Garden Size and Depth
The size of your rain garden depends on the amount of runoff you need to manage and how much space you have. A good rule of thumb is to size your rain garden to cover 20% to 30% of the area draining into it. For instance, if your roof is 1,000 square feet, aim for a rain garden between 200 and 300 square feet.
Depth is another key factor, and it depends on your yard’s slope. Use the slope measurement you calculated earlier to determine the appropriate depth:
| Yard Slope | Recommended Depth |
|---|---|
| Less than 4% | 4 inches |
| 5% to 7% | 6 inches |
| 8% to 12% | 8 inches |
| Greater than 12% | Choose a different location |
For slopes steeper than 12%, it’s often better to explore other locations or consult a professional. Keep in mind that the bottom of your rain garden must be level, even on a sloped site, to ensure water infiltrates evenly. This will also help you estimate the amount of soil amendments and guide your excavation plans.
Understanding Soil Types and Drainage
Your soil type is a critical factor in how well your rain garden will function. Clay soils tend to hold water for too long, while sandy soils drain too quickly, potentially depriving plants of adequate moisture. In most cases, you’ll need to adjust your soil to strike the right balance.
To test your soil’s drainage, dig a hole about 12 inches deep and 6 inches wide. Fill it with water, let it drain completely, then refill it. If the water level drops by 0.5 to 3 inches per hour, your soil has acceptable drainage. Slower drainage (less than 0.5 inches per hour) means your soil is likely too clay-heavy and will need additional sand and organic matter. Faster drainage (more than 3 inches per hour) suggests overly sandy soil, which may benefit from added compost or clay to retain moisture.
In regions like central Maryland, clay-heavy soils are common and often require significant amendments. A mix of 30% to 50% sand along with compost can improve the soil structure for better drainage and plant health. By identifying your soil conditions early, you can plan your budget and gather the right materials for your rain garden. This step ensures you’re set up for success when choosing the ideal soil mix.
Choosing the Right Soil Mix for Rain Gardens
The soil mix is the backbone of any successful rain garden. It plays a critical role in ensuring proper drainage, retaining moisture, and providing essential nutrients for plant growth.
Ideal Soil Composition
The best rain garden soil balances drainage with moisture retention and nutrient supply. Sand ensures water flows through efficiently, topsoil provides structure and nutrients, and compost contributes organic matter and helps hold water.
"The soil mix placed back in the excavated rain garden should consist of ~ 50% sand, 25% topsoil, and 25% compost. Additional sand can always be added to the mix but limiting your clay content in the mix is very important. The mix should have very little clay as it impedes water from infiltrating into the soil." [2]
Here are a few recommended soil blends to consider:
- Standard Mix: Combine 50% sand, 25% topsoil, and 25% compost. This blend strikes a good balance between drainage and organic content, supporting healthy plant growth.
- High-Drainage Mix: For areas with frequent heavy rain or soils rich in clay, use 50–60% sand, 20–30% topsoil (low in clay), and 20–30% compost [2].
- Clay-Heavy Soil Amendment: If you’re dealing with clay-heavy native soil, the Rain Garden Alliance suggests a mix of 30% sand, 30–40% loamy topsoil, and 30% organic compost derived from yard waste [3].
When gathering materials, choose coarse sand over fine sand for better drainage. For topsoil, opt for a loamy, low-clay variety that feels loose and crumbly. Avoid soil that clumps easily, as it likely contains too much clay. If the soil feels overly gritty, mix in additional compost to improve its texture and water-holding ability.
Adding Gravel or Drain Rock Layers
Improving sub-surface drainage can make a big difference in how your rain garden handles water. Adding a layer of gravel or crushed stone at the bottom of the garden can help prevent water from pooling by creating a reservoir effect. For areas with persistent drainage challenges, consider installing an underdrain system. This involves placing a perforated pipe within the gravel layer and connecting it to a safe discharge point, such as a storm drain [4]. Large stones placed around the garden’s edges can also help control erosion and strengthen the perimeter [2].
Using Geotextile Fabric
To keep the drainage layer functioning properly, geotextile fabric is a smart addition. This fabric acts as a barrier between the gravel and the soil mix, preventing fine particles from clogging the drainage system. Look for non-woven geotextile fabric specifically designed for drainage purposes – it allows water to flow through while filtering out soil particles.
When adding the soil mix, install it over the geotextile fabric in 8-inch layers. After placing each layer, saturate it with water and let it drain. This process maintains a loose structure, which is essential for water infiltration and healthy root growth [4].
sbb-itb-843f8be
Selecting Mulch and Stone Materials
Choosing the right mulch and stone materials is a key step in creating a rain garden that works efficiently. These materials help manage water flow, prevent soil erosion, and improve the garden’s overall appearance while supporting healthy plant growth.
Using Mulch for Moisture Retention and Weed Control
Hardwood mulch plays a crucial role in maintaining a rain garden. Spread it 2–3 inches deep across planted areas, but avoid piling it against plant stems to prevent rot and discourage pests.
Mulch serves multiple purposes: it keeps the soil moist, adds nutrients as it breaks down, and suppresses weeds that could compete with your carefully selected native plants.
If you’re looking for a reliable option, shredded hardwood mulch is a standout choice. It stays in place better than lighter alternatives during heavy rainstorms. Unlike cypress or pine mulch, hardwood mulch decomposes at a moderate pace, so you’ll only need to refresh it every 18–24 months.
Avoid using rubber mulch or landscape fabric underneath your organic mulch. These materials can block water infiltration, which is a critical function of a rain garden. The goal is to allow water to flow freely through the layers while still controlling weeds and retaining moisture.
Stone Materials for Water Flow Management
Washed round rock and pea gravel are excellent for managing stormwater energy. Use these materials at water inflow points, such as where downspouts, driveways, or slopes direct water into the garden.
Create a buffer zone by laying a stone layer 6–12 inches wide and extending it 2–3 feet into the garden. This setup slows fast-moving water, protecting your soil mix and delicate plants from damage.
- Pea gravel (¼-inch to ⅜-inch diameter) is ideal for lighter water flow.
- River rock (1–3 inches diameter) is better suited for heavier volumes of water. Its rounded edges allow water to flow smoothly without causing turbulence that could lead to erosion.
For areas with steep slopes or particularly strong water flow, mix in crushed stone with the round rock. The angular edges of crushed stone interlock, creating a more stable surface that resists shifting during heavy storms.
Avoid using smooth decorative stones like polished river rock at inflow points. While visually appealing, they can become slippery and lack the friction needed to effectively slow water.
Decorative Stone for Edging
To define the edges of your rain garden, consider using natural fieldstone or decorative pavers. These materials create clean borders that keep mulch in place, prevent wash-out, and make lawn maintenance easier.
- Fieldstone is a great option, particularly in Maryland, as it blends well with the area’s natural geology. Stack stones 2–3 layers high for a sturdy border that won’t shift over time. Stones should be 6–12 inches wide to provide enough weight and stability.
- Concrete pavers offer a more polished look. Partially bury them to create a flush edge that’s easy to mow over. Opt for pavers at least 2 inches thick to handle the freeze-thaw cycles common in Maryland winters.
For gardens with curved edges, smaller stones (4–6 inches) are easier to work with than larger pavers. Flagstone is another versatile option that can be cut to fit curved designs while maintaining a natural aesthetic.
Since edging materials are visible year-round, choose stones that complement your home’s exterior and landscaping. Investing in quality materials not only enhances curb appeal but also reduces the need for ongoing maintenance.
With mulch and stones in place, the next step is selecting plants that will thrive alongside these materials and keep your rain garden functioning effectively.
Selecting Plants for Maryland Rain Gardens
Choosing the right plants is the foundation of a rain garden that not only manages stormwater effectively but also thrives as a mini-ecosystem supporting local wildlife. The trick lies in picking species that can handle Maryland’s seasonal shifts, from extended wet periods to dry spells.
Why Native Plants Matter
Native plants are a natural fit for Maryland rain gardens. They’ve adapted to the local climate over time, making them easier to care for once they’re established. But their benefits go far beyond low maintenance. These plants help reduce flooding and erosion, improve water quality, recharge groundwater, and provide vital habitats for local wildlife. Plus, by incorporating native plants, you’re contributing to the health of nearby streams and the Chesapeake Bay. If you’re unsure where to start, The Center for Land Use Education and Research at the University of Connecticut offers a Rain Garden app with a catalog of Maryland’s recommended native plants. It’s a handy tool for homeowners looking to make informed choices.
Planting for Different Moisture Zones
Rain gardens naturally create areas with varying moisture levels. The center tends to stay wetter for longer, while the slopes and edges dry out more quickly. For the drier spots, opt for drought-tolerant options. Perennials like daylilies, Black-eyed Susan (Maryland’s state flower), coreopsis, and scabiosa are excellent choices. For shrubs, consider nandina, Indian hawthorn, spireas, abelias, and bush clover. When picking plants for these areas, look for features like small or waxy leaves, or even fuzzy coatings – these adaptations help plants conserve water during dry stretches. Matching plants to these microenvironments ensures your garden can handle Maryland’s variable weather.
Timing and Plant Size: Setting Up for Success
Timing is everything when it comes to planting. Fall and early spring are ideal, giving plants time to establish strong root systems before the summer heat kicks in. Additionally, choosing plants with natural water-conserving traits – like smaller leaves or a waxy coating – can make a big difference in how well they handle challenging conditions. By combining smart timing with thoughtful plant selection, your rain garden will stay vibrant and functional year-round.
Building a Functional Rain Garden
Creating a functional rain garden involves thoughtful planning and choosing the right materials to manage stormwater effectively while promoting a healthy ecosystem.
Start by preparing a soil mix that drains well and is rich in organic matter, while keeping clay content to a minimum. Before digging, always call 811 to check for underground utilities and ensure the garden is at least 10 feet away from your home’s foundation. To determine the garden’s size, multiply your drainage area by 0.1 for sandy soil, 0.2 for loamy soil, or 0.3 for clay soil. This calculation helps you estimate the square footage needed and guides your soil preparation efforts[6].
If drainage is a concern, consider placing a layer of gravel or drain rock at the base. This improves filtration and helps reduce pollutants from entering nearby waterways[8]. Mark the garden’s perimeter, dig to the proper depth, and build berms to retain water. Layer your materials carefully to optimize drainage and filtration[5][7]. To prevent soil erosion, position stones at inflow points to slow down water. For slopes steeper than 12%, terracing and erosion control fabric can help maintain stability[6].
Once the layout is finalized, focus on material quantities to ensure long-term performance. Spread 2–3 cubic yards of mulch per 100 square feet to retain moisture and suppress weeds without obstructing water flow[6]. Use stones strategically to guide water flow and prevent erosion.
For those in Maryland, Pro Landscapes MD offers specialized rain garden design and installation services tailored to the region’s climate and regulations. Their expertise ensures your garden effectively manages stormwater while meeting local requirements.
FAQs
How can I find the best spot for a rain garden in my yard?
To find the ideal spot for a rain garden, pick a location at least 10 feet away from your home’s foundation to prevent water-related issues. Look for a flat or gently sloped area where water tends to flow naturally – like downhill from your roof, driveway, or another runoff source. Steer clear of areas with underground utilities, septic systems, or slopes steeper than 12%.
Avoid persistently soggy or low-lying spots, as these may not drain well. Choosing the right location ensures your rain garden manages stormwater efficiently while adding visual appeal and practical value to your yard.
Why should I use native plants in a Maryland rain garden?
Using native plants in your Maryland rain garden comes with plenty of perks. Since these plants are already suited to the local climate, soil, and water conditions, they’re naturally tougher and easier to care for. They don’t demand as much water, fertilizers, or pesticides, which means less effort and fewer expenses for you.
But it’s not just about convenience – native plants also help clean up stormwater runoff by filtering out pollutants. This improves water quality while also providing essential support for local wildlife. By opting for native species, you’re creating a rain garden that’s not only good for your property but also contributes to a healthier, more balanced ecosystem in your area.
Can I install a rain garden if my yard has a steep slope?
If your yard has a slope steeper than 12%, setting up a traditional rain garden can be tricky because of potential drainage and erosion problems. In such cases, you might want to explore other options like contour swales, terracing, or berms. These methods can help slow down water runoff and stabilize the area.
For more pronounced slopes, it’s worth reaching out to a landscaping expert. They can implement solutions such as retaining walls or soil stabilization techniques to ensure your rain garden works effectively while safeguarding your yard against erosion and water-related damage.
Chat with Us