









- bhavya gada
- No Comments
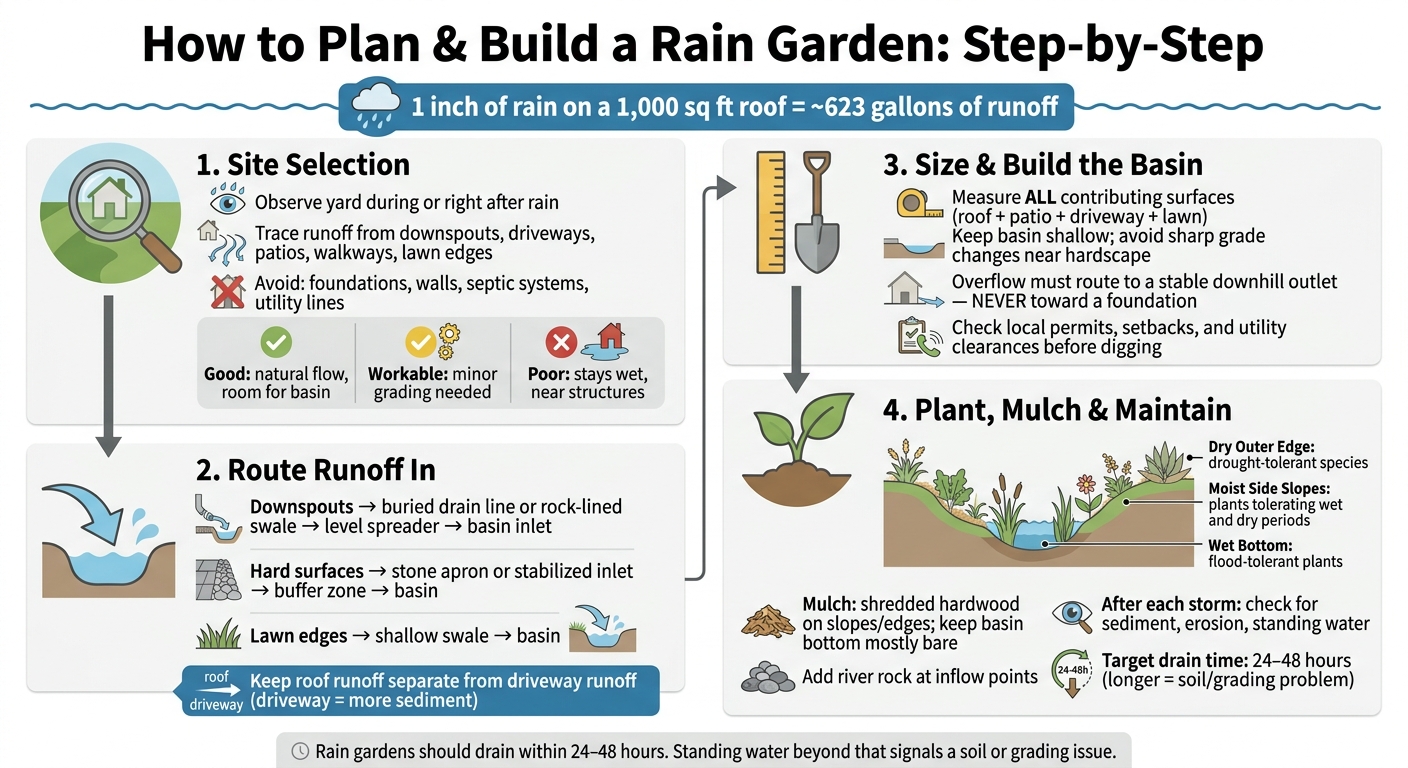
A rain garden works best when I place it where water already flows, keep it away from the house, and give overflow a safe exit. In many yards, roof and hard surfaces can send runoff fast, and even 1 inch of rain on a 1,000-square-foot roof can produce about 623 gallons of water. That means site choice, inlet control, basin size, and plant zones all matter from day one.
Here’s the short version:
- I watch the yard during or right after rain
- I trace runoff from downspouts, driveways, hardscaping like patios and walkways, and lawn edges
- I avoid spots that stay wet or send water toward foundations, walls, septic parts, or utility lines
- I route water in with buried pipe, swales, stone aprons, or a level spreader
- I size the basin from the full drainage area
- I make sure overflow has a clear downhill path
- I plant by moisture zone: wet bottom, middle slopes, dry edge
- I check the garden after storms for sediment, erosion, and standing water
A few rules make a big difference: keep the basin shallow, keep inflow stable, and keep overflow away from structures. Most rain gardens should drain within 24 to 48 hours, and if water sits much longer, that points to a soil or grading problem.
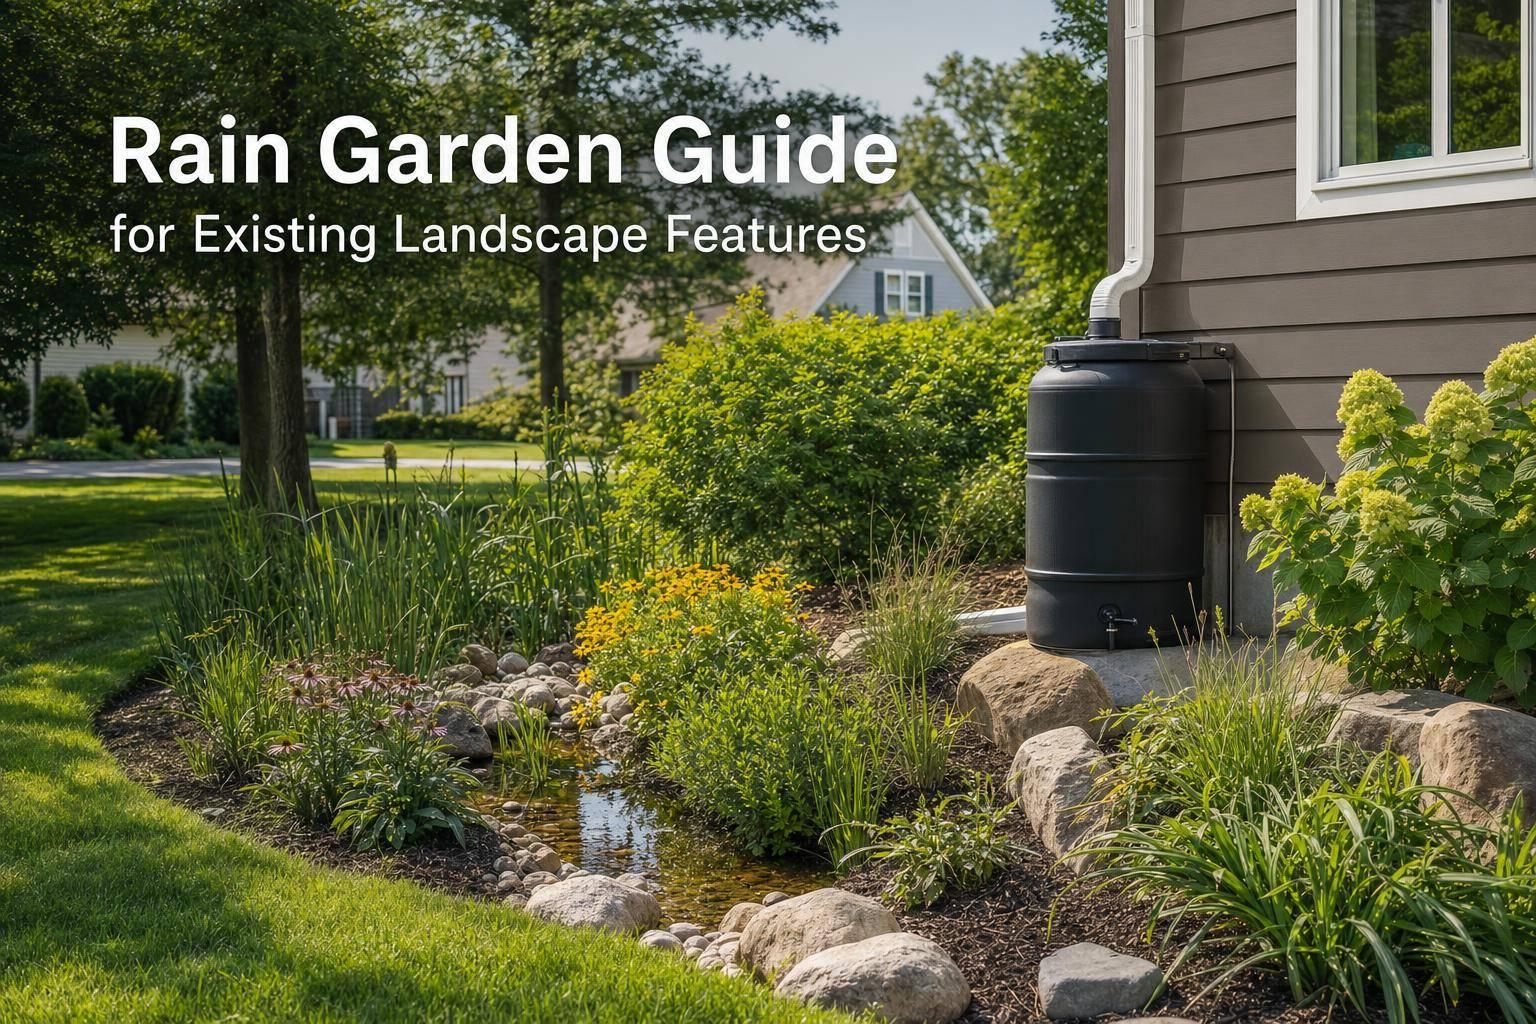
This guide is about fitting a rain garden into the yard you already have, with simple planning instead of a full landscape rebuild.
Rain Garden Planning & Installation: Step-by-Step Guide
How To Create a Rain Garden | Ask This Old House

sbb-itb-843f8be
Review the Site and Pick a Safe Location
The best time to study your yard is during or right after a heavy rain. Walk the property then, not on a dry day, so you can see where runoff gathers and where it leaves the site.
Map Runoff Around Patios, Walkways, Driveways, Walls, Downspouts, and Drainage Lines
Start at each downspout. Watch where the roof runoff lands, then track where it goes next. After that, check patio edges, driveway margins, walkway seams, lawn edges, retaining walls, and drainage lines.
Those spots often collect runoff, so they can help you find a rain garden location that fits the yard’s natural flow. Flag low spots and flow paths, or take photos so you don’t have to rely on memory later.
Then use those flow paths as a first filter. A spot may look good at a glance, but it still needs to meet slope, drainage, utility, and setback limits.
Check Soil Drainage, Slope, Utilities, and Basic Setbacks
Check how fast water drains. Also watch for areas that stay saturated after the storm passes. A basin site should work with the yard’s current grading, not fight against it.
Rule out places that stay wet, slope toward structures, or push water against the yard’s existing drainage pattern. Before you settle on a spot, check for buried utilities, foundation clearances, septic parts, and property-line setbacks.
Compare Good, Workable, and Poor Locations
Some sites are clear winners. Good locations follow natural runoff and leave enough room for a shallow basin. Workable locations can still do the job, but they may need minor grading or small inlet changes. Poor locations stay wet, clash with structures or utilities, or don’t have a safe inlet or overflow path.
Once you choose the site, map out how runoff will get there from downspouts and hardscape edges.
Route Runoff From Existing Features Into the Rain Garden
After you pick the site, the next job is simple in theory but easy to get wrong in practice: get runoff into the basin without causing erosion or putting your foundation at risk.
Route Water From Downspouts and Roof Drainage
Use a buried drain line to move downspout runoff to the inlet and keep water off footpaths, paths, beds, and foundations. If a buried line isn’t an option, use a rock-lined swale instead. Right before the water enters the basin, add a level spreader so flow enters evenly instead of hitting one spot hard.
Keep roof runoff separate from driveway runoff when you can. Driveway water usually brings more sediment and debris, and that can clog the basin sooner.
Bring in Runoff From Patios, Walkways, Driveways, and Lawn Edges
Runoff from hard surfaces needs the same kind of control, but the inlet should be built for heavier flow and more debris. For paved edges, a stone apron or stabilized inlet helps cut erosion at the entry point and spread water more evenly into the basin. Add a stabilized buffer between the pavement edge and the rain garden so water doesn’t wash out the edge from underneath.
If water is cutting a channel along a lawn edge, use a shallow swale to guide it into the garden and keep the soil in place. Skip bare-soil inlet points where water moves fast, since those spots tend to dump sediment into the basin.
Protect Walls, Pavement Edges, and Existing Drain Pipes
Retaining walls, garden walls, and paver edges are usually the first things to watch when you add a rain garden nearby. Don’t send concentrated flow along the base of a retaining wall. Route overflow away from wall foundations.
Protect any yard drains and French drains that are already in place. Keep rerouted flow direct and properly graded so water doesn’t sit downslope.
Once the runoff path is set, you can size the basin and overflow to match it.
Size and Build the Rain Garden Within Site Limits
Estimate Drainage Area and Basin Size
Once runoff has a place to go, the next step is sizing the basin to match the drainage area. Measure every surface that drains into the rain garden, including roof sections, patios, driveways, walkways, and lawn edges. Use the full contributing area so the basin is sized for the runoff it will get.
If the combined drainage area is larger than the yard can handle, size the rain garden to fit the space you have.
Choose Basin Shape, Depth, and Overflow Routing
Pick a basin shape that fits around existing features and still leaves room for stable side slopes. Keep the basin fairly compact, and avoid sharp grade changes near patios, walkways, driveways, and walls.
Overflow needs just as much thought as the basin itself. During a heavy storm, the garden can fill up fast, so excess water needs a clear and stable path away from sensitive areas. Send overflow toward a stable downhill outlet, and do not direct it toward a foundation or fence line.
Work Within Grading Limits and Check Permit Requirements
Most yards don’t give you much room to work with. Hardscape often limits how much excavation is possible, so keep digging shallow enough to match existing grades.
Before you break ground, check local setback rules, utility clearances, and any grading or permit requirements. For tight Maryland sites, Pro Landscapes MD can help with rain garden design, drainage integration, and hardscape coordination.
After the basin size, shape, and permits are set, choose plants and mulch that fit the wet bottom, side slopes, and dry edges.
Plant, Mulch, and Maintain for Long-Term Performance
Once the basin is sized and graded, planting and upkeep decide how well it works over time. A rain garden does its job only when plants stay healthy and water can keep moving, filtering, and soaking into the soil.
Select Plants for Wet Bottoms, Side Slopes, and Dry Edges
Plant the rain garden in three zones: wet bottom, moist side slopes, and dry outer edge.
The basin bottom stays wet the longest, so it needs plants that can handle occasional flooding. The side slopes drain faster, but they still hold moisture, so plants there should be able to deal with both wet and dry periods. The outer edge is drier most of the time, so it should be planted with species that fit those dry-edge conditions.
Use Mulch and Inlet Protection That Resist Washout
Use a thin layer of shredded hardwood mulch on the side slopes and outer edge. Keep the basin bottom mostly bare, or apply only a very light layer that won’t float away during a storm.
Add river rock or washed stone at each inflow point to slow incoming water and help prevent erosion.
Once planting and mulching are done, watch how the basin handles the first storms. That first check can tell you a lot.
Inspect After Storms and Maintain Through the Year
After every major storm, walk the garden and look for sediment at the inlet, erosion on the side slopes, and standing water in the basin. Small problems are much easier to fix when you catch them early.
During the first growing season:
- Water new plants during dry spells
- Pull weeds before they set seed
- Fill bare spots fast to help stop erosion
Each spring, remove dead plant material, make sure the overflow path is open, and replace thin mulch. Maintenance matters here for a simple reason: rain gardens work only when plants stay healthy and flow paths stay open.
FAQs
How far should a rain garden be from my house?
Place a rain garden at least 10 feet from your home’s foundation. That buffer helps keep water from collecting too close to the house, which can cut the risk of basement flooding and foundation damage.
It also helps to pick a fairly flat spot and stay clear of existing tree roots. That makes the garden easier to build and helps it work the way it should.
What if my yard drains slowly or stays soggy?
Slow drainage or soggy spots usually point to poor soil infiltration. In plain English, the ground isn’t letting water move through fast enough. A common reason is high clay content, since clay holds water and drains slowly. A simple way to check is to dig a hole 2 to 3 feet deep and watch how fast the water soaks in.
If drainage is still poor, an underdrain can help move water away from the area. This setup uses perforated pipe set in gravel to redirect water away from buildings. You can also fix pooling by regrading the area to a 2%–3% slope. In some cases, French drains or dry riverbeds also do the job by guiding runoff away from low spots.
Do I need a permit for a rain garden?
Usually, yes. In Maryland, rain gardens are often treated as stormwater Best Management Practices, so permits may be required to meet state and local rules.
You’ll need a grading permit if the project disturbs more than 5,000 square feet or moves more than 100 cubic yards of fill. Permits can also come into play in sensitive areas, such as the Chesapeake Bay Critical Area or historic districts.
County rules don’t always match, so it’s smart to check with your local stormwater management office before you dig.
Chat with Us