


- bhavya gada
- No Comments
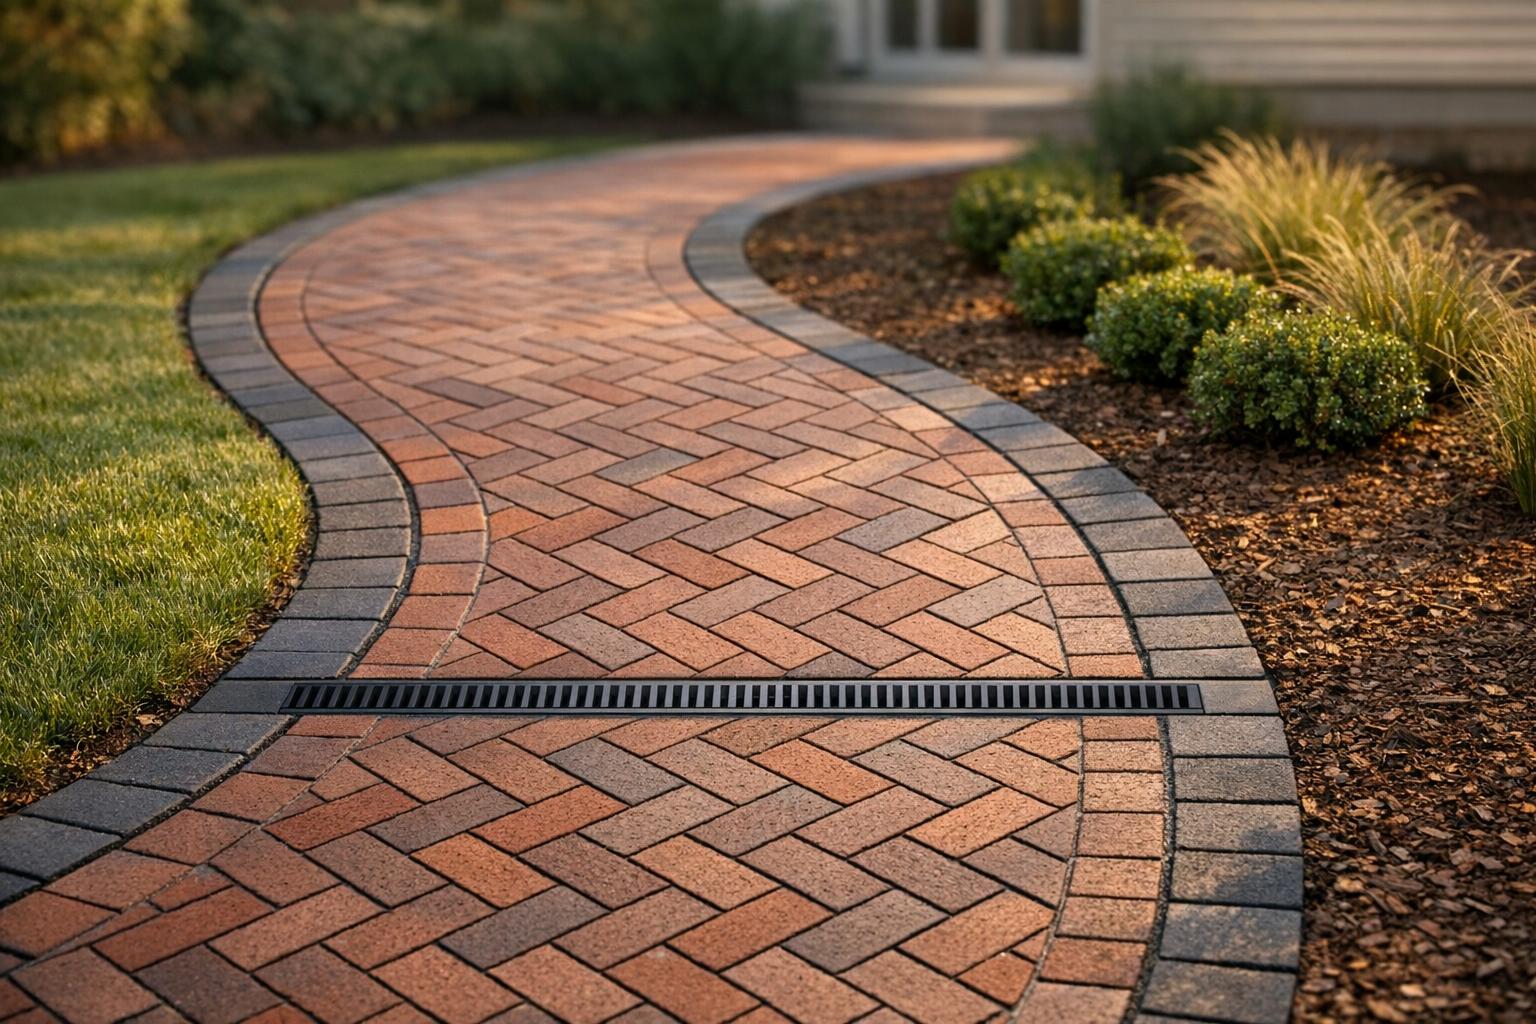
Curved brick pathways blend beauty and practicality, creating inviting, natural-looking walkways that enhance any outdoor space. These paths guide visitors through gardens, around trees, and toward focal points like patios, seating areas, or fountains. With proper planning, materials, and installation, they can last for years and withstand harsh weather conditions.
Here’s what you’ll learn:
- Design Tips: Use flexible tools like garden hoses to plan curves and ensure smooth layouts.
- Material Choices: Standard brick pavers, crushed stone, sand, and polymeric sand for durability and drainage.
- Installation Steps: From excavation to laying bricks in patterns like running bond or herringbone.
- Maintenance: Address freeze-thaw damage, reseal bricks, and replace joint sand as needed.
Whether you’re DIYing or hiring professionals, the key is a strong base, consistent drainage slope, and precise cutting for clean curves.
How to Lay a Curved Paving Stone Walkway
sbb-itb-843f8be
Design Planning for Curved Brick Pathways
A well-planned design can turn a curved brick pathway into a standout feature in your landscape. Start by outlining the curve with a flexible garden hose or ribbon, securing it with stakes every 2–3 feet. This approach helps you visualize the curve before digging and lets you tweak the layout to create a natural flow, resembling a winding stream or a gently curved flower bed.
An essential part of the process is determining the pathway’s width and the curve’s radius. To ensure consistency, measure the width every 6 inches as you lay it out. For proper drainage, aim for a 2% grade – about 1/4 inch per foot [3]. Once your dimensions are set, you can focus on blending functionality with visual appeal.
Determining Path Width and Curve Radius
Striking a balance between practicality and style is key. When excavating, extend 12 inches beyond the edge of the pavers to create a sturdy apron. Use string lines set at the final paver height to maintain a consistent slope for drainage. Be mindful to avoid creating four-corner joints, where the corners of four bricks meet, as these can weaken the structure and detract from the overall look.
Once the layout is finalized, choose a brick pattern that complements the curve and enhances the pathway’s design.
Brick Patterns for Curved Designs
For curved pathways, the running bond pattern is a favorite, especially for beginners. This design creates smooth, continuous lines that follow the curve naturally, reducing the need for complex cuts. Expert Sajal explains:
On a tight curve, I like a soldier course border, then a running bond inside – clean, strong, and easy to read from the street [3].
In this setup, the soldier course – where bricks are placed side-by-side perpendicular to the edge – frames the pathway effectively and hides minor cutting imperfections.
For a more intricate look, the herringbone pattern is another option. It offers excellent interlocking strength and a polished appearance, though it requires more precision during installation. To highlight the curves, consider using a contrasting border color. Before finalizing, dry-lay the bricks, mark the curve with chalk or a flexible guide, and cut them in small batches using a wet saw with a diamond blade for clean, precise edges. These steps not only enhance the pathway’s visual charm but also simplify the installation process.
Materials and Tools You’ll Need
To get started, gather the essentials: standard brick pavers, a wet saw with a diamond blade, a brick splitter, chalk or a flexible guide, yard stakes, ribbon, a tape measure, and 1-inch metal pipes for screeding. When working with curved designs, you’ll need to cut bricks to fit the outer curve. Make sure to space the bricks 1/4 to 1/2 inch apart – this allows for proper drainage and creates clean, uniform lines.
For layout precision, use yard stakes and ribbon to mark curves every 2–3 feet. A tape measure will help you double-check the width of the pathway every 6 inches along the curve. To level the sand bed, place 1-inch metal pipes as screed rails, then drag a straight board across them to create a perfectly flat surface.
Brick Types and Edge Restraints
When it comes to curved walkways, standard brick pavers are a reliable choice. They’re durable, easy to find, and can be custom-fitted to align with the design, especially along the outer edge of the curve.
Edge restraints are a must for curved designs. Flexible plastic or aluminum restraints help keep the bricks in place and prevent them from shifting over time. Hardscaping expert Sajal emphasizes their importance:
Edge restraints prevent drift; spikes set every 8–12 inches keep borders tight through freeze-thaw [3].
For tighter curves, reduce the spacing between spikes to maintain the desired radius. Always install edge restraints on the compacted base – not on loose topsoil – so the spikes anchor firmly into the dense material. This method ensures the curve holds its shape and complements earlier layout techniques for a polished, lasting result.
Base Materials: Gravel, Sand, and Weed Fabric
A strong foundation begins with 4–6 inches of compacted, angular crushed stone (commonly 3/4-inch minus). Unlike round gravel, angular stone locks together securely. As Sajal explains:
Most foot-traffic walkways need 4–6 inches of compacted, angular base stone plus a 1-inch bedding layer; add 2–4 inches in frost or soft soils [3].
Use a mechanical plate compactor to compact the stone in 2–3 inch layers, ensuring maximum density and reducing the risk of settling.
Next, spread a 1-inch layer of concrete sand as the bedding layer. This sharp-edged sand provides a stable base for the bricks but shouldn’t be used to fix major dips in the foundation. For filling the joints between bricks, use polymeric sand. Its binders harden when moistened, locking the joints in place and discouraging weeds.
If you’re working with clay or organic soils, lay down nonwoven geotextile fabric beneath the gravel base. This fabric separates the soil from the stone, preventing sinking and ensuring the pathway remains level for years to come. Taking this extra step protects your hard work and keeps the walkway looking great.
With your materials and base layers ready, you’re set to move on to the installation process.
Installation Instructions
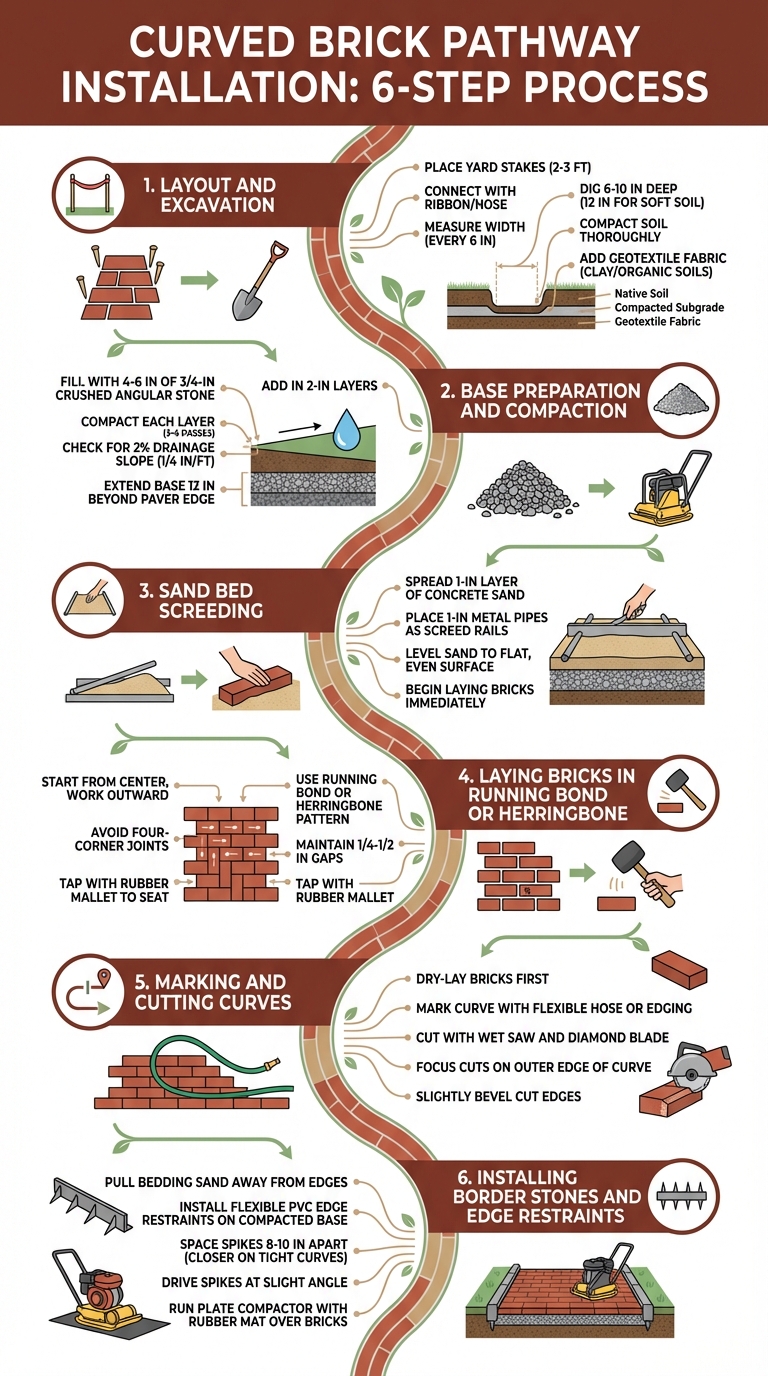
6-Step Guide to Installing Curved Brick Pathways
Follow these steps carefully to create a curved brick pathway that not only looks great but also stands the test of time. A strong foundation and attention to detail are key to achieving long-lasting results.
Step 1: Layout and Excavation
Start by placing yard stakes about every 2 to 3 feet along the intended curve. Connect the stakes with ribbon or lay a flexible garden hose along the ground to visualize the path. Adjust the curve until it looks natural and flows smoothly. Once you’re satisfied, measure the walkway’s width every 6 inches during excavation to ensure consistency.
Dig to a depth of 6–10 inches for standard foot traffic. For soft or organic soil, go deeper – about 12 inches – to allow for a thicker base. Use a mechanical soil tamper or plate compactor to compact the soil thoroughly [2]. If you’re working with clay or organic soils, add a layer of nonwoven geotextile fabric over the compacted soil. This prevents the stone base from sinking over time.
After excavation, it’s time to focus on building a stable base.
Step 2: Base Preparation and Compaction
Fill the trench with 4–6 inches of 3/4-inch crushed angular stone. Add the stone in 2-inch layers and compact each layer with 3–4 passes of a plate compactor to ensure stability and reduce settling.
Sajal, a writer specializing in landscaping and hardscaping, offers this advice:
Most paver walkways last when the base is thicker than you think, the slope is honest, and the pattern avoids four‐way joints [3].
While compacting, use a level on a straightedge every 4–6 feet to check for a proper drainage slope. Aim for a 2% pitch, or about 1/4 inch of drop per foot, sloping away from building foundations. Extend the base stone about 12 inches beyond the edge of the pavers to create a structural apron that supports the walkway.
Step 3: Sand Bed Screeding
Spread a 1-inch layer of concrete sand over the compacted stone base. Place 1-inch metal pipes across the width of the pathway to act as screed rails. Use these rails to level the sand into a flat, even surface. Keep in mind, this sand bed is only for leveling – don’t use it to fill dips in the gravel base. Begin laying bricks immediately, kneeling on the already-installed sections to avoid creating uneven spots.
Step 4: Laying Bricks in Running Bond or Herringbone
Start laying bricks from the center of the walkway and work outward. Use a running bond or herringbone pattern to ensure structural interlock. Avoid creating four-corner joints (where four brick corners meet), as these can compromise stability over time.
Sajal notes:
The ‘four‑corner rule’ means staggering joints so there is always a running bond or interlock, not a crosshair [3].
Maintain a gap of 1/4 to 1/2 inch between bricks for proper drainage and joint sand. Use a rubber mallet to gently tap each brick into the sand bed, ensuring it’s securely seated.
Once the bricks are laid, refine the curved edges with precise cuts.
Step 5: Marking and Cutting Curves
For tight curves, dry-lay the bricks first to identify where cuts are needed. Use a flexible garden hose or edging to mark the curve. A wet saw with a diamond blade is ideal for making accurate cuts. Slightly bevel the cut edges to remove small chips and help the polymeric sand lock in better [3].
Focus on cutting bricks along the outer edge of the curve, where the radius is tightest. The inner edge may require fewer cuts, depending on the pattern. Clean, accurate cuts give the pathway a polished, handcrafted appearance.
Step 6: Installing Border Stones and Edge Restraints
Before installing edge restraints, use a flat-nosed shovel to pull the bedding sand away from the edges of the pavers. This ensures the restraints sit directly on the compacted aggregate base instead of loose sand.
Install flexible PVC edge restraints using non-galvanized spikes set at a slight angle. Space the spikes 8–10 inches apart, with closer spacing on tighter curves, to prevent the bricks from shifting over time [4]. Drive the spikes shallowly to avoid creating voids that could trap water and lead to freeze-thaw damage [4].
Finally, run a plate compactor with a protective rubber mat over the bricks. This settles them securely into the sand bed, completing your curved brick pathway.
Maintenance and Care
Keeping a curved brick pathway in top condition doesn’t require much effort, but it does demand attention to key areas like joint upkeep, drainage, and addressing freeze-thaw damage as soon as it appears. Here’s how to ensure your pathway stays both beautiful and functional.
Joint Sanding and Sealing
Using polymeric sand for jointing is a smart choice. This material contains binders that harden when moistened, locking the pavers in place and reducing weed growth [3]. For the best results, apply the sand when the temperature is above 50°F and the joints are dry. Sweep it into the gaps, then carefully blow any excess dust off the brick surfaces to avoid leaving behind a stubborn polymer haze once the joints get wet [3].
When misting the joints, use a gentle shower rather than a hard spray to prevent washing out the sand. Allow 12–24 hours of dry weather for the sand to set properly [3]. Before winter arrives, applying a high-quality masonry sealant can help protect the bricks from water infiltration, which can lead to freeze-thaw damage [5].
Repairing Freeze-Thaw Damage
Winters in Maryland can be harsh, with freeze-thaw cycles that wreak havoc on even well-constructed pathways. When water seeps into cracks and freezes, it expands by about 9%, putting stress on the masonry and widening gaps [5]. Over time, this process leads to spalling, which causes the brick surface to weaken and flake. Frost heaving can also shift bricks, creating uneven surfaces [5].
Be on the lookout for signs of winter damage, such as crumbling or cracked joints, loose or displaced bricks, and noticeable gaps between stones [5]. Quick repairs can prevent further issues and maintain the pathway’s structure and appearance. If frost heaving has shifted bricks, remove the affected pavers, re-level the bedding sand, compact it, and reset the bricks [3] [5]. Replace any degraded sand with fresh polymeric sand, ensuring the joints are completely dry before application [3]. For major masonry repairs, wait for warmer weather to ensure proper curing [5].
| Maintenance Task | Recommended Timing | Benefit |
|---|---|---|
| Sealing | Before winter | Protects against water damage and spalling [5] |
| Joint Sanding | When dry and above 50°F | Secures pavers and reduces weed growth [3] |
| Edge Spiking | Every 8–12 inches (closer on curves) | Prevents lateral shifting [3] |
| Base Depth | 4–6 inches standard; add 2–4 inches in frost zones | Reduces frost heave [3] |
Pro Landscapes MD Curved Brick Pathway Services

Our professional services bring skilled craftsmanship to every curved brick pathway project. Whether you’re a homeowner looking for DIY advice or seeking expert implementation, Pro Landscapes MD combines guidance and professional expertise to deliver exceptional results.
Custom Designs in Central Maryland
Pro Landscapes MD specializes in designing and building curved pathways throughout the Baltimore and Washington, D.C. metro areas. What sets us apart? Our team holds college degrees in landscape design and horticulture – qualifications that are rare among local contractors.
The process starts with a professional site visit to evaluate your property’s unique features, including topography and drainage. From there, we create custom pathways that follow the land’s natural contours, working around elements like mature trees and slopes. Using high-quality materials from trusted brands like Techo-Bloc, Allen Block, and El Dorado Stone, we ensure that your pathway is both durable and visually appealing. Integrated drainage solutions are also included to prevent erosion and water damage, making your pathway not just beautiful but built to last.
Our expertise doesn’t stop at pathways. We aim to create outdoor spaces that feel complete and cohesive.
Integration with Patios and Retaining Walls
At Pro Landscapes MD, we go beyond standalone pathways. Our designs connect curved brick walkways seamlessly with other hardscape elements, such as patios, retaining walls, and even aquatic features. This approach ensures that your pathway naturally flows from one part of your property to another – whether leading from your driveway to your front door or winding around a patio to a quiet seating area.
Every design is tailored to your specific needs, ensuring smooth transitions between pathways, steps, and other landscaping features. We also prioritize eco-friendly practices by incorporating environmental pavers and native plants into our projects. Homeowners in Howard, Montgomery, Carroll, Frederick, Prince George’s, and Baltimore Counties can schedule a free site visit to receive a custom proposal tailored to their property.
Conclusion
Curved brick pathways bring together both style and practicality, offering a softer, more natural aesthetic compared to straight walkways. Their gentle curves mimic the flow of nature, creating eye-catching focal points that highlight garden features and guide movement through outdoor spaces with a calming rhythm [1]. Beyond their visual charm, these pathways are durable, provide clean walking surfaces, and can enhance curb appeal while potentially boosting property value.
The key to a long-lasting pathway lies in what’s beneath the surface. Proper installation is essential for ensuring durability and functionality. Skilled professionals avoid common pitfalls like four-corner joints and use precise cutting techniques to maintain consistent joint spacing of 1/8–1/4 inch, even on curves.
As landscaping expert Sajal puts it:
"The strongest hardscapes are quiet. They shed water, ignore winter, and invite you down the path without a word." – Sajal, Landscaping & Hardscaping Writer [6]
Pro Landscapes MD specializes in creating beautifully designed curved brick pathways that seamlessly integrate with other hardscape features like patios and retaining walls. Their work also includes addressing critical factors like drainage to prevent erosion and freeze-thaw damage – vital for Maryland’s variable climate.
Whether you’re tackling a DIY project or hiring professionals, the foundation of success lies in preparing a solid base, ensuring proper drainage, and using high-quality materials. Homeowners in Howard, Montgomery, Carroll, Frederick, Prince George’s, and Baltimore Counties can schedule a free site visit to explore custom pathway designs that complement their property’s unique characteristics.
FAQs
How do I figure out the best curve for my yard?
To design the perfect curve for your yard’s brick pathway, start by considering how your landscape naturally flows. A simple trick is to use a flexible garden hose or a piece of string to outline the curve. This helps you visualize the shape and make adjustments before committing to the installation. It’s a great way to experiment with designs and find a smooth, attractive curve that fits seamlessly with your yard. Browsing photos of curved pathways can also spark ideas and guide your decision.
How deep should the base be for my soil and climate?
The foundation for a curved brick pathway is usually about 4 to 6 inches deep, which helps provide stability and proper drainage. However, this depth can vary depending on your soil type and climate. For instance, if your area has heavy clay soil or experiences freeze-thaw cycles, you might need a deeper base to account for these conditions. To get the best results, it’s a good idea to consult local landscaping experts who understand the unique challenges of your region.
When should I hire Pro Landscapes MD instead of DIY?
Choose Pro Landscapes MD for projects such as curved brick pathways that demand expert skill, careful planning, and long-lasting craftsmanship. Their team ensures precise installation and a seamless fit with your existing landscape. Plus, they offer specialized services, including drainage solutions and the use of eco-friendly materials, tailored to your needs.
When tackling intricate designs or aiming for top-tier results, their expertise can save you from the common pitfalls and maintenance headaches that often come with DIY attempts.
Chat with Us