


- bhavya gada
- No Comments
Building your own backyard fire pit is a cost-effective way to create a cozy outdoor space for gatherings, relaxation, and year-round enjoyment. Here’s what you need to know:
- Cost Savings: DIY fire pits typically cost $100–$500, compared to $700+ for professional installations.
- Customization: Choose materials, design, and size to match your style and space.
- Safety First: Ensure compliance with local regulations, maintain safe distances, and use fire-rated materials.
- Materials & Tools: Fire bricks, gravel, a steel fire ring, and basic tools like a shovel and level are essential.
- Construction Steps: Build a solid foundation with gravel, stack fire-rated materials for walls, and consider adding a smokeless design for better airflow and reduced smoke.
- Maintenance: Regularly clear ashes, inspect for damage, and address drainage issues to keep your fire pit in good condition.
Whether you go DIY or hire professionals, a fire pit adds warmth and charm to your outdoor space. Ready to get started? Let’s dive into the details.
Building Your Perfect Fire Pit on a Budget
Planning Your DIY Fire Pit Project
Careful planning is key to creating a fire pit that’s both safe and visually appealing. By understanding local rules, picking the perfect spot, and using durable materials, you’ll be ready to build a fire pit that stands the test of time.
Maryland Regulations and Permits
Before starting, make sure your project complies with local fire safety laws. Check with your local fire department or county office to understand the regulations in your area. In central Maryland, fire pits typically need to be at least 15 feet from houses and 10 feet from property lines[3]. Some areas may also require permits for permanent structures, such as masonry or gas-connected fire pits. Contact local authorities to confirm these details before you begin[5]. Rules can vary significantly between counties, and a quick call could save you from costly mistakes, like having to move or rebuild your fire pit. Additionally, be aware of seasonal burn restrictions, which may apply during dry or windy conditions.
Choosing the Right Location
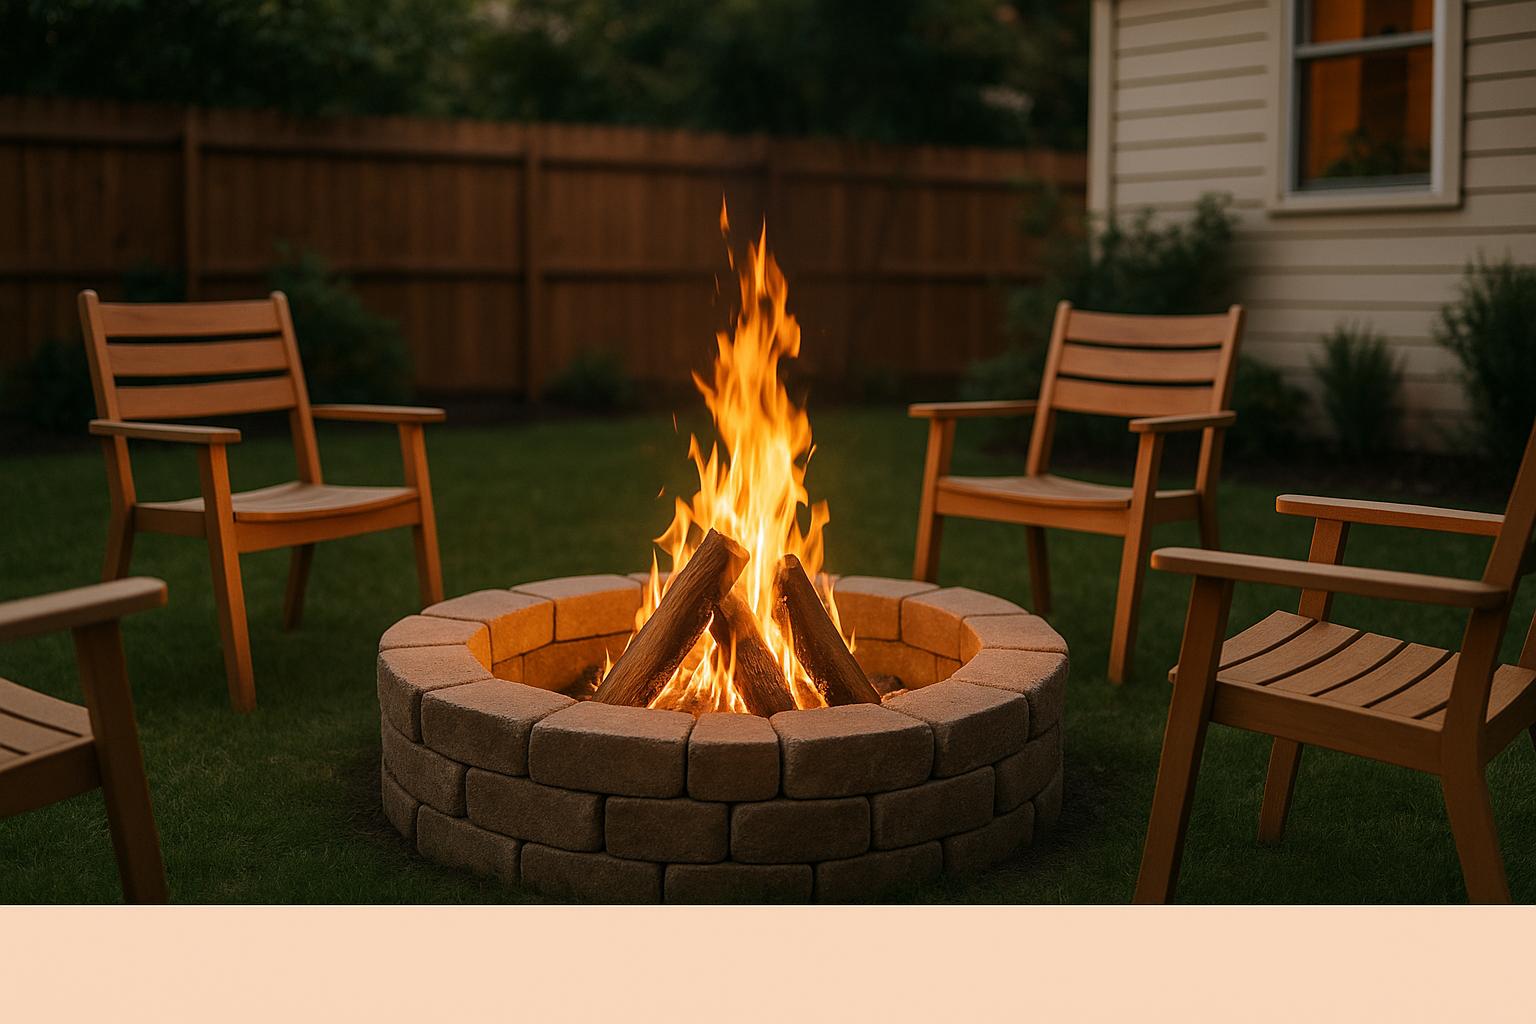
Pick a flat area that’s at least 15 feet away from your house and 10 feet from other structures. The spot should have good drainage, no overhanging branches, and be positioned to minimize the risk of sparks drifting toward buildings. Evaluate wind patterns and remove any nearby hazards, like low-hanging foliage. Think about how the fire pit will fit into your outdoor space – placing it near a patio or deck can create a cohesive look, but always prioritize safety. Many fire pit designs feature a 4 to 5-foot diameter, which provides enough space for the fire while leaving room for seating and walkways[2].
Materials and Tools You’ll Need
Choosing the right materials ensures your fire pit is both durable and safe. For the inner wall, use fire bricks or fire-rated pavers[3], as they can handle high heat without cracking. For the outer wall, options like natural stone, concrete pavers, or retaining wall blocks offer flexibility in style. To create a solid foundation, use gravel or sand, which improves drainage and prevents the structure from shifting over time[2][3]. If you’re going for a smokeless fire pit, a steel fire pit ring is essential – it protects the inner wall and extends the lifespan of your fire pit.
Here’s what you’ll need to get started: shovel, level, tape measure, trowel, rubber mallet, and wheelbarrow[2][3]. For areas with clay-heavy soil, a mattock or pickaxe will come in handy. If you’re building a smokeless design, a drill with a step bit is necessary to create air holes for better combustion.
Material costs can range from $200 to $600, depending on the size and materials you choose. Fire bricks or pavers typically cost between $1 and $5 each, while gravel bags are usually $3 to $6[6]. Check out both big-box hardware stores and local stone suppliers for the best deals and a wider selection[5].
With proper preparation, most DIY fire pit projects can be completed in a weekend. The actual construction for a basic design typically takes about 3 to 4 hours[2]. By gathering all your materials and tools in advance, you can avoid delays and enjoy a smooth building process. These steps will help you create a fire pit that’s ready to enjoy.
Step-by-Step Fire Pit Construction
Now that you’ve got your plan and materials ready, it’s time to bring your fire pit to life. Follow these steps to build a fire pit that’s both safe and durable. Attention to detail at each stage will ensure it stands the test of time.
Building the Foundation
Start by marking the fire pit’s location. Use a stake and string to outline a perfect circle. A 4–5-foot diameter works well for most backyards[2][3]. Once marked, dig out the area to a depth of 6–12 inches. This depth provides enough room for the foundation materials while keeping the fire pit at the right height.
Clear the area of grass, roots, and debris. Use a spirit level to ensure the bottom is even – this step is crucial for stability. If the soil is clay-heavy, break it up to improve drainage.
Next, create the foundation. Spread 1 to 2 inches of gravel or crushed stone across the base[2][3]. This layer helps with drainage and prevents water from pooling, which could lead to cracking during freeze-thaw cycles. Compact the gravel with a hand tamper or the flat side of a shovel.
For a more permanent installation, you can pour a concrete footing between the inner and outer rings of the fire pit[3]. While this adds time and cost, it enhances stability, especially for larger fire pits or areas with unstable soil.
Finally, add a thin layer of sand on top of the gravel. This will make it easier to level the first row of stones or pavers[2]. Check the level frequently as you work – small adjustments now will save you trouble later.
Once the foundation is solid, you’re ready to start building the walls.
Building the Fire Pit Walls
Begin stacking your materials in concentric circles, starting from the inside and working outward. Carefully align each layer of bricks, pavers, or stones, ensuring they are level and evenly spaced[2][3][6]. Fire pit walls are typically 2 to 4 feet high, depending on your preference and any local regulations[2].
Before setting materials permanently, dry-fit each piece to check for alignment[2][4]. This step helps you identify any uneven gaps or pieces that need adjustment. It’s easier to fix these issues now than after installation.
When you’re happy with the fit, secure the materials using fire-resistant mortar or adhesive[4][3]. This not only strengthens the structure but also prevents smoke from escaping through cracks. For the inner wall, use high-heat masonry or fire-rated mortar to withstand direct flames[3]. For the outer veneer, standard exterior mortar will do[3].
Apply the mortar to both horizontal and vertical joints, checking alignment as you go. Once the mortar starts to set, adjustments become much harder, so take your time to ensure everything is straight.
To extend the fire pit’s lifespan, consider adding a steel fire pit ring. This ring protects the structure from direct flames and fits snugly inside the stone walls[3]. Leave enough space for proper installation.
If you want to reduce smoke and enhance the experience, you can also build a smokeless fire pit.
Building a Smokeless Fire Pit (Optional)
For a cleaner, more enjoyable fire, consider upgrading to a smokeless design. This involves installing a steel ring with a 2 to 3-inch gap between the ring and the stone walls to create an airflow chamber[4][3]. This chamber allows for secondary combustion, which significantly reduces smoke.
To ensure proper ventilation, drill 24 evenly spaced holes, each 1 inch in diameter, around the bottom of the steel ring[4]. These holes should be 3.75 inches apart to provide a steady flow of air for combustion[4].
Align the ventilation holes with the gap between the inner and outer walls. This gap allows air to heat up before entering the fire, promoting a more complete burn. The 2 to 3-inch chamber is key to the smokeless design[4][3].
Once installed, test your smokeless fire pit by building a proper fire with dry, seasoned firewood[4]. Let the fire burn for at least 30 minutes to reach the optimal temperature of 550 to 700°F, which is necessary for effective secondary combustion. If smoke persists, check the ventilation holes and ensure you’re using the right type of wood.
A homeowner in Maryland successfully built a smokeless fire pit using retaining wall bricks, gravel, and a steel ring with ventilation holes. By following the steps for proper foundation and wall construction, they created a sturdy fire pit that became a favorite gathering spot for family and friends[4][3]. The smokeless design made it even more enjoyable, as guests didn’t have to dodge smoke.
Pay attention to your first few fires and make adjustments to wood placement or airflow if needed for the best results[4].
Safety and Maintenance
Your fire pit is ready to use, but keeping safety in mind and staying on top of maintenance is key to ensuring it works properly and lasts for years. By following basic safety guidelines and performing regular upkeep, you can prevent accidents and protect your investment.
Safety Rules During Use
Once your fire pit is set up, follow these tips to enjoy it safely:
Keep a safe distance – at least 15 feet away from your house. This space helps shield your home from heat damage and stray embers. Make sure there’s also plenty of overhead clearance to avoid any fire hazards.
Use a spark screen. A metal mesh spark screen keeps embers and sparks from escaping while allowing heat and light to pass through. You can buy one that fits your fire pit or have one custom-made.
Have fire safety tools ready. Always keep a water bucket, garden hose, or Class A fire extinguisher nearby before starting the fire[2][3]. In case of an emergency, you’ll need these to extinguish the fire completely. Stir the ashes and make sure everything is fully cooled before leaving the area.
Burn only dry, seasoned wood. Wet or green wood produces excessive smoke and increases the risk of flying sparks. Avoid burning treated or painted wood, as well as trash, since these can release harmful fumes and damage your fire pit.
Never leave the fire unattended. If you need to step away, assign someone to monitor the fire. Shifting winds can quickly turn a controlled fire into a dangerous situation.
For smokeless fire pits, keep air holes clear of debris to ensure proper airflow and secondary combustion[4].
Check local conditions before lighting. If there’s a burn ban, high winds, or drought conditions, it’s safer to wait before using your fire pit.
Regular Maintenance Tasks
Routine maintenance keeps your fire pit in top shape and ensures it performs well.
Clear out ashes after they’ve cooled for at least 24 hours. Use a metal shovel to transfer the ashes into a metal container with a tight-fitting lid. Store the container away from anything flammable until you can dispose of the ashes properly[3]. Never put hot ashes in plastic bins or compost piles.
Inspect and clean the fire pit regularly. Look for cracks in bricks or stones, loose mortar, rust on metal parts, and any shifting in the foundation[3]. Scrub the walls with a stiff brush and mild detergent to remove residue. For tougher stains, a mix of baking soda and water works well without harming the materials. Fix small problems early to avoid bigger issues later.
Do a quick check before each use and a thorough seasonal inspection. If your fire pit has a steel ring, check for warping, rust, or holes. Clear out any debris in ventilation holes, which is especially crucial for smokeless designs to keep the airflow working properly[4].
Fix drainage problems right away. Standing water around your fire pit can lead to freeze-thaw damage in winter and weaken its foundation. If water pools, add more gravel to the base or adjust the surrounding area to direct water away.
Repoint mortar joints as needed. If you notice cracks or gaps, use high-heat masonry mortar to repair them, especially in areas exposed to direct flames[3].
Protect metal parts from rust. Apply high-heat paint designed for fire pits to keep metal components in good condition. Before painting, remove any rust with a wire brush. Reapply the coating annually or as needed.
If you encounter major structural problems, it’s worth consulting a professional. Companies like Pro Landscapes MD offer expert fire pit maintenance and repair services in central Maryland, ensuring your fire pit stays safe, functional, and up to code.
sbb-itb-843f8be
Improving Your Fire Pit Area
Once you’ve built a safe and sturdy fire pit, it’s time to shift your attention to the surrounding space. With thoughtful seating, decorative touches, and custom features, you can transform your fire pit into the centerpiece of your backyard.
Adding Seating and Decorations
Comfortable seating doesn’t have to mean splurging on pricey outdoor furniture. Built-in options, like paver or retaining wall seating, offer durability and style while doubling as a safety barrier.
For example, curved or circular retaining walls can serve as low seating that defines the fire pit area and adds a layer of protection. If your fire pit is made from natural stone, consider using the same materials for a cohesive look.
Paver patios are another great way to enhance the space. They create a flat, stable surface for chairs and make the area more inviting than bare ground. A circular paver patio not only looks polished but is also easier to maintain. Depending on the size and materials, installing a basic paver seating area can cost between $500 and $1,500[6].
In 2023, a homeowner in Columbia, Maryland, upgraded their backyard with a fire pit surrounded by a retaining wall made of pavers. The built-in seating and added safety barrier boosted outdoor entertaining by 40% and increased the property’s value by 25%, according to a local real estate assessment. The project was completed by Pro Landscapes MD.
Lighting can also elevate the ambiance and improve safety. Solar-powered or low-voltage LED lights along walkways are both practical and visually appealing. String lights draped around the space create a cozy, inviting atmosphere, perfect for evening gatherings.
A family in Bethesda, Maryland, enhanced their fire pit area with a flagstone patio, string lights, and solar-powered path lighting. Completed in June 2023, the project improved safety and ambiance, leading to a 50% increase in evening outdoor activities.
Adding landscaping around your fire pit softens the hardscaping and brings natural beauty to the space. Heat-tolerant shrubs, ornamental grasses, or fire-resistant plants are excellent choices. Just be sure to plant them at least 10 feet away from the fire pit. Decorative gravel or mulch can help define areas and reduce maintenance.
Pathways are another practical addition. Flagstone or paver walkways connecting your fire pit to your house, deck, or patio make the area more accessible and improve the flow of your yard. With proper lighting, these paths also enhance safety for nighttime use.
Beyond these basics, unique features can take your outdoor space to the next level.
Adding Custom Features
For a seamless outdoor living area, consider integrating your fire pit with your patio. Using matching pavers or stone creates a unified look and provides more room for entertaining. This setup is perfect for hosting larger gatherings and makes the space feel intentional.
A 2023 survey by the National Association of Landscape Professionals found that 68% of homeowners who added a fire pit to their backyard reported using their outdoor space more frequently for social events[3].
Pairing your fire pit with an outdoor kitchen can create the ultimate entertaining hub. Position the kitchen or a prep area 10–15 feet from the fire pit to avoid heat and smoke, forming a functional triangle where you can cook, prepare food, and socialize.
For an eco-friendly touch, consider environmental pavers. These permeable pavers allow rainwater to filter through, reducing runoff and helping with stormwater management – an especially useful feature in Maryland’s climate. Often made from recycled materials, they also stay cooler during summer.
Storage is another way to keep the area organized. Built-in benches can double as seating and storage for firewood, cushions, or tools. You can even incorporate storage into retaining walls or create standalone units using the same materials as your fire pit.
Adding a pergola or shade structure can extend the usability of your fire pit area. A pergola positioned to provide shade during the day while allowing smoke to escape creates a defined outdoor room that works for both daytime and evening gatherings.
Lastly, don’t overlook practical elements like proper drainage. Companies like Pro Landscapes MD specialize in blending drainage solutions with hardscaping to ensure your fire pit area remains functional throughout the year.
When to Hire Professionals
DIY fire pits can be a satisfying project, but when things get complicated, calling in the experts can save you a lot of time, money, and stress. Knowing when to hand the reins over to a professional can make all the difference.
If you’re dreaming of a fire pit with multi-level designs, custom shapes, or built-in seating, these require masonry skills and tools that professionals use every day. Tackling these on your own could lead to costly mistakes.
Then there’s the issue of site challenges. Poor drainage, steep slopes, or unstable soil can quickly turn into major headaches. Professionals know how to solve these problems with solutions like French drains or proper grading, ensuring your fire pit stands the test of time.
For homeowners looking to seamlessly blend a fire pit into existing patios, walkways, or other hardscapes, professionals excel at creating a cohesive look. They can match materials and designs to make everything flow beautifully.
Navigating permits and building codes can be tricky, too. Professionals handle this process for you, so you don’t have to worry about violations or delays.
Cost is always a consideration. According to HomeAdvisor, professional fire pit installations range from $300 to $1,400 for basic models, but if you’re going for something custom and integrated, the price can exceed $5,000 [6]. While this might seem like a hefty investment, a survey by the National Association of Realtors found that 83% of homeowners said a fire feature increased their desire to stay home, and 78% reported greater enjoyment in their outdoor space after installation.
In Maryland, where the climate and soil conditions can be unpredictable, professionals bring a big advantage. They can address drainage issues and complete the project in just a few days, compared to the weeks it might take a DIYer working on weekends.
When you’re facing these kinds of challenges, hiring a professional doesn’t just safeguard your project – it can make the whole process smoother and more enjoyable. Ready to take your fire pit to the next level? Pro Landscapes MD has the expertise to make it happen.
How Pro Landscapes MD Can Help

Pro Landscapes MD specializes in tackling the challenges that come with fire pit installations, offering expert services throughout central Maryland, from Bethesda to Columbia and beyond. Their start-to-finish approach ensures every detail is handled with care.
Their custom fire pit installations go beyond basic construction. With a team of college-educated landscape designers, they create outdoor living spaces that balance style and function, elevating your backyard experience.
They’re also experts in drainage solutions, a critical need in Maryland’s variable climate. From French drains to stormwater management and yard leveling, they provide water management services that protect your fire pit and surrounding areas.
When it comes to hardscaping integration, Pro Landscapes MD stands out. They use premium materials to connect fire pits with patios, walkways, and seating areas, ensuring everything looks polished and professionally planned.
For homeowners who care about eco-friendly options, they offer sustainable solutions like environmental pavers. These not only promote proper drainage but also help reduce runoff, aligning with modern practices for greener living.
Their full-service approach means they handle every step of the process – from site assessments and permits to installation and maintenance advice. You won’t have to juggle multiple contractors or worry about missed details.
For projects with complex designs or tricky site conditions, professional installation is an investment that pays off. It adds value to your home, enhances safety, and delivers years of enjoyment. With Pro Landscapes MD, you’ll get results that exceed expectations and protect your investment for the long haul.
Conclusion: Build Your Dream Fire Pit
Creating a DIY backyard fire pit transforms your outdoor space into a cozy gathering spot. Whether you’re toasting marshmallows on a warm summer night or enjoying the warmth during Maryland’s brisk evenings, a well-crafted fire pit can quickly become the centerpiece of your backyard.
Start by choosing the right location, using durable materials, and following local regulations. Routine upkeep, like clearing out ash and inspecting for cracks, ensures safety and prolongs the fire pit’s life [3]. Adding a steel ring inside the stone walls helps shield them from direct flame damage, and proper drainage prevents water-related issues from weakening the structure.
Thinking about building your own? With a solid plan and high-quality materials, you can create a fire pit that suits your style. For those looking to reduce smoke while enhancing the experience, consider smokeless designs that focus on effective airflow [4]. The pride of building your own fire pit – and the countless memories it will host – makes the effort more than worth it.
That said, not all designs are simple. If your vision includes intricate features, challenging layouts, or a seamless blend with existing hardscaping, professional help might be the way to go. Pro Landscapes MD specializes in turning these dreams into reality, with a team of college-educated landscape designers ready to bring their expertise to your project. They manage every detail, from permits and drainage to custom stonework and even outdoor kitchen integration.
"Very few other landscapers will have gone to college for landscape design/horticulture, which puts our business and skill set ahead of the competition." – Pro Landscapes MD [1]
Professionally installed fire pits not only enhance your outdoor living space but can also add value to your home. Whether you opt for a DIY project or enlist expert help, your backyard fire pit will become a treasured feature, creating memories for years to come. Why wait? Your dream fire pit is ready to be built.
FAQs
What safety tips should I follow when building and using a DIY backyard fire pit?
When creating a DIY backyard fire pit, safety should be your top priority. Choose a spot that’s at least 10–15 feet away from any buildings, trees, or branches that could pose a hazard. Build your fire pit using non-flammable materials like stone, brick, or concrete, and make sure it’s designed with proper ventilation to avoid smoke buildup.
While using the fire pit, always keep safety tools within reach – such as a bucket of water, a fire extinguisher, or a garden hose – for emergencies. Never leave the fire unattended, and always keep a close watch on children and pets around the area. Before calling it a night, make sure the fire is completely out by thoroughly dousing it with water and stirring the ashes until they’re cool to the touch. Taking these steps will ensure you can enjoy your fire pit safely and responsibly.
What steps should I take to make sure my DIY fire pit meets local Maryland regulations?
To make sure your DIY fire pit meets Maryland’s local regulations, start by reviewing your county’s specific rules. These typically cover setback requirements – how far the fire pit must be from property lines, buildings, and anything flammable – as well as restrictions on pit size and the type of fuel you can use. Depending on where you live, you might also need a permit.
For accurate information, it’s a good idea to contact your local government office or fire department directly. If the process feels overwhelming, consulting a professional, like Pro Landscapes MD, can help you build a fire pit that’s not only safe but also fully compliant with local regulations.
What are the advantages of a smokeless fire pit, and how can I build one at home?
A smokeless fire pit brings a lot to the table when it comes to outdoor comfort. With reduced smoke, you can enjoy a more pleasant and irritation-free experience – no more watery eyes or scratchy throat. Plus, it burns cleaner, leaving behind less ash, making it a fantastic option for creating a cozy backyard vibe without the annoyance of lingering smoke.
If you’re thinking about building one, you’ll need a few key materials: heat-resistant bricks, a metal fire ring, and some gravel or sand for proper drainage. The real trick lies in ensuring good airflow. Features like vent holes or a double-wall design help air circulate better, boosting combustion and cutting down on smoke. If you want a polished look or need some extra guidance, you might want to reach out to professionals like Pro Landscapes MD, who are pros at designing and building custom fire pits.
Chat with Us