


- bhavya gada
- No Comments
Proper drainage is critical for maintaining the stability and lifespan of retaining walls in small gardens. Without it, water buildup can cause structural damage, soil erosion, and harm to nearby property. Here’s a quick summary of effective drainage strategies:
- Gravel Backfill and Filter Fabric: Use clean gravel (¾–1 inch) behind the wall to allow water to flow and pair it with filter fabric to prevent soil clogging.
- French Drains and Perforated Pipes: Install a perforated pipe at the wall’s base, sloped at 2% (¼ inch/foot), to redirect water to a safe outlet.
- Weep Holes: Add small openings (2–3 inches in diameter) every 4–6 feet to release trapped water.
- Grading: Ensure the ground slopes at least 2% away from the wall to prevent water accumulation.
- Wall Types with Built-In Drainage: Gabion, dry-stone, and modular block walls integrate water management into their design.
These solutions protect your wall and garden while preventing costly repairs. Testing your system after installation ensures proper functionality.
Key Drainage Solutions for Small Garden Retaining Walls
Keeping your small garden’s retaining wall stable and looking great starts with managing water effectively. By using a combination of drainage techniques, you can create a system that prevents water buildup, reduces pressure on the wall, and extends its lifespan.
Gravel Backfill and Filter Fabric
Gravel backfill is the foundation of any reliable retaining wall drainage system. This involves placing coarse gravel directly behind the wall, typically 12-18 inches thick. The gravel forms a permeable layer that allows water to flow downward instead of building up pressure against the wall. This not only protects the wall but also helps maintain its appearance.
For best results, use clean gravel measuring ¾ to 1 inch in size and avoid materials like crushed concrete, which may introduce dust or debris that clogs the system.
To keep the gravel effective over time, pair it with filter fabric. This fabric acts as a barrier, preventing soil from mixing into the gravel and clogging the drainage zone. Place the fabric against the soil, covering the gravel from the foundation up to about 6 inches below the surface. Overlap any seams by 12 inches to ensure full coverage. Without this step, the gravel’s permeability will degrade as soil particles seep in.
French Drains and Perforated Pipes
French drains are another effective way to manage water, especially in small garden spaces. These systems actively collect and redirect water away from the wall’s foundation. To install one, place a 4-inch perforated pipe at the base of the wall, surrounded by gravel and wrapped in filter fabric.
Make sure the pipe is oriented with the perforations facing downward to prevent sediment from entering. The pipe should also have a slope of at least 2% (¼ inch per foot) to guide water toward an outlet.
Direct the water to a safe discharge point, such as a storm drain, dry well, or natural drainage area at least 10 feet away from nearby structures. If space is tight, you can run the pipe along property lines or beneath walkways to reach an appropriate outlet.
For easier maintenance, include cleanout access points every 50 feet and at changes in pipe direction. These vertical cleanouts make it simple to clear blockages without digging up the system later.
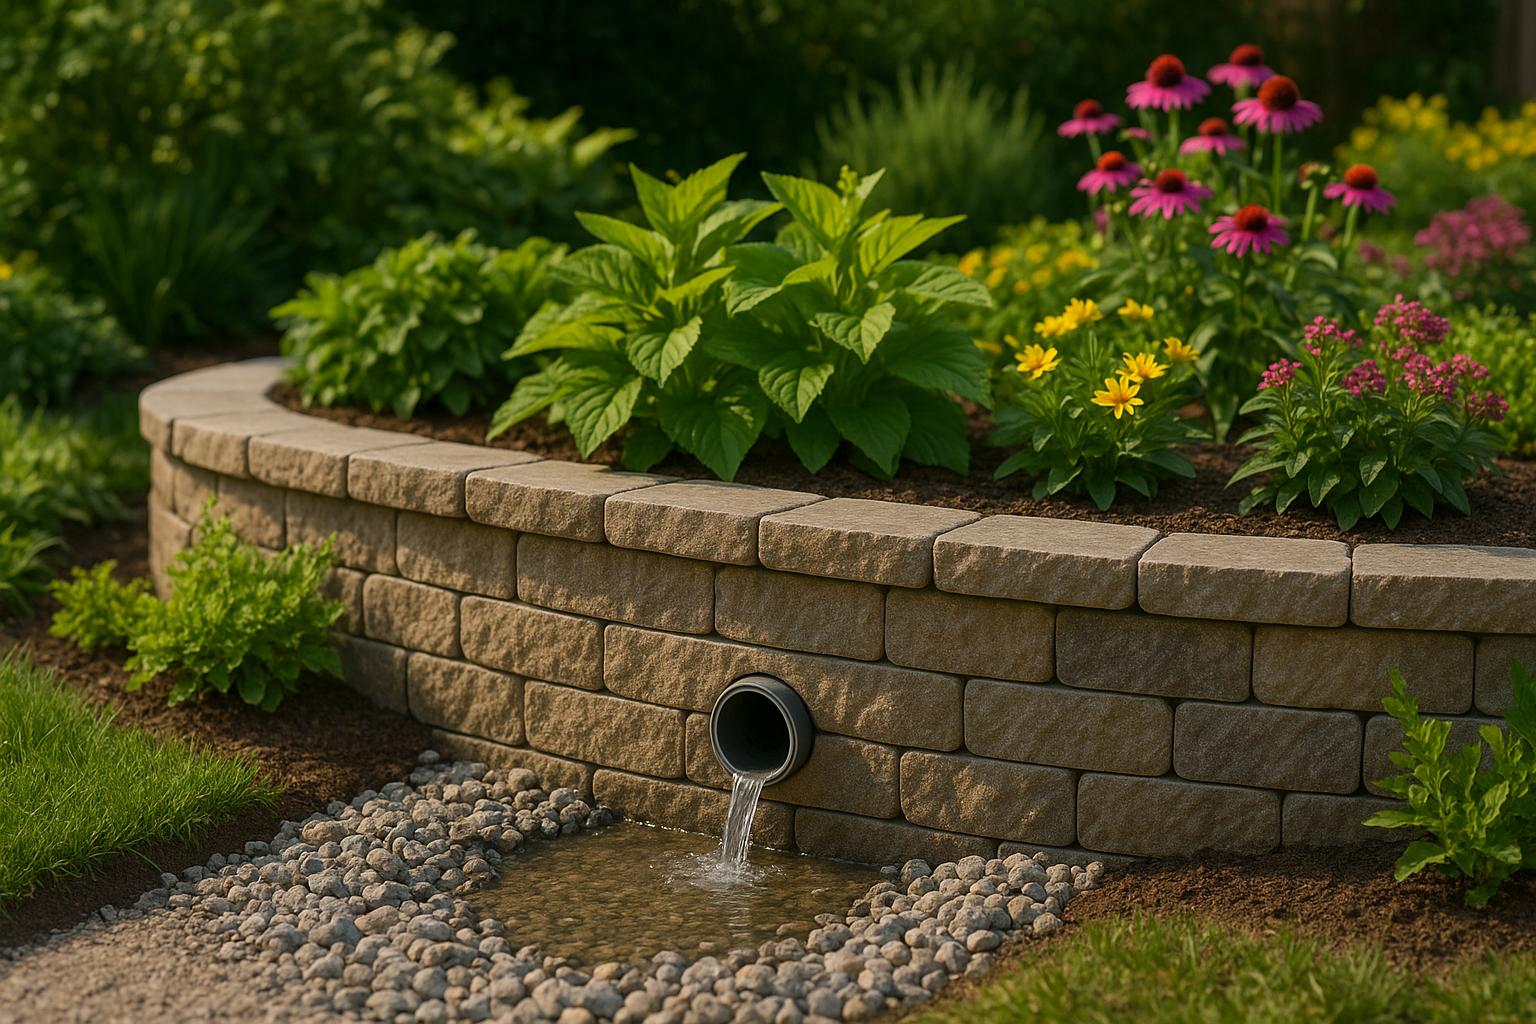
Weep Holes for Water Escape
Weep holes are small openings in the wall that let trapped water escape, reducing pressure and helping maintain structural stability. These holes, typically 2-3 inches in diameter, should be spaced every 4-6 feet horizontally along the wall.
Install weep holes at the lowest course of the wall, just above ground level. To prevent blockages, secure the openings with small gravel or plastic inserts. Angling the holes slightly downward encourages water flow.
For concrete block walls, specialized weep hole inserts can keep the openings clear while giving them a polished look. With natural stone walls, weep holes can be integrated between stones during construction for a seamless appearance.
Regular upkeep is essential – check for blockages, especially after heavy rains. Minor clogs can usually be cleared with a garden hose, while more stubborn issues may require removing the gravel insert for cleaning.
Grading and Surface Water Management
Grading is key to keeping surface water away from your retaining wall. A slope of at least 2% for the first 6 feet from the wall is recommended to direct water away before it can seep behind the structure.
In smaller gardens where space is tight, terracing can be a practical solution. By creating stepped levels, you can maintain the necessary slope while also adding usable planting areas.
To handle larger volumes of water, consider adding surface drainage features like shallow swales or decorative dry creek beds. These not only manage water effectively but also enhance the garden’s visual appeal. Position them to intercept runoff and redirect it to safe drainage areas.
For hard surfaces near the wall, such as patios or driveways, install channel or trench drains to catch and redirect water. These systems blend well with hardscape designs and provide an efficient way to manage runoff.
Retaining Wall Types with Built-In Drainage Features
Selecting a retaining wall design that incorporates drainage features can help manage water effectively while making the most of limited garden space. These types of walls integrate water management directly into their construction, reducing the need for additional drainage systems. Some are naturally permeable, while others include built-in drainage channels to handle water flow efficiently.
Gabion Walls: Practical and Permeable
Gabion walls are constructed using wire mesh baskets filled with stones, allowing water to pass freely through the structure. This natural permeability helps reduce water pressure, which can damage solid walls, making gabion walls an excellent choice for areas with high water flow or challenging soil conditions.
These baskets come in various sizes, offering flexibility in design. You can stack them in straight lines, curves, or stepped patterns to follow your garden’s natural contours. Proper stone selection and placement are key to maintaining stability without sacrificing permeability.
Beyond functionality, gabion walls add a unique aesthetic. Over time, soil can settle in the gaps between stones, creating an opportunity for plants to grow and soften the wall’s overall appearance. If you’re looking for a more traditional style with planting opportunities, dry-stone or plantable walls might be worth considering.
Dry-Stone and Plantable Retaining Walls
Dry-stone walls rely on gravity and carefully placed stones for stability. The gaps between the stones allow water to flow through, while also serving as small niches for planting, making them both functional and visually appealing. This method is ideal for small gardens where you want to combine structural support with natural beauty.
For best results, use a mix of flat stones in varying sizes to create an interlocking structure. Building the wall with a slight backward lean enhances its long-term stability.
Plantable retaining walls take this concept a step further by incorporating built-in planters. These walls are designed with intentional gaps or planter spaces to support plants like sedums, creeping thyme, or native grasses. This approach not only retains soil but also maximizes planting opportunities, providing vertical growing spaces that save ground space.
Modular Block Systems with Built-In Drainage
When space and time are limited, modular block systems offer a modern solution. These engineered systems combine structural durability with integrated drainage features, making them a practical choice for small gardens. The interlocking blocks form a complete wall system, with built-in channels to manage water flow effectively.
A standout example is Stone Strong Systems, which uses a hollow block design to integrate drainage directly into the wall. According to the manufacturer:
"Innovative hollow design makes Stone Strong the only wall system in the industry to feature a fully integrated drainage system requiring no additional parts or labor." [1]
This eliminates the need for separate French drains or extensive gravel backfill, simplifying the construction process. The large 24-square-foot block size also reduces installation time and labor costs, which is especially beneficial for smaller projects.
Installation is further simplified by lift and alignment loops built into each block, ensuring precise placement without heavy machinery. Once installed, stone infill locks the blocks together, creating a stable structure with continuous drainage.
For small gardens, modular block systems provide a reliable, efficient option. They can be customized to meet specific height or load requirements and come in a variety of textures and colors to complement your garden’s look.
Step-by-Step Guide to Installing Retaining Wall Drainage
Building on the drainage strategies mentioned earlier, here’s a guide to installing a reliable retaining wall drainage system. This process involves three key phases, each building on the last. Taking the time to execute each step properly can save you from expensive repairs down the line.
Evaluating Soil and Water Flow
Before you start digging, it’s essential to understand the conditions below the surface. Soil type plays a big role in how water moves through your yard and will shape your drainage strategy. For example, clay soils trap water and can increase pressure behind the wall, while sandy soils drain quickly but may need different stabilization methods.
To test your soil, dig a 2-foot hole, fill it with water, and see how long it takes to drain. If water remains after 24 hours, you’re dealing with poor drainage and may need solutions like French drains or extensive gravel backfill.
Next, perform a slope analysis. Using a 4-foot level and measuring tape, determine the grade of your yard. Water always flows downhill, so identify where runoff naturally collects. Signs of water issues, such as erosion channels, soggy areas, or pooling after rain, can help pinpoint trouble spots.
Don’t forget to consider seasonal water patterns. Walk your property during or after different weather events to observe how water moves and where it collects.
Finally, check with your local building department for setback requirements and permit needs. Many areas require engineered plans for retaining walls over 4 feet tall, and some have specific drainage regulations you’ll need to follow.
Once you’ve assessed soil and water flow, you’re ready to prepare a stable, drainage-friendly foundation.
Layering and Base Preparation
Good drainage starts with a solid foundation. Begin by digging to the proper excavation depth, which should extend at least 6 inches below the frost line plus the base height. In northern states, this often means digging 3-4 feet deep for the foundation alone.
Create a base layer using 6-8 inches of compacted crushed stone or gravel. Opt for angular stones rather than rounded ones, as they interlock better. Compact the stone in 2-inch layers using a plate compactor until the surface is level. This base provides both stability and the first layer of drainage.
Next, install filter fabric along the back of the excavation, extending it up the back wall and across the base. This fabric prevents fine soil particles from clogging the drainage system while still allowing water to pass through.
For drainage pipe placement, use a 4-inch perforated pipe wrapped in additional filter fabric. Place the pipe at the base of the wall with the holes facing downward to prevent clogging. Ensure the pipe slopes at least 1/4 inch per foot toward the outlet, whether that’s a storm drain, daylight outlet, or dry well.
Behind the wall, fill the space with angular gravel for effective drainage. Extend the gravel at least 18 inches back from the wall face and up to within 6 inches of the final grade.
Final Backfilling and Grading
Once the base is ready and the drainage pipe is installed, it’s time to finalize the project with proper backfilling and grading to manage surface water.
Start with soil backfill on top of the gravel layer. Use granular soil that drains well, avoiding clay or organic materials that can retain water and create pressure. Compact the soil in 8-inch layers to prevent settling, which could lead to low spots where water collects.
For surface grading, create a gentle slope of at least 2% (about 1/4 inch per foot) leading away from the wall for the first 10 feet. This helps direct water away from the wall before it becomes an issue.
Protect your system’s outlet to ensure it functions properly. If the drain pipe exits onto a slope, use riprap or a splash pad to prevent erosion. For connections to storm drains, follow local codes and use proper fittings to prevent backflow.
Think beyond the immediate area when managing surface water. Install gutters and downspouts to redirect roof runoff away from the retaining wall. You can also create swales or use permeable materials in pathways to reduce the amount of water reaching the wall.
Finally, test your system. Run water from a garden hose along the top of the wall to simulate heavy rain. Check that water flows through the system as planned, that weep holes are clear, and that water exits at the designated outlet points. This ensures everything is working as it should.
sbb-itb-843f8be
Pro Landscapes MD: Expert Drainage and Hardscaping Services

Pro Landscapes MD specializes in combining effective drainage systems with beautifully designed retaining walls, serving communities across central Maryland. Their work ensures landscapes remain protected from water damage while enhancing their aesthetic appeal. Here’s how they achieve this balance of functionality and design.
Specialized Drainage Services
Pro Landscapes MD provides a full range of drainage solutions designed to integrate seamlessly with retaining wall systems. Their French drain installations are particularly effective at redirecting excess water from wall foundations, helping to maintain stability and prevent water buildup. This is crucial in areas where standing water could compromise the integrity of retaining walls.
"Proper drainage is essential to maintaining the health and stability of your landscape. We offer a range of drainage solutions to prevent water damage, flooding, and erosion." – Pro Landscapes MD
They also use berms and swales to naturally control water flow around retaining walls, tailoring each solution to the property’s unique topography. Their regrading services reshape the land to improve water flow, ensuring water is directed away from critical areas. Additionally, grate and channel drains are discreetly incorporated into hardscaping designs, providing effective water collection points without disrupting the overall look of the space.
Custom Retaining Walls and Hardscaping
Pro Landscapes MD takes a tailored approach to retaining wall design, ensuring that drainage considerations are built into every project from the start. Using high-quality materials like Techo-Bloc, Allen Block, and El Dorado Stone, they construct walls that combine durability with efficient water management. Each project is customized to address specific factors such as soil type, slope, and water flow patterns, delivering solutions that work both structurally and visually.
Their expertise extends beyond retaining walls. By incorporating their knowledge of landscape design and horticulture, they create cohesive outdoor spaces where plants, soil, and hardscaping work together. Whether it’s patios, walkways, or outdoor living areas, their designs ensure water management remains effective while enhancing the overall aesthetic.
Commitment to Eco-Friendly Practices
Sustainability plays a key role in Pro Landscapes MD’s approach. Their use of environmental pavers encourages natural water infiltration, reducing runoff. They also integrate native plants into their designs, which not only thrive in Maryland’s climate but also act as natural water filtration systems, minimizing erosion and maintenance needs.
For stormwater management, they offer dry riverbeds and rain gardens, which not only control water flow but also add visual interest and support local biodiversity. These methods focus on capturing and redirecting water for beneficial use, a particularly important feature for smaller gardens where efficient water use can significantly impact plant health and soil stability.
"At Pro Landscapes MD, we specialize in creating outdoor environments that blend beauty, function, and sustainability." – Pro Landscapes MD
Serving areas like Howard County, Montgomery County, Carroll County, Frederick County, Prince George’s County, and Baltimore County, Pro Landscapes MD combines local expertise with a commitment to quality. They offer free consultations and customized proposals, helping homeowners tackle drainage issues while transforming their outdoor spaces into functional and beautiful environments.
Conclusion: Ensuring Long-Term Durability and Functionality
Effective drainage transforms retaining walls into lasting features of your landscape. Without proper water management, even the most well-built walls can fail within a few years, leading to expensive repairs and potential safety risks. By using gravel backfill, French drains, weep holes, and smart grading techniques, you can create a drainage system that protects your investment.
In smaller gardens, space limitations make engineered drainage solutions even more essential. With less room for water to disperse naturally, pressure can build up behind a retaining wall, causing structural damage, soil erosion, and harm to nearby plants. Thoughtfully integrating drainage into the design ensures a system that performs reliably over time.
Think of drainage as a key part of the wall’s design. Every component – from the foundation to the backfill – needs to work together to direct water away efficiently. This coordinated approach helps your retaining wall maintain both its strength and visual appeal for years.
Collaborating with professionals can make all the difference. Pro Landscapes MD combines expertise in hardscaping and drainage, ensuring every retaining wall project includes effective water management from the very beginning.
FAQs
What’s the best way to plan drainage for my garden’s soil and layout?
To create an efficient drainage system for your garden, the first step is understanding your soil type – whether it’s loamy, sandy, or clay. Loamy soil already has decent drainage and might only need a bit of organic material to improve it further. Clay soil, which tends to hold onto water, often requires more intervention, such as installing French drains or aerating the soil to improve water flow. For sandy soil, which drains too quickly, features like rain gardens can help slow down water movement and keep moisture around longer.
Once you’ve assessed your soil, take a close look at your garden’s layout. You might need to incorporate features like grading to guide water away from areas like retaining walls. Other options include dry creek beds to handle excess runoff and raised beds to prevent water from pooling around your plants. If you’re dealing with a smaller garden, compact solutions like dry wells or perforated drain pipes can work wonders to manage water effectively without taking up too much space. Thoughtful planning not only protects your retaining walls from water damage but also ensures your garden stays healthy and thriving.
What are the warning signs that my retaining wall’s drainage system might be failing?
If your retaining wall’s drainage system isn’t working properly, you might see walls starting to lean or tilt, cracks appearing, or water collecting near the base. Other warning signs include soil or debris spilling over the top and sections of the wall bulging or bowing out. These problems are often caused by water pressure building up behind the wall, which can weaken its structure and cause serious damage. It’s important to tackle these issues quickly to prevent further harm.
How can I maintain the drainage system in my small garden’s retaining wall to keep it effective over time?
To ensure your retaining wall’s drainage system works effectively, regular upkeep is essential. Start by clearing weep holes and drainage pipes on a routine basis to avoid clogs that might cause water to accumulate. Keep an eye out for vegetation, like roots or weeds, that could block water flow or harm the wall, and remove them as needed. Be sure to inspect the area for signs of erosion or any shifting near the wall, addressing problems as soon as they appear.
Another crucial step is to check that the ground around the wall slopes gently away. This helps direct water runoff properly and reduces the risk of water damage. By staying proactive with these simple measures, you can help your retaining wall last longer and stay in good condition.
Chat with Us