


- bhavya gada
- No Comments
Spring bulbs can transform your garden with early-season blooms, but simple planting mistakes often lead to poor results. Here’s how to avoid the most common errors:
- Plant at the Right Time: For Maryland (Zone 7), plant bulbs like tulips and daffodils in October to allow root development before winter. Late planting can result in weak blooms.
- Prepare Soil Properly: Ensure well-drained soil to prevent rot, especially in clay-heavy areas. Use raised beds or amend soil if drainage is poor.
- Correct Depth and Spacing: Plant bulbs 2.5–3 times their diameter deep, with adequate spacing to avoid overcrowding.
- Provide Enough Sunlight: Most bulbs need 5–6 hours of daily sunlight; choose sunny spots for best results.
- Water Wisely: Avoid overwatering, especially during dormancy. Water deeply only during dry spells.
- Protect from Pests: Use barriers like chicken wire and choose pest-resistant varieties such as daffodils and crocuses.
- Don’t Cut Foliage Too Soon: Let leaves yellow naturally after blooming to store energy for next year.
Focus on timing, soil, depth, sunlight, and care to ensure vibrant blooms every spring. Proper preparation is key for a thriving garden.
7 Bulb Planting Mistakes to Avoid 🌷❌ Don’t sabotage spring blooms!
sbb-itb-843f8be
Mistake 1: Planting at the Wrong Time
Timing is everything when it comes to planting bulbs. Plant too early, and you risk premature sprouting; plant too late, and the roots may not develop properly before winter sets in [1]. The University of Maryland Extension explains:
Bulbs need time to establish a healthy root system prior to the onset of winter, therefore they should not be planted late [1].
For Maryland gardeners, October is the sweet spot for planting tulips, daffodils, and crocuses as part of your fall lawn care routine. This timing allows the bulbs to establish strong roots before the frost arrives. On the flip side, planting too early in warm soil might cause the bulbs to sprout prematurely, leaving tender shoots vulnerable to frost damage. Planting too late, however, can mean the bulbs don’t have enough time to develop roots, leading to weak or even nonexistent blooms. That’s why sticking to the recommended planting windows is crucial.
When to Plant Spring Bulbs in Maryland
In Maryland’s Zone 7, the ideal time to plant spring bulbs is from late September through October. If conditions allow, you can even extend this window into late December. The key is ensuring the bulbs get at least 12 weeks of cold temperatures between 35°F and 45°F, as this chilling period is essential for proper flower development [2][4][5].
Different bulbs have their own timelines. Most spring-flowering bulbs should go into the ground in October. Fall-flowering varieties like colchicum need to be planted as early as August, while lilies thrive when planted in late fall [1]. If you happen to buy bulbs before October, store them in a cool, dry place where the temperature stays between 60°F and 65°F to keep them dormant [1].
Soil temperature is a better guide than the calendar. Julio Freitas, owner of The Flower Hat, offers this advice:
Plant after the first fall frost [4].
Mistake 2: Poor Soil Preparation and Drainage
Maryland’s clay-heavy soil often makes growing spring bulbs tricky. The University of Maryland Extension explains the challenge:
Adequate drainage is an important consideration, as most bulb plants will not tolerate poor drainage and will rot easily if overwatered or planted in wet areas. [1]
Clay soil tends to hold onto water, which can lead to bulb rot – especially in urban areas where compacted soil limits root growth and bulb establishment. To address this, improving soil drainage is essential.
For most bulbs the soil should be well-draining. Bulbs that don’t have good drainage are likely to rot. [3]
Improving Soil for Healthy Bulb Growth
Start by loosening the soil deeper than the intended planting depth. This extra depth allows water to drain away from the bulbs and promotes strong root development. When refilling the planting hole, replace the heavy clay soil with amended, lighter soil to create a better growing environment. If you’re using fertilizer, make sure to cover it with a layer of soil to avoid fertilizer burn.
For areas with severely compacted soil – like those under trees or in urban yards – planting Crocus thomasianus can be a smart choice. The University of Maryland Extension describes it as "a tough durable crocus that is one of the best species to use in lawns or compacted areas such as urbanized soils." [1] If amending the soil isn’t enough to fix drainage problems, elevating your planting area might be the next step.
Using Raised Beds or Elevation Techniques
When soil amendments don’t fully solve drainage problems, raised beds or other elevation techniques can help. In areas with persistent moisture or poor drainage, raised beds allow water to flow away naturally. For more severe issues, professional solutions like French drains, grading, or land leveling can be highly effective. Pro Landscapes MD specializes in these types of drainage improvements. The goal is simple: move water away from your bulbs to keep them healthy and thriving instead of rotting.
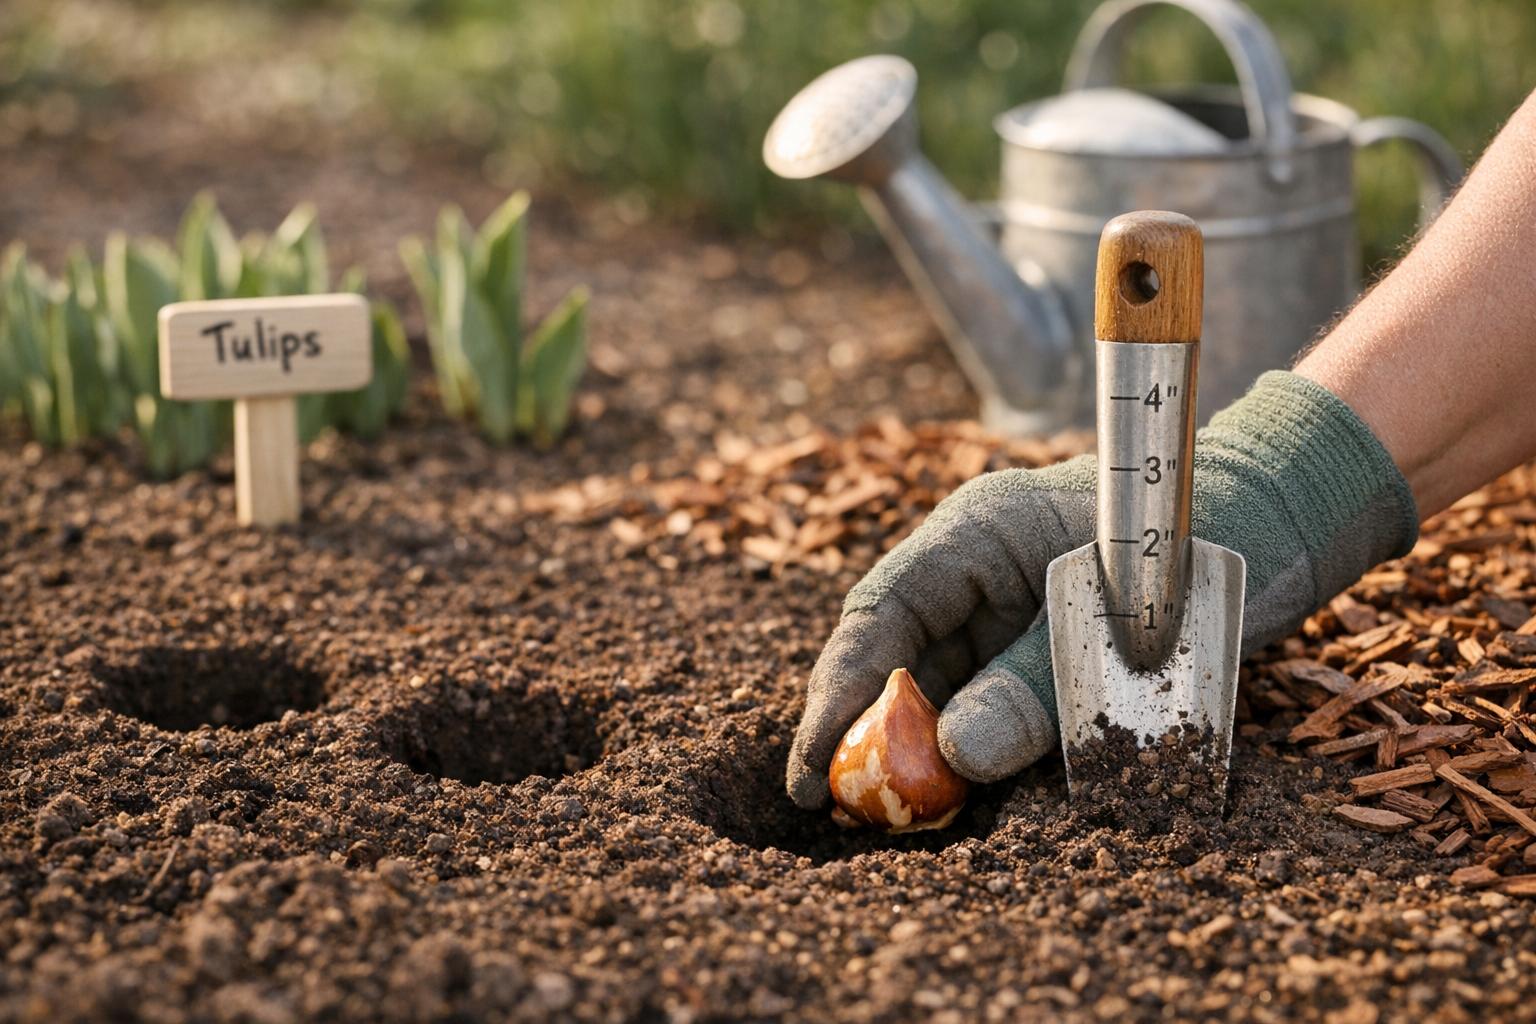
Mistake 3: Incorrect Planting Depth or Spacing

Spring Bulb Planting Guide: Depth, Spacing, and Sunlight Requirements for Maryland Gardens
Getting the timing and soil preparation right is crucial, but don’t overlook the importance of planting bulbs at the correct depth and spacing. These factors play a big role in the health and performance of your bulbs. If bulbs are planted too shallow, they risk exposure to Maryland’s freeze-thaw cycles, which can lead to frost heaving. Overcrowding, on the other hand, can stifle growth and force you to divide the bulbs prematurely.
The University of Maryland Extension provides a simple guideline to help:
Generally, plant bulbs two and one-half to three times the diameter of the bulb in depth. If you plant bulbs too shallowly, you may encourage frost heaving and lose the bulbs. [1]
When measuring depth, it’s important to go from the bottom of the bulb to the soil surface – not the top. For example, a tulip bulb that’s 2 inches in diameter should be planted about 5–6 inches deep. Brent Heath, Co-owner of Brent & Becky’s Bulbs, offers this advice:
Typically we recommend three times the height of the bulb to the bottom of the hole. So a bulb that’s 2 inches tall goes 6 inches to the bottom of the hole. [5]
By following these planting tips, you can avoid common mistakes and set your bulbs up for success.
Guidelines for Proper Planting Depth and Spacing
When planting, always place bulbs upright with the pointed end facing up and the basal plate down. For spacing, leave at least two bulb-widths between each bulb. If you’re treating tulips as annuals and replanting every year, they can be placed much closer together – almost touching, but not quite. As Susan Harris, Co-founder of GardenRant, suggests:
You can plant bulbs very, very close together – ‘cheek by jowl’… as long as they weren’t actually touching each other. [5]
For bulbs that are meant to naturalize, like daffodils or hyacinths, allow 3 to 6 inches of space so they can spread over time. If you’re planting in Maryland’s heavy clay soils, consider going slightly shallower and adding a layer of mulch or compost on top to ensure proper coverage and protection.
Comparison Table of Planting Requirements
The table below outlines specific planting depths, spacing, and sunlight needs for various bulb types.
| Bulb Type | Planting Depth (to bottom of bulb) | Recommended Spacing | Sunlight Needs | Hardiness/Notes |
|---|---|---|---|---|
| Tulips | 8 inches [6] | 1–5 inches (closer for annuals) | Full sun (5–6+ hrs) | Darwin hybrids perennialize best in MD [1] |
| Daffodils | 6 inches [5] | 3–6 inches | Full sun to part shade | Highly deer/rodent resistant [5] |
| Crocus | 4 inches [6] | 2–3 inches | Full sun | C. thomasianus is best for MD lawns [1] |
| Hyacinths | 4 inches [6] | 4–6 inches | Full sun | Space apart to allow for multiplication [6] |
| Small Bulbs (Scilla, etc.) | 3–4 inches [6] | 1–2 inches | Full sun to part shade | Often used for naturalizing in drifts [1] |
For tailored advice on planting bulbs in Maryland, reach out to Pro Landscapes MD. Their expertise can help you achieve the best results for your garden.
Mistake 4: Ignoring Sunlight Requirements
Getting the timing and soil right is essential for healthy bulbs, but don’t overlook sunlight. Without enough light, bulbs can struggle to perform. According to the University of Maryland Extension, most spring bulbs need at least five to six hours of daily sunlight to bloom properly. If you want your bulbs to naturalize and come back year after year, aim for eight to 10 hours of sunlight each day [1].
Bradley Sarno, Enhancement Operations Manager at Level Green Landscaping, sums it up perfectly:
More sun means stronger plants.
Sunlight doesn’t just trigger blooms; it also helps the plant store energy for the next growing season. If bulbs don’t get enough light after blooming, they may weaken and fail to flower the following spring. That’s why choosing the right planting location is so important.
Choosing the Best Planting Locations
To ensure your bulbs thrive, focus on finding spots with consistent sunlight. Areas that receive morning and midday sun are ideal. South-facing slopes work particularly well, as they warm up faster and get more intense light, encouraging earlier blooms. Steer clear of low-lying areas where cold air tends to settle, as these spots can stay cooler and delay flowering [8].
For gardeners in Maryland, planting under deciduous trees is a great option. Since bulbs bloom before the trees develop their full canopies, they still get plenty of light [8][9]. On the other hand, avoid planting near evergreens or on the north side of buildings, where constant shade will block the sunlight bulbs need [2].
For the most eye-catching displays, consider planting bulbs in high-visibility locations like property entrances, along walkways, or near signage. You can also mix bulbs with perennials such as ornamental grasses, daylilies, or hostas. As the bulb foliage dies back, these companion plants can help hide the fading leaves while the bulbs recharge for next year. Remember, sunlight is just as important as timing, soil, and spacing when it comes to achieving vibrant, healthy blooms.
Mistake 5: Overwatering or Improper Irrigation
Too much water can spell disaster for bulbs, often leading to rot in soggy soil. The University of Maryland Extension highlights that most bulb plants struggle with poor drainage and are prone to rotting if overwatered or placed in consistently wet areas [1].
Fortunately, Maryland’s natural rainfall usually provides enough moisture for bulbs to thrive. The trick is to avoid waterlogging – especially during dormancy. As Brent Heath, Co-owner of Brent & Becky’s Bulbs, explains:
When they’re dormant, they like sleeping in a dry bed. [5]
Bulbs start growing roots after fall planting, and normal rainfall should be sufficient. If the autumn season turns out to be unusually dry, a deep soak just once a week works well. The key is ensuring the water reaches deep into the soil rather than settling for light, frequent sprinkling. Once dormancy sets in, follow these watering tips to keep your bulbs safe.
Watering Tips for Maryland Gardens
- Check drainage before planting: If water tends to collect in certain areas of your yard, avoid planting bulbs there. Alternatively, raised beds can help keep bulbs above overly wet soil. Poor drainage, coupled with overwatering, can completely ruin bulbs before spring even begins [1].
- Water deeply during dry spells: In dry weather, aim for a deep soak once a week to maintain soil moisture. This is especially important for keeping foliage healthy, which is essential for next year’s blooms [1].
- Monitor soil moisture: During spring dry spells, keep an eye on soil conditions. However, bulbs prefer drier soil during their summer dormancy. For areas with heavy clay or a high water table, adding a layer of compost beneath the bulbs and covering them with mulch can improve drainage and reduce the risk of rot.
Mistake 6: Failing to Protect Bulbs from Pests
Once you’ve nailed the soil and watering requirements, the next challenge is keeping pests away from your bulbs. Animals like squirrels, deer, and rodents can undo all your hard work by digging up or munching on your bulbs. For gardeners in Maryland, tulips are a favorite snack for these pests, while daffodils, hyacinths, and ornamental onions tend to be left alone [3]. Squirrels are notorious for digging up bulbs right after planting or when they start sprouting, and rodents often tunnel underground to feast on them [1][3].
But it’s not just furry critters you need to worry about. Invertebrate pests like bulb flies, bulb mites, aphids, and slugs can cause damage too, leading to internal rot or stunted growth [10]. Andrew Bunting, PHS VP of Horticulture, highlights the problem:
Tulips… are very susceptible to damage from squirrels and deer so think about how to protect them. [3]
Luckily, a few professional landscaping services and straightforward steps can help safeguard your bulbs.
Pest Prevention Strategies
Physical barriers are your best defense. Cover your planting area immediately with chicken wire or hardware cloth [11]. Secure the edges with bricks or heavy objects to keep animals from pushing it aside. Come early spring, you can remove the barrier before the new growth appears [11].
Plant at the right depths (as discussed in Mistake 3). Larger bulbs like tulips and daffodils should go 6–8 inches deep, while smaller ones like crocuses need about 3–4 inches [11]. Firmly tamp down the soil and water right after planting to help settle it and mask any scents that might attract pests [11].
Opt for pest-resistant varieties when possible. For rodent-prone areas, the University of Maryland Extension suggests Crocus thomasianus, noting:
Crocus thomasianus is a tough durable crocus that is one of the best species to use in lawns or compacted areas… This vigorous species will easily naturalize, even in areas troubled by rodents. [1]
Other great options include daffodils (Narcissus), snowdrops (Galanthus), and snowflakes (Leucojum), which deer and rodents tend to avoid [3]. Combining these strategies with earlier tips will help protect your bulbs and ensure they thrive.
Mistake 7: Cutting Foliage Too Early
Hold off on cutting foliage right after your flowers finish blooming. Those green leaves are doing an important job – photosynthesis. They’re producing the energy and nutrients the bulb needs to survive the winter and bloom again next spring. The University of Maryland Extension explains:
Bulb foliage is very important. Do not cut the leaves after flowering until they start to wither. This allows the green leaves to produce food for next year’s growth.
Cutting foliage too soon can harm your bulbs. Without the energy stored from the leaves, bulbs might not bloom the following year – or worse, they could stop growing entirely. To avoid this, deadhead the spent flowers to prevent energy from being wasted on seed production, but leave the green leaves alone until they naturally fade. This process usually takes about six weeks after flowering ends.
How to Manage Foliage After Blooming
Here are some simple steps to ensure your bulbs store enough energy for next year.
- Wait for yellow leaves. Don’t remove foliage until it turns yellow or straw-like. During this time, keep up with deep watering and apply a light, balanced fertilizer to support the bulbs. Avoid tying or braiding the leaves, as this reduces their ability to absorb sunlight.
- Use companion plants to hide fading leaves. Plant perennials like daylilies, ornamental grasses, or groundcovers such as ivy or liriope nearby. They’ll help mask the dying foliage without interfering with the bulbs’ growth. Once the leaves are fully yellow, remove and discard them to prevent disease from spreading.
- Mark your bulb spots. Use markers to note where your bulbs are planted. This will make it easier to relocate or divide them in the fall.
Taking these steps will help your bulbs stay healthy and ready to bloom beautifully next season.
Conclusion
Avoiding common mistakes with spring bulbs comes down to timing, preparation, and patience. The ideal planting time is October, once soil temperatures drop to 60°F or lower. This gives bulbs about six weeks to establish roots before the ground freezes. Use well-drained soil and plant bulbs at a depth of 2.5–3 times their diameter, always with the pointed end facing up. Most bulbs thrive with at least 5 to 6 hours of direct sunlight daily, but if you’re aiming for naturalized blooms year after year, aim for 8 to 10 hours of sunlight.
Let the foliage yellow naturally over six weeks after blooming – this helps the bulbs store energy for the following spring. During this period, water regularly during dry spells and remove spent flowers to direct energy back into the bulb.
For large-scale displays, professional landscapers can make quick work of planting. A two-person team with the right tools can plant about 200 bulbs per hour and can layer varieties to create stunning early, mid, and late-blooming combinations.
If you’re dealing with challenging conditions like Maryland’s clay-heavy soil or planning a large installation, Pro Landscapes MD offers expert services in Howard County, Montgomery County, Carroll County, Frederick County, Prince George’s County, and Baltimore County. Their team of horticulturists can handle soil corrections, ensure proper planting techniques, and help you achieve vibrant, consistent blooms year after year.
FAQs
What if I miss October – can I still plant bulbs?
If you’ve missed the window for planting bulbs in October, it’s usually best to wait until next year. Bulbs need to be planted in fall to develop roots before winter sets in. That said, certain hardy bulbs, such as crocuses, can sometimes still be planted later if the weather cooperates. Just make sure the soil hasn’t frozen yet, and stick to proper planting techniques to give them the best shot at thriving.
How can I tell if my soil drains well enough for bulbs?
Want to know if your soil is ready for planting bulbs? Try a simple percolation test:
- Dig a hole about 12 inches square.
- Fill the hole with water.
- Time how long it takes for the water to drain.
For ideal bulb planting conditions, the water should drain at a rate of 15–100 seconds per inch. If it takes longer or water pools at the bottom, your soil might be too compacted. In that case, you may need to improve the soil with amendments or consider planting in a spot with better drainage.
Why didn’t my bulbs bloom again next spring?
If your bulbs didn’t bloom, it could be due to a few common problems. Planting varieties that can’t handle your winter conditions, using soil that’s either waterlogged or lacking nutrients, or planting too late in the season (which can stop roots from developing properly) are all potential culprits. Other issues might include using poor-quality bulbs or planting them incorrectly, like placing them upside down.
To improve your chances next time, start with hardy bulbs suited to your climate. Plant them at the right time in soil that’s fertile and drains well, and make sure to follow proper planting techniques.
Chat with Us