


- bhavya gada
- No Comments
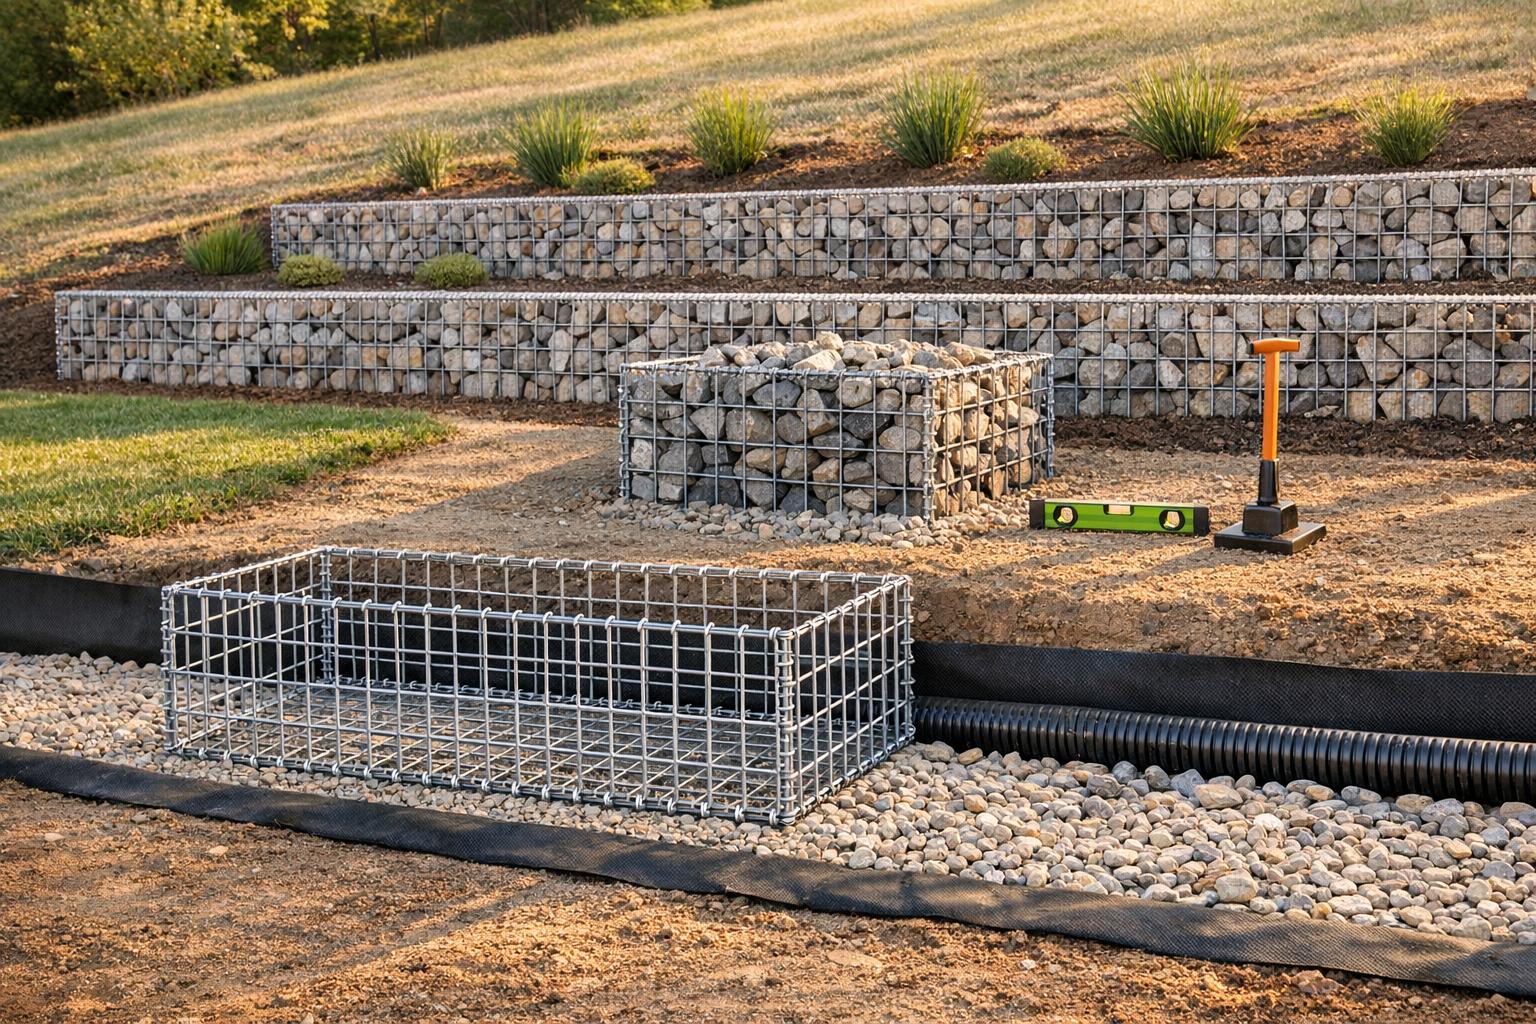
Gabion structures are rock-filled wire mesh baskets used to stabilize slopes, prevent erosion, and manage water drainage. These walls are ideal for sloped landscapes due to their durability, flexibility, and ability to handle soil pressure. They also allow water to pass through, reducing the risk of hydrostatic pressure buildup that can cause traditional walls to fail.
Here’s a quick summary of what you need to know:
- Key Features: Gabions act as retaining walls, control erosion, and promote water drainage.
- Design Factors: Wall stability depends on slope angle, soil type, and proper drainage integration.
- Construction Steps: Site preparation, foundation grading, basket assembly, and rock filling.
- Maintenance: Regular inspections ensure long-term performance and prevent structural issues.
Gabion walls can also be integrated with vegetation for added strength and a natural appearance. Proper planning and execution are essential for creating a long-lasting structure that supports both function and aesthetics.

Step-by-Step Guide to Building Gabion Walls on Sloped Landscapes
Site Assessment and Planning
Evaluating Slope and Soil Conditions
Start by measuring the slope angle and identifying the soil type. The steepness of the slope plays a key role in determining the lateral pressure your gabion wall will need to withstand. A common guideline for stability is a 2:1 ratio, which helps establish the necessary dimensions for your wall [1].
Pay close attention to the soil bearing capacity. Softer soils demand a wider base and a deeper "toe" – the part of the wall buried below ground at the front – to evenly distribute the load and reduce the risk of settlement. If soil testing shows a pH above 5.5, indicating strong acidity, you’ll need to incorporate geotextile fabrics and specialized drainage systems to shield the wire baskets from corrosion [1].
Don’t forget to account for additional loads, like driveways or patios, at the top of the slope. These "surcharge loads" may require deeper baskets for added stability. For larger or more complex projects, it’s wise to hire a geotechnical engineer and conduct a formal soil investigation to determine precise specifications.
Design Considerations for Slopes
The inclination of the wall plays a big role in its stability. A 7° batter (slight backward tilt) is recommended for better support [1]. Vertical walls are possible but require greater thickness to compensate for the lack of tilt, which can drive up material costs and make construction more challenging.
The wall’s height also dictates the depth of the toe. Taller walls need deeper toes to anchor the structure securely and prevent sliding. Be sure to check local regulations, as many areas require permits for retaining walls taller than 4 feet.
Integration with Drainage Systems
Gabion walls are naturally effective at managing water because of their built-in permeability. The rock-filled wire baskets allow water to pass through, preventing the buildup of hydrostatic pressure that could destabilize the slope.
For steeper slopes, consider using multiple smaller gabion walls arranged in tiers to create terraces. This design slows down water runoff and enhances drainage compared to a single tall wall. If there’s significant water flow in the area, adding features like French drains or dry riverbeds can help direct water away from the base of the gabion wall and minimize erosion.
These insights will guide you in preparing a solid foundation for your project in the next phase.
sbb-itb-843f8be
Preparing the Foundation
Excavation and Leveling
Start by clearing the foundation area of overburden, spoil, and organic material. Then, excavate to a depth that is twice the anticipated scour depth, based on your wall height and slope conditions [2].
After excavation, install a layer of compacted granular stone fill with a size range of 1/2″ to 1 1/2″. This layer should be 6″ to 18″ deep, compacted in 9″ lifts to at least 95% Standard Proctor density [2]. This granular base plays a crucial role in increasing the bearing capacity, reducing differential settlement, and improving drainage beneath the gabion wall.
"To increase the bearing capacity, minimize differential settlement, and/or allow for additional drainage, a base layer of granular stone fill with consistent gradation ranging ½″ – 11/2″ may be placed and compacted to local standards 6″ – 18″ in depth as a founding course for wall placement." – GABION PROS [2]
Using Geotextile Fabric
Non-woven geotextile filter fabric is an essential element in gabion wall construction. It prevents fine soil particles from migrating into the gabion stone fill. Lay this fabric on the compacted subgrade before placing the baskets. This step helps maintain the integrity of the soil-structure interface while allowing water to pass through without washing away the subgrade material [2][3].
The geotextile fabric also acts as a permanent erosion-resistant layer, shielding the underlying soil from concentrated runoff and scour. For best results, extend the fabric from the toe of the wall through the backfill zone, ensuring a continuous barrier against soil migration.
"Non-woven Geo-textile filter fabric is a vital component of any gabion gravity retaining wall… The geotextile filter fabric will prevent loss of soil during drainage and drawdown." – GABION PROS [2]
Creating a Sloped Foundation
To improve stability, grade and compact the foundation with a 6°–10° inward batter (a slight backward lean). This slope enhances resistance to sliding forces and is particularly effective for walls up to 18 feet high [2].
"One option to pursue prior to enlarging the wall cross section for additional stability is to place wall on a 6 – 10 degree batter towards the retained slope. This will require the founding soils to graded and compacted to accommodate for the specified wall batter." – GABION PROS [2]
When positioning the gabion baskets, orient their length dimension perpendicular to the wall face – running from back to front. This layout strengthens the wall’s resistance to soil forces and improves overall structural performance [2].
These foundational steps provide the groundwork for the next phase: assembling and filling the gabion baskets.
Gabion Assembly and Filling Process
Assembling Gabion Baskets
Start by unfolding the gabion baskets on the prepared foundation. Connect the panels using spiral binders (helical coils) or C-rings. Spiral binders are quicker to install and offer a clean finish, while C-rings require tools like a manual or pneumatic hog ring tool. Equip yourself with wire cutters, linesman pliers, and heavy-duty gloves for this task.
To create a continuous structure, connect adjacent baskets using the same fastening method. Keep the alignment precise by using a spirit level and string line, especially if the baskets need a slight inward tilt for added stability. Install internal stiffeners or cross-ties at the 1/3 and 2/3 height marks (about every 12 inches for a 3-foot basket). These help prevent the mesh from bulging under the weight of the rocks.
Once the baskets are connected and aligned, you’re ready to fill them with rocks.
Filling with Rocks
With the baskets securely in place, begin filling them with interlocking rocks. Use clean, durable stones sized between 4–8 inches, which is about 1.5–2 times the size of the mesh openings. Angular rocks are ideal since they interlock better than rounded stones, enhancing the structure’s stability. Fill the baskets in 12-inch layers, slightly overfilling each layer by 1–2 inches to account for settling.
For the front mesh, hand-place flat stones to create an even appearance, then fill the interior with smaller angular rocks. Use a crowbar to position larger stones as needed. After each layer is filled, add granular stone and sweep it into the voids between the larger rocks – this prevents soil from migrating into the structure [4]. Water jetting can also help the granular material settle deeply into the gaps, ensuring effective filtration [4].
Ensuring Proper Drainage
Although gabion walls naturally allow water to drain, managing slope drainage is still essential. The pre-installed geotextile fabric plays a key role in stopping soil migration while supporting drainage [4]. For vertical or steep slopes, the combination of granular stone within the voids and the geotextile barrier works as an effective filter system, managing water without compromising the wall’s stability.
On gentler slopes with a gradient of 1:5 or less, you can add a 4 to 6-inch layer of soil over the stone fill. Cover this with an erosion control blanket, secured under the gabion lid [4]. This setup encourages vegetation growth, which strengthens the structure as roots develop and surface drainage gradually deposits more soil into the stone voids over time.
Final Steps and Quality Assurance
Backfilling and Compacting
After filling and securing the gabion baskets, the next step is to backfill the area behind the wall with granular material like crushed stone or gravel. Spread this material in layers between 6 and 12 inches thick, compacting each layer thoroughly before adding the next. This process minimizes shifting and ensures the structure can handle the lateral earth pressure from the slope.
It’s crucial to keep the backfill clean – free from organic material, spoil, or debris[5]. Additionally, create a 12-inch-wide drainage chimney directly behind the gabion face using free-draining stone. This vertical layer allows water to flow freely toward the structure instead of pooling behind it, which reduces voids and helps prevent settlement over time[5].
Once backfilling is complete, take time to inspect the wall and make any necessary adjustments before moving on to landscaping.
Inspection and Adjustments
Before wrapping up the project, carefully inspect the entire structure to ensure proper alignment and stability. Check that the wall leans inward toward the slope by 6°–10°, a design feature that helps counter soil pressure and directs water into the drainage system. Look for any signs of bulging on the front face of the baskets, as this could indicate loose rock packing or improperly installed stiffeners.
Pay close attention to all connection points, such as lacing wires, C-rings, and spiral binders, ensuring they’re securely fastened. Confirm that the geotextile fabric is intact and that water flows freely through the backfill to prevent hydrostatic pressure buildup. Double-check that the foundation, filling, and drainage systems meet the original design specifications. Also, measure the slope to ensure surface irregularities don’t exceed 1 foot from the planned slope when measured at right angles[5]. After the first significant rainfall, conduct a follow-up inspection to identify any soil migration, clogged drainage paths, or unexpected settling at the base.
Once you’ve confirmed the structure’s integrity, you can move on to adding landscaping elements.
Integration with Landscaping Features
The final step transforms the gabion wall from a functional structure into a harmonious part of the landscape. One way to achieve this is by using live staking – placing dormant plant cuttings through the gabion mesh into the soil behind the wall. As these cuttings grow and take root, they strengthen the structure and help it blend naturally with its surroundings.
For properties in areas like Howard County or Montgomery County, Pro Landscapes MD specializes in installing and integrating gabion structures. Their expertise ensures your wall not only performs well but also enhances the aesthetic appeal of your outdoor space.
Building a gabion wall: Slope stabilization with stone baskets step by step
Conclusion
Constructing gabion structures on sloped terrain demands meticulous planning and execution. The stability and effectiveness of these installations rely on a solid foundation, adequate drainage, and properly assembled baskets to resist lateral soil pressures.
Key design elements include ensuring the structure offsets slope forces effectively. A long-lasting gabion wall requires the right lean, geotextile barriers, and carefully sized stone fill to maintain its integrity over time.
With these principles in mind, Pro Landscapes MD specializes in gabion installations across central Maryland. Their team combines technical expertise with a focus on aesthetics, offering services like site-specific engineering assessments and stepped foundation designs for steep slopes. This ensures your gabion wall not only functions as intended but also enhances the natural appeal of your property.
When done right, a gabion wall can transform a steep, challenging slope into a durable and visually striking feature.
FAQs
How can I tell if my slope needs a gabion wall or terracing?
The decision to use a gabion wall or terracing largely depends on the steepness of your slope, the risk of erosion, and your landscaping objectives. Gabion walls are a solid choice for steep slopes that are at high risk of erosion. They provide excellent stabilization and natural drainage. On the other hand, terracing is better suited for moderate slopes. It creates flat, step-like areas that help reduce water runoff while also offering functional, usable spaces. Consulting with a landscape professional can help you determine the most effective option for ensuring slope stability and managing erosion.
What type of rock is best for gabion baskets on a slope?
Crushed rock or angular stones work perfectly for filling gabion baskets on slopes. Thanks to their interlocking nature, they offer outstanding stability, minimizing movement and effectively controlling erosion.
When do I need a permit or an engineer for a gabion retaining wall?
Permits or engineering reviews are often necessary for gabion retaining walls taller than three feet, but local building codes ultimately determine this. It’s essential to review your area’s regulations to understand the exact requirements. Reaching out to local authorities can help ensure your project meets all safety and compliance standards.
Chat with Us