


- bhavya gada
- No Comments
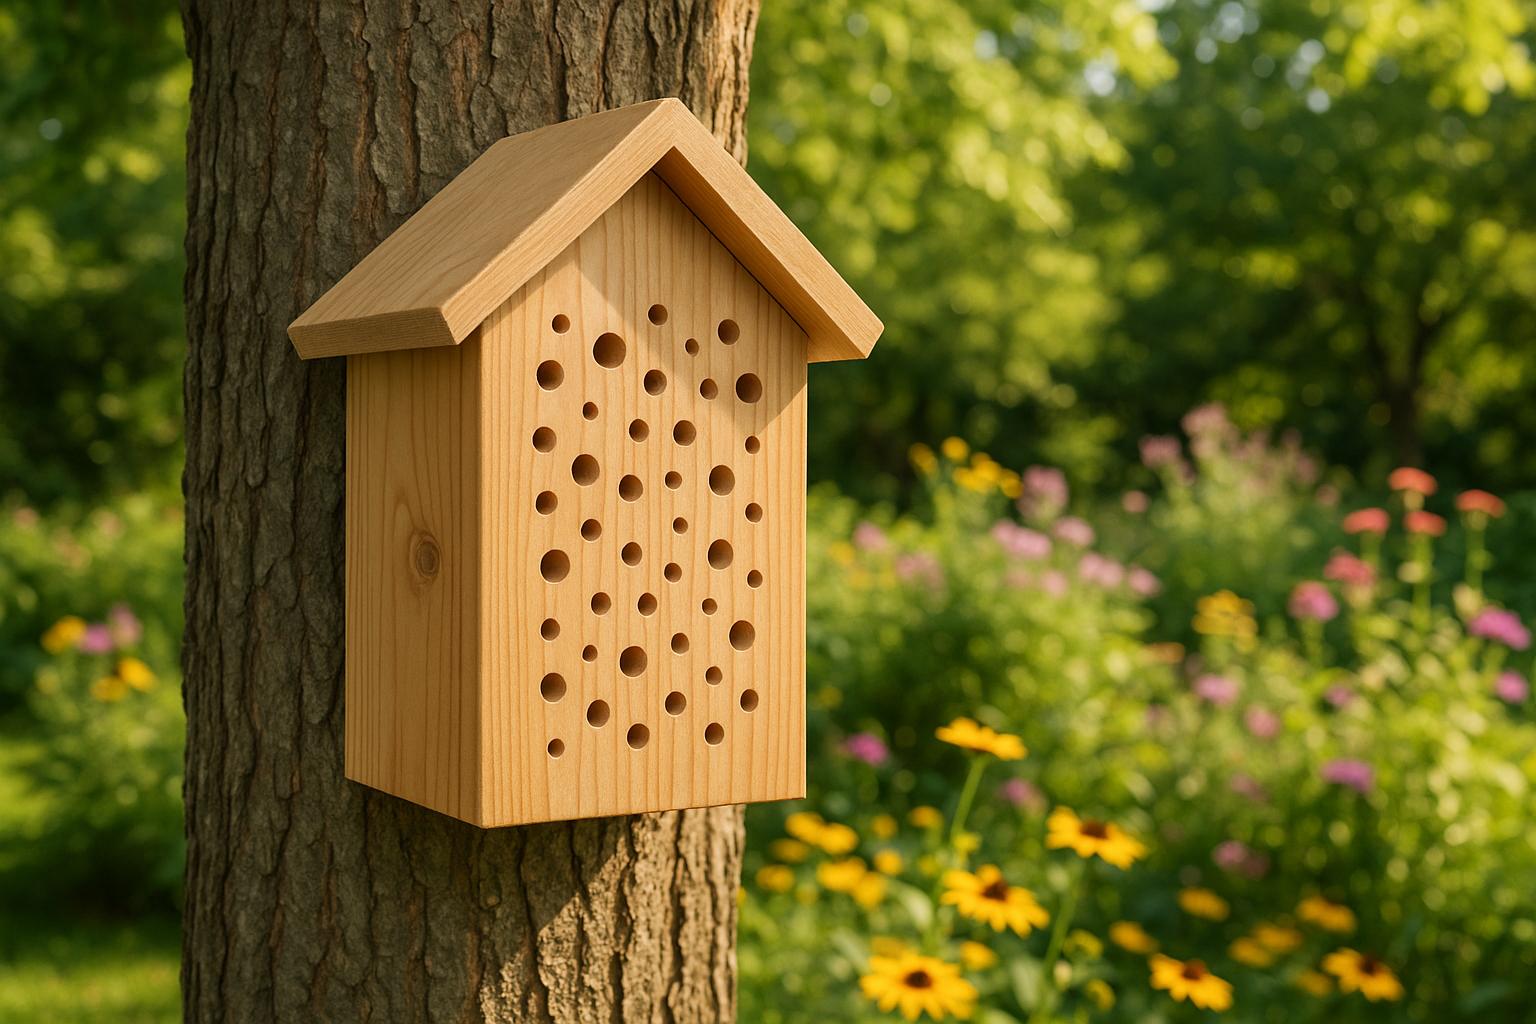
Native bees are vital pollinators, responsible for pollinating 80% of flowering plants and contributing to one out of every four bites of food we eat. Yet, habitat loss is making it hard for them to find nesting sites. Building bee nesting boxes is an easy way to support these important insects while boosting your garden’s health and biodiversity.
Key Takeaways:
- Why It Matters: Maryland has 400+ native bee species, most of which are solitary and rely on suitable nesting spaces.
- Materials: Use untreated wood, bamboo reeds, or paper tubes sealed at one end. Avoid composite materials.
- Tools: Drill, saw, sandpaper, and safety gear are essential for construction.
- Placement: Install the box in a sunny, sheltered spot near blooming plants.
- Maintenance: Replace nesting tubes annually and clean the box in fall to prevent disease.
By pairing nesting boxes with native plants, you can create a thriving habitat for bees while enhancing pollination in your garden. Ready to make a difference? Let’s dive into the steps.
Creating and Maintaining Stem Bee Boxes | DIY Native Pollinator Habitat Project
Materials and Tools Needed
Creating a bee nesting box that works well starts with selecting the right materials and tools. These choices play a big role in attracting native bees and giving them a safe place to thrive.
Choosing the Right Materials
The backbone of a sturdy bee house is natural, untreated wood. Opt for rot-resistant types like cedar or redwood, as they hold up better outdoors[2][4].
Stay away from composite materials like chipboard or particleboard since they degrade quickly when exposed to the elements[4]. If you’re on a budget, using recycled or scrap wood is a smart, eco-friendly option – just make sure the wood is untreated and in good shape[4].
For nesting tunnels, consider natural reeds, plant stems, paper tubes sealed with clay, or bamboo reeds. Each of these materials mimics the natural habitats bees prefer and provides practical or cost-effective benefits[4].
"Nesting materials sealed at one end, breathable, thick-walled, and easily opened are the best way to protect bees from pathogens and parasites such as excessive mold, chalkbrood, parasitic wasps, and pollen mites." – Crown Bees[1]
Tunnel size matters. Different bee species have specific preferences. For example, spring mason bees are drawn to tunnels about 8 mm in diameter, while summer leafcutter bees prefer smaller openings around 6 mm[1]. Including a variety of sizes in your design can attract a broader range of cavity-nesting bees[1].
No matter which nesting material you pick, make sure one end of each tunnel is completely sealed. For paper tubes, you can seal the back with clay. Bamboo reeds often come with naturally sealed ends thanks to their nodes, but it’s a good idea to double-check each piece.
Once your materials are ready, it’s time to gather the tools for building your bee house.
Tools for the Build
Having the right tools makes the construction process smoother and more precise.
A drill with various bit sizes is essential. Bits between 6 mm and 10 mm are ideal for creating nesting holes in wood blocks, while larger bits can be used for pilot holes. A drill press can help you achieve cleaner, more uniform holes, but it’s not a must-have for smaller projects.
For cutting, a miter saw provides precision, though a circular or hand saw will work for simpler cuts. A jigsaw can come in handy for cutting entrance holes or adding decorative touches.
To ensure smooth surfaces that won’t harm the bees, use sandpaper in different grits. Pay special attention to the insides of the holes, sanding away any splinters or rough edges[4]. A sanding block or orbital sander can speed up this task and ensure even results.
Accurate measurements and alignment are critical, so keep measuring tools like a tape measure, square, and pencil within reach. Clamps are helpful for holding pieces steady during drilling or while adhesive dries, making the process safer and more precise.
For assembly, a screwdriver set or impact driver will make driving screws easier, and wood glue can add extra strength to joints.
Don’t forget safety equipment. Wear safety glasses to shield your eyes from flying debris and a dust mask to avoid inhaling fine particles when sanding or drilling.
Adding ventilation is another thoughtful touch. Drill small holes (around 2 mm) for air circulation to reduce the risk of mold growth[4].
If you’re working with bamboo reeds, pruning shears are useful for trimming them to the right length. For paper tubes, scissors or a utility knife will do the job.
Finally, use a level to make sure your finished bee house hangs straight. This not only makes the house more appealing to bees but also ensures proper water drainage. Keep some fine-grit sandpaper on hand for any last-minute touch-ups.
With your materials and tools in place, you’re ready to start building a cozy and safe nesting spot for your local bees.
Step-by-Step Guide to Building Bee Nesting Boxes
With your materials and tools ready, it’s time to dive into creating your bee nesting box. The process can be broken down into three key phases: building the frame, preparing the nesting tubes, and assembling the final bee house.
Building the Frame
Start by cutting your wood pieces to size, ensuring the internal depth measures about 6 inches – this depth is ideal for nesting tubes. When designing the frame, plan for panels that will shield the tubes from rain and direct sunlight. Adding a small roof overhang is a great way to keep water away from the tubes.
As you assemble the frame, use pre-drilled wood screws and apply a thin layer of wood glue for extra durability. To ensure the frame is square, measure diagonally from corner to corner – both measurements should match. Once the frame is assembled, sand all surfaces, paying special attention to the edges where bees will enter. Smooth edges are essential to prevent any harm to the bees. With the frame complete, you’re ready to prepare the nesting tubes.
Preparing Nesting Tubes
The nesting tubes are where native bees will lay their eggs, so proper preparation is key. Bees prefer different-sized cavities depending on the species. For example, mason bees are drawn to tunnels about 8mm in diameter, while smaller native bees might opt for openings between 4mm and 6mm[5][6].
Cut bamboo pieces to 6-inch lengths, making sure one end is naturally sealed. If the end isn’t sealed, you can use non-toxic materials like clay or wood putty to close it off[7]. For paper-based tubes, select a thick, breathable material and seal one end fully to help prevent parasites. Clean out all nesting holes using compressed air and a small brush to remove any debris[8].
Prepare tubes in a variety of diameters – 6mm, 7mm, and 8mm are good options – to attract a range of bee species. If you’re using natural reeds, inspect them carefully and discard any that are cracked or show signs of mold. Avoid purchasing unopened tubes or reeds, as they could harbor pests[5]. Once your tubes are ready, it’s time to assemble and finish your bee house.
Final Assembly and Finishing
Place the prepared nesting tubes securely inside the frame. If your design includes a wooden block with pre-drilled holes, slide it into place snugly. For loose bamboo or reed tubes, pack them tightly to ensure they stay stable.
Position the nesting tubes so they are flush with the front of the frame, making it easier for bees to access. Install the bee house facing southeast to catch the morning sun – this helps with bee development[7]. For finishing touches, you can apply a non-toxic, water-based stain or paint for color, or leave the wood natural, as bees are often drawn to untreated materials.
Lastly, drill a few small drainage holes in the bottom of the frame to prevent water from collecting inside. Double-check that all components are secure and weatherproof to provide a safe, long-lasting home for your bees.
sbb-itb-843f8be
Installation and Maintenance of Bee Nesting Boxes
Once your bee nesting box is ready, how you install and care for it will play a big role in its success as a home for native bees.
Best Placement for Bee Boxes
Choosing the right spot for your bee nesting box is crucial. Look for a location that’s sheltered, warm, and stable. Ideally, install the box in early spring when temperatures climb above 55°F [9]. Placing the box near a variety of blooming plants is equally important. Native bees typically have short flight ranges, so having easy access to pollen and nectar ensures they can thrive. A well-placed bee box not only benefits the bees but also reduces the maintenance required over time.
Seasonal Maintenance Tips
After finding the perfect spot, regular upkeep is key to keeping your bee box effective and safe for its tiny residents. Seasonal maintenance, especially in the fall, helps protect native bees and extends the life of the box. In Maryland, for example, maintenance is best done in October or November, when the bees’ activity winds down for the year [10].
Annual cleaning is a must. Start by using a soft brush to remove any dead bees or debris from inside the box. Check for and remove weathered or damaged cocoons and nests [10]. For the exterior, a simple wipe-down with warm water will do the trick.
"I recommend against trying to clean out used nesting tubes – a task difficult to do well enough to effectively remove pathogens", advises Tim McCoy, an associate with Virginia Tech Pesticide Programs [9].
Instead of attempting to clean individual tubes, replace them every year to prevent the buildup of diseases and parasites [9]. After cleaning, let the bee box dry thoroughly in the sun. Vacuum it to remove any lingering debris, and wipe away mold or mildew with a damp cloth. Make sure the box is completely aired out before use [10]. For added protection during winter, cover the roof with a tarp and add absorbent materials like newspaper or straw [10].
Winter storage also requires some thought. Store the box in an outbuilding where it will experience natural temperature changes, or leave it outdoors in a sheltered area [9]. Avoid heated indoor spaces, as native bee larvae need exposure to cooler temperatures to develop properly.
To protect against predators, secure the box as needed. If birds start pulling out tubes or breaking open nests, attach chicken wire or hardware cloth to the front of the box. Use a large mesh size and leave a small gap between the wire and the nest entrances so the bees can still access their homes [3]. Regularly check for signs of pests or disease, and replace any damaged parts to keep the box in good condition [3].
Creating a Pollinator-Friendly Landscape
Installing bee nesting boxes is a fantastic start, but to truly support pollinators, you’ll need to create an environment where they can thrive. Pairing your bee boxes with native plants that provide consistent blooms and shelter is key to building a welcoming habitat.
Native Plants and Continuous Blooms
Native plants play a vital role in any pollinator garden. These plants have co-evolved with local bees for thousands of years, making them an excellent food source. In fact, studies show that native plants are four times more attractive to pollinators than non-native species [11].
To ensure your garden provides year-round forage, consider succession planting. This involves selecting plants that bloom at different times of the year. For example, include early bloomers like wild columbine and Virginia bluebells for spring, summer favorites like purple coneflowers and black-eyed Susans, and fall bloomers such as New England asters and goldenrod. Grouping these plants together not only enhances your garden’s visual appeal but also makes it easier for pollinators to forage efficiently [12].
For a well-rounded garden, aim to include at least five pollinator-friendly plant species, with three of them being native to your region [13]. Keep in mind that pollinators are crucial for the environment, as about 75% of flowering plants and over 30% of the world’s food crops depend on animal pollination [14].
When designing your space, think in layers. Use tall shrubs, mid-height perennials, and low ground covers to maximize the use of available space. Additionally, leave some areas undisturbed. Since around 70% of bees nest in the ground, maintaining dry, sandy patches of bare soil can provide essential nesting spots.
If you’re unsure about selecting and arranging plants, there’s plenty of professional help available to guide you in creating the perfect pollinator haven.
How Pro Landscapes MD Can Help
While DIY gardening is rewarding, professional landscape design can take your pollinator habitat to the next level. Pro Landscapes MD specializes in creating pollinator-friendly gardens tailored to central Maryland’s unique climate and soil conditions.
With their horticultural expertise, Pro Landscapes MD can help you choose native plants that ensure continuous blooms from early spring to late fall. This guarantees your bee nesting boxes are surrounded by ample food sources. Their planting services also ensure proper installation, giving your garden the best chance to thrive.
But their services don’t stop at planting. Pro Landscapes MD can incorporate eco-friendly features like natural stone pathways, rain gardens, and environmental pavers that enhance your garden’s functionality and ecological value. These elements not only add diversity to your landscape but also create microclimates that support various plant communities and provide water sources for pollinators. Their drainage solutions ensure plants receive the right amount of moisture, preventing waterlogging and promoting healthy growth.
Want to enjoy your garden without disturbing your new buzzing neighbors? Pro Landscapes MD can integrate fire pits and outdoor living spaces into your design. They also specialize in landscape restoration, helping to create pollinator corridors that connect your property to larger ecosystems. Serving areas such as Howard County, Montgomery County, Carroll County, Frederick County, Prince George’s County, and Baltimore County, Pro Landscapes MD is dedicated to supporting Maryland’s 3,500+ native bee species [12]. Their commitment to sustainable practices ensures your garden contributes to biodiversity and creates a resilient, thriving ecosystem right in your backyard.
Conclusion: Supporting Native Bees in Your Backyard
Creating bee nesting boxes is a simple yet impactful way to support Maryland’s struggling native bee populations. These boxes provide much-needed nesting spaces for solitary bees, which are not only different from honeybees in their lifestyle but are also up to three times more efficient as pollinators [15].
Studies from Europe reveal that these nesting boxes can accommodate over 15% of native bee species, highlighting their importance in conservation efforts [6]. When combined with landscaping that prioritizes pollinator-friendly plants, your yard can become a haven that meets both the nesting and foraging needs of native bees.
Experts emphasize the importance of a healthy, pesticide-free habitat filled with native plants to attract bees naturally. As Tess Renusch from the National Wildlife Federation puts it:
"The best way to support and bring native bees to your yard is to build a healthy habitat full of native plants and free of pesticides, and the bees will find their way to you." [16]
For best results, position your bee house to face the morning sun, protect it from harsh weather, and replace nesting materials annually to prevent the spread of disease. To further enrich the habitat, consider adding mud sources, hollow garden stems, and logs for additional nesting options.
By integrating your bee box into a thoughtfully designed, pollinator-friendly landscape, you can amplify its benefits. Native plants, a variety of blooms throughout the growing season, and a pesticide-free environment will naturally draw a diverse range of bees to your yard. Whether you build your bee box yourself or enlist help from professionals like Pro Landscapes MD, your efforts contribute to the conservation of Maryland’s native bee species.
Each bee box and native plant you add to your yard plays a role in combating habitat loss. As natural spaces continue to shrink, your backyard can serve as a vital sanctuary where these essential pollinators can thrive and sustain their critical role in our ecosystems.
FAQs
How do I properly maintain bee nesting boxes to keep them clean and safe for bees?
To ensure your bee nesting boxes stay clean and safe, make it a habit to inspect them regularly and give them a thorough cleaning at least once a year. Swap out or sterilize nesting tubes and liners to keep pests and diseases at bay. When building or maintaining the boxes, opt for seasoned, untreated wood, and position them in sunny, dry spots – this creates the perfect environment for native bees.
Clear away any debris, mold, or damaged parts as soon as you notice them, and steer clear of harsh chemicals around the boxes. By following these straightforward steps, you’ll help provide a healthy home for your bees while keeping the nesting boxes functional for years to come.
How can I attract native bees to my nesting box?
To draw native bees to your nesting box, include a variety of materials such as hollow plant stems, untreated wood with drilled holes, or paper-based bee tubes. These materials replicate the natural cavities that many native bees favor for nesting. Place the box in a sunny, protected spot and ensure it’s firmly secured to prevent any movement.
You can also make your yard more inviting by planting native, pollinator-friendly flowers that bloom at different times throughout the growing season. This ensures a steady food supply and encourages bees to linger in your space. Steer clear of pesticides, as they can harm bees and other helpful insects. By offering diverse nesting materials and plenty of blooms, you’ll create an environment that attracts a range of native bee species to your yard.
Why should I pair bee nesting boxes with native plants in my garden?
Pairing bee nesting boxes with native plants is a fantastic way to support local bee populations. Native plants supply the pollen and nectar that bees rely on, ensuring they have a steady food source. Many native bee species are uniquely suited to the plants in their area, making this combination especially beneficial for their survival.
Not only does this pairing help bees, but it also enhances pollination in your garden. The result? Thriving fruits, vegetables, and flowers. On top of that, it encourages biodiversity, fostering a healthier, more balanced ecosystem while adding to the natural charm of your outdoor space.
Chat with Us