


- bhavya gada
- No Comments
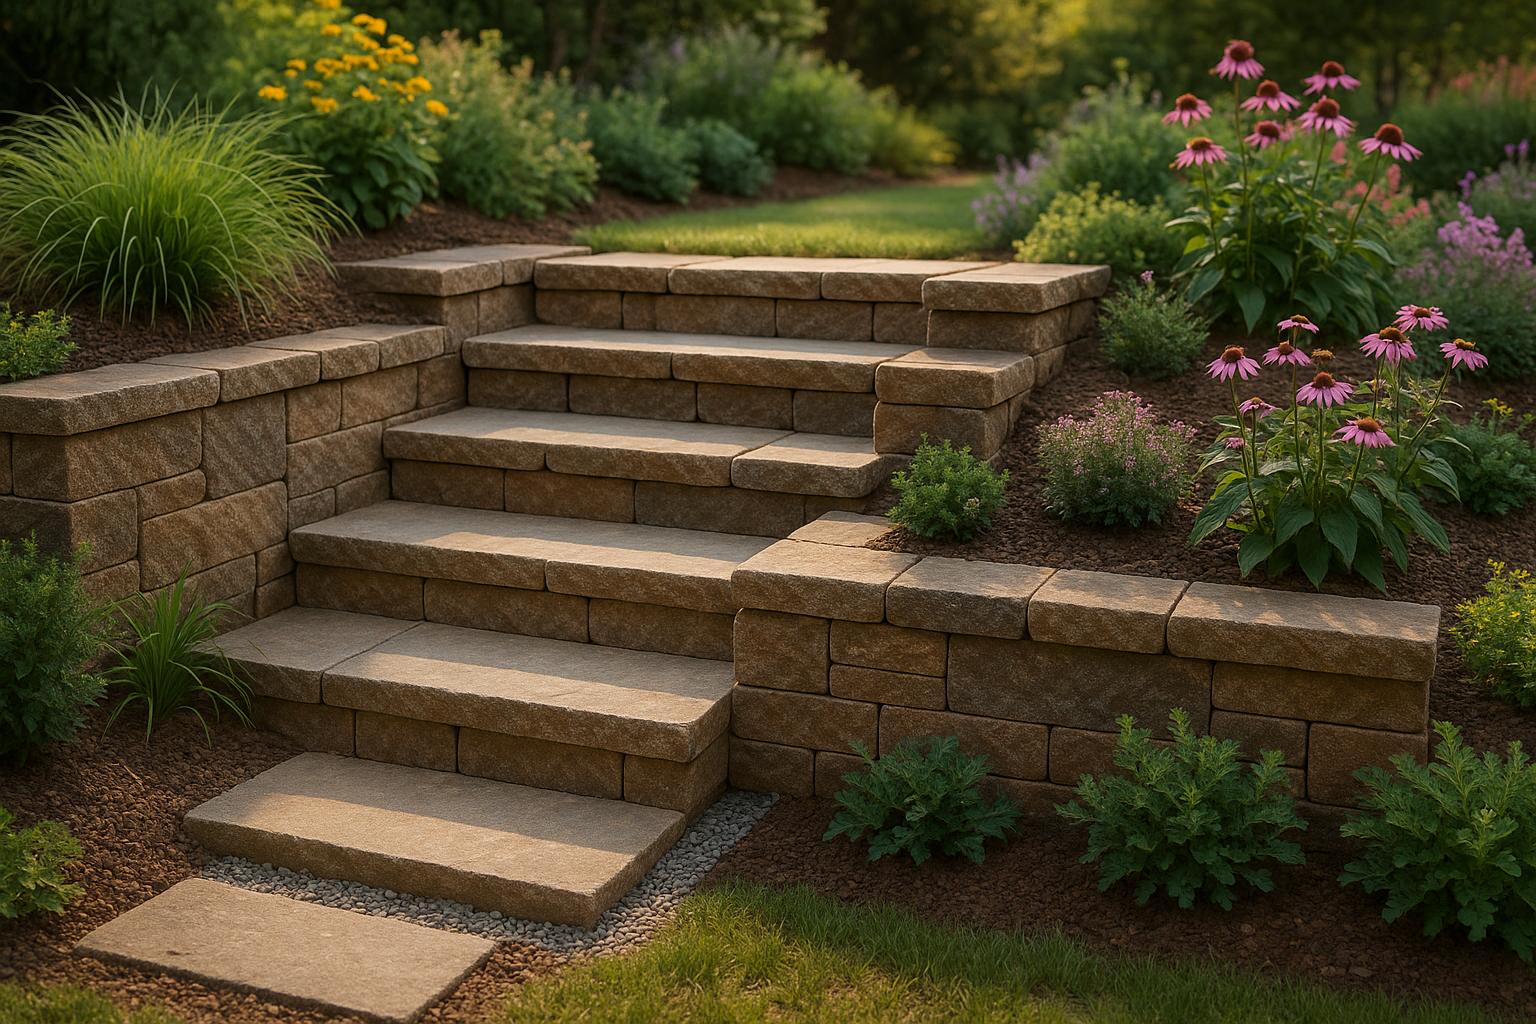
Building retaining wall steps can transform a sloped yard into a functional, attractive space while preventing soil erosion and improving drainage. Here’s a quick overview to get started:
- Plan and Design:
- Measure the slope and calculate the number of steps needed (1 step per 7–8 inches of rise).
- Test soil stability and plan for proper drainage (e.g., perforated drain pipes, gravel backfill).
- Choose step dimensions: 6–8 inches high, 12+ inches deep, and 3–5 feet wide.
- Materials:
- Options include concrete blocks, natural stone, wood, or brick. Costs range from $15–$50 per square foot.
- Essential materials: retaining wall blocks, crushed gravel, perforated drain pipes, geotextile fabric, and construction adhesive.
- Tools:
- Key tools: tape measure, level, hand tamper, trenching shovel, circular saw with masonry blade, and safety gear.
- Building Process:
- Prepare the ground by digging a trench, compacting soil, and laying a stable base.
- Install steps level by level, staggering block joints for stability.
- Add drainage and backfill with gravel to prevent water damage.
- Finishing Touches:
- Install capstones for durability and style.
- Landscape with shallow-rooted plants to enhance aesthetics and stability.
Pro Tip: Maryland’s climate and soil conditions require careful attention to freeze-thaw cycles and water management. While DIY is possible, hiring professionals ensures safety, durability, and compliance with local building codes.
For a durable, visually appealing retaining wall with steps, follow these steps or consult experts like Pro Landscapes MD.
How to Build Steps Using Retaining Wall Units
Planning and Design
Careful planning is what sets long-lasting retaining wall steps apart from those that fail. Before starting any work, it’s crucial to evaluate your site’s specific conditions and design a structure that can handle Maryland’s climate.
Check Site Conditions
Start by measuring the slope. Use a level and tape measure to calculate the total rise and determine how many steps you’ll need – aim for one step for every 7–8 inches of rise.
Next, test the soil. Maryland’s soil types can range from clay-heavy to sandy, so dig test holes to check soil stability and drainage. Make sure your foundation extends below the frost line to avoid damage from freeze-thaw cycles.
Observe how water flows on your site after a rainstorm. Areas prone to water pooling can cause serious issues, like bulging or cracking walls. To prevent this, plan for a perforated drain pipe and add a layer of gravel backfill to improve drainage[2].
Think about how the steps will be used. Will they handle regular foot traffic, or do you need wider steps for moving items like garden tools or furniture? Also, check local building codes – permits are usually required for retaining walls taller than three feet[1].
Once you’ve assessed these conditions, finalize the layout to ensure your steps are both safe and visually appealing.
Calculate Layout and Size
The size and spacing of your steps are key to both safety and usability. Ideally, each step should rise between 6 and 8 inches, with a depth (run) of at least 12 inches. This combination makes walking up and down feel natural and secure.
Measure your total area and sketch a basic design to visualize the final look. Mark the location of each step using stakes or spray paint[3]. To determine the number of steps, divide the total rise by your chosen step height. Make sure the spacing between steps is consistent – uneven steps can create tripping hazards and look unprofessional. Use a laser or transit level to ensure each step is level and aligns with the retaining wall.
The width of the steps also matters. For single-person use, a width of around 3 feet works well. If the steps need to accommodate two people walking side by side, aim for at least 5 feet. If the total rise exceeds 30 inches, consider adding handrails for extra safety.
Once the layout is set, it’s time to pick materials that balance durability, style, and ease of maintenance.
Choose Materials
Selecting the right materials is critical, especially in Maryland’s climate, where freeze-thaw cycles and seasonal rainfall are common challenges. Choose materials that are durable, visually appealing, and require minimal upkeep.
- Concrete blocks: These are a practical option, combining strength with easy installation. They also require less maintenance than wood.
- Natural stone: Materials like fieldstone, limestone, or granite offer a classic look and can boost property value. These stones hold up well in Maryland’s weather, but professional installation is often recommended.
- Wood: A budget-friendly option for temporary projects, wood works best in drier conditions but requires frequent maintenance.
- Brick: Known for its polished appearance, brick is durable and low-maintenance, making it a great choice for long-term use.
For retaining walls taller than 4 feet, it’s wise to consult a structural engineer. Maryland building codes mandate professional input for taller walls to ensure stability and proper drainage[4].
| Wall Material | Average Cost per Square Foot |
|---|---|
| Timber | $15–$30 |
| Brick | $20–$25 |
| Stone | $20–$100 |
| Concrete | $30–$50 |
These cost estimates are based on typical market prices but may vary depending on local conditions.
Materials and Tools Needed
Before diving into your project, make sure you have all the necessary materials and tools ready to go. This will save you time and prevent any unexpected delays. While the exact supplies depend on the materials you’ve chosen, most retaining wall step projects share a common set of requirements.
Josh Brazytis from Leafstone Landscapes highlights the importance of selecting materials that suit your budget, climate, design, and site needs [8].
Plan ahead and buy about 10% extra material to account for waste and future repairs [6][7]. Since retaining wall blocks can be heavy, it’s a good idea to have a helper. Also, consider having materials delivered to reduce physical strain [7].
Materials List
The materials you’ll need will vary based on the type of wall you decided on during the planning phase. However, here are the essentials for most projects:
- Retaining wall blocks or stones: Interlocking concrete blocks are a popular choice for DIY projects, costing around $11.40 per square foot [5]. For a more natural look, fieldstone costs about $25 per square foot, while pressure-treated pine posts are priced at roughly $45 per 6-inch by 6-inch by 10-foot section [5].
- Base materials: Crushed gravel or stone dust is necessary for creating a stable base. Plan for a compacted layer that’s 4–6 inches thick.
- Drainage components: Proper drainage is critical. You’ll need perforated drain pipe (typically 4-inch diameter), landscape fabric or geotextile fabric to keep soil out of the drainage system, and gravel for backfill.
- Construction adhesive: Use this to secure blocks, especially for the top layers. A standard caulk gun makes application easy [7][9].
- Sand: Helps with leveling individual blocks and filling gaps between pavers if they’re part of your design.
If you want to enhance the appearance of concrete blocks, consider using Rust-Oleum concrete stain, which costs about 15 cents per square foot [5]. For a premium finish, Natural Stone Veneers, like the Tuscan collection, start at $16 per square foot [5].
Tools List
Having the right tools on hand can make your project much smoother. Here’s what you’ll need:
- Measuring and leveling tools: A tape measure and levels (torpedo, line, or laser) ensure precise measurements [7][9].
- Excavation and preparation tools: A trenching shovel is essential for digging, while a garden rake helps smooth surfaces. Use a hand tamper to compact soil, or rent a plate compactor for larger areas [7][9][10].
- Cutting and shaping tools: A circular saw with a masonry blade works for most concrete block cuts. For finer adjustments, a chisel and drilling hammer are useful. For extensive cutting, renting a wet masonry saw can reduce dust and provide cleaner cuts [6].
- Assembly tools: A rubber mallet helps position blocks without damage, and a speed square ensures accurate angles. Before applying adhesive, clean surfaces with a broom [10].
- Material handling equipment: A wheelbarrow is essential for moving heavy materials efficiently.
- Safety equipment: Protect yourself with safety glasses, sturdy work boots, heavy-duty gloves, and appropriate work clothes. Use hearing protection for power tools and a respirator when cutting materials that produce dust [7].
| Material Type | Cost/Unit | Best For |
|---|---|---|
| Pressure-treated pine | ~$45 per 6×6×10-ft post | Budget-friendly DIY projects |
| Fieldstone | ~$25 per square foot | Natural, rustic appearance |
| Ready-mix concrete | ~$8 per square foot | Custom shapes and permanent installation |
| Interlocking concrete blocks | ~$11.40 per square foot | DIY-friendly with professional results |
When choosing wood materials, keep in mind their lifespan. Pressure-treated pine and fir can last up to 40 years, while cedar and redwood typically last around 20 years [5]. If you’re building steps that will see frequent use, this is an important factor to consider.
Once you’ve gathered your materials and tools, you’ll be ready to move on to preparing the ground and installing your steps.
Building Steps
Building a stable structure requires careful planning and attention to detail. Regularly check your progress to ensure everything remains level and aligned.
Prepare the Ground
Before laying the first block, preparing the ground is essential to ensure long-term stability. Start by calling 811 to locate any underground utility lines. This free service can help you avoid accidents and expensive repairs [6][7].
Mark the locations for your steps and walls using stakes and string. This will help you create straight and accurate lines for your wall [6]. Then, dig a trench deep enough to bury at least half the height of the first row of blocks, plus an extra 3 inches for the paver base. The trench should be twice as wide as the blocks you’re using to allow for proper working space. For instance, if your blocks are 8 inches wide, the trench needs to be 16 inches wide [6].
Compact the trench thoroughly with a hand tamper or plate compactor. This step is critical because loose soil can settle over time, causing your wall to shift or sink. Once compacted, pour in the paver base, compact it again, and ensure it is level both lengthwise and front to back [6]. If your site has a slope, create steps in the trench to keep the top of the wall level. Avoid running the wall parallel to a slope, as this can compromise its stability [6].
For the first row of blocks, use a hammer and chisel to remove the flanges so they sit flat. Always wear safety glasses and gloves when working with tools [7].
Once the foundation is ready, you can move on to installing the steps.
Install the Steps
Using your marked guide, begin placing the first row of blocks. Use a screed and carpenter’s level to ensure each block is perfectly level. Any mistakes in this row will only worsen as you build higher, so double-check both individual blocks and the entire course [11].
For the next rows, stagger the joints by placing half-blocks at the ends if needed. This pattern adds strength and stability to your structure [11]. As you build, backfill with crushed stone to support the wall and make the process easier. Adding backfill as you go helps keep everything stable and manageable [11].
Add Drainage and Backfill
Proper drainage is critical for preventing water damage, such as bulging, cracking, or even wall collapse. Regardless of the wall’s height, always install a perforated drain pipe at the base, just behind the foundation [13][2].
Position the pipe so it slopes at least 0.5%, directing water away from the wall. Make sure the pipe "daylights" into an open area where water can safely escape [12]. To prevent soil from clogging the drainage system, cover the area with geotextile fabric. Wrap the drain pipe in a sleeve or filter fabric for added protection [12][13].
For backfill, use clean gravel or crushed stone, which allows water to flow freely. Add the gravel in 4-inch layers, compacting each one as you go [12]. This step-by-step approach ensures the backfill is stable and prevents future settling.
Finally, extend the drain pipe to a safe discharge point, such as a drainage ditch or a low spot in your yard. For walls taller than 2 feet, proper drainage becomes even more crucial [12].
The drainage system works as a team: the perforated pipe collects water, the gravel allows it to flow, and the geotextile fabric keeps soil out. Skipping any of these components could lead to water damage and compromise all your hard work.
sbb-itb-843f8be
Final Details
After completing the backfilling and drainage installation, it’s time to add some finishing touches. These steps not only improve the appearance but also ensure the structure remains durable for years to come.
Install Capstones and Plants
Capstones are the crowning feature of your wall, offering both protection and style. These flat stones or specialized blocks sit on top of the wall, helping to divert water and prevent damage. For the best results, choose capstones that complement your existing landscape and allow for a slight overhang – about an inch on each side – to direct water runoff away from the wall.
Landscaping around your newly built steps can further enhance the area. Plants, when selected and placed thoughtfully, can soften the look of retaining walls and contribute to their stability. Perennials and shrubs are great options, as they’re both aesthetically pleasing and less likely to interfere with the wall’s structure [15][16]. Be sure to maintain at least 5 feet of distance between plant root balls and the wall [17]. This prevents larger trees or shrubs from growing too close and potentially damaging the wall over time.
Opt for shrubs with shallow roots to minimize any risk to the foundation [14]. For example, smaller evergreens like American holly can add year-round greenery and even provide pops of color with their red berries during the winter [15]. While evergreen trees can camouflage a retaining wall beautifully, avoid larger varieties with aggressive roots that might compromise the structure [15]. If you’re unsure which plants are best suited for your soil and climate, consult a local expert for advice on native species that can also help control erosion [15]. To help your plants establish, consider temporary irrigation, and if you plan to install a permanent system, make sure it won’t interfere with the wall’s drainage by consulting your design engineer [17].
For the areas directly around your steps, spread 2–3 inches of quality topsoil and finish with mulch. This not only creates a neat transition between hardscape and planted areas but also helps retain moisture and suppress weeds.
Once these enhancements are complete, take a moment to inspect the structure and address any potential issues.
Check and Fix Any Issues
After installing capstones and landscaping, perform a thorough inspection to ensure everything is in good shape. Regular checks are essential for spotting early signs of wear or potential waterproofing problems [18].
Start by looking for cracks, gaps, or water damage. Discoloration, efflorescence, or moss growth can indicate moisture issues [18]. While small hairline cracks are common, larger cracks may require immediate attention. Use a level or step back to check for leaning or tilting, as these can signal underlying structural problems [20][22]. Uneven settlement, noticeable in a sloping or uneven top surface, is another red flag [21].
Also, inspect the drainage system. Make sure water flows freely from the drain pipe outlet and that debris isn’t clogging weep holes. Use a small stick or wire to gently clear any blockages [18]. Check for wet spots or water stains on the steps, as these could indicate drainage issues that need fixing [18].
For minor cracks, a concrete patch or mortar mix can do the trick [19]. Larger cracks may require epoxy or polyurethane injections for a more durable seal [19]. Applying a waterproof sealant in areas prone to moisture can also help protect the structure [20]. If the wall is leaning or tilting, it may need reinforcement, such as anchors or additional supports [19]. Drainage issues uncovered during inspection might call for solutions like installing French drains or adding more weep holes [19]. If settling or soft spots are found behind the wall, backfill with compacted gravel or crushed stone to stabilize the area [20].
Finally, document your completed project with photos taken from multiple angles. These images will serve as a reference for future inspections, helping you track any changes over time. Plan regular check-ups, especially after heavy rains or freeze-thaw cycles, to catch potential problems early and keep your wall in great condition.
Why Choose Pro Landscapes MD
When it comes to retaining walls and steps, working with skilled professionals ensures your project not only looks great but also meets the necessary structural standards. Pro Landscapes MD combines technical expertise with a keen eye for design, delivering results that are built to last.
Retaining Wall and Step Specialists
Pro Landscapes MD specializes in creating retaining walls that seamlessly blend functionality with aesthetic appeal [23]. They tailor each project to the unique conditions of your site, ensuring the final design enhances your property’s overall look while addressing practical needs.
The company prioritizes quality by using top-tier materials and precise construction techniques. This meticulous approach is especially critical when steps are involved, as proper drainage, structural soundness, and accurate measurements are essential for safety and durability.
What truly sets Pro Landscapes MD apart is their material expertise. They offer a wide range of options to suit various styles and requirements, including:
- Natural Stone: Delivers a timeless, organic feel that complements Maryland’s natural scenery [23].
- Brick: Offers a classic, polished look ideal for traditional homes [23].
- Concrete Blocks: Provides unmatched strength and durability, perfect for challenging soil conditions [23].
- Techo-Bloc & Allen Block: Combines engineered precision with visual appeal for a balance of beauty and strength [23].
- El Dorado Stone: Adds a luxurious, natural stone finish for high-end projects [24].
Their custom design process ensures retaining walls are tailored for purposes like soil retention, terracing, or simply enhancing the landscape’s visual appeal [23]. This attention to detail is particularly valuable when integrating steps, creating smooth transitions that maintain both form and function.
Beyond retaining walls, Pro Landscapes MD is also highly skilled in crafting natural stone steps, walkways, and drainage solutions. They ensure all hardscape features, including retaining wall steps, work together seamlessly to elevate your property.
This combination of technical precision and local experience makes their work stand out.
Serving Central Maryland
Pro Landscapes MD brings not just design expertise but also a deep understanding of local conditions. Based in Dayton, Maryland, they serve the Baltimore/Washington, DC area, leveraging their knowledge of the region’s soil, climate, and building requirements [24][25]. Their location at 4790 Linthicum Rd, Dayton, MD 21036, positions them perfectly to assist central Maryland communities [25].
Their services extend throughout Baltimore, MD, and Washington, DC, where they address challenges like clay soils that expand and contract with moisture and the drainage issues common in rolling terrain [24].
Local environmental factors play a crucial role in the planning and design phase. Pro Landscapes MD accounts for Maryland’s freeze-thaw cycles, seasonal rainfall, and varied soil types to ensure long-lasting wall performance. Their experience spans Howard County, Montgomery County, Carroll County, Frederick County, Prince George’s County, and Baltimore County, ensuring every project is tailored to the region’s unique demands.
Conclusion
Building retaining wall steps requires careful planning, quality materials, and precise execution. The process involves assessing site conditions, calculating layout dimensions accurately, preparing the ground with proper drainage, and installing each component with attention to detail. It’s a good idea to purchase about 10% extra materials to account for mistakes or future repairs. Combining thoughtful preparation with solid construction techniques ensures the steps are built to last.
Adequate drainage and structural support are critical. Without proper drainage behind the retaining wall, hydrostatic pressure can build up, potentially leading to failure [26].
"Building stairs and steps requires careful planning, flexibility on the job site and an eye for detail. Be sure to allow adequate time for layout and building of stairs." – Allan Block [27]
While a DIY approach can save money upfront, complex retaining wall projects often benefit from professional expertise. Professionals bring structural engineering knowledge, adhere to local building codes, and use specialized tools to ensure the project is safe and durable for years to come. They handle critical details like drainage and structural support with precision, delivering a reliable and long-lasting result.
For Maryland homeowners, experienced contractors like Pro Landscapes MD provide additional value by understanding local soil conditions, freeze-thaw cycles, and drainage challenges unique to the Baltimore/Washington, DC area. Their expertise in working with materials like natural stone and engineered blocks ensures that your retaining wall steps not only function well but also enhance the beauty of your outdoor space.
Whether you decide to take on this project yourself or hire professionals, well-constructed retaining wall steps can improve your property’s accessibility, reduce soil erosion, and add an appealing focal point to your landscape.
FAQs
What mistakes should I avoid when building retaining wall steps?
When constructing retaining wall steps, it’s important to steer clear of several common missteps that can compromise the structure:
- Neglecting drainage: Without proper drainage, water can accumulate behind the wall, creating pressure that may lead to cracks or even structural failure.
- Choosing unsuitable materials: Using materials that aren’t durable or appropriate for the project can weaken the stability and longevity of the steps.
- Skipping a solid foundation: If the base isn’t properly prepared or lacks sufficient support, it can cause the steps to become uneven or collapse over time.
- Ignoring local building codes: Overlooking regulations can not only pose safety risks but also result in fines or the need for costly adjustments later.
For retaining wall steps that stand the test of time, focus on careful planning, invest in durable materials, and make sure to prioritize proper drainage and a strong foundation.
How do I make sure my retaining wall steps are safe and meet local building codes?
Before building retaining wall steps, it’s crucial to prioritize safety and compliance with local building codes. Start by consulting a professional engineer or a landscape expert. They can guide you in designing steps that are not only safe but also meet all necessary regulations. Plus, they can help you secure any required permits, saving you from potential headaches down the road. Proper planning upfront can prevent expensive mistakes later.
Some key factors to keep in mind include laying a solid foundation, ensuring proper drainage to avoid water buildup, and meeting frost line requirements to prevent structural issues. Additionally, the steps should be designed to withstand lateral soil pressure, with a focus on long-term safety. Don’t forget to review your local building codes for specific guidelines and best practices to ensure your project is both stable and secure.
What materials are best for building retaining wall steps in areas with freezing and thawing weather?
For regions that experience freeze-thaw cycles, reinforced concrete and natural stone stand out as reliable materials for constructing retaining wall steps. These materials are built to endure and resist cracking caused by the constant freezing and thawing of water.
Reinforced concrete, when combined with steel reinforcement, delivers outstanding strength and durability, making it a practical choice for long-lasting structures. Meanwhile, natural stone not only holds up against tough weather but also adds a classic, elegant look to your landscape. With either option, you can count on steps that are both sturdy and visually pleasing for many years.
Chat with Us