


- bhavya gada
- No Comments
A sump pump protects your basement from flooding and water damage, especially in areas prone to heavy rainfall or high humidity like Maryland. Preparing for installation involves assessing the site, planning drainage, and gathering the right tools and materials. Here’s a quick guide:
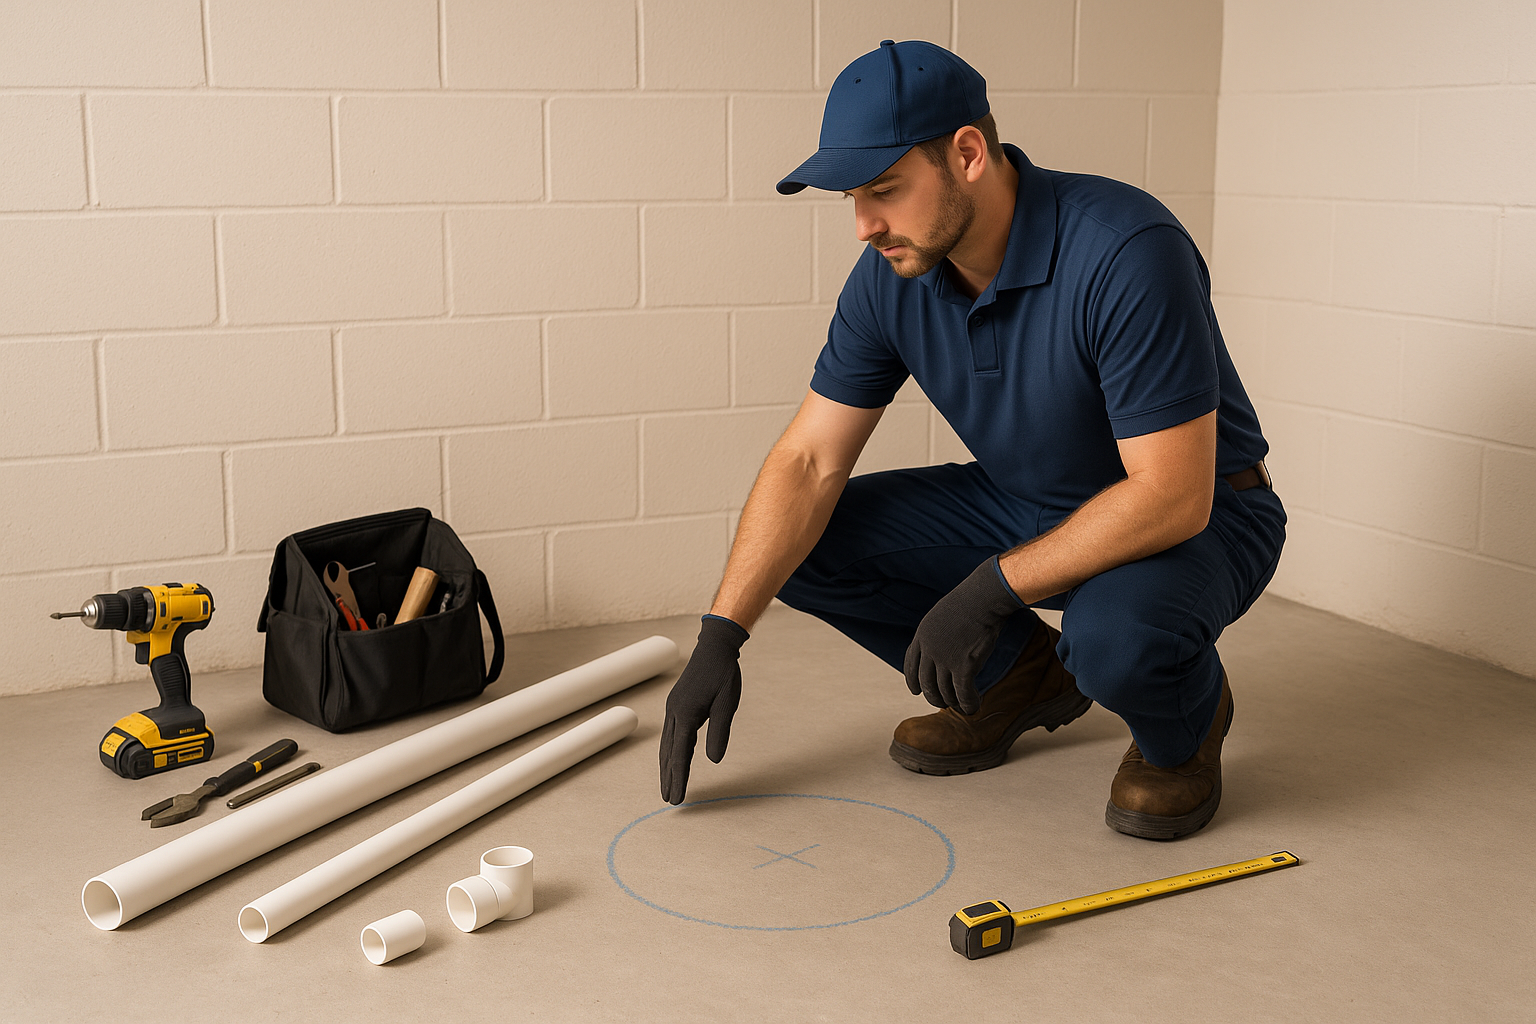
- Site Assessment: Locate the lowest point where water collects, ensure proper pit size (at least 12 inches deep), and check for underground utility lines.
- Local Regulations: Review permit requirements and ensure compliance with building codes.
- Drainage Planning: Extend discharge lines 10–20 feet away from your foundation, directing water toward storm drains or natural drainage areas.
- Workspace Preparation: Clear the area, control dust with plastic sheeting, and use sandbags to manage water.
- Tools: Pavement breaker, drill, level, tape measure, PVC pipe cutter, and safety gear.
- Materials: Sump pump, basin (plastic or fiberglass), gravel, PVC pipes, check valve, hydraulic cement, and silicone caulk.
A well-prepared site ensures smooth installation and long-term protection. Professional help may be necessary for complex setups or challenging soil conditions.
How to install a sump pump pit the right way!
Site Assessment and Planning
Before diving into the installation process or buying equipment, it’s essential to evaluate your site thoroughly. This step helps you avoid costly mistakes and ensures your sump pump system is ready to perform when it matters most.
Evaluating the Installation Area
The sump pit should be located at the lowest point where water naturally collects. To find this spot, check your basement after a heavy rainstorm and take note of where water tends to pool.
When preparing the sump pit, make sure it’s at least 12 inches deep and wide enough to accommodate both the pump and the liner[1]. Knowing your property’s water table level is equally important – it will help you determine the right pump capacity and the necessary pit depth[3].
Before you start digging, identify any utility or service lines under your foundation to avoid accidental damage[3]. Once the area is assessed, confirm that your plans align with local regulations.
Understanding Local Regulations
After pinpointing the installation area, the next step is to review local permit requirements. For example, Maryland building codes typically require permits for sump pump installations[1]. Check with your local building department to ensure your project complies with all applicable rules and guidelines.
Planning Drainage Paths
To keep water from seeping back into your basement, the discharge line should extend 10–20 feet away from your home’s foundation[2]. Ideally, the water should flow toward a nearby storm drain or a natural drainage area.
For expert advice on creating effective drainage paths that meet local regulations, Pro Landscapes MD offers tailored solutions to safeguard your property. A well-designed drainage system sets the stage for a smooth and efficient sump pump installation.
Preparing the Area for Installation
When setting up for installation, it’s essential to prioritize controlling dust, managing water, and ensuring your tools are ready to go.
Clearing the Workspace
Start by covering the work area with plastic sheeting to keep dust and debris contained. To handle potential water issues, place sandbags around the workspace. Keep a temporary sump pump and a shop vacuum on hand to deal with any water that may accumulate during excavation. Once the area is secure, mark the location of the sump basin to guide the excavation process.
Marking and Excavating the Sump Basin
Before breaking through the concrete, install a temporary 20-amp breaker and connect a power cord to your electrical panel. This setup ensures you’ll have enough power for heavy-duty tools, like a pavement breaker, so the work can proceed without interruptions.
sbb-itb-843f8be
Tools and Materials Needed
Once you’ve prepped the site, it’s time to gather the tools and materials you’ll need to ensure the installation goes smoothly and safely.
Required Tools
For concrete removal, you’ll need heavy-duty equipment like a pavement breaker or jackhammer. To handle the finer details, have tools like a drill with masonry bits for creating holes in concrete, a tape measure, level, and chalk line for precise measurements and alignment.
For pipe connections and cutting, keep an adjustable wrench, utility knife, hacksaw, or PVC pipe cutter handy. A pair of pliers will help secure components, while a wet/dry shop vacuum is essential for keeping the area free of water and debris during the process.
Don’t forget safety gear! Equip yourself with safety glasses, work gloves, knee pads, and a flashlight or headlamp to ensure a safe and efficient workflow.
Materials Checklist
Once your tools are ready, double-check that you have all the materials necessary for the sump pump system. Start with the sump pump itself, selecting either a pedestal or submersible model based on the depth of your basin and available space.
The sump basin serves as the system’s core, typically measuring 18 to 24 inches in diameter. To promote proper drainage, you’ll need ¾-inch gravel (about 2–3 cubic feet) to surround the basin.
For the discharge system, gather 4-inch PVC pipe for the main line, 2-inch PVC pipe for smaller connections, and PVC elbows, couplings, and pipe cement to secure joints. A check valve is crucial to prevent water from flowing back into the basin, while pipe clamps will secure the discharge line to the floor joists.
To seal and waterproof the system, have hydraulic cement on hand for filling gaps around the basin and silicone caulk for sealing connections. Use plastic sheeting to protect your workspace and sandbags to manage water flow during installation.
Sump Basin Material Options
When choosing a sump basin, the two main options are plastic and fiberglass. Each has its own advantages, depending on your needs and budget.
| Feature | Plastic Basin | Fiberglass Basin |
|---|---|---|
| Cost | $50-$80 | $120-$200 |
| Weight | 15-25 lbs | 25-40 lbs |
| Durability | 10-15 years | 20-25 years |
| Installation | Easier to handle | Requires more care |
| Crack Resistance | Moderate | Excellent |
| Chemical Resistance | Good | Superior |
Plastic basins are a cost-effective choice for typical residential installations. They’re lightweight and easy to handle, but they may develop cracks over time, especially in areas with shifting ground.
Fiberglass basins, while more expensive, are better suited for demanding conditions. They resist cracking under soil pressure and handle temperature fluctuations more effectively. Their extra weight also provides added stability, reducing the risk of movement during heavy water flow. If long-term durability is a priority, fiberglass may be worth the investment.
Setting Up Proper Drainage and Discharge
Once your site is ready and your materials are gathered, the next step is creating a reliable water discharge system. This system is essential to protect your foundation and prevent water-related damage.
Designing the Discharge Route
Your discharge route should align with your overall drainage plan. To keep water from seeping back into your basement, direct it at least 10 feet away from the foundation – 15 to 20 feet is even better.
Ensure the water flows downhill and away from structures like sheds, patios, and driveways. Avoid directing water toward neighboring properties, as this can lead to legal disputes and strained relationships.
Whenever possible, connect your discharge route to a storm drain, dry creek bed, or natural drainage area. Be cautious of oversaturating the discharge point, as this can cause water to back up into the system.
Mark the planned route, noting any obstacles like tree roots, utility lines, or landscaping features that could require adjustments.
Installing and Securing Discharge Pipes
Use a 4-inch PVC discharge pipe to carry water from the sump basin to your chosen exit point. Maintain a slight downward slope of at least ¼ inch per foot to ensure proper flow. To prevent sagging, secure the pipe with J-hooks or hangers every 4 to 6 feet. While the hangers should be tight, allow for minimal movement to accommodate slight shifts.
At the point where the pipe exits your foundation, drill a hole slightly larger than the pipe’s diameter. Seal the opening with silicone caulk to keep out moisture, insects, and cold air.
In areas prone to freezing, install a freeze-proof extension to prevent ice blockages in the system.
Use PVC cement to connect all pipe joints securely, and allow 24 hours for the cement to fully cure before testing the system. Loose connections are a common cause of basement flooding during sump pump operation.
For more complex setups, you may need professional assistance to ensure the system works effectively.
Professional Drainage Solutions
If your property has challenges like poor soil drainage, steep slopes, or limited discharge options, professional help can make all the difference. Experts can design drainage systems tailored to your property’s specific needs.
For instance, Pro Landscapes MD specializes in solutions like French drains, grading, and stormwater management to improve sump pump performance. In areas like Columbia, Ellicott City, and Gaithersburg, where soil conditions vary, professional regrading can prevent water from pooling near your foundation. This is particularly crucial in Montgomery County and Howard County, where clay-heavy soils can slow water movement.
Another option is installing dry riverbeds, which handle large volumes of water during storms while doubling as decorative features during dry spells.
Professional installation ensures your system complies with local building codes and HOA rules. Many Maryland communities have specific regulations about water discharge, and experienced contractors are familiar with these requirements across various counties and municipalities.
Next Steps
Now that you’ve assessed your site, cleared your workspace, and planned the discharge system, you’re ready to move forward with your sump pump installation. The next decision is whether to tackle the installation yourself or bring in a professional.
When planning your discharge route, make sure it extends at least 10–20 feet away from your foundation. Also, ensure all PVC joints are tightly secured to avoid any risk of flooding.
If your property faces challenges like poor drainage, uneven grading, or strict local regulations, hiring a professional can make all the difference. For example, Pro Landscapes MD offers expert drainage solutions and sump pump installation services throughout Maryland. Whether you’re in Columbia, Ellicott City, Gaithersburg, or Bethesda, they specialize in integrating sump pump systems with broader drainage strategies, including French drains, stormwater management, and grading.
Properties in areas like Montgomery County and Howard County often deal with clay-heavy soils and varied elevations, which can complicate water management. Professional contractors not only understand these unique challenges but are also well-versed in local building codes and HOA guidelines. They can design systems that protect your foundation while maintaining the integrity of your landscape.
Whether you choose a DIY approach or enlist professional help, you’re now equipped to move into the installation phase and set up a system that ensures long-term basement protection and effective water management.
FAQs
What should I consider when deciding between a plastic or fiberglass sump basin?
When deciding between a plastic or fiberglass sump basin, it’s important to weigh factors like price, strength, and ease of installation. Fiberglass basins stand out for their toughness and resistance to cracking, making them a solid choice for heavy-duty use and long-term reliability. That said, they come with a higher price tag – often nearly double the cost of plastic options.
On the other hand, plastic basins, typically made from polyethylene, are lightweight, simpler to install, and much easier on the wallet. However, they might not hold up as well in harsher conditions or over extended periods. Ultimately, your decision should align with your budget, the environmental demands of the site, and how long you need the basin to perform.
What steps should I take to ensure my sump pump installation meets local building codes?
To make sure your sump pump installation follows local building codes, start by reviewing the specific requirements in your area. This typically includes getting the right permits, building the sump pit correctly, and installing the discharge pipe so it directs water safely away from your property without affecting neighboring land, sidewalks, or driveways.
Reach out to your local building department for details on rules like discharge distance, venting needs, and any additional standards. Planning ahead and sticking to these guidelines can help you avoid fines and ensure your setup works as intended. If you need professional help, experts like Pro Landscapes MD specialize in drainage solutions and can ensure your project meets all necessary regulations.
What challenges can arise with DIY sump pump installation, and when is it better to hire a professional?
Installing a sump pump by yourself can be a challenging task, mainly because it demands a certain level of technical expertise. Some of the common hurdles include designing the pit correctly, ensuring efficient drainage, waterproofing the area, and adhering to local building codes. Errors such as placing the pump in the wrong spot or failing to waterproof properly can lead to water damage or even a malfunctioning pump – problems that might end up costing more to fix than hiring a professional in the first place.
If you’re not confident in your plumbing skills, or simply want to avoid the risk of costly mistakes, bringing in a professional is a smart move. Skilled installers can handle the job with precision, ensuring the system works flawlessly from the start. For dependable drainage solutions and sump pump installation in central Maryland, Pro Landscapes MD offers services designed to build a reliable system tailored to your specific needs.
Chat with Us