


- bhavya gada
- No Comments
Boulders can transform your garden into a visually striking and low-maintenance space. They add a natural, enduring charm while solving common landscaping challenges. Here’s a quick guide to integrating boulders effectively:
- Choose the Right Boulder: Match size, shape, and color to your garden’s style and scale. Rounded stones create a softer look, while angular ones add a modern touch. Opt for local stones to reduce costs and blend naturally with the environment.
- Placement Tips: Partially bury boulders to make them look like part of the landscape. Group them in odd numbers for a balanced, nature-inspired arrangement.
- Pair with Plants: Use ornamental grasses, evergreen shrubs, and ground covers to soften the look and create contrast. Match plant sizes to the boulders for harmony.
- Add Materials: Surround boulders with mulch, gravel, or smaller rocks for texture and practicality, like improving drainage and suppressing weeds.
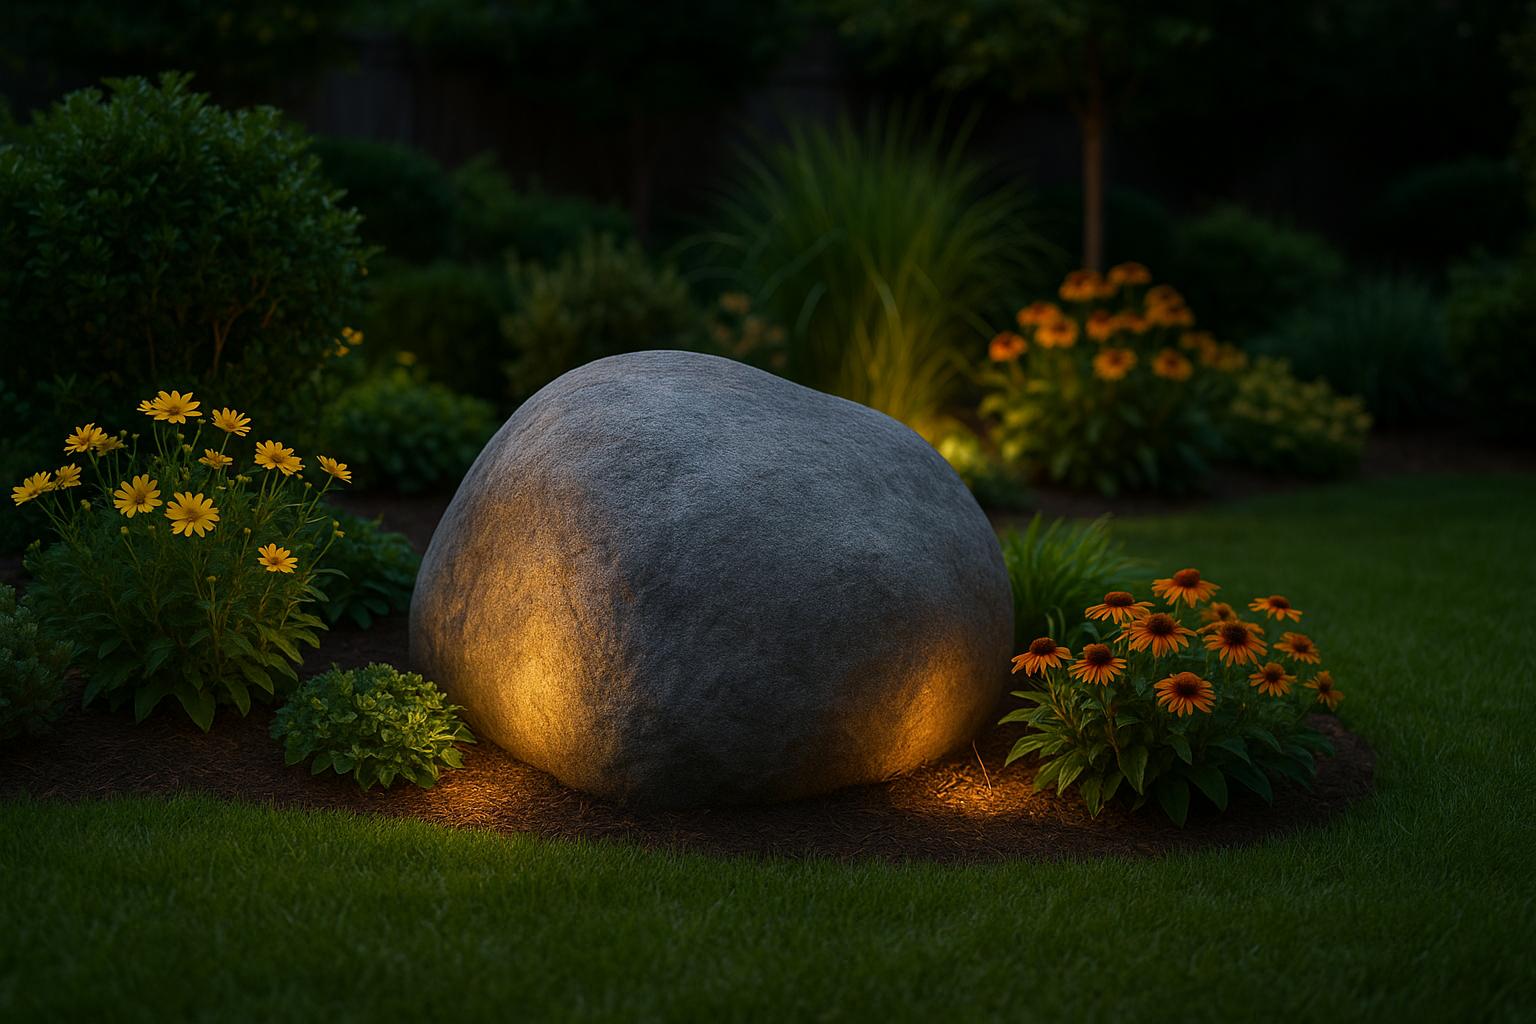
- Incorporate Lighting: Use uplighting or spotlights to highlight boulders at night, creating depth and ambiance.
Whether you’re working with a small yard or a large property, boulders can serve as both functional and decorative elements in your garden. With proper planning and placement, they’ll provide year-round interest and enhance your outdoor space.
The Practical Use of Boulders in Your Landscape
Choosing the Right Boulders for Your Garden
Picking the right boulders for your garden isn’t just about aesthetics – it’s about finding stones that blend seamlessly with your outdoor space. A carefully chosen boulder can elevate your garden’s design, while the wrong one might feel out of place or overpowering.
Size, Shape, and Color Selection
Size matters when it comes to boulders. In smaller yards, opt for modest stones that enhance the space without feeling overwhelming. Larger properties, on the other hand, can handle more dramatic, sizeable boulders. Keep in mind that partially burying a boulder can make it appear smaller and more natural.
Shape sets the tone. Angular stones can add a bold, modern edge to your garden, while rounded, weathered boulders create a softer, more traditional look. Flat-topped stones are not only visually appealing but also practical – they can double as seating areas for relaxing or gathering with friends and family.
Color plays a key role. Look for boulders that complement your existing landscape. For example, Maryland’s native fieldstone, with its gray and brown hues, blends beautifully with local environments. If possible, match the stones to your home’s accent tones to create a cohesive look.
Consider seasonal contrasts. Light-colored stones pop against autumn foliage, darker tones add depth to winter landscapes, and medium shades provide balance throughout the year.
Texture adds personality. Smooth stones pair well with ornamental grasses, creating a sleek and polished look. Rough, rugged boulders, on the other hand, cast interesting shadows and offer small crevices for alpine plants to thrive. These textural details can make a big difference in your garden’s overall vibe.
Finding Local Stone Materials
Local stone is a smart choice. Once you’ve nailed down your style preferences, explore Maryland’s local stone options. The state’s geology offers a diverse selection, from granite to limestone, all of which work well with the regional soil and native plants.
Visiting local quarries or stone yards gives you the chance to handpick boulders based on size, shape, and character. Seeing the stones in person can help you spot unique qualities that might not be obvious in photos or catalogs.
Choosing local materials also has practical benefits – it reduces delivery costs and lessens the environmental impact. Plus, suppliers often refresh their inventory in spring and early summer, and you might even find more competitive prices in the fall.
For an added layer of interest, ask about the history behind the stones. Some boulders in Maryland come from historic quarries that supplied materials for notable structures, giving your garden a touch of local heritage.
For expert advice and precision in sourcing and placing boulders, consider working with professionals like Pro Landscapes MD. Their local knowledge and experience can help bring your garden vision to life.
Placement Strategies for Maximum Visual Impact
The way you position boulders in your garden can make all the difference. Thoughtful placement doesn’t just enhance the look of your outdoor space – it makes it feel like the rocks have always been a natural part of the landscape.
Positioning and Grouping for a Natural Look
Clusters over singles – always. Experts suggest arranging boulders in groups rather than scattering them individually. Using an odd number of stones, with a mix of sizes and a dominant piece slightly off-center, creates a more authentic, nature-inspired look [1][2].
"Creating a natural look with boulders often starts by grouping them in clusters. This mimics how boulders are found in nature, enhancing the rock garden aesthetic. Instead of placing a single boulder, try clustering three or more together." [1]
"To create a natural appearance in your landscape, try using an odd number of rocks and combining different sizes. Placing the largest boulder off-center can also contribute to a more natural look." [2]
Start with a standout stone as your anchor, then add medium and smaller rocks to create balance and visual interest. To make your arrangement even more organic, blend the boulders with the surrounding soil.
Embedding Boulders for a Natural Look
Don’t let boulders “float” – bury them. Troy Bankord, a designer from Troy Bankord Design, highlights a common mistake:
"A lot of mistakes that homeowners or contractors make is they will set a boulder on top of the dirt and just have it floating, but in nature the soil has washed around it." [5]
To avoid this, bury about one-third to one-half of each boulder. This technique makes the stones look like they’ve always been part of the terrain, seamlessly integrating them into the landscape [3][4][5]. By embedding the boulders, you’ll achieve a grounded, natural appearance that elevates the overall design.
sbb-itb-843f8be
Adding Plants and Complementary Materials
Once your boulders are in place, it’s time to bring your garden design to life by pairing them with thoughtfully selected plants and additional materials. These elements not only enhance the boulders but also add texture, color, and functionality to your outdoor space. Here’s how to seamlessly integrate plants and materials to complete your natural garden design.
Pairing Boulders with Plants
The combination of contrasting textures creates a striking visual effect. Soft, flowing plants can balance the hardness of stone, while bold, structured plants echo the strength of boulders. Maryland gardeners, working in USDA zones 6b–7a, have plenty of plant options that thrive in the region’s climate. Here are a few ideas:
- Ornamental grasses: Fountain grass and feather reed grass bring movement and softness to the edges of boulders. They’re also hardy enough to handle Maryland’s humid summers and chilly winters.
- Evergreen shrubs: For year-round interest, boxwood offers a clean, formal look, while mountain laurel adds native charm with its spring blooms. In shady areas, rhododendrons and azaleas provide vibrant springtime color.
- Perennial ground covers: These plants help boulders blend naturally into the surrounding landscape. Creeping phlox can spill gracefully over rock edges, hostas thrive in partial shade with lush foliage, and wild ginger works beautifully in woodland settings.
- Seasonal color plants: Keep your garden dynamic with plants that change through the seasons. Spring bulbs like daffodils and crocuses bring early bursts of color, summer annuals such as coleus and begonias fill in gaps, and fall-blooming asters extend the show into autumn.
- Scale matters: Match the size of your plants to the size of your boulders. Large boulders pair well with mature shrubs or small trees, while smaller rocks look best with delicate perennials.
Using Gravel, Mulch, and Smaller Rocks
Layering materials around your boulders can enhance the overall look while serving practical purposes like moisture retention, weed suppression, and erosion control. Here’s how to make the most of these complementary materials:
- Mulch for smooth transitions: Shredded hardwood mulch in natural brown tones works well with most stone colors, creating a seamless look without overpowering the design. Spread 2–3 inches of mulch around plants, keeping it a few inches away from tree trunks and shrub stems to prevent rot.
- Gravel for texture and drainage: Fine gravel or decomposed granite (¼ to ½ inch) is perfect for the base of boulders, especially if you’re aiming for a desert or Mediterranean vibe. River rocks in coordinating colors can also bridge the space between large boulders and surrounding soil.
- Smaller accent rocks: Scatter stones that are about one-third the size of your main boulders around their base. This mimics the natural weathering process, making it look like smaller rocks have broken away over time.
- Drainage considerations: Proper drainage is key, especially in clay-heavy soils. Adding a 6-inch layer of coarse gravel beneath decorative materials ensures water flows away from both rocks and plant roots.
- Color coordination: Choose materials that complement or subtly contrast with your boulders. For example, gray stones pair beautifully with warm brown mulches, while reddish boulders stand out against cool gray gravel or plants with silver-toned foliage.
Start with the largest elements – your boulders – then build layers around them. Add medium-sized plants and accent rocks, finishing with finer materials like mulch or small gravel to fill gaps and create smooth transitions. The goal is a natural, cohesive look that feels effortless yet thoughtfully designed.
Adding Hardscaping and Lighting Features
Incorporating boulders with hardscaping and lighting can enhance both the visual appeal and functionality of your outdoor space. These elements turn garden features into striking highlights that stand out during the day and transform into captivating focal points at night. Let’s dive into how patios, walkways, and lighting can elevate the natural beauty of boulders.
Combining Boulders with Patios and Walkways
Adding boulders to flagstone or paver patios introduces a natural, organic touch to otherwise structured designs. For instance, placing large, smooth boulders among pavers can soften sharp lines and create a more fluid, harmonious look. This approach is particularly effective in Maryland gardens, where natural fieldstone pairs beautifully with the local architectural style.
When it comes to pathways, boulders can serve as natural dividers or edging materials. Lining stone or concrete walkways with carefully placed rocks not only creates a welcoming entrance but also enhances the overall aesthetic when paired with native plants and mulch. Plus, the rugged textures and earthy tones of boulders add charm while helping to control erosion along garden paths.
For a balanced yet natural look, consider placing boulders symmetrically on either side of pathways or entryways. However, avoid rigid uniformity – mixing boulders of varying sizes and shapes mimics the randomness of nature. For example, a larger boulder on one side can be balanced by a cluster of smaller rocks on the other, creating a sense of equilibrium without feeling overly structured.
To ensure a cohesive design, match the tones of your boulders with the hardscaping materials. Gray fieldstone boulders, for example, pair wonderfully with bluestone patios, while warm sandstone boulders complement brick walkways or earth-toned pavers. This thoughtful coordination transforms boulders from simple accents into integral elements of your garden’s design.
Using Landscape Lighting to Highlight Boulders
Lighting can completely change how boulders are perceived, turning them into stunning nighttime sculptures. A well-planned lighting scheme not only highlights these natural features but also adds depth and dimension to your outdoor spaces.
Uplighting is a popular technique, where accent lights are directed upward to emphasize the surface of boulders. This creates dramatic shadows and draws attention to their unique forms. Wash lighting, on the other hand, uses broad beams to evenly illuminate boulder surfaces, showcasing their textures and subtle color variations. For standout pieces, narrow spotlights can be used to focus on specific shapes or details, making them the centerpiece of your nighttime landscape.
The color temperature of your lighting plays a key role in setting the mood. Warm lights (around 2,700K) create a cozy and inviting atmosphere, while cooler, brighter lights (around 4,100K) offer a more modern and vibrant effect. In Maryland gardens, warmer tones often work best, as they enhance the natural hues of stone and create a welcoming ambiance.
"Did you know you can use light layering outside to add depth and dimension, switch the mood in an instant and showcase aesthetics of your outdoor living space? Play with different layers of light to see how you can transform your space." – Kichler Lighting [6]
Smart lighting systems take customization to the next level, allowing you to adjust brightness and color to suit the occasion or mood. Professional installation ensures that electrical connections, weatherproof fixtures, and placement are handled correctly for both safety and maximum impact. Companies like Pro Landscapes MD specialize in integrating lighting with boulder installations, creating seamless designs that highlight natural stone while providing functional lighting for patios, walkways, and outdoor living areas across central Maryland.
Investing in quality landscape lighting doesn’t just enhance beauty – it also improves safety and boosts the entertainment value of your outdoor space. Illuminated boulders become striking anchor points, helping to define your garden while creating memorable evenings for family and friends.
Conclusion: Transforming Your Garden with Boulder Focal Points
Incorporating boulder focal points into your garden takes a bit of thought and planning, but the results are worth it. Start by selecting stones that work well with your landscape – think about size, shape, and color. Larger boulders can act as eye-catching centerpieces, while smaller rocks can be grouped together for added texture and interest.
Placement is key. Partially burying boulders helps them blend naturally into the environment, making them look like they’ve always been there. Position them thoughtfully to create a sense of harmony without overshadowing other garden elements. A helpful tip? Use odd-number groupings, like three or five, to give your design a balanced, organic feel.
Take it a step further by pairing your boulders with complementary features. Native plants, ornamental grasses, and carefully chosen mulch or gravel can highlight the stones beautifully. Hardscaping elements – like a flagstone patio or paver walkway – can tie the entire space together. And don’t forget lighting! Strategically placed landscape lights can make your boulders stand out even after the sun goes down.
For homeowners in Maryland, working with professionals can make all the difference. Pro Landscapes MD offers expertise in landscape design, stone installation, and lighting integration, serving communities across central Maryland. From selecting the perfect stones to ensuring proper placement and addressing practical needs like drainage, their team can help you create a cohesive and stunning outdoor space.
Whether you’re adding one dramatic boulder or creating an entire rock garden, these focal points bring timeless charm to your yard. With the right materials and thoughtful placement, your garden will only grow more beautiful over time. Let Pro Landscapes MD help bring your vision to life with expert design and craftsmanship.
FAQs
How can I select the right size and shape of boulders for a small garden to keep it visually balanced?
When picking boulders for a small garden, it’s important to choose sizes that fit the space – usually around 1 to 2 feet. Smaller boulders can serve as accents or edging, while arranging a few together can create a more natural effect. To prevent the garden from feeling cramped, use tools like a cardboard template to plan placement and ensure there’s room for plants and other elements. Strive for a balanced look by factoring in the overall layout and leaving open areas to keep the design visually pleasing.
What plants work well with boulders to enhance their visual appeal in a garden?
To make boulders stand out in your garden, pair them with drought-resistant plants like succulents or ornamental grasses. This creates a natural, easy-to-care-for aesthetic. Add ground covers such as creeping thyme or sedum to soften the edges of the rocks while introducing pops of color and texture. Incorporating dwarf shrubs or small conifers can also add structure and contrast, turning the boulders into bold focal points in your landscape.
How can I use lighting to showcase boulders and create a cozy nighttime garden atmosphere?
To highlight boulders and elevate your garden’s nighttime charm, try using low-voltage landscape lighting. Warm white LED spotlights or uplights work well to bring out the boulders’ natural textures and shapes. Position the lights at different angles to create depth and intriguing shadows for a more dramatic look.
You could also add soft pathway lights or string lights to create a cozy, inviting glow around the area. For a greener option, solar-powered lights or glow-in-the-dark stones are excellent choices. These stones soak up sunlight during the day and emit a gentle glow after dark. These simple lighting ideas can turn your garden into a serene and eye-catching retreat once the sun sets.
Chat with Us