


- bhavya gada
- No Comments
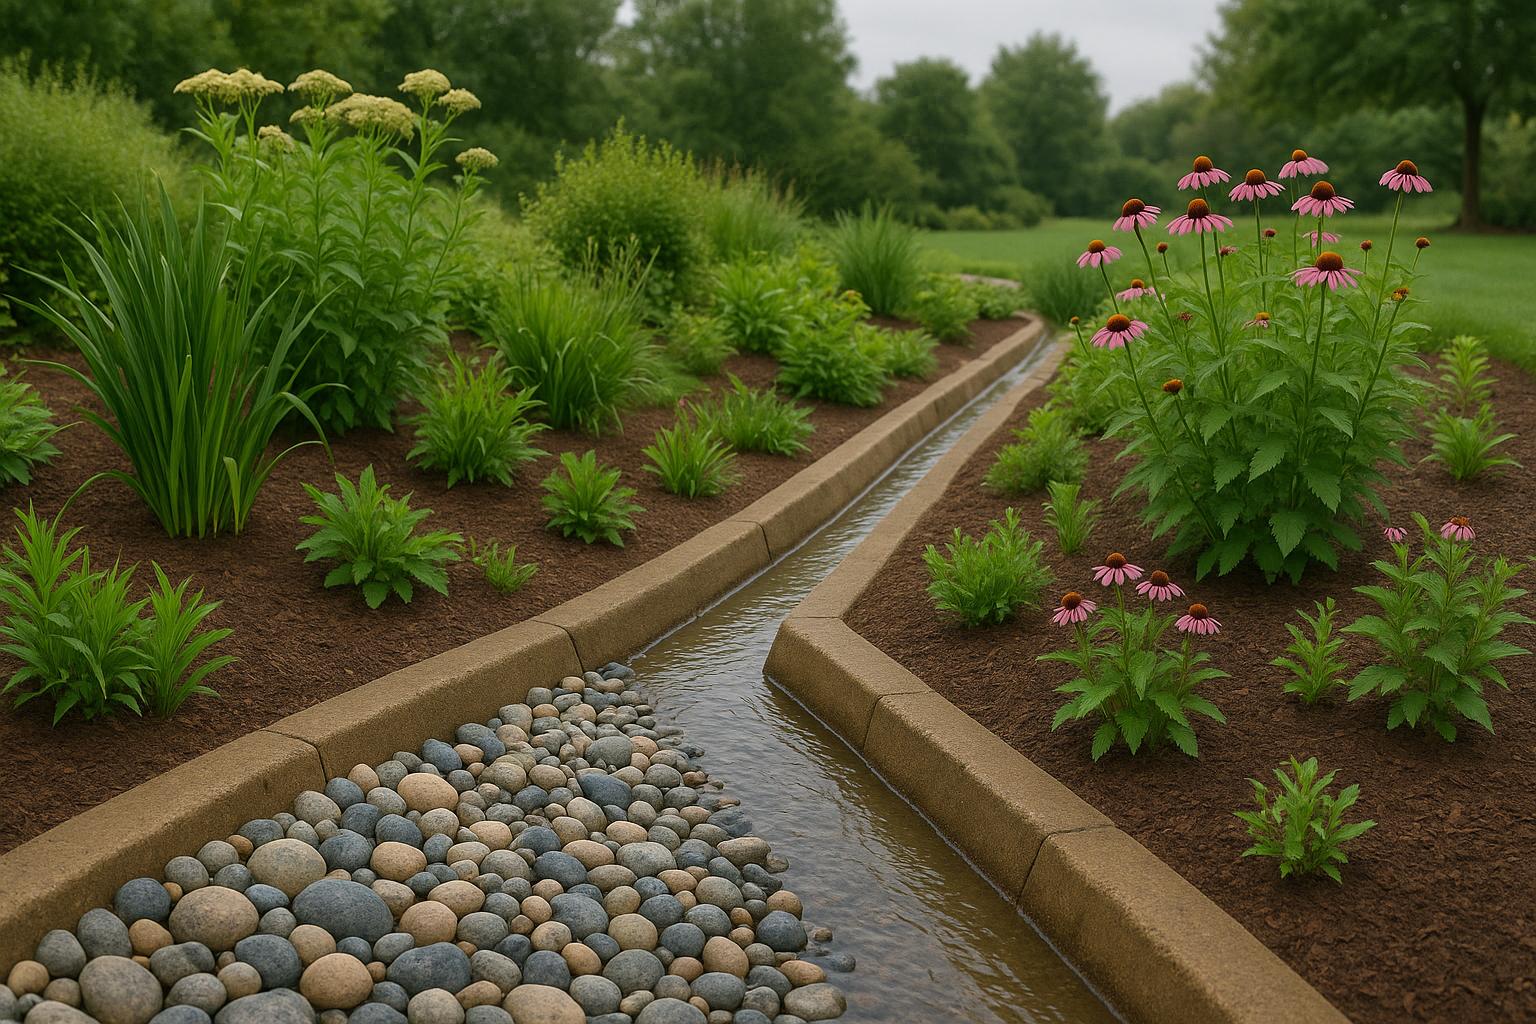
Rain gardens are a smart way to manage stormwater runoff while improving your outdoor space. But to keep them working efficiently, regular inspections are key. Here’s a quick summary of what you need to know:
- Why Inspect? Prevent water pooling, erosion, and plant health issues by catching problems early.
- Tools Needed: Shovel, garden hose, gloves, rake, and broom.
- What to Check: Look for standing water, sediment buildup, erosion, and plant health. Ensure water drains within 48 hours.
- Seasonal Tips: Inspect after storms, clean debris in fall, and check for winter damage in spring.
- Common Problems: Water pooling? Remove sediment. Erosion? Add rocks. Dying plants? Replace with native species.
Routine inspections save you from costly repairs and keep your rain garden functioning properly. If you notice persistent issues, consider hiring professionals like Pro Landscapes MD for expert solutions tailored to your area.
Stormwater BMP: Bioretention (Rain Garden) – Visual Inspection
Required Tools and Safety Precautions
Having the right tools and following safety guidelines are key to conducting effective and safe rain garden inspections.
Inspection Tools
For a thorough inspection, you’ll need a mix of visual observation and hands-on tools. Here’s what to have on hand:
- A shovel is essential for checking sediment depth and clearing out any debris obstructing water flow. A standard garden shovel works perfectly for this task [1].
- Use a garden hose to simulate rainfall. This helps you observe water movement and pinpoint spots where drainage might be an issue [2].
- Work gloves or gardening gloves are a must to protect your hands from thorny plants, sharp stones, and other debris during the inspection [2].
- A rake is handy for clearing leaves, mulch, and other debris that might block drainage. Keeping the surface clear allows for better soil and water flow assessment [2].
- A broom is great for cleaning drop-in filters and pretreatment structures. Regular maintenance of these components ensures they function properly [1].
Outdoor Safety Tips
When inspecting your rain garden, always prioritize safety. Wear protective gear, such as gloves and sturdy footwear, to guard against potential hazards. Be mindful of weather conditions – wet surfaces can be slippery and may pose a risk.
Once you’ve gathered your tools and ensured your safety, you’re ready to dive into the inspection process.
Step-by-Step Rain Garden Drainage Inspection Checklist
With your tools in hand and safety measures in place, it’s time to methodically inspect your rain garden’s drainage system. This checklist will guide you in spotting potential issues before they escalate.
Visual Assessment of Drainage Performance
Begin by observing how water flows through your rain garden. A key sign of proper drainage is the absence of standing water. After a storm, the garden should drain fully within 48 hours. If water remains longer, it could indicate a drainage issue that needs attention.
"If the area holds water for more than 48 hours after rain it might turn into a swamp instead of a functional garden, killing plants and creating mosquito breeding grounds." – Adria Marshall, Green Living Expert, Ecoslay [4]
Check the garden’s surface for mud or sediment deposits. These can indicate poor infiltration, as water might be pooling and leaving debris behind. Research from Wrocław, Poland, found that a well-functioning rain garden managed 72% of 81 rainfall events through direct infiltration without prior retention [3].
Pay attention to ponding: water levels should not exceed 6 inches and should clear within 15 minutes [3]. Also, check for even moisture distribution throughout the garden, especially in the center. After heavy rain, the soil should appear uniformly moist, which confirms proper infiltration and prevents the development of overly wet or dry patches.
Once you’ve assessed these visual signs, move on to the garden’s structural elements.
Inspection of Structural Components
Evaluate the physical structures that support your rain garden. Start with the inlet structures – these are the entry points for stormwater. Clear any debris and test the inlets using a garden hose to ensure smooth water flow.
Next, examine the overflow outlets, which prevent flooding during heavy storms. These outlets must remain clear and at the correct height to allow excess water to exit effectively. Research shows that rain gardens designed to handle rainfall intensities up to 261.4 mm/h (about 10.3 in/h) can maintain their ponding depths without exceeding capacity [3].
If your rain garden has an underdrain system, inspect the access points for blockages and confirm that the outlets are functioning properly. Additionally, check the soil layer for signs of erosion, settling, or compaction, as these can hinder water movement. The soil should retain its structure and porosity to support effective infiltration.
Once the structural components are reviewed, focus on managing sediment and debris.
Sediment and Debris Management
To keep drainage flowing smoothly, clear away accumulated debris like leaves and grass clippings, especially around inlets. Use a rake to prevent blockages.
Sediment buildup is common as stormwater carries particles into the garden. Check sediment depth in various spots using a shovel. If more than 2 inches of sediment has accumulated, remove it to restore infiltration efficiency.
Pay special attention to pretreatment areas – these zones often collect the most sediment and may need more frequent cleaning. While some organic matter benefits soil health, too much decomposing material, like leaf litter, can clog soil pores and slow down drainage.
Vegetation Health and Maintenance
Healthy plants are essential for a rain garden’s performance. Thriving vegetation indicates proper drainage, while stressed plants may signal underlying problems.
Weed control is critical. Remove invasive species entirely, including their roots, to prevent regrowth. During the first two years after planting and during dry spells, water your garden regularly to help plants establish themselves [5][6].
Ensure the plant selection matches the garden’s design. If wetland plants appear in areas meant for upland species, it could indicate drainage issues. After rainfall, check for erosion around plants and replace any damaged vegetation to maintain soil stability. Watch how water moves through planted areas during heavy rain to spot any areas where plants might be contributing to erosion or disrupting overflow patterns [5].
Seasonal and Post-Storm Inspections
Timing your inspections to align with weather events and seasonal changes can help you catch problems early. Post-storm inspections should be done within 24–48 hours after heavy rainfall. This allows you to evaluate how well the garden managed the water while drainage patterns are still visible.
During spring inspections, look for winter damage, such as frost heave on structural components. Remove debris from winter storms and assess plant health to determine any growth needs.
In fall, clear away fallen leaves and prepare the drainage system for winter precipitation. This is also a good time to replace plants that didn’t thrive during the growing season.
Regular seasonal monitoring helps you track how your rain garden performs under different weather conditions. Take notes on drainage behavior during storms of varying intensities and across seasons to identify patterns that could signal emerging problems.
For times when rainfall is scarce, conduct targeted inspections using supplemental water to ensure the system is functioning as intended.
sbb-itb-843f8be
Common Issues and Solutions
Rain garden drainage problems tend to follow familiar patterns. Recognizing these issues early can help you resolve them before they affect your garden’s functionality. Below is a handy table summarizing common problems and their solutions.
One frequent issue is standing water. If water lingers in your rain garden for more than 4–6 hours after a storm, it often points to sediment buildup. The fix? Remove the sediment and apply a fresh layer of mulch.
Erosion at water entry points is another common problem. This happens when fast-moving water hits the soil with too much force, creating channels. To address this, place 3-inch cobble or small boulders where water enters the garden. These stones help slow the water and protect the soil from further damage[7].
Spillway erosion occurs when water exits the garden improperly, washing away soil. To fix this, ensure the spillway directs water correctly and reinforce it with rocks if needed[7].
For bioswale erosion, use 3-inch or larger gravel as mulch to protect the soil surface[7].
Plant stress and die-off often indicate poor drainage or inappropriate plant selection. Replace struggling plants with native wetland species like rose turtlehead, orange coneflower, blue flag iris, or yellow fox sedge. These plants have deep roots that stabilize the soil and improve water infiltration[7].
Structural damage to the garden’s bowl shape can reduce its ability to capture stormwater. To restore it, ensure the garden maintains a depth of 6–8 inches. Add soil or mulch as needed to rebuild the bowl structure[7].
Quick Reference Table for Common Issues
| Problem | Likely Cause | Solution |
|---|---|---|
| Water stands for 6+ hours | Sediment clogging soil layers | Remove sediment and add fresh mulch |
| Erosion at water inlets | High-velocity water impact | Install 3-inch cobble or small boulders |
| Spillway washing out | Improper water direction | Redirect spillway and reinforce with rock |
| Bioswale channels eroding | Unprotected soil surface | Mulch with 3-inch or larger gravel |
| Plants dying in wet areas | Poor plant selection | Replace with native wetland species |
| Shallow water retention | Loss of bowl structure | Restore 6–8 inch depth with soil or mulch |
| Mulch washing away | Insufficient mulch depth | Apply a fresh mulch layer as needed |
To keep your rain garden in top shape, focus on prevention rather than reactive fixes. During construction, include erosion protection at water entry points. Add fresh mulch every six months – ideally in spring and fall – to maintain proper drainage. Every 2–3 years, remove old mulch entirely and replace it with a new layer for optimal performance.
Regular inspections are essential. After rainstorms, check that water drains within 4–6 hours. If you notice new erosion, stabilize the affected areas with small stones. This proactive approach can help you avoid significant repairs down the road. Using the checklist above during routine inspections ensures your rain garden remains effective for years to come.
Professional Inspection and Maintenance Services
While basic inspections can often be handled on your own, situations involving structural damage, persistent water pooling, or significant erosion call for the expertise of professionals. Issues like water seeping into your foundation, eroded spillways, or a deformed garden bowl need prompt attention to prevent costly repairs down the line.
Why Choose Pro Landscapes MD?

Pro Landscapes MD specializes in creating custom drainage solutions for even the most complex rain garden challenges. Their services are designed to prevent water damage, flooding, and erosion, ensuring your property stays protected.
What sets them apart is their focus on tailored designs and environmentally friendly practices. By incorporating native plants and sustainable methods, they enhance the health and functionality of your rain garden, working in harmony with nature rather than against it.
Their specific expertise in "Dry Riverbeds & Rain Gardens" as stormwater management systems highlights their ability to address unique and specialized drainage needs.
When inspections uncover drainage problems, Pro Landscapes MD offers a range of targeted solutions, including:
- French Drains: Redirect excess water away from areas where it tends to pool.
- Berms & Swales: Use natural features to control water flow and minimize erosion, especially during heavy storms.
- Box & Pipe Drain Systems: Handle large volumes of stormwater, protecting both your rain garden and the surrounding landscape from overflow.
- Grate & Channel Drains: Efficiently collect and guide surface water, particularly in areas prone to erosion.
- Regrading, Leveling & Grading: Reshape the land to improve water flow, eliminate pooling, and restore the functionality of compromised garden structures.
- Sump Pump Installation: Manage water accumulation near basements or crawlspaces, safeguarding your home’s foundation while maintaining effective stormwater control.
These solutions showcase Pro Landscapes MD’s extensive knowledge and ability to address a wide range of drainage challenges.
Service Areas and Expertise
Pro Landscapes MD serves central Maryland counties, including Howard, Montgomery, Carroll, Frederick, Prince George’s, and Baltimore. They also extend their services to communities in the greater Baltimore/Washington area.
Whether your rain garden requires minor upkeep or a complete system overhaul, their deep understanding of Maryland’s climate and soil conditions ensures effective solutions that keep your garden functioning optimally year-round.
Conclusion
Keeping up with regular inspections is your best defense against water damage and drainage system failures. By sticking to this checklist, you can spot minor issues early – before they turn into costly repairs or full system replacements.
Frequent visual checks, especially after storms, help maintain proper drainage and ensure your system continues to handle stormwater efficiently over time.
If you notice ongoing problems like pooling water, erosion, or signs of damage, it’s time to call in the experts. Pro Landscapes MD specializes in Dry Riverbeds and Rain Gardens as part of their drainage solutions. Their expertise can tackle complex issues that might be unsafe or challenging for homeowners to manage alone.
For the best results, consider scheduling a drainage assessment with Pro Landscapes MD before spring storms or early summer. Their local knowledge and tailored solutions make a big difference.
Key Takeaways
Regular maintenance and timely professional assessments are the backbone of a healthy and functional rain garden.
- Consistency matters. A quick monthly walkthrough is more effective than irregular, intensive checks. Focus on essentials like monitoring water flow, plant health, and clearing debris.
- Keep records. Use photos and notes to document changes over time. These can be incredibly helpful when discussing concerns with professionals or planning seasonal upkeep.
- Don’t ignore warning signs. Standing water, erosion, or unhealthy plants often point to deeper drainage issues. Addressing these early can prevent bigger problems down the road.
FAQs
How often should I check my rain garden drainage system for proper functionality?
To ensure your rain garden’s drainage system runs smoothly, make it a habit to inspect it at least once a month, particularly after heavy rainfall. These regular checkups can help you catch and fix potential problems like clogs, sediment buildup, or pooling water before they escalate.
Keep an eye out for warning signs of poor drainage, such as standing water or slow absorption into the soil. By staying consistent with maintenance, you can keep your rain garden functioning efficiently and shield your landscape from potential water damage.
How can I tell if my rain garden needs professional maintenance or repairs?
If you spot too much sediment piling up, erosion along the edges, or notice that invasive plants or overgrowth are taking over, your rain garden might need some professional care. Signs of trouble can also include unhealthy plants – think wilting or dying vegetation. Keep an eye out for clogged or broken outlets and spillways, floating debris, or structural concerns like cracks in the inlet or outlet areas. Tackling these issues quickly can keep your rain garden working properly and avoid bigger problems down the road.
Why should I use native plants in my rain garden, and how do they benefit its performance?
Using native plants in your rain garden is a smart choice because they naturally thrive in the local environment. This means they’re tougher, easier to care for, and better suited to handle the climate. Plus, their deep roots do an excellent job of soaking up and filtering stormwater, which cuts down on runoff and keeps pollutants from reaching nearby waterways. The result? A rain garden that works more efficiently and helps improve water management.
Native plants also bring life to your garden by attracting local wildlife like birds, butterflies, and pollinators, turning your outdoor space into a lively ecosystem. And here’s a bonus: because these plants can tap into underground moisture, they don’t need to be watered as often. That saves you time and helps conserve water.
Chat with Us