


- bhavya gada
- No Comments
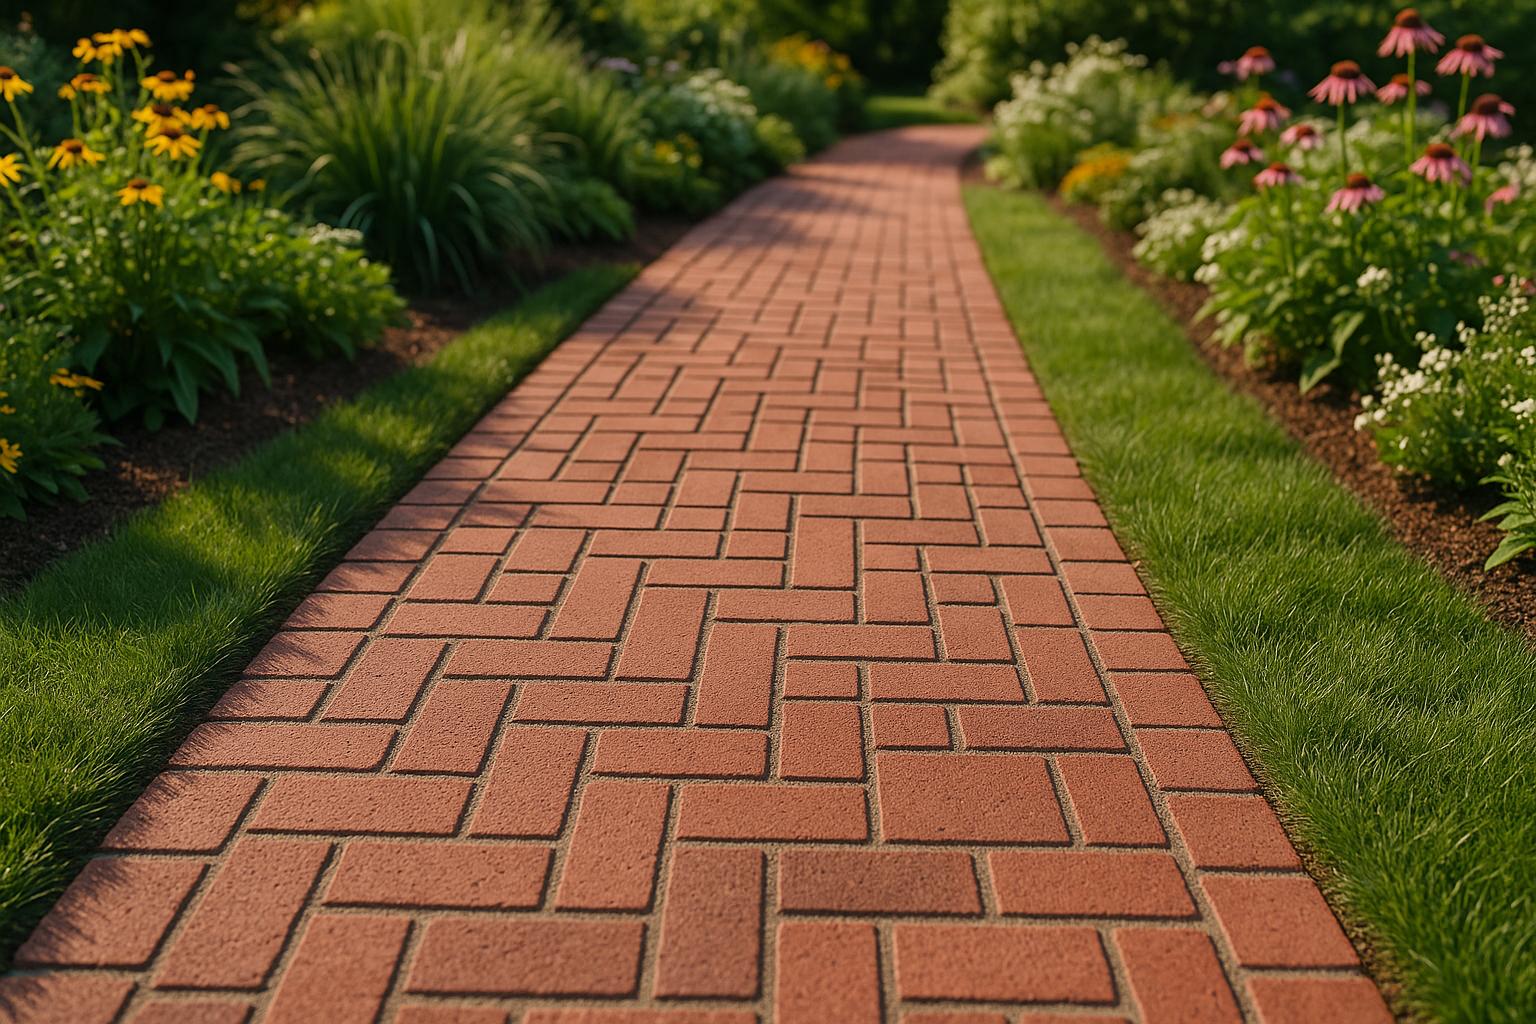
The running bond brick pattern is a popular choice for pathways and patios due to its clean look, durability, and ease of installation. This design, where each brick is offset by half its length, creates a flowing, staggered layout that works well with standard 4×8-inch bricks. It’s simple to install, requires minimal cutting, and is cost-effective, making it ideal for both professionals and DIYers.
Key Benefits:
- Durability: Staggered joints distribute weight evenly, reducing shifting and improving stability.
- Visual Appeal: Smooth, continuous lines elongate narrow paths and complement various architectural styles.
- Ease of Installation: Straightforward layout reduces labor and material waste.
- Versatility: Suitable for garden walkways, residential paths, and curved layouts.
Installation Steps:
- Prepare the Site: Excavate 6–8 inches, add a compacted gravel base, and level a 1-inch sand layer.
- Lay Bricks: Start with a full brick, offset each row by half a brick, and use a string line for alignment.
- Secure Edges: Install edge restraints to prevent movement.
- Fill Joints: Use polymeric sand to lock bricks in place and reduce weed growth.
For Maryland homeowners, professional services like Pro Landscapes MD ensure pathways are built to withstand the region’s freeze-thaw cycles and heavy rainfall. Proper maintenance, including sweeping, re-sanding joints, and addressing drainage issues, helps extend the pathway’s lifespan.
Running bond pathways are a practical and attractive solution for enhancing outdoor spaces, offering both functionality and timeless design.
brick path in running bond pattern #brickpaving #gardenpath #gardendesign #backyarddesign
Design Basics and Key Benefits
The running bond pattern is a popular choice for brick pathways because it combines a simple, clean appearance with practical installation advantages. Its design principles not only make it visually appealing but also ensure efficient installation and long-lasting performance.
Stability and Durability
What gives the running bond its strength is its staggered 1-over-2 design, where each brick’s joint is positioned at the center of the brick below[6]. This interlocking arrangement creates a stable structure that minimizes shifting over time, making it a reliable option for standard walkway use.
Material and Installation Efficiency
The repetitive nature of the running bond pattern makes it ideal for quick installation[4]. Its straightforward layout simplifies the process, reducing labor time and, in turn, lowering costs.
Comparison with Other Patterns
Although the running bond is known for its ease of installation and timeless appeal, it isn’t as strong under heavy loads as some other patterns[4]. For areas like high-traffic driveways, a herringbone pattern might be a better choice due to its superior load-bearing strength. However, for residential walkways or garden paths, the running bond strikes a great balance between practicality and aesthetic appeal.
Materials and Site Preparation
Laying a pathway that can endure Maryland’s freeze-thaw cycles starts with choosing the right materials and preparing the site properly. Let’s break down the best brick options and the essential preparation steps.
Choosing the Right Bricks
When it comes to outdoor pathways, pavers outperform standard bricks. They’re specifically designed to handle harsh weather, heavy foot traffic, and shifting ground. For a running bond pattern, 4" x 8" pavers are ideal because their uniform size creates the clean, consistent look this pattern is known for[2].
The standout feature of these pavers is their durability. While standard bricks may crack during Maryland’s winter freeze-thaw cycles, high-quality pavers resist frost damage and maintain a slip-resistant surface – even when wet[1]. Pro Landscapes MD uses premium materials like Techo-Bloc, Allen Block, and El Dorado Stone to ensure pathways are both long-lasting and visually appealing[7].
For durability, choose 2¼-inch thick pavers for medium traffic areas. If the pathway will handle heavier use, opt for 2⅝-inch thick pavers to ensure they hold up over time[8].
Preparing the Site
Once you’ve selected your materials, site preparation is the next step. Start by clearing out any plants, roots, and debris from the pathway area. Mark the pathway edges using stakes or spray paint for better accuracy.
Excavate the area to a depth of 6–8 inches, extending the width by an extra 4 inches on each side. This extra space allows for edge restraints, which prevent the pathway from spreading over time[1].
Next, install a gravel base. A 4–6-inch layer of compacted gravel is key to creating a stable foundation. Pro Landscapes MD stresses the importance of using power compactors – especially in Maryland’s clay-heavy soil. Proper compaction minimizes uneven settling and improves drainage, reducing the risk of frost heave in colder months[1].
After the gravel layer, spread a 1-inch layer of coarse sand. This layer helps with fine adjustments during brick placement. Avoid fine sand, as it doesn’t provide the stability needed. Use a screed board to level the sand evenly across the pathway.
Finally, install edge restraints along both sides of the pathway. Whether you use plastic or metal edging, this step is critical to keeping the pavers in place and preventing the pathway from shifting – a common cause of failure over time[1].
Calculating Material Needs
Accurate material estimates are essential for a smooth installation. Start by measuring the length and width of your pathway in feet to calculate the total square footage.
Each 4" x 8" paver covers about 0.22 square feet. Divide your pathway’s total area by 0.22 to determine the number of pavers needed, and add an extra 5–10% to account for cuts and breakage[1][3]. For curved pathways, you’ll need even more pavers due to additional cuts and adjustments.
You’ll also need to calculate the amount of gravel or crushed stone for the base. Multiply the pathway area by the base depth (typically 4–6 inches) to determine the volume needed. For the 1-inch bedding layer, coarse sand is required, and polymeric sand is recommended for filling the joints between pavers. This helps lock the pavers in place and reduces weed growth.
Pro Landscapes MD offers detailed material estimates as part of their design service, taking the guesswork out of ordering materials[1].
Tools You’ll Need
To tackle this project, gather the following tools:
- Shovel
- Wheelbarrow
- Hand tamper or plate compactor
- Level
- Rubber mallet
- Masonry saw for cutting
- Broom
- Garden hose
For larger pathways or areas with heavy clay soil, renting a power compactor is a smart choice to ensure the base is properly prepared[1].
Installation Steps for a Running Bond Brick Pathway
Now that you’ve got your materials ready and the site prepped, it’s time to start laying your running bond brick pathway. While this pattern is simple, careful attention to detail will ensure a pathway that’s both durable and visually appealing.
Step-by-Step Installation Process
Begin by dry-laying the first row of pavers along one edge of your pathway. This step allows you to double-check the spacing and make any necessary tweaks before setting the bricks permanently. To keep your edge straight, stretch a string line between stakes as a guide.
Start at one end with a full paver, setting it firmly on the leveled sand base. Use a rubber mallet to tap it into place, ensuring it aligns with your string guide. Place the next paver snugly against the first, leaving just a small gap for joint sand.
For the second row, start with a half paver to create the offset characteristic of the running bond pattern. This staggered arrangement – where each row is offset by half the length of a paver – not only looks neat but also helps distribute weight evenly. Continue this pattern row by row, keeping the offset consistent.
Check alignment regularly using a level to ensure the pathway remains straight and properly graded. If a paver sits too high or low, adjust the sand base beneath it and reset the paver. Staying on top of these small adjustments as you work will save you from bigger headaches later.
Work systematically from one end of the pathway to the other. This method ensures even spacing, alignment, and a clean, professional finish.
Tips for Straight and Curved Pathways
Here’s how to handle different pathway layouts:
- Straight Pathways: These are the easiest to manage. For longer pathways, set intermediate reference points to avoid any gradual drift from the straight line.
- Curved Pathways: Gentle curves require a bit more flexibility. Adjust the spacing slightly by widening the gaps on the curve’s outer edge and narrowing them on the inner edge. For example, during a Maryland garden project, installers used this method to maintain the pattern without excessive cutting. The result? A smooth, natural transition through the curve with minimal waste. For tighter curves, cutting pavers may be unavoidable. Plan carefully to minimize cuts, and remember that slight disruptions in the pattern can add charm to garden paths. If a curve proves too tricky, consider adjusting the pathway width or switching to a different layout for that section.
Required Tools and Equipment
Having the right tools on hand is key to a smooth installation process. Here’s what you’ll need:
- Excavation and Base Prep: A shovel for digging and adjustments, a wheelbarrow for moving materials, and a rake for fine-tuning the sand base.
- Compaction Tools: A plate compactor is ideal for larger pathways, while a hand tamper works well for smaller projects.
- Alignment Tools: Use a 4-foot level for checking pavers and sections, a string line with stakes for overall alignment, and a tape measure for consistent spacing.
- Setting and Cutting Tools: A rubber mallet is perfect for gently setting pavers, and a brick chisel and hammer are handy for small adjustments. For cleaner cuts, a masonry saw is recommended.
- Finishing Tools: A broom for sweeping joint sand into place and a garden hose to help settle the sand.
- Safety Gear: Don’t forget gloves to protect your hands, knee pads for comfort during extended kneeling, and a chalk line for marking reference points.
With these tools and steps, you’ll be well-equipped to create a running bond pathway that’s both functional and attractive.
sbb-itb-843f8be
Maintenance and Care for Longevity
A properly installed running bond pathway requires consistent care to preserve its stability and appearance. Addressing small issues early can save you from dealing with bigger, more expensive problems down the road. Regular upkeep ensures your pathway remains functional and visually appealing, even through Maryland’s unpredictable weather.
Routine Maintenance
A simple weekly sweep goes a long way in keeping your pathway clean. Removing leaves, dirt, and debris prevents organic buildup, which can lead to weed growth and stains on the bricks.
Re-filling sand joints is another key task. These joints maintain the interlock between bricks, so inspect and refill them annually or after heavy rain or freeze-thaw cycles. Using polymeric sand is a smart choice – it hardens when wet, helping to block weeds and discourage ants from nesting[8].
To keep your bricks stable and level, periodic compaction is important. For small areas, a hand tamper works just fine, but for larger pathways, you might need a plate compactor. This step is especially crucial in Maryland, where freeze-thaw cycles can cause shifting over time[1].
For deeper cleaning, use a garden hose or a pressure washer to tackle stubborn dirt. A mild detergent usually works well for stains, but avoid harsh chemicals that could harm the bricks. For organic stains like algae or moss, a mix of water and vinegar is a safe and effective option[1][5]. These simple preventive measures can reduce the need for more intensive repairs later on.
Fixing Common Issues
Weed growth between bricks is a frequent problem. The best prevention is starting with polymeric sand in your joints. If weeds do pop up, remove them quickly or apply a targeted herbicide to stop their roots from spreading and disturbing the bricks.
Settling or uneven bricks are another issue, especially after heavy rain or winter weather. To fix this, remove the affected bricks, adjust the base with more sand or gravel, compact it, and re-lay the bricks evenly[1][8]. Don’t ignore small dips – they can worsen over time and even become tripping hazards.
Water pooling is a sign of poor drainage and needs immediate attention. You can address this by re-grading the area to create a slight slope or adding drainage channels[8]. Sometimes, clearing debris from existing drainage systems is enough, but persistent pooling may require professional help. Adjusting these fixes to Maryland’s seasonal conditions can help extend your pathway’s lifespan.
Seasonal Care in Maryland
Maryland’s climate brings challenges that require seasonal maintenance. In winter, use a plastic shovel for snow removal to avoid scratching the bricks, and skip salt-based deicers. Opt instead for sand or deicers that are safe for brick surfaces[1].
In spring, check for damage caused by freeze-thaw cycles, such as shifted or cracked bricks and eroded joints. Address these issues right away, and consider refreshing the joint sand and giving the pathway a good cleaning.
During summer and fall, focus on managing heavy rains and prepping for winter. Keep drainage systems clear of leaves and debris to ensure water flows away from the pathway during storms. In fall, removing leaves regularly helps prevent organic matter from decomposing in the joints, which can lead to weed growth.
Regular inspections after storms and seasonal changes can help you catch and fix issues early, saving you time and money in the long run[1].
Pro Landscapes MD offers maintenance services tailored to Maryland’s unique conditions. From pathway restoration to drainage solutions and seasonal care, they provide expert help to keep your pathway in top shape year-round.
Why Choose Pro Landscapes MD for Your Brick Pathway?

When it comes to creating stunning and durable brick pathways in central Maryland, Pro Landscapes MD stands out as a trusted name. Their expertise in hardscaping, combined with a deep understanding of the region’s unique challenges, makes them the go-to choice for homeowners looking to enhance their outdoor spaces.
Local Expertise in Maryland
Pro Landscapes MD knows Maryland like the back of their hand. They’ve mastered the art of designing and installing pathways that can handle the state’s freeze-thaw cycles, heavy rainfall, and diverse soil conditions – all factors that can wreak havoc on poorly constructed pathways.
Their portfolio includes successful projects in communities such as Columbia, Bethesda, and Ellicott City, where they’ve tailored their techniques to meet the specific needs of each site. From proper base preparation to drainage management and climate-appropriate material selection, their methods ensure pathways that stay stable despite Maryland’s ever-changing seasons[1].
Beyond just technical expertise, their formal training in landscape design and horticulture gives them an edge in tackling Maryland’s environmental challenges. They also have a keen sense of local architectural styles and landscaping trends, making them adept at creating pathways that not only last but also blend seamlessly with the surrounding aesthetics. Whether it’s in Howard County, Montgomery County, or Baltimore County, they know how to design pathways that complement the area’s character while adhering to HOA guidelines and local regulations.
Complete Hardscaping Services
Pro Landscapes MD doesn’t just stop at pathways – they offer a full suite of hardscaping services to create cohesive and functional outdoor spaces. Whether it’s patios, driveways, retaining walls, or drainage systems, they ensure every project is built to last.
For brick pathways, they use high-quality materials specifically rated for the Mid-Atlantic climate. Their meticulous installation process minimizes maintenance needs, saving homeowners time and money in the long run. Plus, their expertise in drainage solutions is a game-changer. From installing French drains to managing grading and stormwater systems, they tackle water-related issues head-on, preventing problems like pooling and erosion before they arise.
Their craftsmanship shines in projects like a classic running bond pathway in Silver Spring, where they used 4" x 8" bricks with a bordered design for added flair. The result? A pathway that not only handled heavy foot traffic but also seamlessly integrated with the client’s existing landscaping. Another standout project in Annapolis featured a curved running bond pathway, showcasing their ability to adapt intricate patterns to complex layouts without compromising durability.
Customer Satisfaction and Quality Assurance
Pro Landscapes MD takes pride in their commitment to quality and customer satisfaction. They’ve built a reputation for delivering exceptional results through meticulous planning, clear communication, and skilled craftsmanship.
Their process includes detailed planning, transparent estimates, and strict quality controls. They work exclusively with vetted materials and a team of highly trained installers, ensuring every project meets their exacting standards. After installation, they provide follow-up support and maintenance advice, standing behind their work with warranties that give homeowners peace of mind.
To further guarantee quality, they conduct regular inspections during and after installation, ensuring every detail is perfect. Their expertise in base preparation, material selection, and installation techniques ensures pathways that are as stable as they are beautiful.
Pro Landscapes MD also embraces eco-friendly practices, offering options like environmental pavers and permeable bases that allow water infiltration, reducing runoff and promoting sustainability. These practices not only benefit the environment but also reduce maintenance needs, providing long-term value for homeowners.
With years of experience serving the Baltimore and Washington, DC area, Pro Landscapes MD combines technical know-how, local insight, and a customer-first approach to deliver top-tier results. Whether you’re envisioning a classic running bond pathway or a custom design, their dedication to quality and attention to detail ensures your outdoor space will be both functional and visually stunning. From start to finish, they bring your vision to life with precision and care.
Transform Your Outdoor Space with Running Bond Pathways
Running bond brick pathways bring a classic charm paired with practical durability, making them a favorite for homeowners in Maryland. By following the design and installation principles mentioned earlier, this timeless pattern not only enhances the aesthetics of your property but also adds lasting value.
Key Takeaways
Running bond pathways offer a seamless, flowing look that naturally draws the eye along the walkway, giving narrow paths a longer and more structured appearance [2]. The staggered joint design not only looks great but also helps distribute weight evenly and resists shifting – perfect for Maryland’s freeze-thaw cycles [2].
Using 4"×8" bricks, this pattern creates a steady rhythm and allows for efficient installation [2]. Unlike intricate designs like herringbone or basketweave, running bond minimizes material waste and requires less cutting, making it an economical and straightforward choice [3]. It works well for both straight paths and gentle curves, though slight spacing adjustments may be needed to keep curves visually consistent [1].
In Maryland’s climate, running bond pathways are a robust option when installed properly. The pattern’s structural strength helps it endure moisture and temperature changes, while the minimum 2-5/8 inch brick thickness ensures proper interlocking and load distribution [8].
This versatile design complements a wide range of home styles, from traditional colonial homes to sleek modern residences found throughout central Maryland. Whether you’re upgrading a garden path or a residential walkway in areas like Columbia, Bethesda, or Annapolis, running bond pathways enhance curb appeal and boost property value, setting the stage for a stunning outdoor transformation.
Contact Pro Landscapes MD
Thinking about upgrading your outdoor spaces? Pro Landscapes MD specializes in crafting durable and visually striking hardscaping solutions designed to handle Maryland’s unique climate challenges.
With deep local expertise in Maryland’s soil and weather conditions, Pro Landscapes MD offers comprehensive hardscaping services. From site preparation to precise installation, their team uses proven techniques tailored to the region. With professionals trained in landscape design and horticulture, you can trust that your running bond pathway will be as sturdy as it is beautiful.
Get in touch with Pro Landscapes MD today to schedule a consultation and receive a personalized proposal for your brick pathway project. Let Maryland’s trusted hardscaping experts help you transform your outdoor space into something extraordinary.
FAQs
What makes the running bond brick pattern a great choice for pathways?
The running bond brick pattern is a classic favorite for pathways, celebrated for its timeless charm, durability, and straightforward installation. This design involves arranging bricks in rows, with each brick offset by half its length from the row above, resulting in a seamless and visually appealing layout.
Beyond its good looks, this pattern is practical too. The staggered arrangement evenly distributes weight, which enhances durability and reduces the risk of cracking or shifting over time. Plus, compared to more complex designs, the running bond often requires fewer cuts, making it an efficient and budget-friendly choice for walkways.
If you’re considering a running bond pathway or other hardscaping projects, professionals like Pro Landscapes MD can help bring your vision to life with expertly crafted, long-lasting outdoor spaces.
How can I maintain my running bond brick pathway to handle Maryland’s weather throughout the year?
To keep your running bond brick pathway looking great and ready to handle Maryland’s unpredictable weather, regular upkeep is essential. Start by giving the surface a good cleaning every so often to clear away dirt, debris, and moss that tend to collect. A gentle power wash or a stiff-bristle broom works well for this while keeping the bricks intact.
It’s also important to check for loose or uneven bricks, especially after harsh winters or heavy rain, which can cause the bricks to shift. If you spot any issues, relevel or replace the affected bricks to keep the pathway smooth and safe. For added protection, applying a weather-resistant sealant can shield the bricks from moisture and temperature swings, helping to prevent cracks and erosion over time.
If you’d rather leave it to the pros, consider contacting experts like Pro Landscapes MD. They specialize in hardscaping and can help ensure your pathway stays sturdy and attractive throughout the seasons.
What materials and tools are best for building a running bond brick pathway in Maryland’s climate?
To create a sturdy running bond brick pathway that can handle Maryland’s unpredictable weather, you’ll need the right mix of materials and tools. Start with clay or concrete bricks specifically made for outdoor use – these should be rated to handle freeze-thaw cycles, which are crucial for preventing cracks during cold winters. You’ll also need gravel and sand for the base and polymeric sand to secure the joints.
As for tools, gather a shovel, wheelbarrow, level, rubber mallet, measuring tape, and a plate compactor to ensure the base is solid and even. If your design includes curves or edges, a brick cutter or saw will help you make clean, precise cuts. With careful preparation and top-notch materials, your pathway will not only look great but also stand the test of time.
Chat with Us