


- bhavya gada
- No Comments
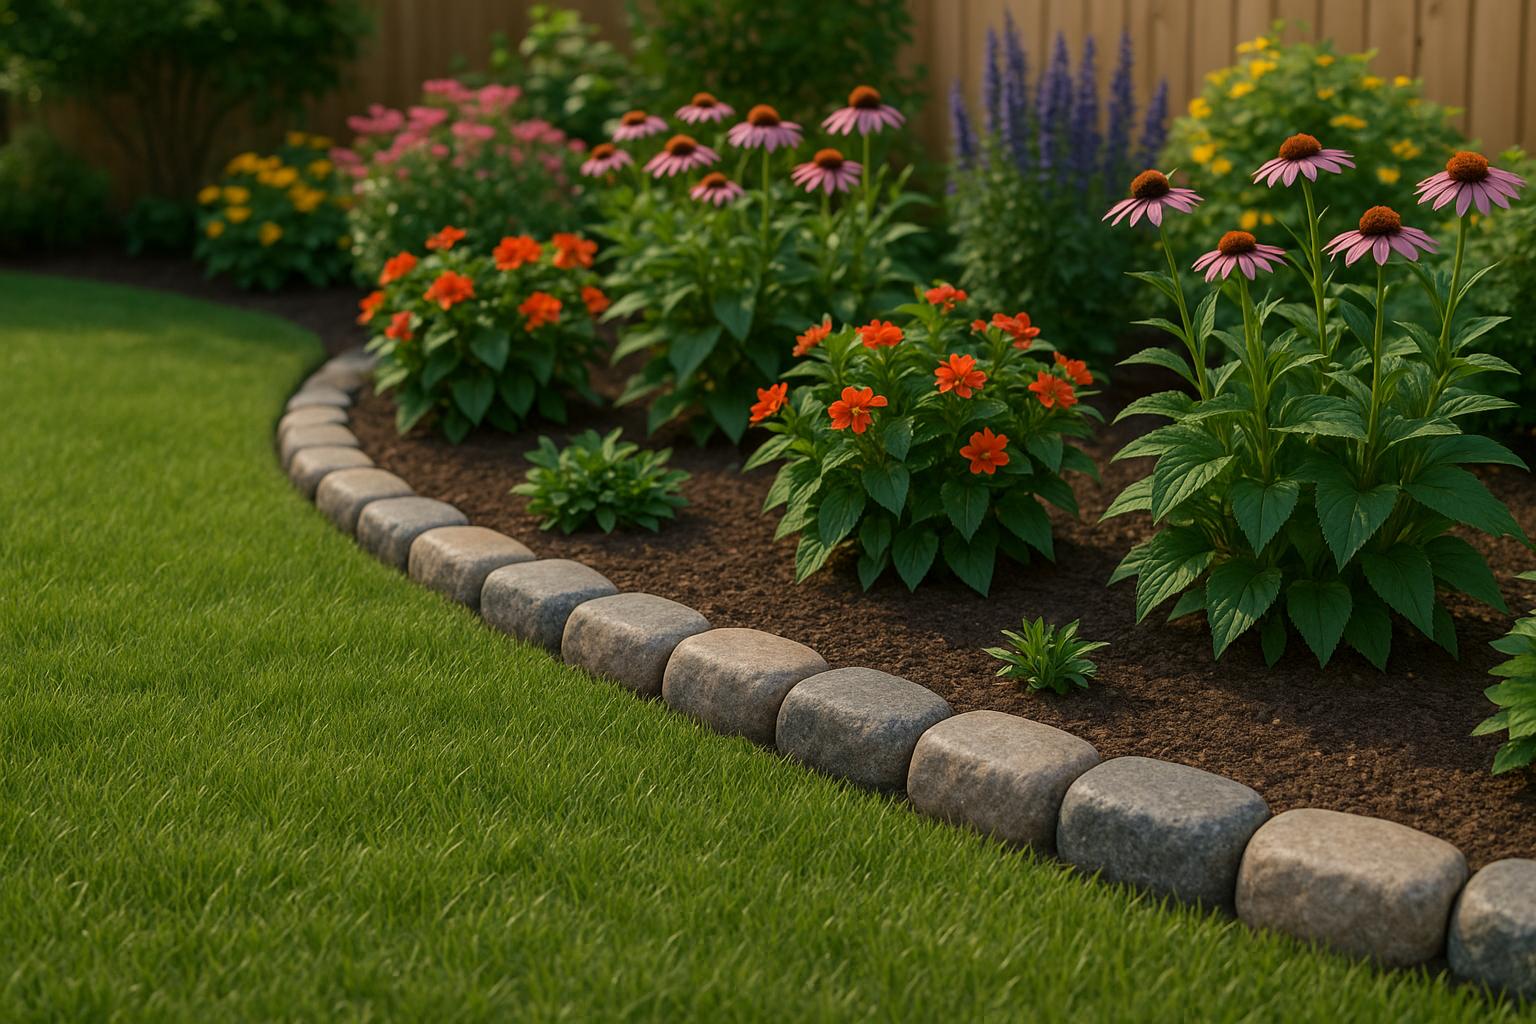
Stone edging is a practical and visually appealing way to define garden beds, walkways, and driveways. It prevents soil erosion, keeps grass and weeds at bay, and adds structure to outdoor spaces. This guide explains how to choose materials, prepare your site, and install stone edging with professional results – whether you do it yourself or hire experts like Pro Landscapes MD.
Key Points:
- Material Options: Granite, Bluestone, Flagstone, and Limestone are popular choices, with costs ranging from $6–$20 per linear foot depending on durability and style.
- Tools You’ll Need: Shovel, rubber mallet, level, measuring tape, wheelbarrow, landscape fabric, gravel, and sand.
- Installation Process: Includes trench digging, base preparation, stone placement, and securing with backfill or mortar.
- Maintenance Tips: Inspect annually, control weeds, replenish joint materials, and reseal stones every few years for longevity.
Proper planning and site preparation are essential to ensure your edging lasts for years. For complex projects or professional-grade results, consider hiring a contractor like Pro Landscapes MD, who specializes in custom stone edging and landscaping services in Maryland.
Choosing Stone and Tools
Stone Types and Features
Picking the right stone is key to ensuring your edging project looks great and lasts for years. Granite is a standout choice for its durability and resistance to weathering. It’s perfect for long-term installations and handles Maryland’s freeze-thaw cycles like a pro. While it costs between $10–$20 per linear foot, its low maintenance makes it worth the investment.
If you’re after a classic look, Bluestone delivers with its smooth, blue-gray finish. It’s moderately durable and works well in both traditional and modern landscapes. Expect to pay $12–$18 per linear foot for this elegant option.
For a more natural, rustic vibe, Flagstone is a versatile pick. Available in various colors and shapes, it’s ideal for curved or cottage-style borders. Priced at $8–$15 per linear foot, it’s a great middle-ground option but may need more upkeep in high-traffic areas.
If budget is a priority, Limestone is the most affordable at $6–$12 per linear foot. Its soft, natural look and easy-to-shape quality make it appealing for many projects. However, it’s less durable in freeze-thaw climates and may show wear over time.
| Stone Type | Durability | Appearance | Cost (per linear foot) | Maintenance Needs |
|---|---|---|---|---|
| Granite | High | Polished, modern | $10–$20 | Low |
| Bluestone | Moderate | Classic, elegant | $12–$18 | Moderate |
| Flagstone | Moderate | Varied, rustic | $8–$15 | Moderate |
| Limestone | Low-Med | Soft, natural | $6–$12 | Higher |
When choosing your stone, think about thickness, color, texture, and shape. Thicker stones offer more stability, while the color and texture should match your landscape design. For clean, straight edges, go with cut stones. For a natural look, irregular stones are the way to go.
Once you’ve chosen your stone, it’s time to gather the right tools and materials.
Required Tools and Supplies
To ensure a professional finish, having the right tools is essential. You’ll need a shovel for digging trenches, a rubber mallet to set stones without damaging them, a level for even placement, and a measuring tape for layout accuracy. Moving heavy stones like granite? A wheelbarrow will save your back.
For supplies, start with landscape fabric to block weeds, gravel for drainage and stability, and sharp sand for leveling. Use stakes and string to mark your layout before digging.
For added stability in high-traffic areas, consider a plate compactor or a tamper for smaller projects. Compacting the base material ensures your edging holds up over time. A solid base includes 2–4 inches of gravel for drainage and stability, topped with 1–2 inches of sharp sand for leveling. Gravel prevents water buildup and frost heave, while sand allows for precise adjustments during installation. These materials generally cost $30–$50 per cubic yard.
If your project involves curves or slopes, use stakes or rebar for extra reinforcement to keep the stones in place. High-quality weed membrane is also a must – overlap the edges to create an effective barrier against weeds.
Calculating Material Needs
Accurate measurements are crucial to avoid running out of materials or wasting money. Start by measuring the total length of your border with a measuring tape. For curved sections, trace the path with string and measure the string length.
Decide on the height and width of your edging. Most residential projects use stones that are 4–6 inches tall and 6–8 inches wide. To calculate the number of stones, divide the total length by the average length of each stone. For example, a 100-foot border using 2-foot stones will require 50 stones.
If using irregular stones, add 10–15% extra to account for gaps and breakage. This ensures you won’t run out mid-project.
For stacked stone edging, calculate the number of layers based on your desired height. For instance, a 12-inch high border using 4-inch stones will need three layers, tripling your stone count.
When it comes to base materials, calculate the trench volume. A trench that’s 100 feet long, 8 inches wide, and 6 inches deep will need about 2.5 cubic yards of base material. Online gravel calculators can help you estimate accurately, so you order just the right amount of gravel and sand.
Always round up your calculations to the nearest whole unit. It’s better to have a little extra material than to stop mid-project to get more. Professionals often order 5–10% more material as a standard practice to avoid delays.
How To Make a STONE LANDSCAPE BED BORDER | Step-by-Step Process
Site Preparation
Proper site preparation is essential to prevent uneven stones, weed growth, and long-term maintenance headaches. Investing time in this step ensures your edging looks polished and stands the test of time.
Planning and Layout Design
Start by visualizing the path of your border before breaking ground. Consider your soil type – sandy soils drain well but may not hold stones securely, while clay soils are more stable but prone to retaining water. Loamy soils are often ideal for stone edging, but with the right preparation, most soil types can work.
Use stakes and string for straight lines or a garden hose for curves to mark your desired path. Check the layout from different angles to ensure it blends seamlessly with your landscape. Avoid sharp angles that make mowing difficult; gentle curves often create a more natural flow.
Drainage is a crucial factor in your design. Plan for a slight slope away from garden beds or structures to channel water runoff and prevent pooling. In areas like Maryland, where freeze-thaw cycles are common, good drainage helps keep stones in place and prevents gaps from forming. For sloped or uneven terrain, dig your trench to a consistent depth relative to the finished grade, using extra base material to level the surface as needed.
Digging and Base Preparation
Once your layout is marked, it’s time to dig the trench and set the base. Begin by clearing the area – remove any existing edging, grass, weeds, rocks, and debris to create a clean workspace.
Dig a trench 4–6 inches wide and deep enough so that about half of each stone will sit below ground once the base is added. For 6-inch stones, aim for a trench depth of 3–4 inches before laying the base materials.
If you hit hard clay or rocky layers, adjust the trench depth or add extra drainage materials. Remove any large rocks or roots that could disrupt the stability of the stones.
A solid base is key to long-lasting edging. Add a 2–3 inch layer of compacted gravel or crushed stone to the bottom of the trench to promote drainage and prevent water buildup. Then, add a 1-inch layer of sharp sand to help with leveling. Compact each layer thoroughly with a tamper or plate compactor. The base should feel firm underfoot but still allow for small adjustments when placing the stones.
In areas with heavy foot traffic or unstable ground, consider adding a thin layer of dry mortar mix beneath the sand for extra support.
Weed Prevention and Drainage
With the trench prepared and the base in place, focus on weed control and optimizing drainage. Line the trench with landscape fabric, overlapping the edges by 2–3 inches, and secure it with staples. This barrier prevents weeds from growing while allowing water to drain. It also keeps the base materials from mixing with the surrounding soil, maintaining the integrity of the foundation.
For areas with persistent weeds or drainage challenges, professionals like Pro Landscapes MD recommend deeper base preparation and premium weed barriers to ensure durability.
Grade the base to guide water away from the edging, then add a final 1-inch layer of sharp sand for leveling. Avoid using fine or play sand, as it lacks the stability of sharp, angular sand particles. Test the base by walking on it lightly – it should feel solid with no significant movement. If you notice soft spots, add more material and compact it again. A well-prepared base will keep your stone edging secure and low-maintenance for years to come.
Installing Stone Edging
Starting your stone edging project with a properly prepared base and the right tools is key. Taking your time and working with care will ensure a polished, professional-looking result.
Placing and Aligning Stones
Begin at one end of the trench and work your way along systematically. Each stone should sit with about half of its height below ground level, leaving the rest visible. This setup not only stabilizes the stones but also gives the edging a neat, finished look.
Use a spirit level to check the alignment of each stone, both horizontally and vertically. Place the level across multiple stones to confirm they form a straight, even line. For curved sections, step back often to make sure the curve flows naturally and the height stays consistent.
If you’re using stones of similar size, spacing will be easier to manage. For irregular natural stones, lay them out ahead of time to find the best arrangement. Adjust their position gently with a rubber mallet – avoid using a regular hammer, as it could chip the stones.
When working on corners or tight curves, you may need to cut stones for a snug fit. Mark the cutting line with chalk, and use a masonry saw or chisel to create clean edges. Stagger the joints between stones to create a more natural appearance and a stronger overall structure.
Once the stones are aligned, secure them in place to ensure they remain stable.
Securing the Stones
Backfill the trench with either the soil you removed earlier or additional gravel, compacting it firmly with a tamper. For areas with light foot traffic, compacted soil backfill works well. In high-traffic or sloped areas, you’ll need extra reinforcement.
In places like Maryland, where freeze-thaw cycles can shift stones, consider using steel spikes or stakes for added stability. These can be driven through the base into the subsoil and hidden behind the stones for a seamless look.
Make sure to compact the backfill thoroughly and add more material as needed to eliminate air pockets. The stones should feel solid underfoot, with no movement when pressed.
After securing everything, take the time to perform a final check and make any necessary adjustments to achieve a polished, sturdy finish.
Final Adjustments and Finishing
Inspect the entire border to identify any uneven stones. Use your level to double-check these areas, and adjust as needed by tapping the stones with a rubber mallet or adding extra base material underneath.
Aim for the stones to sit about ½ to 1 inch above the surrounding ground level. This height creates a clear border without interfering with mowing or foot traffic. Stones set too high may shift over time, while those placed too low risk being covered by mulch or soil.
Fill any remaining gaps with materials like sand, gravel, or soil, depending on the look you want. For a natural appearance, match the soil to your garden beds. For a more formal finish, use sand or mortar to create clean, defined joints.
Lightly water the area to help settle the backfill and reveal any low spots. With these final touches, your stone border will look level, secure, and professionally installed, enhancing your landscape for years to come.
sbb-itb-843f8be
Advanced Methods and Maintenance
Once your stone edging is installed, keeping it in great shape requires a bit of know-how. With proper care and attention, you can maintain its durability and visual appeal for years to come. Here’s how to take your maintenance game to the next level.
Using Mortar and Adhesives
For areas that see a lot of foot traffic or where you want a permanent, sturdy setup, mortar is your go-to. Follow the mixing instructions carefully, then spread a layer between the stones. Press them firmly into place, and give the mortar 24–48 hours to fully cure before disturbing the area.
If you’re working on curved sections or intricate designs, masonry adhesives might be a better fit. They’re easier to use, don’t require mixing, and allow for some flexibility. Apply a continuous bead of adhesive along the contact surfaces, press the stones together, and let it bond for 1–2 hours. It’ll fully cure in about 24 hours. Just make sure the stones are clean and dry before you start.
Sealing and Protecting Stone Edging
To protect natural stone edging from moisture, freeze-thaw damage, and stains, penetrating sealers are a solid choice. They won’t change the stone’s natural look but will add a layer of protection. Use a brush or sprayer to apply thin, even coats, working in small sections to ensure full coverage. Be sure the stone is completely clean and dry – wait at least 24 hours after rain or cleaning before sealing.
For concrete or manufactured stone, acrylic or polyurethane sealers can add durability and subtly enhance the color. These sealers create a protective layer on the surface but may need more frequent reapplication, especially in high-use areas. Typically, reapply every 2–3 years or as directed by the product’s manufacturer. These sealing steps, combined with regular care, will keep your edging looking fresh and performing well.
Regular Maintenance Tips
A little routine maintenance goes a long way in keeping your stone edging in top-notch condition. Here are a few practical tips:
- Inspect Annually: Check for any shifting or settling, especially after heavy rain or freeze-thaw cycles. If you spot movement, lift the affected stones and adjust the base material (sand or gravel) to restore proper leveling.
- Replenish Joint Materials: Over time, sand, mortar, or adhesive in the joints can wear down. Replace any loose material and compact it firmly to prevent water from seeping behind the stones, which can lead to further movement.
- Weed Control: Weeds growing between stones can push them out of alignment. Remove weeds promptly and consider applying a pre-emergent herbicide in early spring to prevent new growth. For stubborn weed problems, you might need to lift stones and add more weed barrier fabric.
- Improve Drainage: If you notice water pooling or soil erosion around your edging, add gravel or sand beneath the affected stones to improve drainage. For ongoing issues, a French drain may be a worthwhile solution.
- Replace Damaged Stones: If a stone gets damaged, replace it with a matching piece. Clean and level the base, secure the new stone with fresh mortar or adhesive, and allow it to cure fully before exposing it to moisture or foot traffic.
For long-term care, consider scheduling professional maintenance. Experts can catch small problems early, saving you from bigger headaches down the road. With these strategies, your stone edging will stay functional and beautiful for years to come.
Why Choose Pro Landscapes MD

When it comes to stone edging installation, picking the right contractor is key to creating a durable and visually appealing feature that elevates your property. Pro Landscapes MD combines deep expertise, advanced tools, and a strong understanding of local conditions to ensure your project is executed perfectly the first time. Their services go beyond just stone edging, blending seamlessly with larger landscaping projects to enhance your outdoor space.
Expertise in Custom Stone Edging
Pro Landscapes MD is your go-to expert for custom stone edging design and installation across central Maryland, covering areas like Howard, Montgomery, Carroll, Frederick, Prince George’s, and Baltimore counties, as well as Washington, DC. Their team, which includes skilled horticulturists, excels in combining technical precision with artistic design.
They specialize in harmonizing stone edging with existing landscape elements, tailoring every project to Maryland’s unique environment. Using high-quality, locally preferred materials, their hardscaping experts ensure your stone edging remains both beautiful and durable. Whether you need a simple border for a garden bed or a more intricate design that follows the natural flow of your landscape, they customize their approach to meet your specific needs.
Comprehensive Landscaping and Hardscaping Services
One of the standout benefits of working with Pro Landscapes MD is their full range of services. Beyond stone edging, they offer design and installation for flagstone and paver patios, walkways, driveways, retaining walls, garden walls, seat walls, stone veneer, natural stone steps, and fire pits. They even create outdoor kitchens and complete outdoor living spaces.
This all-encompassing approach means your stone edging can seamlessly fit into a larger landscaping vision. For instance, if you later decide to add a patio to complement your stone edging or need drainage solutions, Pro Landscapes MD has you covered. Their expertise extends to eco-friendly practices and environmental pavers, ensuring your outdoor space is not only stylish but also environmentally conscious.
A Reputation Built on Customer Satisfaction
Pro Landscapes MD consistently earns praise for their reliability and high-quality craftsmanship. Clients often highlight the company’s ability to deliver exactly what’s promised, creating outdoor spaces that reflect both beauty and functionality. Their strong reputation throughout the Baltimore-Washington area speaks to their dedication to excellence.
From start to finish, every detail is carefully managed to ensure your stone edging is polished and built to last. For homeowners and property managers in Maryland, Pro Landscapes MD offers the local knowledge, wide-ranging services, and proven track record to transform your property and add lasting value.
Conclusion
Installing stone edging is a considerable investment that requires meticulous planning and execution to achieve long-lasting results. The success of your project depends on three key factors: choosing the right materials, using proper installation techniques, and committing to regular upkeep.
Key Takeaways
The type of stone you select should align with your region’s climate and how you plan to use it. Companies like Pro Landscapes MD rely on high-quality materials such as Techo-Bloc, Allen Block, and El Dorado Stone to ensure both durability and aesthetic appeal.
Site preparation is critical for stability and longevity. This includes digging trenches to the correct depth, using a compacted gravel and sand base, and adding a weed barrier. At least half of each stone should be buried to prevent shifting, while proper drainage safeguards against weather-related damage.
Precise installation makes all the difference. Aligning and leveling each stone, securing them with mortar or stakes, and maintaining consistent spacing will give your project a clean, professional look.
Routine maintenance preserves the investment. Annual inspections, removing weeds promptly, and resealing when necessary can prevent minor issues from escalating into costly repairs. These steps are essential, especially for larger or more intricate designs, to ensure the edging remains functional and visually appealing over time.
Why Consult a Professional?
When accuracy and durability are non-negotiable, working with experts like Pro Landscapes MD can make all the difference. Their in-depth knowledge of local soil conditions, climate considerations, and the best materials ensures your project is built to last.
Pro Landscapes MD has extensive experience in stone edging projects across central Maryland and Washington, DC. They combine technical expertise with creative design to deliver edging that not only enhances your landscape but also stands the test of time.
Partnering with professionals helps you avoid costly mistakes and ensures the right materials and methods are used from the start. For tailored advice and a comprehensive proposal that covers every detail of your stone edging project, reach out to Pro Landscapes MD today.
FAQs
What should I consider when selecting the best stone for my garden edging project?
Choosing the right stone for your garden edging comes down to a few key considerations. Start by thinking about the style and vibe you want for your outdoor space. If you’re aiming for a rustic charm, natural stones like flagstone or slate are great options. On the other hand, if you prefer a sleek, modern look, polished or precisely cut stones might be a better fit.
Next, assess the durability and how well the stone matches your local climate. If you live in an area with freezing winters, some stones may be prone to cracking. Similarly, prolonged sun exposure can cause certain stones to fade over time, so it’s worth choosing a material that can handle your region’s weather.
You’ll also want to think about the purpose of the edging. Is it meant to hold in soil, define pathways, or simply add a decorative touch? Knowing its role will guide you toward the right type of stone. Lastly, make sure the stone works for your budget and is available in the sizes and shapes needed for your project. By keeping these factors in mind, you can craft a garden edge that’s both practical and visually appealing.
What’s the best way to ensure proper drainage and prevent weeds when installing stone edging?
To set up stone edging that lasts and keeps weeds at bay, start by prepping the ground carefully. Dig a shallow trench where the stones will sit, ensuring the base is both level and firmly compacted. Laying down landscape fabric under the stones is a smart move – it stops weeds from sprouting while still letting water pass through.
For better drainage, add a layer of gravel or sand beneath the stones. This directs water away from the edging and prevents puddles from forming. Once the stones are in place, secure them firmly and fill any gaps with sand or soil. This not only gives the edging a neat, finished look but also helps it stand up to both weeds and water over time.
How can I maintain my stone edging to keep it looking new and prevent damage?
To keep your stone edging in top shape and avoid long-term damage, consistent upkeep is essential. Start by cleaning the stones regularly with water and a mild detergent to get rid of dirt, moss, or algae buildup. For those stubborn stains, a soft-bristle brush can come in handy to gently scrub the surface without causing damage.
Take time to inspect the edging for any shifting, cracks, or loose stones. If you spot any problems, fix them right away by repositioning or repairing the affected sections. This will help maintain both the stability and the overall look of your edging. It’s also a good idea to check for proper drainage around the area to avoid water pooling, which can weaken the structure over time.
Lastly, consider applying a stone sealant. This added layer of protection can shield the edging from weather exposure, stains, and fading – especially useful in areas with extreme weather conditions. By following these straightforward steps, your stone edging can stay strong and attractive for years to come.
Chat with Us