









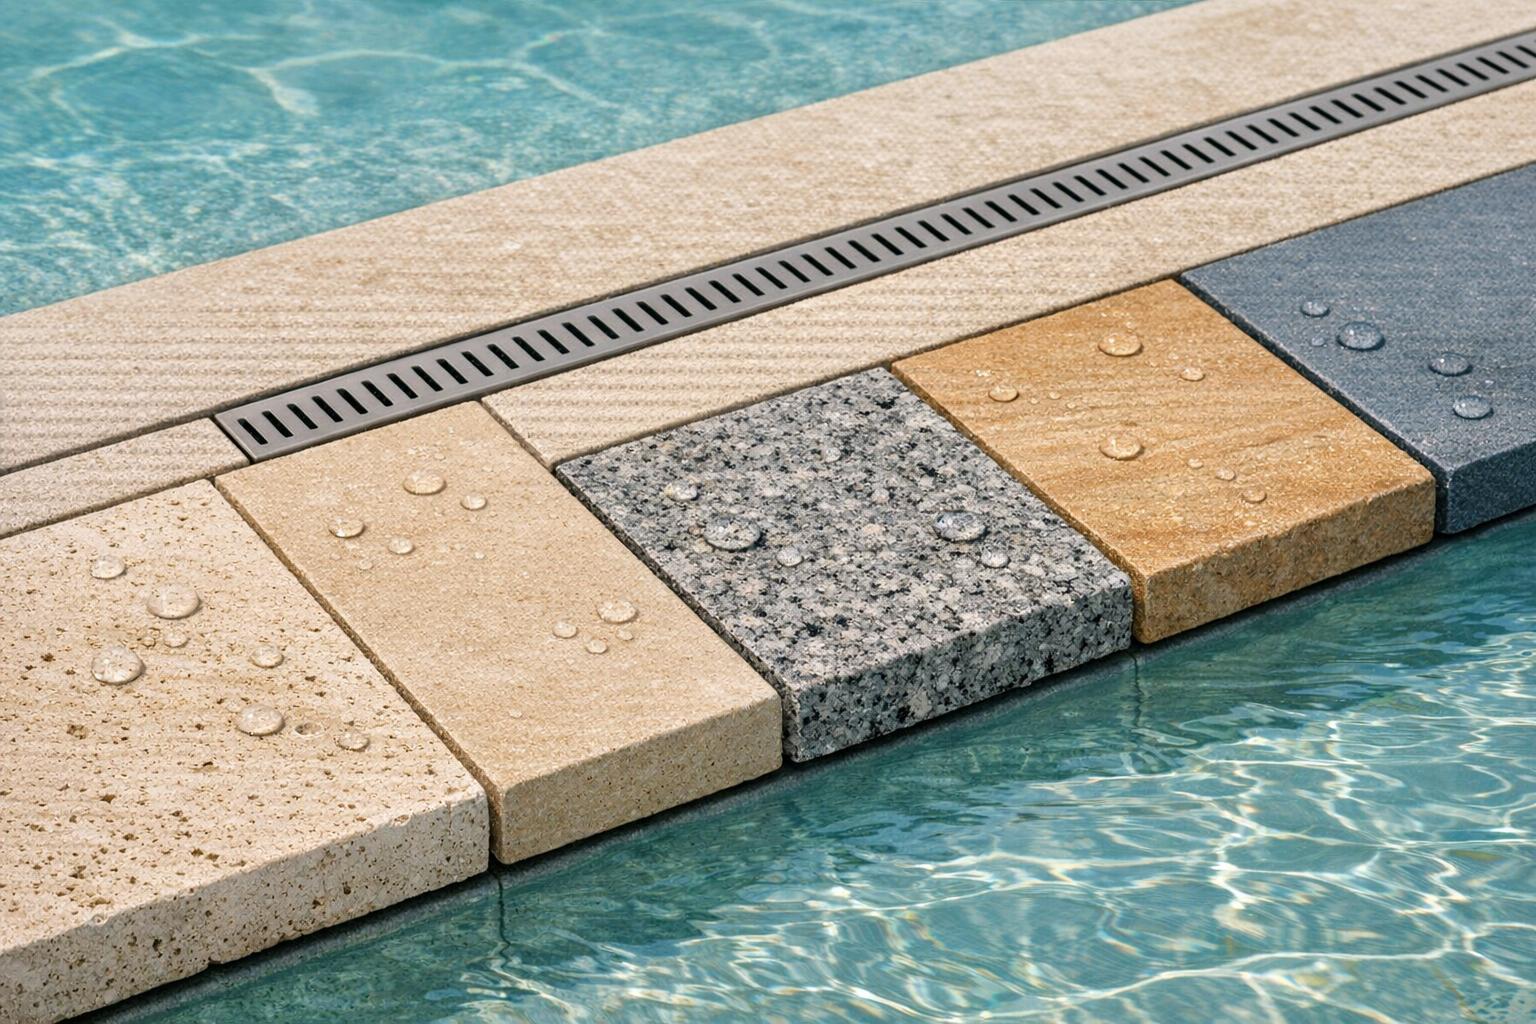
- bhavya gada
- No Comments
Choosing the right natural stone for your pool surround involves balancing safety, durability, and aesthetics. Here’s what you need to know:
- Safety First: Opt for slip-resistant finishes like flamed, tumbled, or sandblasted. Avoid polished surfaces as they can get dangerously slippery when wet.
- Stay Cool Underfoot: Light-colored stones like travertine and limestone reflect sunlight and stay cooler, making them ideal for sunny areas.
- Durability Matters: For freeze-thaw climates like Maryland, choose dense stones with low water absorption (below 1%) and ensure proper sealing to prevent cracks.
- Drainage Is Key: Ensure your pool deck slopes 1–2% away from the pool to manage water effectively and prevent damage.
Common Stone Options:
- Travertine: Cool, slip-resistant, but needs sealing.
- Limestone: Stylish and versatile but select dense varieties for durability.
- Granite: Extremely durable, but darker shades can get hot.
- Sandstone: Warm tones with natural traction but varies in porosity.
- Bluestone: Great texture and grip but retains heat in darker shades.
Quick Comparison:
| Stone Type | Slip Resistance | Heat Retention | Maintenance | Estimated Cost (per sq. ft.) |
|---|---|---|---|---|
| Travertine | High | Low | Moderate | $5–$15 |
| Limestone | Moderate | Low to Moderate | Moderate | $6–$12 |
| Granite | High | Moderate to High | Low | $8–$20+ |
| Sandstone | Moderate | Moderate | High | $5–$10 |
| Bluestone | High | Moderate to High | Moderate | $7–$15 |
For a long-lasting pool surround, focus on proper installation, sealing, and ongoing maintenance. Choose materials that suit your climate and lifestyle for a safe and functional outdoor space.
See How a Flagstone Pool Deck Gets Built Step by Step!
sbb-itb-843f8be
Step 1: Identify the Functional Needs of Your Pool Surround
Before diving into design choices, it’s critical to outline the practical needs of your pool surround: safety, comfort, durability, and drainage. These four factors should guide every decision, ensuring your pool area is as functional as it is attractive.
Check Slip Resistance
A wet pool deck can be a serious safety hazard. Water, sunscreen, and algae can make surfaces dangerously slick. To gauge safety, measure the wet dynamic coefficient of friction (DCOF) – a higher value means better grip. The Tile Council of North America (TCNA) advises a minimum wet DCOF of 0.42 for level surfaces, but for pool decks, aiming for 0.60 or higher is a smarter choice.
The finish of the material plays a huge role in slip resistance. Flamed, sandblasted, bush-hammered, tumbled, or brushed finishes provide the necessary texture to prevent slips, while polished finishes are unsuitable for wet areas. If you plan to seal the stone, opt for a penetrating, non-film-forming sealer designed for exterior wet conditions. Avoid film-forming sealers, as they can make surfaces slippery.
Think About Heat and Comfort Underfoot
Maryland summers often hit the high 80s to 90s °F, and a pool deck in full sun can become unbearably hot for bare feet. Studies show that dark granite can reach surface temperatures of 120–140°F on hot days, whereas light limestone stays 10–20°F cooler under the same conditions.
For a cooler surface, choose light-colored stones like cream travertine, ivory limestone, or light sandstone, which reflect more sunlight. Conversely, dark stones like bluestone or granite absorb heat, making them better for shaded areas or as decorative accents. Additionally, textured finishes can help reduce heat retention and allow for more airflow underfoot, adding to overall comfort.
Plan for Durability and Weather Resistance
Maryland’s freeze-thaw cycles add a layer of complexity when selecting pool deck materials. Water trapped in porous stones can freeze, expand, and cause cracking. To prevent this, check the stone’s water absorption rate: stones with absorption below 0.5–1.0% by weight (per ASTM C97 standards) are better suited for these conditions.
Dense granites, high-quality bluestone, and properly rated limestones and travertines perform well in Maryland’s climate when paired with the right base preparation and a breathable, penetrating sealer. Keep in mind that pool chemicals like chlorine and salt can damage stones with high calcium carbonate content, such as some limestones and travertines. Promptly clean spills and ensure the stone is properly sealed to prevent etching or discoloration. Before finalizing your choice, confirm the material has been tested for exterior freeze-thaw use (ASTM C666/C666M) and verify its compatibility with your pool’s sanitizing system.
Account for Drainage and Landscape Integration
Even the best materials won’t last if water isn’t properly managed. A well-designed pool surround should slope 1–2% (about 1/8 to 1/4 inch per linear foot) away from the pool’s edge. This ensures water flows toward drains, planting beds, or lawns instead of pooling on the surface. Standing water not only creates slip hazards but also promotes algae growth and accelerates freeze-thaw damage.
To handle heavy rain and splash-out, consider installing linear drains, point drains, or French drains at low points around the deck. In central Maryland, a contractor like Pro Landscapes MD can help integrate your pool deck with proper grading, French drains, dry riverbeds, and stormwater systems. This ensures water is effectively directed away from both your pool deck and your home’s foundation.
Step 2: Review Common Natural Stone Options for Pool Surrounds
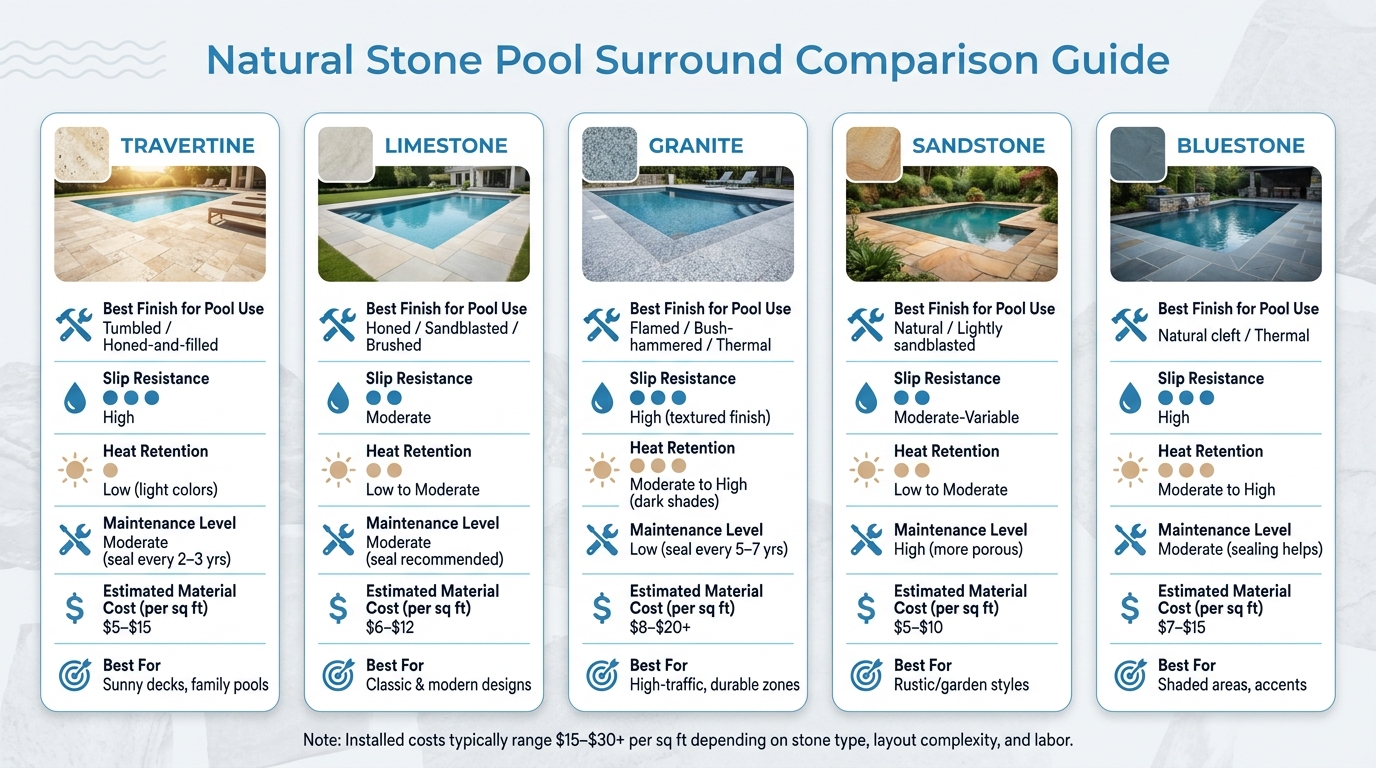
Natural Stone Pool Surround Comparison Guide
Once you’ve outlined your functional needs, it’s time to assess how different types of natural stone meet the practical demands of a pool surround. In the U.S., five stones are commonly used for residential pool projects: travertine, limestone, granite, sandstone, and bluestone. Each has its own strengths, tailored to meet priorities like safety, comfort, and ease of maintenance.
Travertine
Travertine is a go-to option for pool decks, and for good reason. Its porous surface provides extra grip when wet, reducing the risk of slips. Plus, lighter shades like cream, ivory, and light beige can stay 20–30°F cooler underfoot compared to darker, denser stones in direct sunlight. For pool surrounds, finishes like honed-and-filled or tumbled work best, offering a matte texture that balances comfort and traction. Standard sizes include 12"×24" and 16"×24" pavers, along with bullnose coping pieces for a smooth, rounded edge at the pool. However, travertine’s porous nature means you’ll need solid drainage and regular applications of a penetrating sealer to prevent stains and freeze-thaw damage.
Limestone
Limestone is known for its clean, understated look, making it a versatile choice for both classic and modern designs. A honed or lightly brushed finish ensures a surface that’s smooth yet textured enough for safe footing, aligning well with the slip-resistance goals from Step 1. However, the key is to choose a dense variety. Softer or more absorbent limestones can scratch, stain, or flake, especially in climates with freeze-thaw cycles. Always verify that the limestone is rated for outdoor, wet conditions and ensure it’s sealed before installation. When properly maintained, limestone is a dependable choice for pool surrounds in areas like Maryland.
Granite
Granite stands out for its durability. With a Mohs hardness of 6–7 and water absorption often below 1%, it resists scratches, chips, stains, and even pool chemicals better than most stones. This makes it a strong contender for high-traffic areas like outdoor dining spaces, zones with heavy furniture, or decks near outdoor kitchens. However, polished granite should be avoided for pool use. Instead, opt for finishes like flamed, bush-hammered, or thermal, which enhance traction and improve wet slip resistance. For sunnier areas, lighter gray or speckled patterns are preferable, as darker granite can absorb and retain more heat.
Sandstone
With its warm, natural hues, sandstone complements rustic and garden-style settings beautifully. Its surface naturally provides good traction, often without requiring aggressive finishes, which makes it a practical choice for slip resistance. That said, sandstone’s water absorption can vary widely – from 1% to over 6% – depending on the source. Softer varieties may flake or erode in freeze-thaw conditions, so it’s crucial to select a dense, frost-resistant product explicitly rated for outdoor use. Regular applications of a penetrating sealer can also help protect against staining from pool chemicals and organic debris.
Bluestone
Bluestone is valued for its rich blue-gray tones and fine texture, which offer excellent slip resistance. A natural cleft or thermal finish adds just enough roughness to handle foot traffic around pools effectively, addressing the traction concerns from Step 1. While durability isn’t a major issue, darker shades of bluestone can absorb heat, making them less comfortable in direct sunlight. It performs best in partially shaded areas, in lighter "full range" color blends, or as an accent material for walkways and terraces rather than as the primary material for the pool deck.
| Stone | Finish for Pool Use | Heat Retention | Approx. Material Cost (per sq ft) |
|---|---|---|---|
| Travertine | Tumbled, honed-and-filled | Low (light colors) | $5–$15 |
| Limestone | Honed, sandblasted, brushed | Low to moderate | $6–$12 |
| Granite | Flamed, bush-hammered, thermal | Moderate to high (dark shades) | $8–$20+ |
| Sandstone | Natural, lightly sandblasted | Low to moderate | $5–$10 |
| Bluestone | Natural cleft, thermal | Moderate to high | $7–$15 |
Step 3: Match Your Stone Choice to Your Pool Design and Lifestyle
Once you’ve considered the practical aspects and narrowed down your stone options, it’s time to align your selection with your home’s design and how you plan to use your pool. The right choice will balance functionality with the overall aesthetic of your pool area.
Match Stone to Your Home and Landscape Style
Start by analyzing your home’s exterior. Focus on its three main colors – roof, siding, and trim – and choose a stone that complements these tones. For example, warm red brick with tan trim pairs beautifully with travertine or sandstone. On the other hand, a modern gray stucco exterior works well with bluestone or light gray granite.
Texture is equally important. Sleek, uniform stones like sawn limestone or honed travertine in larger pieces fit contemporary or transitional homes. Meanwhile, stones with more natural textures, such as tumbled bluestone or sandstone, align better with farmhouse, colonial, or cottage-style designs.
If you already have a patio, walkway, or garden wall, bring a sample of that material when selecting pool stones. Using the same or a similar material across your pool deck, steps, and retaining walls creates a cohesive look. Experts often suggest limiting your hardscape materials to two or three to maintain a unified outdoor space.
Pick Finishes and Formats for Safety and Appearance
After choosing your stone, focus on finishes that enhance safety and style. Around waterlines and steps, finishes like tumbled, brushed, flamed, or natural cleft provide traction. For a modern look, honed stone combined with a non-slip sealer can offer a balance between aesthetics and safety.
Coping – the stone lining the pool’s edge – deserves special attention. Bullnose coping, with its rounded edge, is comfortable for sitting and gentle on skin, making it a practical option for family pools. If you prefer a sharper, architectural style, square or straight-edge coping can be a great fit for geometric pools and modern homes, though slightly easing the edges is important to avoid sharp corners. For a more luxurious feel, drop-face coping extends over the pool wall, hiding the pool shell and adding visual depth. However, this style requires precise installation to avoid uneven edges.
Factor In Family and Entertainment Needs
Your family’s needs should guide the final touches, especially when it comes to color and finish. For families with children or seniors, lighter stones like ivory travertine or light limestone are a smart choice – they stay cooler underfoot and provide safer footing due to their textured surfaces. Adding a contrasting color band along the pool steps can also improve visibility and safety.
If you frequently host outdoor gatherings, consider mid-tone stones with natural color variation, such as beiges or grays. These tones help hide scuffs, water marks, or spills between cleanings. Durable materials like granite or well-sealed limestone are ideal for areas with heavy furniture or high foot traffic. Applying a penetrating sealer is crucial in these zones to protect against stains from food, drinks, or sunscreen.
For homeowners in Maryland and D.C. trying to coordinate pool surrounds with existing patios or garden walls, consulting a local hardscaping professional can make the process easier. Pro Landscapes MD specializes in designing and installing natural stone for pool decks, patios, steps, and retaining walls. They can even evaluate stone samples on-site, ensuring the materials work harmoniously with your existing features and lighting conditions.
Step 4: Weigh Maintenance, Longevity, and Cost
Once you’ve chosen a stone that fits your design and lifestyle, it’s time to think about upkeep, durability, and cost. These factors go beyond aesthetics and functionality – ignoring them could lead to unexpected expenses in the future.
Understand Sealing and Cleaning Needs
Different stones have varying levels of porosity, which affects how they handle moisture. Stones like travertine, limestone, and sandstone are more porous and need a penetrating sealer to protect them from stains and freeze–thaw cycles. In areas with heavy use or colder climates, plan to reseal these stones every 2–3 years. Denser materials, such as granite, usually require less frequent maintenance, with resealing needed every 5–7 years [2].
For cleaning, stick to a pH-neutral cleaner and a soft-bristle brush to remove sunscreen, oils, and algae buildup. Avoid harsh cleaners like vinegar, bleach, or acidic solutions, as they can damage calcareous stones like travertine and limestone. If you use a power washer, keep the PSI low and opt for a wide fan tip to avoid damaging softer surfaces.
Think About Durability and Repairs
Durability often comes down to how well the stone is installed. A properly prepared base with appropriate excavation, compaction, and a stable substrate is key to preventing movement, cracking, or settling. Using polymer-modified grout and adding expansion joints can help absorb minor shifts, reducing the risk of cracks.
When repairs are necessary, natural stone has the advantage of allowing you to replace individual pieces without tearing up the entire area. Harder stones like granite or high-grade bluestone are less likely to chip over time, while softer materials like sandstone may show edge wear more quickly. Planning for repairs as part of your maintenance strategy can help keep long-term costs manageable.
Budget Wisely
Cost considerations go beyond just the price of the stone. Factor in base preparation, labor, sealing, grout materials, and ongoing maintenance. Complex designs, such as curves or intricate patterns, can drive up labor costs, even if the stone itself isn’t expensive. Choosing locally quarried stone can help cut down on freight costs, making it a more economical option.
When gathering quotes, ask contractors to break down costs for materials, labor, and maintenance. This will give you a clearer picture of the total lifecycle expenses, not just the upfront price. Skipping proper base preparation might save money initially but can lead to expensive repairs later on.
Step 5: Use a Selection and Planning Checklist
Now that you’ve sorted out both maintenance and budget considerations, it’s time to bring everything together into a clear, actionable plan. A simple checklist can help ensure your decision isn’t swayed purely by how a stone looks in a showroom photo – and it can save you from expensive mistakes down the road.
Define Your Priorities and Constraints
Using your earlier evaluations of functionality, aesthetics, and maintenance, create a checklist to organize everything. Start by listing your top priorities, such as safety, comfort, aesthetics, and upkeep. Think about who will be using the pool most often and how much direct sunlight your deck will get during the peak summer months. For example, lighter-colored stones tend to stay cooler underfoot, which might be a key factor if your deck gets full sun in July and August.
On the constraints side, be realistic about your budget. Factor in the full installed cost – not just the materials. National data suggests natural stone pool decks typically range from $15 to $30+ per square foot installed, depending on the type of stone and the complexity of the layout. Also, consider your local climate (freeze-thaw cycles are a concern in areas like central Maryland and the mid-Atlantic region), your pool system (saltwater vs. chlorine affects sealing requirements), and any hard deadlines for completing the project.
Narrow Down Stone Options and Finishes
Once you’ve clarified your priorities, compare your top stone choices side by side. Use the table below to assess factors like slip resistance, heat retention, maintenance needs, and cost:
| Stone Type | Slip Resistance (pool finish) | Heat Retention | Maintenance | Relative Installed Cost |
|---|---|---|---|---|
| Travertine | Good (tumbled/honed) | Stays relatively cool | Seal every 2–3 years | Medium–High |
| Limestone | Good (textured) | Moderate; lighter tones cooler | Seal recommended; more porous | Medium–High |
| Sandstone | Variable; needs non-slip finish | Can get warm | More porous; prone to staining | Medium |
| Bluestone | Good (natural cleft/thermal) | Can get hot in full sun | Durable; sealing helps | Medium–High |
| Granite | Very durable (flamed/textured) | Hot depending on color | Less frequent sealing | High |
Request take-home samples of your preferred finishes to test traction and heat retention. It’s also important to confirm that both the coping and deck stones come from the same production lot to ensure consistent color matching. Don’t forget to order an extra 10–15% of material to account for cuts and waste during installation. This step will help you refine your options before finalizing your plans.
Work with a Professional for Installation Planning
Once you’ve selected your materials, it’s time to collaborate with a professional to ensure everything is installed correctly. Proper base preparation and drainage are crucial, as highlighted in Step 1. A specialist can assess your site conditions, determine the right base requirements, and document material specifications and warranties.
In areas like central Maryland and the greater Washington, DC region, companies such as Pro Landscapes MD handle not only hardscaping but also landscape integration. They can coordinate essential elements like drainage design, grading, and seamless transitions to patios, walkways, and planting beds. This ensures your pool surround will function as a cohesive and polished outdoor space [1].
Conclusion: Choose the Right Natural Stone for a Better Pool Area
Picking the right natural stone for your pool area means finding the perfect balance between safety, durability, appearance, and maintenance. Each stone type comes with its own pros and cons, so your choice should reflect your yard’s specifics, local climate, and personal lifestyle.
Once you’ve addressed the functional and design aspects, think about long-term maintenance and cost. Look for stones with a slip-resistant finish, a surface that stays cool underfoot, and strong freeze–thaw ratings. And don’t forget to consider not just the upfront cost but also the long-term expenses of keeping your pool surround in great shape.
In colder climates, improper installation can lead to cracks within just a few winters. But with the right materials, proper base preparation, and professional installation, your natural stone surround can last for decades. Drainage and grading are just as important as the stone itself in ensuring durability.
If you’re located in central Maryland or the Washington, DC area, Pro Landscapes MD offers expertise tailored to these local conditions. They don’t just install natural stone; they also handle drainage solutions, grading, and seamless integration with patios, walkways, retaining walls, and outdoor kitchens. Their comprehensive approach ensures your pool area blends beautifully into your overall outdoor design.
While most homeowners can handle routine tasks like rinsing away pool chemicals and spot cleaning, bigger jobs like resealing or resetting stones are best left to professionals. These services not only save you time but also protect your investment for years to come. For expert installation and maintenance, Pro Landscapes MD is a trusted partner.
FAQs
What stone is best for a saltwater pool deck?
Natural stone pavers are an excellent choice for saltwater pool decks, offering both style and resilience. While there isn’t one stone universally considered the best for saltwater, these pavers provide a classic aesthetic and hold up well over time. It’s essential to work with professional installers to ensure the stone you select can handle exposure to saltwater chemicals. If you’re in Maryland, Pro Landscapes MD specializes in creating beautiful and durable pool surrounds tailored to your needs.
How can I test if a stone gets too hot in the sun?
To see if a natural stone gets too hot under direct sunlight, take a sample and leave it in full sun during the hottest part of the day. Let it sit for a few hours, then touch the surface to check how warm it feels. Because stone types differ in how they absorb and retain heat, testing in your specific outdoor setting helps ensure the material will be comfortable for bare feet around your pool.
What’s the best way to prevent freeze-thaw cracking?
To reduce the risk of freeze-thaw cracking in pool surrounds and hardscaping, start by ensuring proper drainage and using a dense, durable base. Adding geotextile fabric helps keep the soil separate from the gravel, which is crucial for maintaining effective drainage. Use layers of angular crushed stone – such as ASTM No. 2, No. 57, and No. 8 – for both stability and water flow. This setup minimizes moisture accumulation, helping to protect against damage caused by temperature changes.
Chat with Us