









- bhavya gada
- No Comments
When designing a patio audio system, the goal is to create a balanced, durable, and efficient setup tailored to your outdoor space. Here’s what you need to know:
- Plan Early: Integrate audio during patio construction to hide wiring and ensure a clean look. Use conduits under pavers or seat walls for protection.
- Speaker Placement: Use multiple speakers placed 8–20 feet apart for even sound coverage. Aim them inward to reduce noise spillover.
- Outdoor-Ready Gear: Choose weatherproof speakers with IP55+ ratings and UV-resistant materials to withstand outdoor conditions.
- Zones and Volume Control: Divide your patio into functional zones (e.g., dining, lounge, kitchen) and install separate volume controls for flexibility.
- Wired vs. Wireless: Wired systems are more reliable for permanent setups, while wireless options work for retrofits or simpler installations.
- Maintenance: Clean speakers quarterly, inspect connections, and protect wiring with conduits to extend system life.
For Maryland homeowners, professionals like Pro Landscapes MD can integrate audio systems seamlessly into hardscape projects, ensuring durability and a polished finish. Start with a clear plan, and you’ll enjoy immersive sound without disturbing neighbors.
Five Outdoor Audio System Tip For Big Spaces, Patios & Porches
sbb-itb-843f8be
Assessing Your Patio and Audio Needs
Before you dive into buying speakers, take a close look at your patio. Its size, shape, and materials play a huge role in determining how many speakers you’ll need, where they should go, and how to control the system. Laying this groundwork helps you choose the right equipment and map out speaker placement effectively.
Measuring Your Patio and Defining Listening Zones
Start by measuring your patio and sketching out its layout. Mark important features like doors, windows, seating areas, grills, fire pits, and property boundaries. This visual guide will act as your "zone map."
"Think of your yard as a series of rooms – one for cooking, one for dining, and maybe one for just chilling out. Use pergolas, fire pits, and outdoor kitchens to define these spaces." – Pro Landscapes MD [1]
Break your layout into functional listening zones. For example, a dining area, a lounge spot, and an outdoor kitchen bar will each have different audio needs. If your patio is between 200–400 square feet, you’ll typically need 2–4 speakers. Larger spaces or multi-zone setups often require 6–8 speakers or more, along with a subwoofer for balanced sound coverage. A good rule of thumb is to place one pair of speakers per zone, spaced 10–20 feet apart.
Keep in mind that hard surfaces like stone, concrete, and brick reflect sound, while softer materials like grass and plants absorb it. You may need to adjust the number and placement of speakers based on these factors.
Identifying Your Audio Use Cases
Your patio’s purpose heavily influences its audio setup. Whether you’re looking for background music, high-energy party sound, or outdoor TV audio, each use case calls for a tailored approach.
| Use Case | Goal | Speaker Strategy | Zones |
|---|---|---|---|
| Background music | Even, subtle sound | Multiple smaller speakers at low volume around the perimeter | Single zone or 2–3 simple zones |
| Parties / high output | Loud, dynamic coverage | More speakers with a subwoofer; landscape systems are ideal | Multi-zone with separate volume controls |
| Outdoor TV / theater | Clear, focused audio | Speakers aimed at seating and the screen area | One dedicated viewing zone plus background zones |
If your patio serves multiple purposes – like quiet dinner music one night and a lively sports game the next – a multi-zone system with independent volume controls is worth considering. This setup allows you to keep dinner music soft in one area while cranking up the volume for a game near the TV, without sound spilling over between zones. Pairing this evaluation with an understanding of local rules will help refine your overall audio design.
Local Regulations and Neighbor Considerations
Once you’ve mapped out your zones and use cases, it’s time to think about local regulations. Outdoor sound travels farther than you might expect, and many municipalities have noise limits – often 55 dBA during the day and 45 dBA at night. Designing your system to stay within these limits can help you avoid complaints or fines.
To minimize sound spillover, aim speakers inward toward your house and key seating areas instead of toward property lines. Using multiple low-volume speakers is more effective at containing sound than relying on a few loud ones. For wiring, follow NEC guidelines and local codes. Typically, low-voltage cables need to be buried 6–12 inches deep, depending on the cable type and whether conduit is used. Additionally, GFCI-protected outdoor outlets should be installed near your audio equipment. If your setup requires electrical work, make sure to hire a licensed electrician for that part of the job.
Choosing the Right Equipment for Outdoor Use
Wired vs. Wireless Patio Audio Systems: Key Differences
Once you’ve mapped out your zones and confirmed local code requirements, it’s time to select equipment designed specifically for outdoor use. A common misstep is using indoor speakers outside – outdoor audio gear is specially built with sealed enclosures, corrosion-resistant parts, and materials that can handle Maryland’s ever-changing weather.
Types of Outdoor Speakers
With your zones defined, you can pick speakers that not only withstand outdoor conditions but also suit the purpose of each area. The three most popular speaker types for patios are wall-mounted speakers, landscape satellite speakers, and outdoor subwoofers. Each serves a unique role.
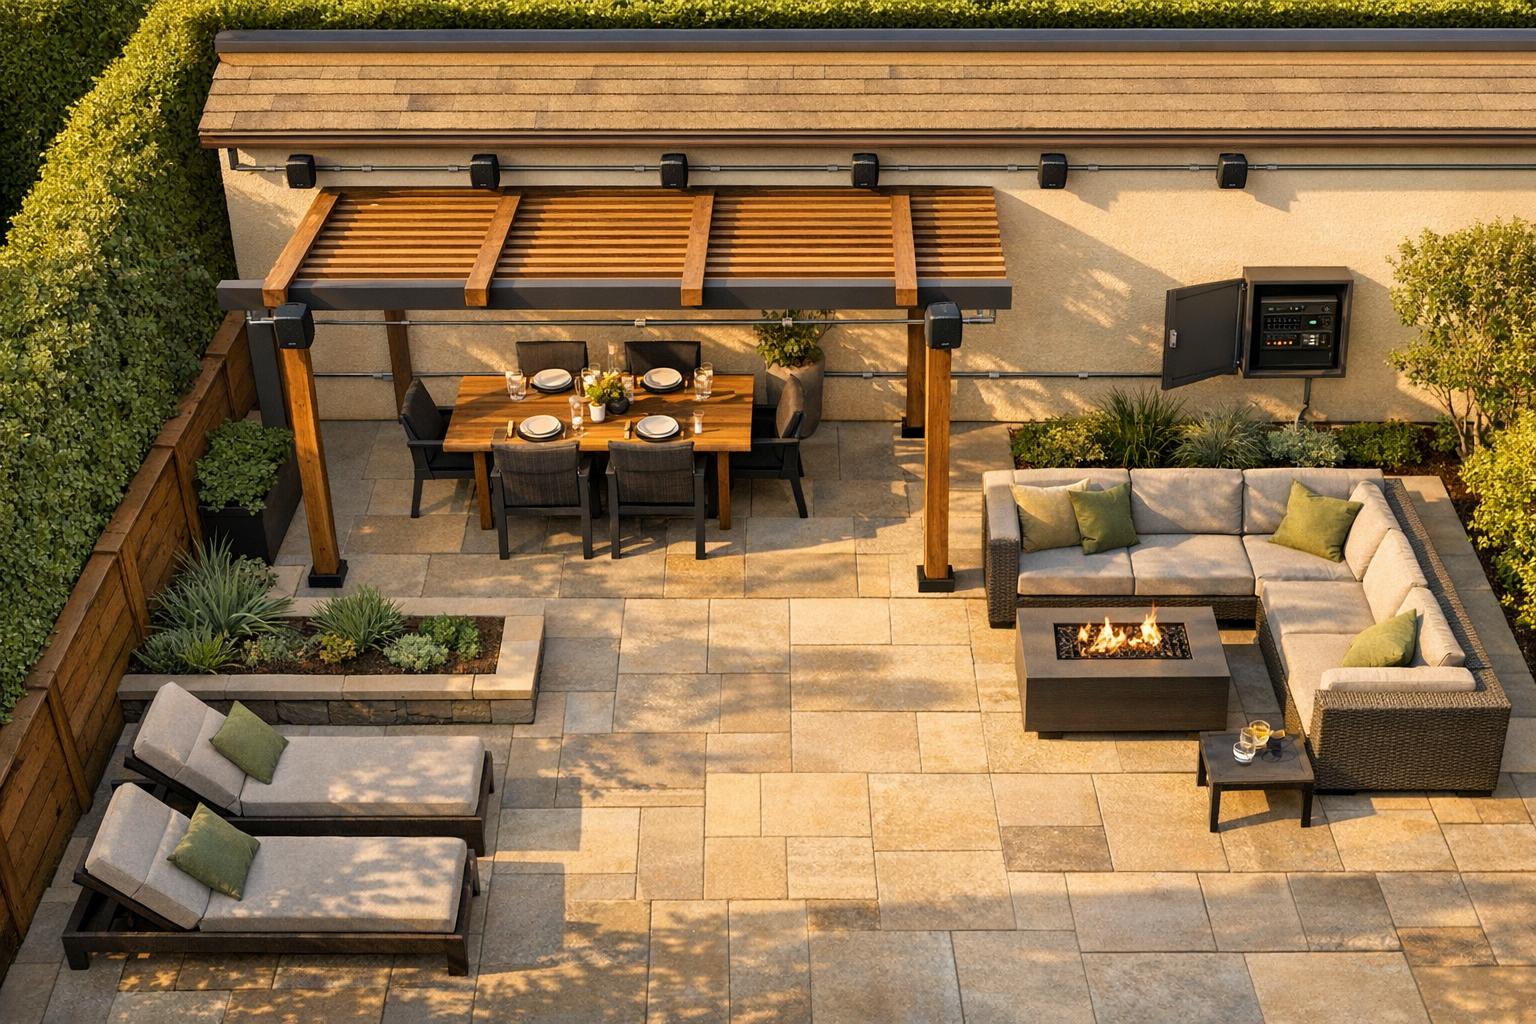
- Wall-mounted speakers: These attach to exterior walls, eaves, or pergola beams. They’re ideal for small to medium patios where the seating is close to the house and sound needs to target a specific dining or lounge area. While they’re easy to install and provide focused sound, they are more visible than other options.
- Landscape satellite speakers: These are discreet, stake-mounted units placed in planting beds or along the edges of hardscapes. By spreading multiple speakers around the perimeter, you can achieve even sound coverage at lower volumes. This setup is neighbor-friendly and avoids creating loud "hot spots." They’re perfect for professionally designed spaces where appearance matters.
- Outdoor subwoofers: Available as above-ground or partially buried units, these handle bass frequencies that often disappear in open-air environments. Without a subwoofer, even a well-designed outdoor system can sound flat. For patios used for music or movie nights, a buried subwoofer adds depth and richness. Many setups combine all three types: wall-mounted speakers near the house, satellites around the yard, and a buried subwoofer tucked into a flower bed.
Weatherproofing and Durability
For outdoor speakers, the IP rating (Ingress Protection) is key. In exposed areas, aim for at least IP55 or IP56. If the speakers are under a covered roof, IP44 might suffice, but higher protection is always better for long-term durability.
Material quality is just as important. Look for UV-stabilized ABS or polypropylene cabinets to resist cracking and fading in the sun. For grills and mounting brackets, powder-coated aluminum or stainless steel is essential to prevent rust from humidity or winter road salt – especially in Maryland’s climate. Seals and gaskets should be made of silicone or EPDM rubber, which remain flexible through temperature swings. Avoid options with foam seals, untreated wood, or plain steel hardware, as these materials won’t last more than a season or two outdoors.
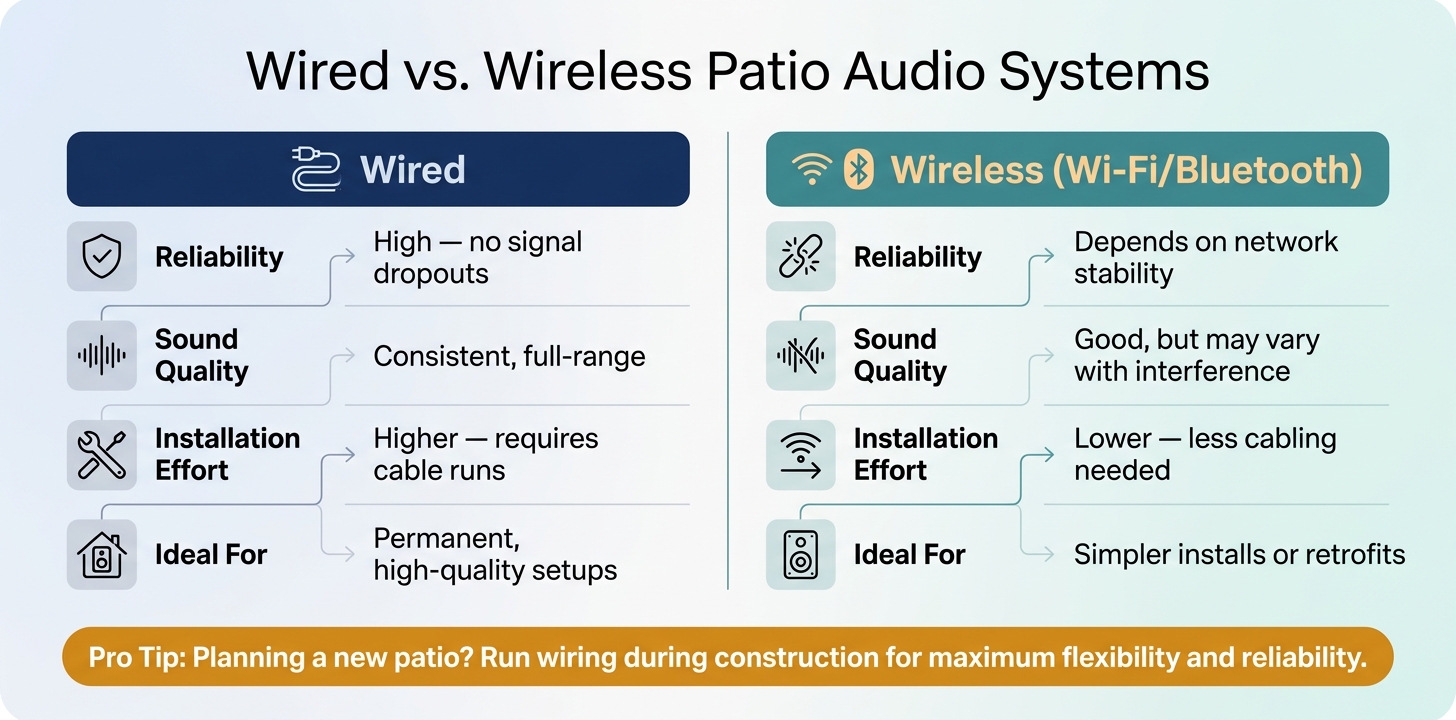
Wired vs. Wireless Systems
| Factor | Wired | Wireless (Wi-Fi/Bluetooth) |
|---|---|---|
| Reliability | High – no signal dropouts | Depends on network stability |
| Sound quality | Consistent, full-range | Good, but may vary with interference |
| Installation effort | Higher – requires cable runs | Lower – less cabling needed |
| Ideal for | Permanent, high-quality setups | Simpler installs or retrofits |
For a permanent patio installation, wired systems are the better option. They provide reliable sound without dropouts, don’t depend on a Wi-Fi connection, and deliver consistent audio quality. The downside is the extra effort required to run cables, which is much easier to handle during a hardscaping project than after the patio is finished.
On the other hand, wireless systems are a practical choice when running cables isn’t feasible, such as in retrofit situations where the patio is already complete. While wireless technology has improved, it still depends on a strong network signal and a stable power source for each speaker. If you’re planning a new patio or hardscape project, it’s worth incorporating wiring into the design upfront. This way, you’ll have the flexibility to choose between wired and wireless systems without limitations. Plan your speaker placement and wiring routes carefully to ensure the best performance.
Speaker Placement and Wiring Design
How to Position Speakers for Even Coverage
Instead of clustering loudspeakers along the house wall, try surrounding each listening zone with lower-volume speakers aimed inward. This setup ensures balanced sound throughout the area without overwhelming any single spot.
For spacing, position speakers 8–12 feet apart on small to medium patios and 12–20 feet apart for larger spaces. If you’re mounting speakers on walls or eaves, place them at 8–10 feet high and angle them downward toward the seating area, ensuring good overlap between adjacent speakers.
Each specific area deserves its own speaker pair. For example:
- A dining area works best with a pair of speakers spaced 8–10 feet apart, directed at the table to maintain a comfortable volume for conversation.
- A lounge or fire pit area benefits from speakers placed around the seating perimeter, rather than just in front.
- In a grill or outdoor kitchen, position speakers away from heat sources and aim them toward areas where people gather.
Always aim speakers inward to reduce sound spillover into neighboring properties. Use zone volume controls to adjust sound levels near fences, especially at night. Many local noise regulations cap residential sound levels at 50–60 dBA at the property line during nighttime hours.
Once your speaker placement is planned, the next step is designing a wiring system that keeps cables discreet and protected.
Planning Your Wiring Routes
Start by identifying the location for your amplifier or AV receiver – whether indoors, in a basement, or in a weatherproof outdoor cabinet. From this central point, run individual cables (known as home-run wiring) to each speaker. This setup simplifies troubleshooting and makes future upgrades easier.
For cable selection:
- Use 14 AWG wire for runs under 100 feet.
- Upgrade to 12 AWG for longer distances or higher-powered systems to minimize signal loss.
For example, a 16-gauge copper wire at 100 feet with an 8-ohm load loses about 0.8 dB, while a 12-gauge wire at the same distance only loses around 0.3 dB. That difference can noticeably impact sound clarity and volume consistency. Always choose CL2/CL3-rated or direct-burial rated cables for outdoor use.
When exiting through an exterior wall, use a sealed junction box or wall plate and seal any gaps with exterior-grade caulk to block moisture and pests. Secure cables under eaves or along fascia using UV-rated clips, and always include a drip loop at entry points to direct water away from connections.
For underground runs, place direct-burial cable inside PVC conduit and bury it at least 12 inches deep in landscaped areas. Before digging, call 811 to have utility lines marked. Keep conduit paths predictable by routing them along hardscape edges like patio borders or retaining walls. Avoid running audio cables parallel to high-voltage electrical lines; if they must cross, do so at a 90-degree angle to reduce interference.
Integrating Wiring with Hardscaping
If you’re building a new patio, run wiring before the surface is installed to avoid expensive retrofitting later. Conduits can be laid in the compacted base layer beneath pavers, with vertical risers emerging inside seat walls, columns, or outdoor kitchen structures where speakers or equipment will be mounted. This approach keeps cables hidden and well-protected.
For homeowners in central Maryland, Pro Landscapes MD offers services to integrate wiring into hardscape construction. They embed conduit sleeves under paver bases, route runs through retaining walls and step risers, and position stub-outs for planned speaker locations before the surface is installed. This method not only keeps the patio looking clean but also makes future upgrades much easier. [2][3]
If you’re working with an existing patio, installers can sometimes add conduit through perimeter trenches along expansion joints, concealing the path with matching edging material. To make future changes simpler, label both ends of every conduit run and keep an as-built diagram handy – you’ll appreciate it the next time you add a speaker or replace a component.
System Integration and Control
Connecting Your Audio Components
To set up your system, connect your audio source – whether it’s a phone, streaming app, or TV – to a central AV receiver or multi-zone amplifier. This receiver will power your outdoor speakers and distribute the sound through the speaker wires you’ve already installed.
Keep in mind, all receivers, amplifiers, and streaming devices should remain indoors or in a well-ventilated, protected cabinet. Only speakers and volume controls designed for outdoor use should be exposed to the elements. Standard AV receivers aren’t built to handle outdoor conditions, and even a covered patio can introduce enough humidity to cause damage over time.
For a versatile setup, choose a receiver that supports multiple inputs. Look for options like HDMI ARC or optical inputs for TV audio, network streaming for services like Spotify or Apple Music, and Bluetooth or RCA inputs for connecting other devices. Many modern AV receivers from brands like Denon, Yamaha, and Onkyo can stream directly from Spotify, TIDAL, or internet radio, eliminating the need for a separate streaming device and simplifying your system. Entry-level Zone 2 receivers typically range from $500 to $1,000.
Once everything is connected, configure your system to manage audio in different patio zones effectively.
Multi-Zone and Volume Control Setup
If your patio includes separate areas – like a dining space, lounge, or outdoor kitchen – treat each as an individual audio zone. Run dedicated wires from each speaker back to a central amplifier, and use a multi-zone AV receiver or multi-channel distribution amplifier to control each zone independently. Four-zone distribution amplifiers typically cost between $800 and $1,500 or more, depending on their features and power output.
For volume control, a combination of tactile and app-based options works best. Install weather-resistant, impedance-matching in-wall volume knobs near convenient spots like patio doors, the outdoor kitchen, or seating areas. This allows for quick adjustments without needing a phone. Pair these with the app-based control from your receiver for more precise tuning. For example, a guest could lower the volume near the grill using a knob, while you manage zone groupings and overall settings from your smartphone.
Once your zones are set up, you can take things a step further by integrating your system with smart home technology.
Smart Home Integration
If you’re already using Amazon Alexa, Google Assistant, or Apple HomeKit, selecting audio equipment that fits into your ecosystem can make your setup even more seamless. For Apple users, receivers or amplifiers with AirPlay 2 compatibility allow you to group your patio with indoor speakers and control everything through the Home app. Alexa users might prefer HEOS-enabled Denon receivers or a Sonos Amp (priced around $699). With Sonos, each speaker pair functions as a "room", so a command like "Alexa, play jazz on the patio" will direct the audio exactly where you want it.
To avoid interruptions like mid-song dropouts, test your Wi-Fi signal strength at all speaker and seating areas. If needed, invest in a weather-resistant mesh satellite or outdoor access point to ensure consistent coverage. Once your signal is solid, you can create automation scenes using Alexa Routines, Google Home, or Apple Home. For instance, a "Dinner Party" scene could simultaneously start a playlist on the patio, dim the string lights, and set the fire pit to low – all with a single voice command or tap on your phone.
Testing, Tuning, and Maintenance
Testing and Adjusting Sound Quality
Before securing speaker mounts or hiding wires, it’s essential to test your system. Start with all volume controls set to the lowest level, then gradually increase the master volume while playing a clear, steady track. Walk through each zone to ensure sound is coming through, listen for any buzzing or crackling, and confirm that all speakers are producing sound evenly at the same settings.
Conduct a full walk-through of your patio, covering the seating area, dining space, and grill station, while playing music at a moderate volume – similar to how you’d typically use the system. Adjust speaker angles to address any uneven sound coverage, focusing on key seating areas. Repeat the walk-through after each adjustment to ensure smooth transitions between zones. The goal is to create a seamless listening experience where you don’t feel the need to adjust the volume every time you move from one area to another.
Outdoor setups often face challenges like thin-sounding vocals and diminished bass due to the lack of walls to reflect sound. To counter this, consider boosting the midrange frequencies by 2 to 3 dB on your amplifier’s EQ. If you have a subwoofer, gradually increase its level until the sound feels rich and balanced at your main seating areas. Save these settings for both casual background music and livelier gatherings, so you won’t have to reconfigure the system each time. Fine-tuning like this ensures an even, enjoyable sound across all zones while setting the stage for regular maintenance.
Routine Maintenance Tips
Quarterly inspections are key to keeping your system in top shape. Use a damp cloth to clean speaker grilles and housings, removing pollen, dust, and debris that can lead to corrosion. Avoid using pressure washers or harsh chemicals, as they can force moisture into the speakers or damage the housing.
Check mounting brackets, conduit entry points, and junction boxes for signs of rust, loose hardware, or cracks caused by temperature fluctuations. Annually, inspect all connection points to ensure terminals are dry and free from corrosion. Applying dielectric grease to exposed terminals can help seal out moisture. After severe weather, check for any shifted speakers, cracked conduit, or signs of water intrusion. Addressing these issues early can prevent minor problems from escalating into costly repairs. Regular upkeep like this ensures your system remains reliable over the long haul.
Long-Term System Durability
Thorough testing and consistent maintenance go a long way, but proper installation is just as important for long-term durability. Protecting your speaker wiring is crucial – embedding it in conduit within your patio structure shields it from UV exposure, frost heave, and accidental damage. Exposed wiring, on the other hand, is far more susceptible to wear and tear, and repairs can be disruptive once your system is fully operational.
Planning your audio setup as part of the patio design process can significantly reduce future headaches. This is where working with professionals, like Pro Landscapes MD, proves invaluable. When the wiring and conduit are integrated into the hardscape – complete with protected wire paths and accessible junction points – maintenance becomes much simpler. Repairs won’t require tearing up pavers or walls, saving time and money. Pro Landscapes MD specializes in durable patio installations across central Maryland, including flagstone and paver patios, retaining walls, and seating walls. Their attention to structural detail ensures your patio not only looks great but also protects the essential components of your outdoor audio system. A well-constructed patio does more than provide a surface – it safeguards your entire setup for years to come.
Conclusion: Building a Patio Audio System That Works
Creating the perfect patio audio system boils down to three main things: careful planning, using outdoor-rated gear, and a clean, professional installation. Start by mapping out your listening zones before buying any speakers. Make sure the equipment you choose can handle the challenges of outdoor use – like rain, UV rays, and temperature changes. And don’t forget to run your wiring through conduit before laying down pavers to keep everything secure and protected.
Focus on achieving even sound coverage rather than just cranking up the volume. Aim for a consistent 70–75 dB in your seating and dining areas. To get there, use multiple low-power speakers positioned inward for balanced sound distribution.
Think ahead for future upgrades. Install extra conduit, add junction boxes at strategic points, and stick to standard outdoor-rated 16/2 or 14/2 speaker cables. This way, when you’re ready to enhance your space with a hot tub, outdoor TV, or additional seating areas, you won’t have to dig everything up again.
If you’re already planning a patio, outdoor kitchen, or hardscape project, it’s the perfect time to bring in a professional. For example, Pro Landscapes MD offers patio and hardscape services throughout central Maryland and the Washington, DC area. They handle everything from grading and drainage to flagstone and paver installation. By coordinating speaker placement, conduit runs, and mounting points during construction, they ensure a seamless, durable setup with minimal hassle.
FAQs
Do I need a subwoofer on a patio?
Deciding whether to add a subwoofer depends on what you want from your audio setup. Most outdoor speakers are great at handling mid-to-high frequencies, but they often fall short when it comes to deep bass. That’s where a subwoofer comes in – it fills in the low-end sound, creating a richer and more immersive listening experience.
This is especially important in open outdoor spaces where sound can easily dissipate. If you’re planning to host gatherings or simply want high-quality audio on your patio, adding a subwoofer can be a game-changer. It’s the perfect way to elevate your Pro Landscapes MD patio setup by ensuring you don’t miss out on those deep, resonant bass notes.
How do I keep outdoor audio from bothering neighbors?
To keep noise levels in check and avoid disturbing neighbors, aim your speakers toward your patio seating area rather than toward property boundaries. You can also include hardscaping features, such as stone retaining walls or custom privacy installations from Pro Landscapes MD, to serve as natural barriers. These additions help absorb and redirect sound, ensuring your audio stays within your space while preserving a calm atmosphere for those around you.
What’s the easiest way to add speakers to an existing patio?
When upgrading your patio or hardscape, the simplest approach to adding an audio system is during the renovation process. This ensures the wiring is neatly routed and speakers are positioned for the best sound quality. For example, Pro Landscapes MD can incorporate audio systems directly into new patio designs – whether it’s a flagstone or paver patio – eliminating the need to deal with exposed wires or retrofitting later on.
Chat with Us