









- bhavya gada
- No Comments
If you seal too soon, you can trap dirt, moisture, oil, and moss under the finish. That often leads to haze, white spots, peeling, or dark stains that stay put.
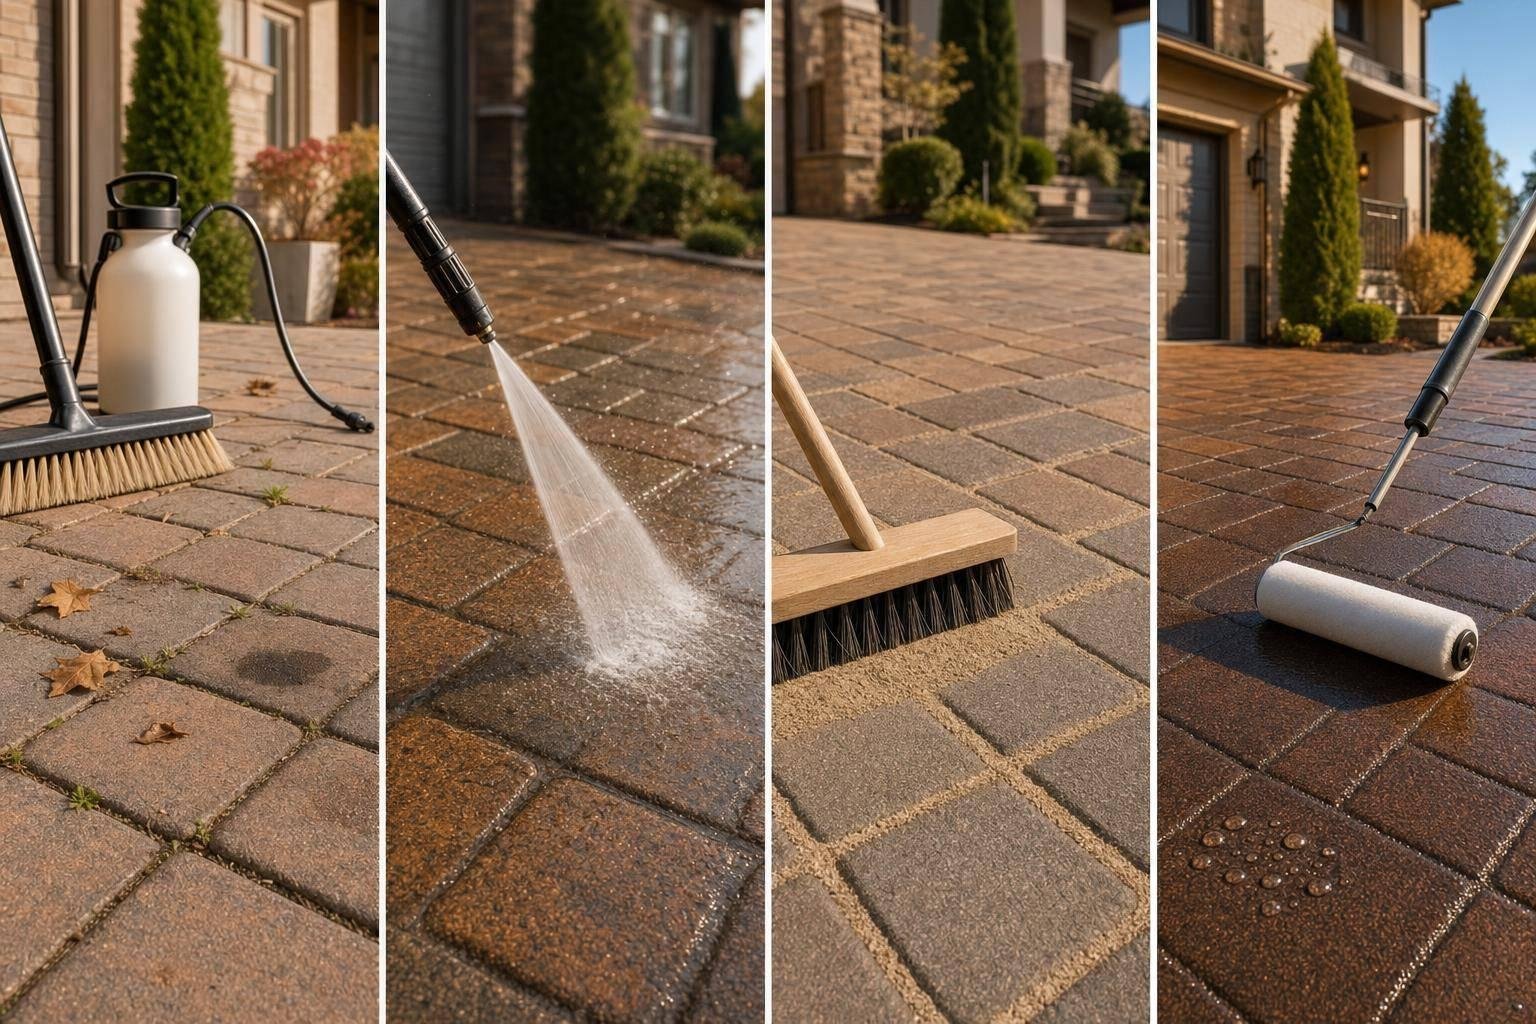
Here’s the short version: I would clear the surface, pull weeds, scrub moss, treat oil, wash the whole driveway, let it dry for at least 24 hours, refill joint sand, and seal only in dry weather between 50°F and 90°F. In humid Maryland weather, 48 hours of drying is often safer than 24.
Before sealing, I’d make sure:
- All cars, bins, and loose items are off the driveway
- Weeds and moss are removed from the joints
- Oil spots are treated before washing
- Pressure washing stays around 1,500 to 2,000 PSI
- The surface and joints are fully dry
- Joint sand sits about 1/8 to 1/4 inch below the paver edge
- No loose sand is left on top
- No rain is expected for 24 to 48 hours
This is the basic order that helps the sealer bond well and last longer without trapping problems underneath.
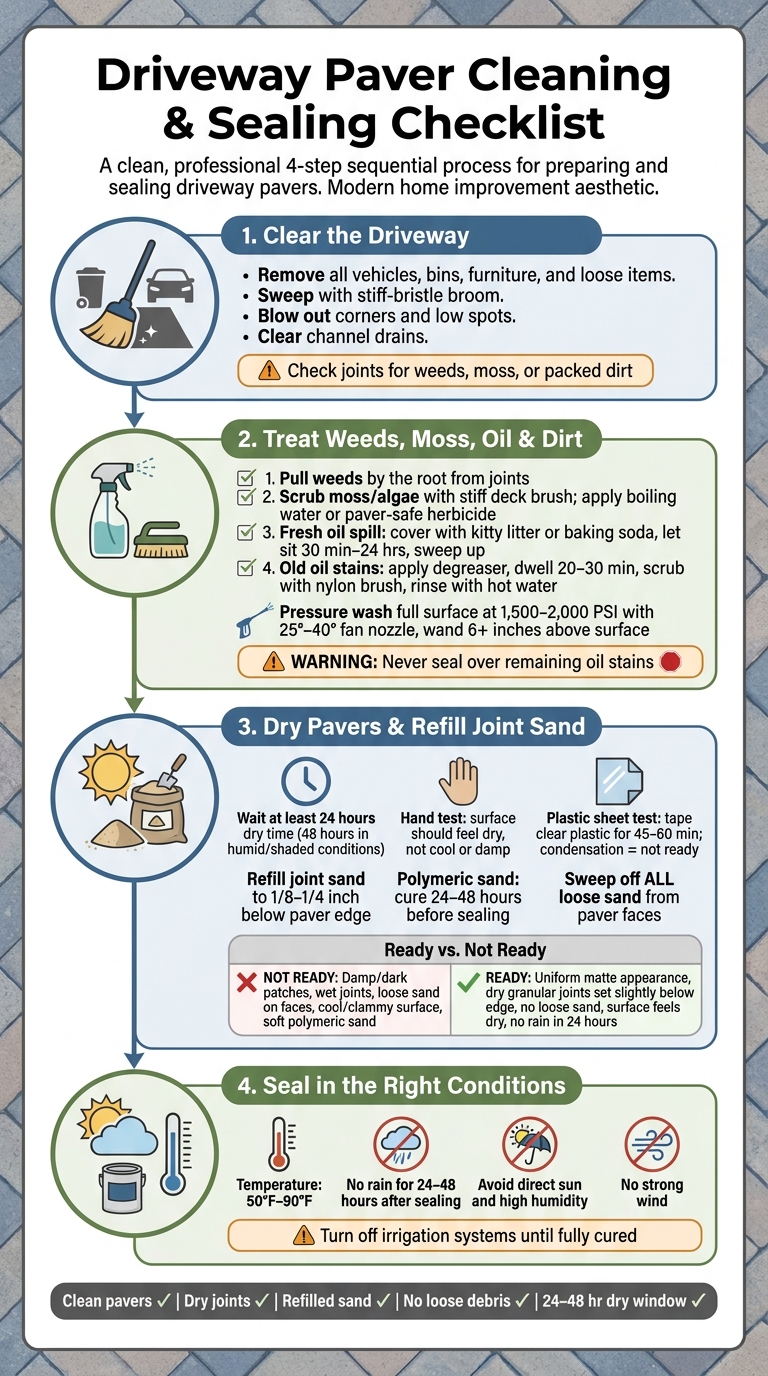
Driveway Paver Cleaning & Sealing: Step-by-Step Checklist
How to Clean and Seal Pavers | COMPLETE GUIDE
sbb-itb-843f8be
Step 1: Clear the Driveway and Remove Surface Debris
Before you start washing or using any chemicals, clear the entire driveway. If parts of the surface are blocked, cleaning can end up uneven and sealing can look patchy. This first pass sets up the rest of the prep work before stain treatment and washing.
Remove Vehicles, Trash Bins, and Loose Debris
Move everything off the driveway first. That includes vehicles, bins, furniture, and any loose items. Park vehicles on the street or in the garage, and keep them off the surface until sealing and curing are done. Move trash and recycling bins, bikes, grills, planters, and toys out of the way. Then pick up larger debris by hand, like branches, rocks, or loose landscape stone, before you sweep.
Use a stiff-bristle broom to sweep the surface, then follow with a blower to remove fine dust. Give extra attention to corners and low spots. Those areas tend to hold sediment and damp debris, which can interfere with even sealer bonding. Clear out channel drains and grates too, so rinse water doesn’t pool.
As you sweep, look for joints filled with weeds, moss, or packed dirt. Those spots will need direct treatment in Step 2. Once the driveway is fully clear, you’ll be ready to deal with weeds, moss, and stains next.
Clean Edges, Borders, and Tight Perimeter Areas
Sweep along the borders, garage aprons, curb edges, retaining walls, and planted areas. The goal is simple: keep soil and mulch from washing back onto the pavers. If grass or groundcover has spread over the paver edge, trim it back along planted borders.
For narrow spots near steps or tight walkways, use a small hand broom. That helps expose the joints and any stains that need treatment. After that, move on to spot treatment before washing.
Step 2: Treat Weeds, Moss, Oil Spots, and General Dirt
Clean in this order: organic growth, stains, then the full wash.
Remove Weeds and Treat Moss in the Joints
Start by pulling weeds out by the root, not just snapping off the tops. A crack scraper, weeding knife, or even a flathead screwdriver works well for this. Focus on the joints around the edges and near planted borders, where weeds usually pile up fastest.
For moss and algae, scrub the joints and paver faces with a stiff deck brush first. That step matters because surface growth holds moisture and gets in the way when sealer needs to bond later. Once you’ve loosened and removed as much as you can, pour boiling water into the cleaned joints to kill leftover roots and spores. It’s a simple, chemical-free option for lighter growth.
If the growth is heavy, use a paver-safe herbicide in dry weather. Be careful with overspray near plants.
Once the joints are clear, move on to oil spots and other stains before washing the whole driveway.
Clean Oil Spots and Other Visible Stains
Fresh oil drips and old stains need different treatment.
For a fresh spill, don’t add water. Water can drive the oil deeper into the paver surface. Instead, cover the spot with unscented clay kitty litter, baking soda, or a commercial oil absorbent. Let it sit for 30 minutes up to 24 hours, based on the size of the spill.[5][6][8] Then sweep it up and throw it away.
For older, set-in stains, apply a paver-safe degreaser, dish soap, or laundry detergent right onto the spot. Let it dwell for 20–30 minutes.[5][7] Then scrub with a stiff nylon brush in circular motions. Skip metal bristles, since they can scratch the paver face.[7][9] Rinse with hot water and repeat if needed.
Don’t seal over an oil spot that’s still there. If you do, you can lock that discoloration in for good.
After spot cleaning, wash the full driveway to clear away residue and loose dirt.
Wash, Rinse, and Inspect the Full Surface
Once you’ve dealt with growth and stains, wash the whole driveway.
If you’re using a pressure washer, keep it around 1,500–2,000 PSI with a 25°–40° fan nozzle. Hold the wand at least 6 inches above the surface.[4][10] Sweep the spray across the pavers at a shallow angle. Don’t point it straight down into the joints, or you’ll blast out the joint sand. At this stage, the pressure washer is there to rinse, not to gouge the surface clean.
After the final rinse, inspect the driveway in daylight. Look for:
- dark oil spots that didn’t come out
- soapy film or cleaner streaks
- loose sediment collecting in low spots
Run your hand over any area that looks off. The surface should feel clean and free of growth, stains, film, and grit.
Once the driveway is clean and free of residue, move to drying and joint sand.
Step 3: Dry the Pavers and Refill Joint Sand Before Sealing
After cleaning, the pavers and the joint sand need to be fully dry before you seal. If moisture gets trapped under the sealer, you can end up with whitening, clouding, peeling, or early failure.
This step helps you avoid those moisture and sand problems before sealing starts.
Allow at Least 24 Hours of Dry Time
After pressure washing, wait at least 24 hours of dry, rain-free weather before sealing.[11][3][13] If the weather is cooler, the area stays shaded, or humidity is high – which happens a lot in Maryland – give it 48 hours or more, especially near trees or garages where surfaces dry slower.[16][19]
Here’s a simple way to check. Press the back of your hand flat on the surface. It should feel dry, not cool or damp.[2] You can also tape a piece of clear plastic to the driveway for 45–60 minutes. If you see condensation under it, the surface is not ready.[17][18]
Once the pavers are dry, refill any joints that lost sand during cleaning.
Refill Washed-Out Joints and Sweep Off Excess Sand
Sweep dry joint sand into the gaps from different directions so it packs in evenly. The finished sand level should sit about 1/8 to 1/4 inch below the top edge of the pavers. Not flush. Not heaped on top.[21][22][23]
If you’re using polymeric sand, let it cure for 24–48 hours after activation before sealing.[12][14][15] It should feel firm, not soft or rubbery. After the joints are filled, sweep or blow off all loose sand from the paver faces. Any sand left behind can get trapped in the sealer film and leave a gritty feel or a permanent haze.[20][1][23]
Surface Condition vs. Ready to Seal: A Quick Reference Table
Use this quick check before sealing.
| Condition | Status |
|---|---|
| Damp or dark patches | ❌ Not ready |
| Dark, muddy, or wet joints | ❌ Not ready |
| Loose sand on paver faces | ❌ Not ready |
| Cool or clammy surface | ❌ Not ready |
| Polymeric sand feels soft or rubbery | ❌ Not ready |
| Uniform, lighter, matte appearance | ✅ Ready |
| Joints dry, granular, and set slightly below paver edge | ✅ Ready |
| No loose sand after sweeping | ✅ Ready |
| Surface feels dry at normal air temperature | ✅ Ready |
| No rain in 24 hours | ✅ Ready |
If even one item misses the mark, wait longer before sealing. If everything checks out, move to Step 4 and seal only in the right weather window.
Step 4: Seal Only in the Right Conditions and Finish With a Final Check
Choose the Right Sealer Timing and Weather Window
Once the pavers and joints pass the dry check, one last thing matters: the weather.
Only seal after the driveway is fully dry and the forecast stays dry through the full cure time. Apply sealer when temperatures are between 50°F and 90°F and keep it out of direct sun. If humidity is high, curing can take longer, so hold off if you see dew or any damp spots in shaded areas.
Wind can also cause problems. Strong gusts may dry the sealer unevenly, which can leave the finish looking patchy. Before you start, turn off any sprinkler or irrigation systems and leave them off until the sealer has cured.
Conclusion: The Final Pre-Sealing Checklist
Before you open the sealer, run through this final checklist:
- Clean pavers
- Dry joints
- Refilled sand
- No loose debris
- A clear 24- to 48-hour dry window
For professional prep and sealing, Pro Landscapes MD provides driveway paver and hardscaping services across central Maryland.
FAQs
How do I know the pavers are dry enough to seal?
Your driveway pavers are dry enough to seal when the surface shows no visible moisture and the moisture inside the paver pores has had enough time to evaporate.
Drying time depends on the sealer type, humidity, and how much rain you’ve had lately. Water-based acrylic sealants often dry sooner, but the pavers still need to be fully dry before you apply anything if you want the sealer to bond well and last.
What happens if I seal over oil stains or moss?
Sealing over oil stains or moss can stop the sealer from bonding well to the paver surface. When that happens, the sealer can fail, peel, or discolor not long after you apply it.
Moss is a problem too. If you seal it in, growth or decay can keep going under the surface. That can hurt both the look of your driveway and the condition of the pavers.
The safer move is simple: clean the pavers, treat any stains or moss, and let the surface dry fully before sealing.
Should I use regular joint sand or polymeric sand before sealing?
It comes down to the type of paver you have.
Permeable pavers need clean, aggregate-based joint material so water can drain and soak into the ground the way it’s supposed to. Polymeric sand can clog those joints and stop that drainage from working.
With standard non-permeable driveways, polymeric sand is often used to harden the joints and help cut down on weeds.
Your safest move is to check the manufacturer’s recommendations for your exact paver system.
Chat with Us