









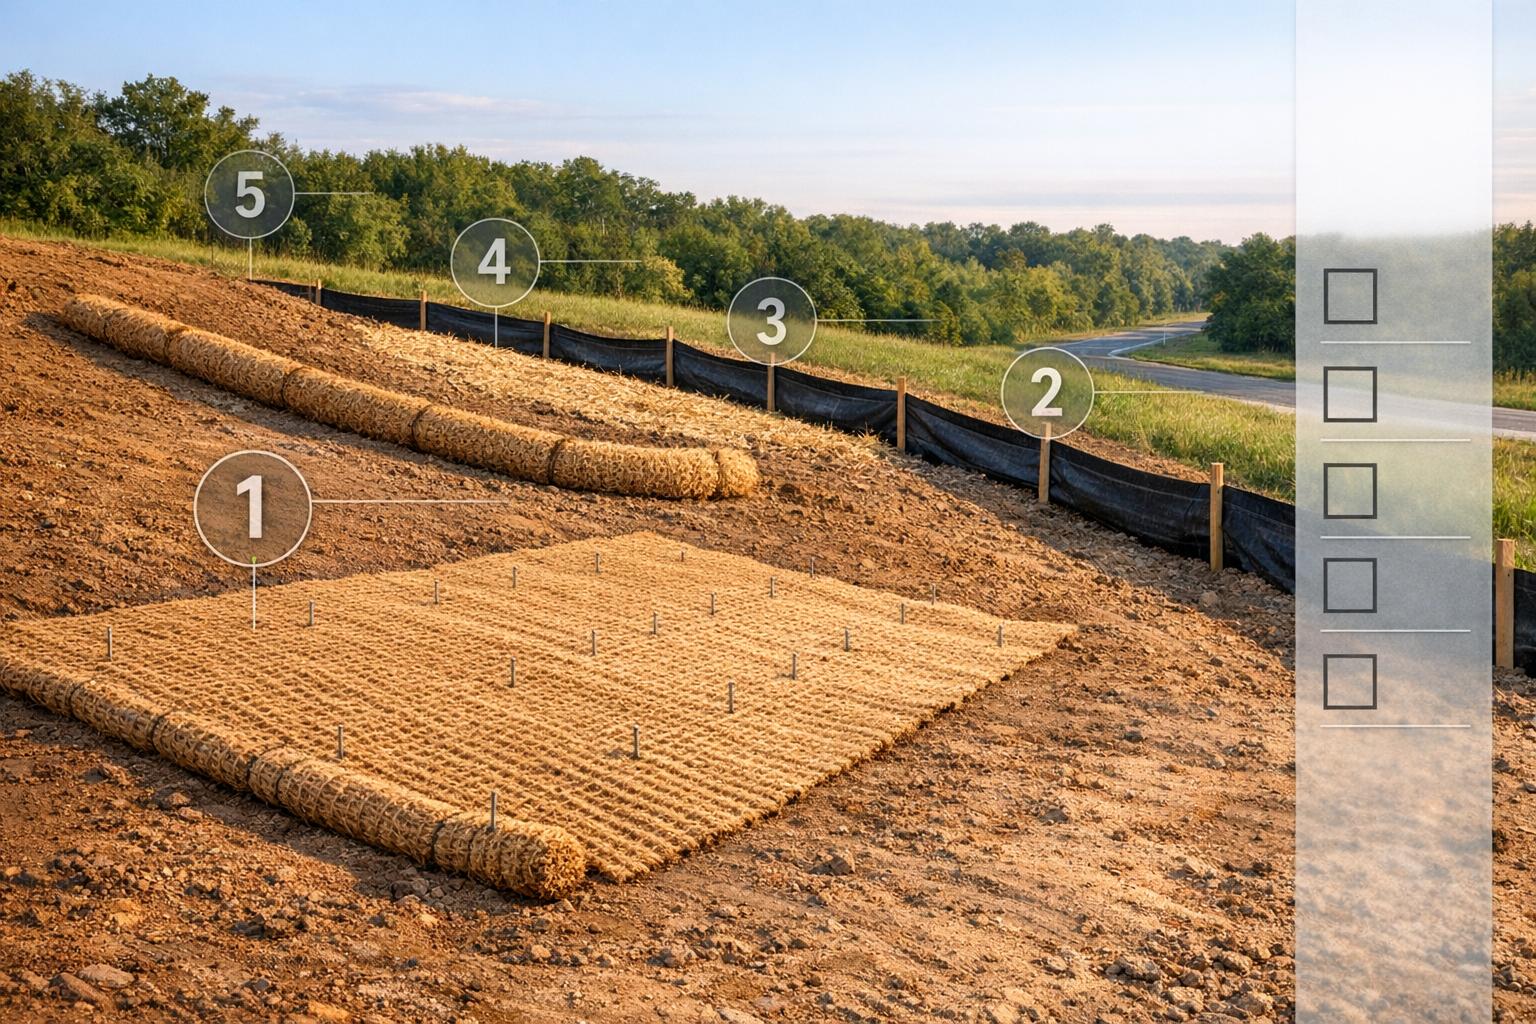
- bhavya gada
- No Comments
Erosion control is critical for protecting construction sites, preventing soil loss, and complying with Maryland’s strict sediment control regulations. This guide outlines a step-by-step process, from site assessment to product installation and maintenance, ensuring compliance and effective soil stabilization. Here’s what you need to know:
- Maryland’s Challenges: Dense clay soils and frequent storms increase runoff and erosion risks, requiring tailored solutions.
- Pre-Installation Steps: Conduct a site assessment to evaluate slopes, soil types, drainage, and proximity to water. Secure regulatory approvals early, as permits can take up to six months.
- Product Selection: Use silt fences, erosion control blankets, and drainage solutions based on site-specific conditions like slope steepness and water flow.
- Installation Best Practices: Properly entrench silt fences, secure blankets tightly to the ground, and follow manufacturer guidelines for all products.
- Maintenance and Inspections: Regularly check for damage, particularly after storms, and adjust controls as construction progresses.
- Final Stabilization: Ensure soil is fully stabilized with vegetation or hardscaping before removing temporary measures.
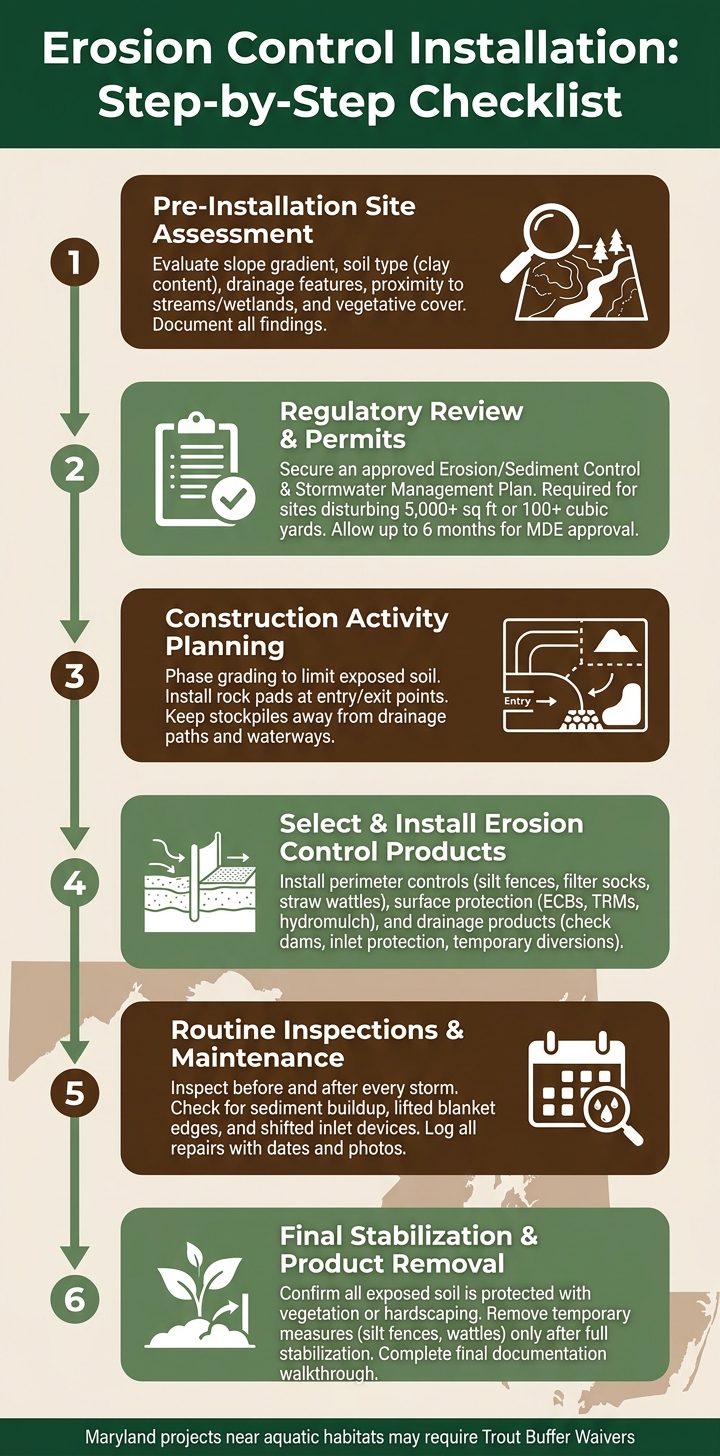
Erosion Control Installation Checklist: Step-by-Step Guide
Erosion Control and Silt Fence
sbb-itb-843f8be
Pre-Installation Site Assessment
Pro Landscapes MD kicks off every erosion control project with a thorough pre-installation site assessment. This step is essential for creating durable, compliant solutions tailored to Maryland’s unique soil and terrain.
A detailed assessment is the backbone of an erosion control plan that can withstand heavy rain, unlike plans that might fail under pressure.
Assessing Site and Soil Conditions
Start by walking the site and documenting its features. Combine slope evaluations with an in-depth soil analysis. Maryland’s heavy clay soils, commonly found in areas like Howard and Montgomery counties, tend to shed water rather than absorb it. This characteristic can lead to significant runoff, even on moderately sloped areas.
Here’s a breakdown of the key factors to evaluate during your walkthrough:
| Assessment Factor | Key Observations | Why It Matters |
|---|---|---|
| Slope Gradient | Steepness and length of slopes | Steeper slopes increase runoff speed and the risk of erosion. |
| Soil Type | Texture, permeability, clay content | Determines erosion rates and sediment levels in runoff. |
| Drainage Features | Existing swales, pipes, natural flow paths | Helps design effective water diversion routes and prevents localized washouts. |
| Proximity to Water | Distance to streams, wetlands, storm drains | Regulatory buffers may be required to protect sensitive areas. |
| Vegetative Cover | Presence of trees, shrubs, existing grass | Loss of vegetation during grading can expose soil to erosion. |
Pay extra attention to nearby streams or wetlands. In Maryland, projects near aquatic habitats often require additional measures, such as Trout Buffer Waivers. These waivers add more documentation to your plan [2][3]. Identifying these risks early ensures you choose and place erosion control products effectively.
Once all site specifics are documented, confirm that your design adheres to local erosion control standards.
Checking Erosion Control Plans and Regulations
After evaluating the site, verify that your erosion control plan aligns with Maryland’s regulations. Before any clearing or grading begins, you’ll need an approved Erosion/Sediment Control and Stormwater Management Plan. If the project disturbs 5,000 square feet or more of land or involves excavating 100 cubic yards or more of soil, approval from the Maryland Department of the Environment (MDE) is required [4]. Since this approval process can take about six months, submitting your plan early is crucial [4].
Make sure the approved plan reflects current site conditions. Use updated topographical maps and weather data to avoid failures in the field [1]. Before starting work, cross-check the documented plan with your on-site observations to ensure accuracy.
"Within stormwater management, perhaps the single most important acronym is BMP – best management practices." – Silver Leaf SWPPP [1]
Planning for Construction Activity
The way construction is sequenced can significantly impact soil exposure. To reduce erosion risks, aim to limit the area of disturbed soil at any given time by phasing construction carefully [3]. Avoid grading the entire site if only a portion will be built on immediately.
Traffic routes are another critical factor. Designate specific access points and install rock pads at entry and exit areas to prevent vehicles from tracking sediment onto public roads [3]. Additionally, keep soil and mulch stockpiles far from drainage paths and waterways [3]. A poorly placed stockpile can compromise an otherwise solid erosion control setup after just one storm.
"Failing to implement BMPs properly can result in fines or even shut down the entire project until corrections are made." – Silver Leaf SWPPP [1]
Choosing the Right Erosion Control Products
Once you’ve assessed your site, it’s time to choose products that address specific erosion challenges. The best options depend on factors like slope, soil type, water flow, and how long the area will be disturbed.
"The U.S. Environmental Protection Agency (EPA) has estimated that erosion from construction sites is the cause of nearly 20% of all sediment pollution, leading to high cleanup costs and numerous environmental impacts." – Environmental Construction Solutions [6]
Perimeter Controls and Sediment Barriers
Start with perimeter controls to effectively trap sediment based on your site’s unique conditions. Silt fences are a common choice, utilizing plastic sheeting buried at least 6 inches below the soil line to slow runoff and trap sediment at site boundaries [7]. For a stronger option, filter socks – mesh tubes filled with organic material – can also capture chemical pollutants along with sediment [7]. If you’re dealing with moderate water flow, straw wattles offer a biodegradable alternative that naturally breaks down as vegetation grows.
The key is matching the control to the expected water volume and flow speed. For instance, silt fences are ideal for flat or gently sloped areas, but they may fail on steeper terrain if water pools against them.
Surface Protection Products
To keep soil in place while vegetation establishes itself, consider erosion control blankets (ECBs) or turf reinforcement mats (TRMs). These products are selected based on the conditions identified in your pre-installation assessment. ECBs, for example, are categorized by the shear stress they can handle, which correlates to the steepness of the slope:
| ECB Classification | Max Slope Ratio (L:H) | Allowable Shear Stress (lbs/ft²) | Material Description |
|---|---|---|---|
| 1C, 2C | 3:1 | ≥1.5 | Rapidly degrading, single netting |
| 1D, 2D | 2:1 | ≥1.75 | Rapidly degrading, double netting |
| 3B | 1.5:1 | ≥2.0 | Slowly degrading, double netting |
| 4B | ≤1:1 | ≥2.25 | Slowly degrading, double netting |
| 5A/5B | ≤1:1 | ≥6.0–8.0 (vegetated) | UV-stabilized, nondegradable matrix |
For larger, steeper, or hard-to-reach areas, hydraulic mulch (hydromulch) is often the better option. This spray-applied solution eliminates the need for workers to navigate unstable slopes. Wood fiber hydromulch is especially effective on steeper grades, offering better durability than basic cellulose, though it comes at a higher cost [5]. To maximize results, apply seed, lime, and fertilizer to the soil before hydromulching – mixing these materials into the tank can reduce seed-to-soil contact.
Next, you’ll want to address water flow challenges using specific drainage and flow control products.
Drainage and Flow Control Products
Managing water flow is critical to preventing erosion. Check dams are effective for slowing water velocity in drainage channels and ditches, helping to reduce the risk of channel scour. Inlet protection devices, placed around storm drain openings, prevent sediment from entering the stormwater system during grading activities. Additionally, temporary diversions like berms or swales can redirect sheet flow away from exposed areas and toward stabilized outlets.
Installation Best Practices
Getting the installation right is just as important as choosing the right products. Proper setup ensures your erosion control measures can handle heavy storms effectively. Each product comes with its own set of guidelines, and skipping steps can undermine the entire plan.
Installing Silt Fences and Barriers
The effectiveness of a silt fence depends heavily on how well it’s entrenched. Start by digging a trench that’s at least 4 inches wide and 6 inches deep, following the natural contours of the land. This helps prevent water from pooling and breaching the fence.
Place support posts on the downslope side of the trench, keeping them no more than 10 feet apart for standard installations. If you’re using wire-backed reinforcement, reduce the spacing to 6 feet. Attach the geotextile fabric to the upslope side of the posts with heavy-duty staples or wire ties, ensuring it’s pulled tight. Fold the bottom 6 inches of fabric into the trench, then backfill with compacted soil to secure it.
When joining two sections of fabric, overlap them by at least 6 inches, and wrap both ends around a shared support post. The slope’s steepness will determine how far a single fence run can protect:
| Slope Steepness | Max Slope Length (ft.) |
|---|---|
| 2:1 | 20 |
| 3:1 | 50 |
| 4:1 | 80 |
| 5:1 or flatter | 100 |
Avoid installing silt fences across concentrated flow channels, as the pressure can cause them to fail. For areas with steep slopes or high water flow, consider using a "super silt fence" reinforced with chain-link fencing for added durability.
Once silt fences are in place, move on to securing erosion control blankets for added soil stability.
Applying Erosion Control Blankets and Mats
After setting up perimeter barriers, the next step is protecting exposed soil with erosion control blankets. Start by preparing the ground – remove debris and level the soil. Full contact between the blanket and the ground is crucial to prevent water from sneaking underneath.
Unroll blankets from the top of the slope downward, following the land’s natural shape. At the top edge, dig a trench 6–8 inches deep, embed the blanket, and secure it with staples spaced every 12–18 inches. Backfill the trench and compact the soil to lock it in place. When overlapping multiple blankets, ensure 6–12 inches of overlap and staple the seams every 18–24 inches. Anchor the bottom edge in its own trench, backfill, and secure it against wind and runoff.
After heavy rains, inspect for any damage, such as tears or lifted edges. Fix these areas immediately by replacing damaged sections and re-anchoring loose edges to maintain stability before the next storm.
With the blankets in place, the focus shifts to installing drainage systems.
Setting Up Drainage Products
Drainage installations should align with your site’s Best Management Practices (BMP) plan, taking into account the land’s topography and expected storm conditions. For check dams and inlet protection devices, precision is key. Position inlet protection devices snugly around storm drain openings before grading begins. Properly space and anchor check dams to handle the anticipated water velocity.
Once installed, maintain thorough records of your BMP setup, including photos, placement details, and maintenance logs. These records are invaluable for regulatory inspections and help your team make necessary adjustments as the project progresses [1].
Inspection, Maintenance, and Final Stabilization
Once installation is complete, keeping erosion control measures effective requires regular monitoring and timely updates.
Routine Inspections and Maintenance
Make it a habit to inspect all control measures regularly – especially before and after significant rainfall. During inspections, check that BMPs (Best Management Practices) are installed as outlined in the site plan [1]. Watch for signs like sediment buildup behind silt fences, edges of blankets lifting, or inlet protection devices shifting out of place.
Stay ahead of the weather by monitoring forecasts and reinforcing controls before storms hit. Train your team to spot and fix problems quickly. Keep detailed records of every inspection, repair, and maintenance activity, including dates and photos.
"Documentation is another huge factor in ensuring compliance with stormwater regulations and preventing any potential fines or other issues." – Silver Leaf SWPPP [1]
Adjusting Controls as Construction Progresses
Erosion control isn’t a one-and-done task – it evolves with the site. Treat your BMP plan as a living document that adapts to changes like new drainage paths, expanded work areas, or altered slopes. Use updated topographical data to adjust control placements, as pre-construction maps may miss runoff changes. If project ownership or contractor roles shift, revise the Statement of Financial Responsibility to reflect these updates [2].
As permanent features like retaining walls, swales, or landscaping are added, incorporate them into your erosion control strategy. This allows for a gradual and orderly reduction of temporary measures.
Final Stabilization and Product Removal
Final stabilization means ensuring that all exposed soil is protected against erosion – continuing the proactive approach used throughout the project. This often involves using rolled erosion control products (RECPs) and performance mats to shield the soil while vegetation takes root. Remove silt fences and wattle barriers only once vegetation or hardscaping is fully stable. For RECPs secured with specialized fasteners like Twist Hex Pins, follow the manufacturer’s instructions for removal to avoid disturbing new root systems. Wrap up with a final walkthrough to confirm all control points are addressed and documentation is complete [1].
Conclusion
Effective erosion control demands careful planning, the right materials, and ongoing inspections. Skipping even one step can jeopardize your site and nearby waterways.
"As SafetyCulture states, a robust control plan distinguishes between enduring performance and failure." [8]
Tailoring strategies to your site is what sets a durable plan apart from one that collapses under the pressure of heavy runoff.
Achieving long-term soil stability often relies on permanent vegetation, deep-rooted native plants, and supportive hardscaping. The University of Maryland Extension highlights that live roots from spreading perennials and shrubs are particularly effective in stabilizing soil [9], especially on slopes with grades of 50% or more.
Partnering with professionals like Pro Landscapes MD can turn temporary fixes into enduring solutions. By offering services such as grading, stormwater management, retaining walls, and native plant installations across central Maryland and Washington, DC, they ensure that erosion control measures are seamlessly integrated into resilient, sustainable landscapes.
Keep this checklist handy to adapt your controls as site conditions change over time.
FAQs
Do I need an MDE permit for my project?
Installing erosion control products typically doesn’t require an MDE permit unless local regulations explicitly state otherwise. However, it’s always a good idea to consult with a qualified design professional to make sure you’re meeting all relevant standards and requirements.
Which erosion control product fits my slope and soil?
Choosing the right erosion control product requires understanding your slope and soil conditions. For steeper slopes (2H:1V or greater), biodegradable erosion control blankets (ECBs) work well as temporary protection while supporting vegetation growth. If you’re focusing on soil stability, rolled erosion control products (RECPs) are a good choice, especially when tailored to your soil’s erosion risk. Be sure to check the manufacturer’s specifications to ensure the product aligns with the unique requirements of your site.
When can temporary erosion controls be removed?
Temporary erosion controls need to be taken out as soon as possible, but no later than 7 days after construction activities have temporarily or permanently stopped. The only exceptions are if work is set to resume within 14 days or if snow cover delays stabilization efforts.
Chat with Us