









- bhavya gada
- No Comments
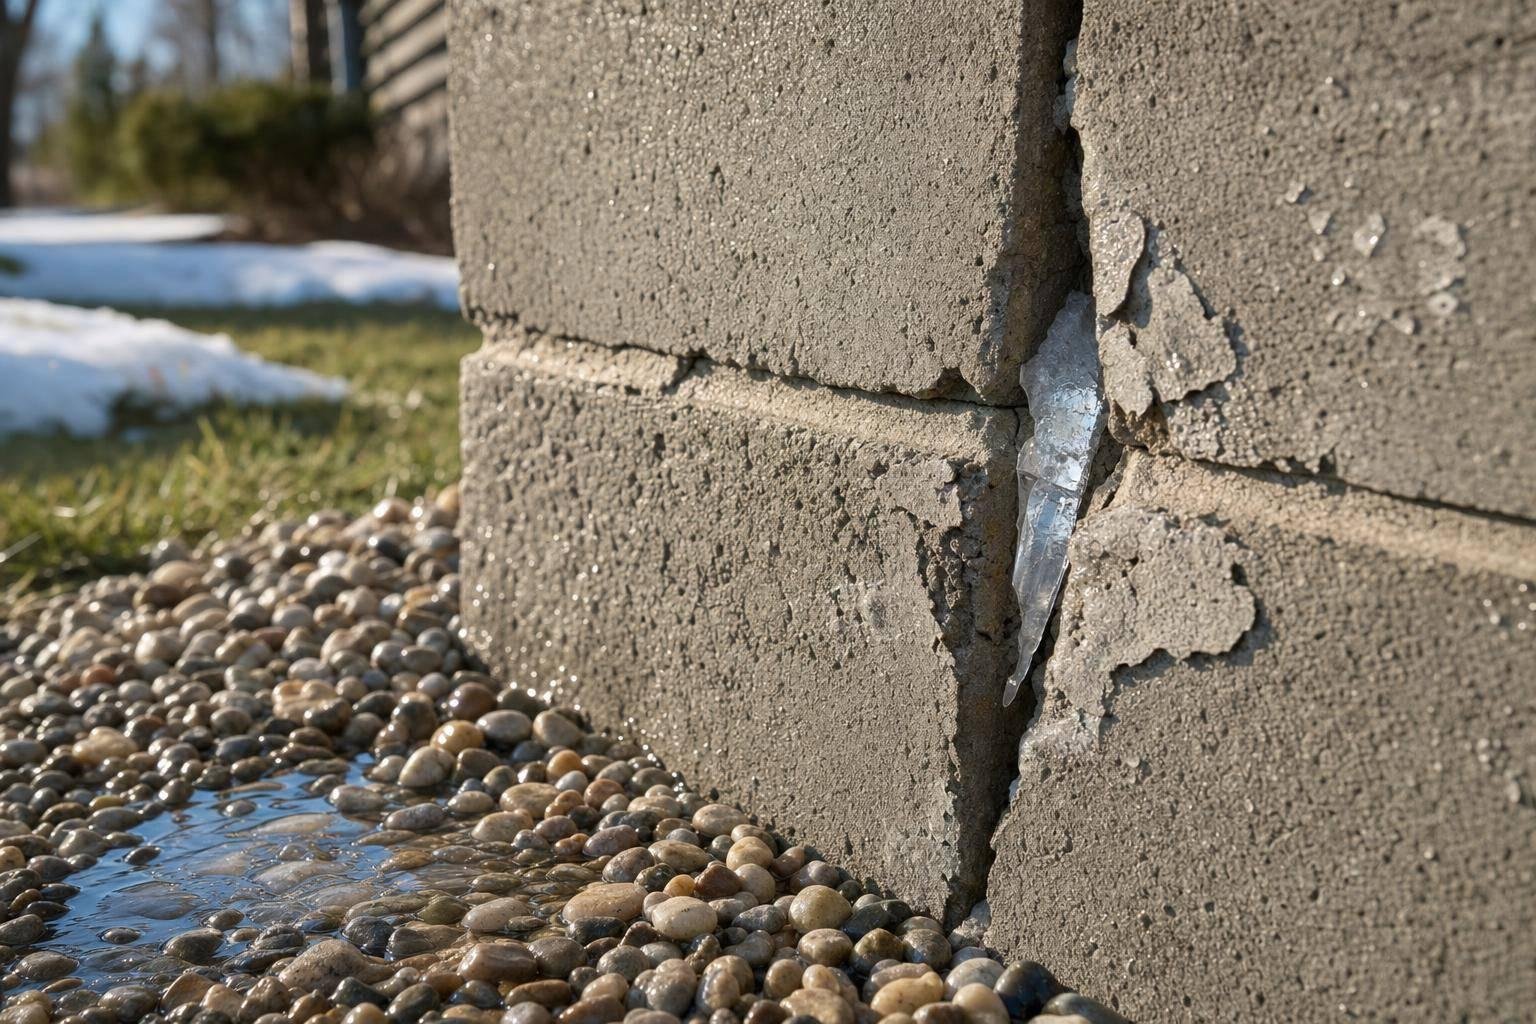
Freeze-thaw damage starts with water. If water gets into a block wall or the soil behind it, winter temperature swings can turn small flaws into cracks, bulges, and lean.
I’d sum it up like this: Maryland often gets 20 to 30 freeze-thaw cycles in a winter, and water expands by about 9% when it freezes. That repeat stress can chip block faces, open joints, push on the wall from behind, and leave you with movement that shows up by March or early April.
If I wanted the short version, I’d focus on these points:
- Water entry is the main problem: through cracks, joints, poor grading, or blocked drainage
- Surface wear can show up as scaling, flaking, pitting, and efflorescence
- Soil pressure can lead to leaning, bulging, tilting, and settlement
- Fall prep matters: clear drains, move downspout flow away, and keep water from pooling
- Spring checks matter too: inspect after thaw, measure cracks, and watch for wet spots
- Small wear can often be patched, but leaning, bulging, or cracks at 1/4 inch or more may mean deeper repair work
Here’s a simple way I look at it:
| What I see | What it often means | What I’d do |
|---|---|---|
| Light white staining | Water moving through the wall | Check drainage and grading |
| Flaking or chipped surface | Freeze-thaw wear at the block face | Patch surface damage and limit salt use |
| Crack growth to 1/4 inch+ | Active movement or repeated water entry | Inspect more closely and repair the cause |
| Lean, bulge, or soil washout | Pressure behind the wall | Call a wall repair pro |
The main takeaway: if you control water before winter and inspect the wall after thaw, you have a much better shot at stopping small damage before it turns into a wall repair or rebuild.
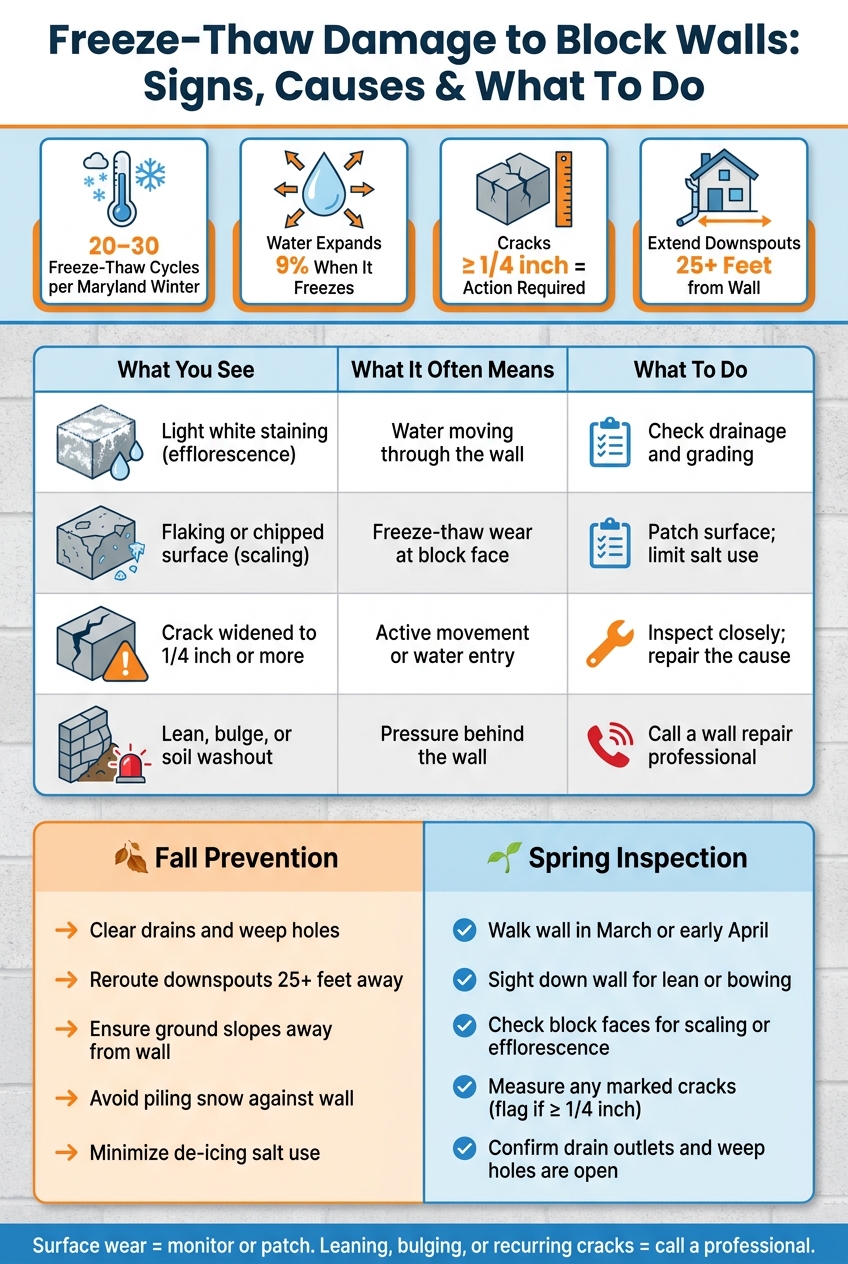
Freeze-Thaw Block Wall Damage: Signs, Causes & What To Do
Why does freezing damage concrete? | Freeze thaw durability mechanisms
sbb-itb-843f8be
How Freeze-Thaw Cycles Damage Modular Block Walls Over Time
Damage usually doesn’t show up in one dramatic moment. It builds little by little, winter after winter, as water moves deeper into the wall system with each freeze and thaw. The first clues often appear in the spots where moisture hangs around the longest: the block face and the area behind the wall.
Water Inside Blocks Leads to Flaking, Pitting, and Surface Loss
Concrete blocks are porous, so water can seep into tiny cracks and joints. Once that moisture gets into the face of the block, it freezes and expands. That outward force can break off thin layers from the surface, a process called scaling. Over time, a rough block face can end up chipped and pitted.
Walls near a salted driveway or patio often wear down faster because runoff carries salt right to the blocks.[2]
"The salts used to melt ice on concrete surfaces actually accelerate freeze-thaw deterioration. Water absorbed into concrete surface pores freezes and expands, popping off thin layers of concrete." – Mr. Handyman [2]
Frozen Soil and Trapped Water Press Against the Wall
When drainage behind the wall slows or stops, water starts to collect in the backfill. If that soil gets saturated and then freezes, it expands and pushes outward. That process is called frost heave. The pressure can bow the wall, crack it, or rotate it forward. When the ice melts, the soil settles back down, but not always evenly. That’s how you end up with lasting tilts, bulges, or dips.[1][2]
If water stays trapped behind the wall, each freeze-thaw cycle can shove the wall a little farther out of line until spring makes the movement easy to spot.
Why Code-Compliant Walls Can Still Fail Early
Even a properly built wall can run into trouble early if downspouts dump water nearby, the grading sends runoff toward the wall, or drainage is missing. In that situation, the backfill stays too wet. Then winter turns that trapped water into pressure behind the wall. What started as a small installation gap can become movement you can see by spring.[1]
Signs of Movement and Water Entry to Check After Winter
Do a spring walkthrough in March or early April, once the ground has thawed. That’s when you get the clearest read on how the wall made it through winter. Focus on two things: where water got in and whether the wall moved.
Surface Damage, Cracks, and Joint Separation
Start with the face of the block. If you see scaling – thin layers of concrete flaking off – that’s a sign winter moisture reached the surface. You might also spot white mineral deposits on the wall. That’s efflorescence, and it points to water moving through the wall.
Cracks and gaps at the joints matter too. They often act like entry points for water. A small crack that gets wider by spring is a red flag because it suggests active movement. And if the same crack or joint gap keeps coming back in the same spot, don’t brush it off. It needs attention.
Lean, Bulges, Settlement, and Wet Spots
Now step back and look at the wall as a whole. Bowing, leaning, or tilting means winter pressure has already pushed the wall out of place. Then check the ground at the base. Ponding water, algae growth, or soil washing out through the joints can all point to drainage that isn’t doing its job.
If the wall has a drain outlet, check it after a rain. Water should move out freely. If the flow is weak, water may still be stuck behind the wall, and that trapped water can lead to movement during winter.
Cosmetic Wear vs. Structural Movement
Keep an eye on scaling and light efflorescence. Those are often surface-level issues. But widening cracks, bulging, leaning, and soil loss point to structural damage.
Call a professional if the wall is out of plumb or if the joints keep opening. Those signs can help you decide if the wall needs simple monitoring, patching, or a deeper repair before the next freeze.
Seasonal Prevention and When to Repair Damage
Late-Fall Steps to Cut Winter Moisture Problems
Before winter sets in, deal with water first. Clear drains, reroute downspouts, and stop water from collecting behind the wall. Extend downspouts at least 25 feet away from the wall to help prevent pooling [1]. Check the slope of the ground too. It should pitch away from the wall, not toward it [2].
A couple of small habits matter here. Don’t pile snow against the face of the wall. And go easy on de-icing salts. They let more water soak into masonry pores, which can make freeze-thaw damage worse [2].
What to Inspect in Early Spring Before Damage Spreads
When winter ends, it’s time to switch from prevention to inspection. After the ground thaws, especially in March, walk the wall carefully before minor wear turns into a bigger repair [2].
Sight down the full length of the wall and look for any new leaning, bowing, or shifting. Check block faces and caps for scaling or efflorescence. Also look at the soil above the wall. If it’s sagging, that can mean the backfill is washing out [1][2].
If you marked hairline cracks last fall, measure them now. A crack that has widened to 1/4 inch or more needs closer attention [2]. While you’re at it, make sure drain outlets and weep holes are open and draining during rain.
Use the spring check to sort surface wear from structural trouble:
- Efflorescence on the block face – Inspect and improve drainage behind the wall; check grading at the top
- Surface scaling or flaking – Patch surface damage; limit salt use; consider a breathable masonry sealer in spring
- Cracks widened to 1/4 inch or more – Fill cracks; check for structural movement if they come back
- Wall leaning or bulging – Call a professional; the wall likely needs drainage correction and may need a rebuild
When to Monitor, Patch, Rebuild, or Call a Professional
Surface scaling or hairline cracks can often be watched or repaired if the wall stays plumb and drainage is doing its job [2]. But recurring cracks, bulging, or any visible lean usually point to the main problem: poor drainage behind the wall. In that case, patching the face is like putting a bandage on a leak in the roof. It doesn’t solve what’s going on underneath.
That type of repair often means excavating behind the wall, adding geo-fabric and crushed stone, and installing proper weep drains to relieve water pressure behind the wall [1].
Plan major repairs after freeze-thaw season ends. If your spring inspection shows structural movement, fix the drainage before the next winter cycle starts.
Conclusion: Keeping Block Walls Safe from Freeze-Thaw Damage
Freeze-thaw damage starts with water, not cold. If moisture gets behind a block wall and can’t drain out, each freeze-thaw cycle chips away at the surface and can shift the wall over time.
That’s why water control comes first. Not last. Keep water away before winter hits, check the wall again in early spring, and deal with drainage issues as soon as you spot movement.
In Maryland, repeated freeze-thaw swings can turn a small water-entry point into a much bigger structural problem fast.
If your wall shows signs of drainage trouble or movement, Pro Landscapes MD can assess the problem and recommend repairs in central Maryland.
FAQs
How fast can freeze-thaw damage get worse?
Freeze-thaw damage often builds quietly over several winters before movement, scaling, or cracking becomes easy to spot. As water gets into pores or small cracks and then freezes, it expands and adds stress with each cycle.
In some cases, shifting or buckling shows up by the next spring, especially when water collects on the surface. Left alone, the damage usually gets worse by the next winter.
Can one winter cause a block wall to lean?
Yes. One winter is enough for a block wall to start leaning.
When soil gets saturated and temperatures drop below freezing, the wall can shift in a single season. Here’s why: water trapped behind the wall freezes, expands, and puts pressure on the blocks. That pressure can push the wall out of place.
If you notice leaning or bulging, take it seriously. Those are strong signs of drainage problems or structural instability. A professional inspection can help catch the cause before the wall gets worse or fails.
Should I seal my block wall before winter?
Yes. A breathable sealant can help keep water out while still letting trapped moisture escape. That matters a lot in Maryland, where freeze-thaw cycles can be rough on masonry and concrete.
That said, sealant is only a backup layer. Good drainage does most of the heavy lifting, so make sure weep holes, drain pipes, and grading stay clear and work the way they should. And if you notice major cracks, bulging, or tilting, sealant by itself won’t solve it.
Chat with Us