









- bhavya gada
- No Comments
Winter can leave behind trip hazards, drainage trouble, and wall movement long before you spot major damage. When I check hardscape after a Maryland winter, I focus on a few numbers first: a 1/4-inch lip can become a trip risk, a 1/2-inch offset often points to a larger repair, standing water after 24 to 48 hours usually means drainage is off, and ground near the foundation should slope about 6 inches over 10 feet away from the house.
Here’s the short version: I inspect patios, walkways, steps, driveways, entries, retaining walls, drains, swales, downspouts, and low spots. I take dated photos, measure cracks, height changes, and puddles, and sort each issue into monitor, routine maintenance, or urgent safety.
If I want a simple spring check, I look for:
- Cracks, spalling, and loose pavers or stone
- Trip hazards at joints, steps, and door transitions
- Missing joint sand, weak mortar, and failed edge restraints
- Ponding water near hardscape or the foundation
- Leaning or bulging retaining walls
- Blocked drains, washed-out outlets, and soft low spots
A few field checks help fast:
- 4 stacked pennies are about 1/4 inch
- Use a 4-foot level or straight board to spot dips and lips
- Recheck surfaces when they’re damp or a day after rain
- Mark repeat trouble spots on a simple site sketch
| Area | What I check first | When it moves into repair |
|---|---|---|
| Patios, walks, steps | Cracks, rocking units, uneven edges | Lip at 1/4 inch+, loose base, weak handrail |
| Driveways, entries | Settlement, ponding, spalling, washout | Water after 24 hours, crack at 1/2 inch+, rutting |
| Retaining walls, drainage | Lean, bulge, seepage, blocked flow | Wall movement, seepage, ponding after 24–48 hours |
This article boils the full process down into a simple spring review, so I can spot small problems early and know when the job has moved past basic upkeep.
Checklist 1: Patios, Walkways, and Steps – Surface Movement and Damage
Clear the Surface, Then Check for Cracks, Spalling, and Loose Units
Start with a full sweep. Remove leaves, branches, grit, and any salt or sand left over from winter. Give extra attention to step noses, expansion joints, and door thresholds. Those areas tend to trap debris, and that buildup can hide damage.
Once the surface is clean, check for movement, height changes, and failing joints.
First, do a visual scan. Then walk the area and feel for movement underfoot. After that, check again when the surface is damp so you can spot places where water hangs around.
On concrete, look for hairline cracks, pitted spots from spalling, and areas where the coarse aggregate is exposed. On pavers, step on single units and shift your weight a bit. If a paver rocks or feels soft, the base or bedding layer likely needs work. For flagstone, tap each stone lightly. A hollow sound usually means the bond underneath has come loose. If stones are pulling away from the base, re-pointing by itself won’t last.
Measure Uneven Areas and Trip Hazards
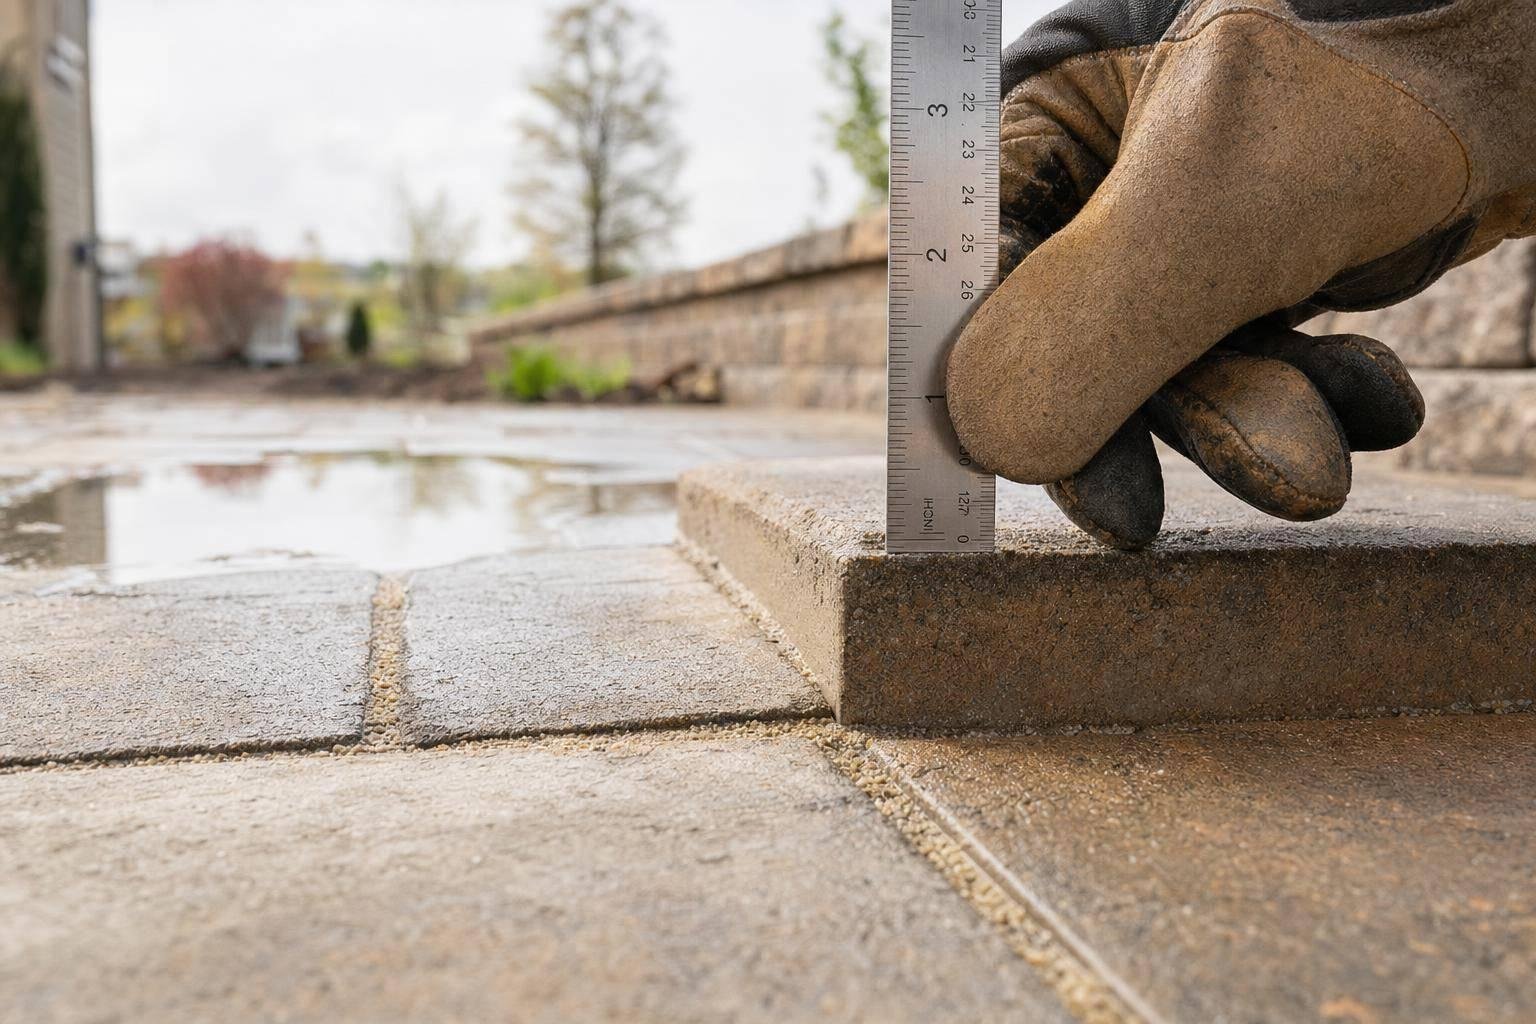
Next, measure any movement that could trip someone. A height difference of 1/4 inch or more at a joint, slab edge, step tread, or door transition is worth writing down. Differences from 1/4 inch to 1/2 inch should be beveled, and anything over 1/2 inch usually calls for a bigger repair[2][3][4][6]. Need a quick way to check in the field? Four stacked pennies are about 1/4 inch[5].
Use a 4 ft. level or a straight 2×4 to span suspect spots, then measure the gap below. Write down the location, the amount of movement, and the likely cause. For example: "patio-to-walkway joint near side gate: 3/8 in. lip from frost heave."
On steps, make sure each riser is even. A variation of more than 3/8 inch between adjacent risers can lead to missteps, especially in low light[1]. Also test handrails. If the post or anchor moves, that’s a safety problem.
Check Joint Sand, Mortar, and Edge Restraints
After the surface check, look at the joints and edges. They help keep the whole system in place.
For pavers, crouch down and sight along the joints. If the sand sits 1/8 to 1/4 inch below the proper level, but the pavers still sit flat and don’t rock, simple re-sanding may be enough. But if pavers still rock after refilling the joints, or you spot small dips near downspout outlets or along retaining walls, the base has likely shifted. In that case, re-sanding alone won’t fix it.
On mortared flagstone, lightly scrape a joint with a screwdriver. If the mortar crumbles or flakes away with little effort, freeze-thaw wear has weakened it. Open joints, water staining, or white efflorescence along certain seams point to repeated moisture under the surface. Then walk the perimeter of any paver area and check the border units. If they have moved outward or lifted, the edge restraint has failed, and the surface can start to spread over time.
| Joint/edge condition | What it signals | Likely next step |
|---|---|---|
| Sand slightly low, pavers stable | Minor joint depletion | Re-sand and compact |
| Rocking pavers after re-sanding | Base or bedding failure | Lift, re-level, reinstall |
| Crumbly or missing mortar | Freeze–thaw damage | Repoint after confirming stone stability |
| Hollow-sounding flagstone | Bond failure beneath stone | Lift and reset with fresh cement layer |
| Shifted or lifted border units | Failed edge restraint | Repair or replace restraint, reset border |
sbb-itb-843f8be
How to Repair a Paver Patio (Step-by-Step Guide for Homeowners & Pros)
Checklist 2: Driveways, Front Walks, and Entry Areas – Damage and Safety
Hardscape Defect Severity Guide: Minor vs. Major Repairs After Winter
Look for Cracks, Settlement, Ponding, and Surface Breakdown
Next, check the driveways and front entries where winter damage tends to show up fast. After patios and steps, look closely at driveways and entry walks. These surfaces handle the most foot traffic, vehicle weight, and runoff. Use the same clean-measure-document method here, but pay extra attention to spots that carry cars or funnel water.
Do the first inspection on a dry day. Then come back 24 hours after the next rain and see where water is still sitting.
Cracks under 1/4 inch are usually hairline cracks. Seal them and keep an eye on them. Cracks from 1/4 to 1/2 inch should be repaired before next winter. Cracks over 1/2 inch often point to base movement or frost heave. Use a tape measure and write down each crack’s location, length, and width. For example: "front walk, 2 ft. from entry step, 5/8 in. wide, running across the full slab."
Settlement and heaving usually show up as lips, tilted slabs, or ridges near joints and downspout outlets. A 4 ft. level works well here. Lay it across any area that looks uneven and measure the gap below. Any vertical displacement of 1/4 inch or more is a trip hazard, so log it.
On concrete, watch for scaling, spalling, pitting, or exposed aggregate near joints and tire tracks. On asphalt, look for raveling, which shows up as a rough surface with loose aggregate. Use a milder deicer, and skip metal blades that scrape the surface.
If water is still sitting in shallow basins on the driveway or walk 24 hours after rain, the slope is off or the base has settled. That water can refreeze, widen cracks, and soften the base even more. By next winter, the damage usually gets worse.
Check Paver Driveways and Stone Entries for Shifted Edges and Washout
Then move to paver driveways and stone entries, where movement often starts along the outside edges. Check the perimeter for edge creep, open seams, or missing sand. Those are common signs that the edge restraint has failed or water is moving where it shouldn’t.
Shallow ruts in tire paths usually point to base compaction or thickness problems, not just surface wear. On flagstone or paver entries, step on each unit near edges and transitions. If a piece rocks or sounds hollow, it has lost its bond to the base. Re-sanding or repointing a loose unit won’t last. The stone needs to be lifted, the base cleaned, and the unit reset with a fresh bonding layer.
If washout keeps coming back after re-sanding, the issue is not the surface. It’s drainage. More specifically, it’s a drainage and base design issue, not a routine maintenance task.
Defect Severity Table: Minor vs. Major and Next Steps
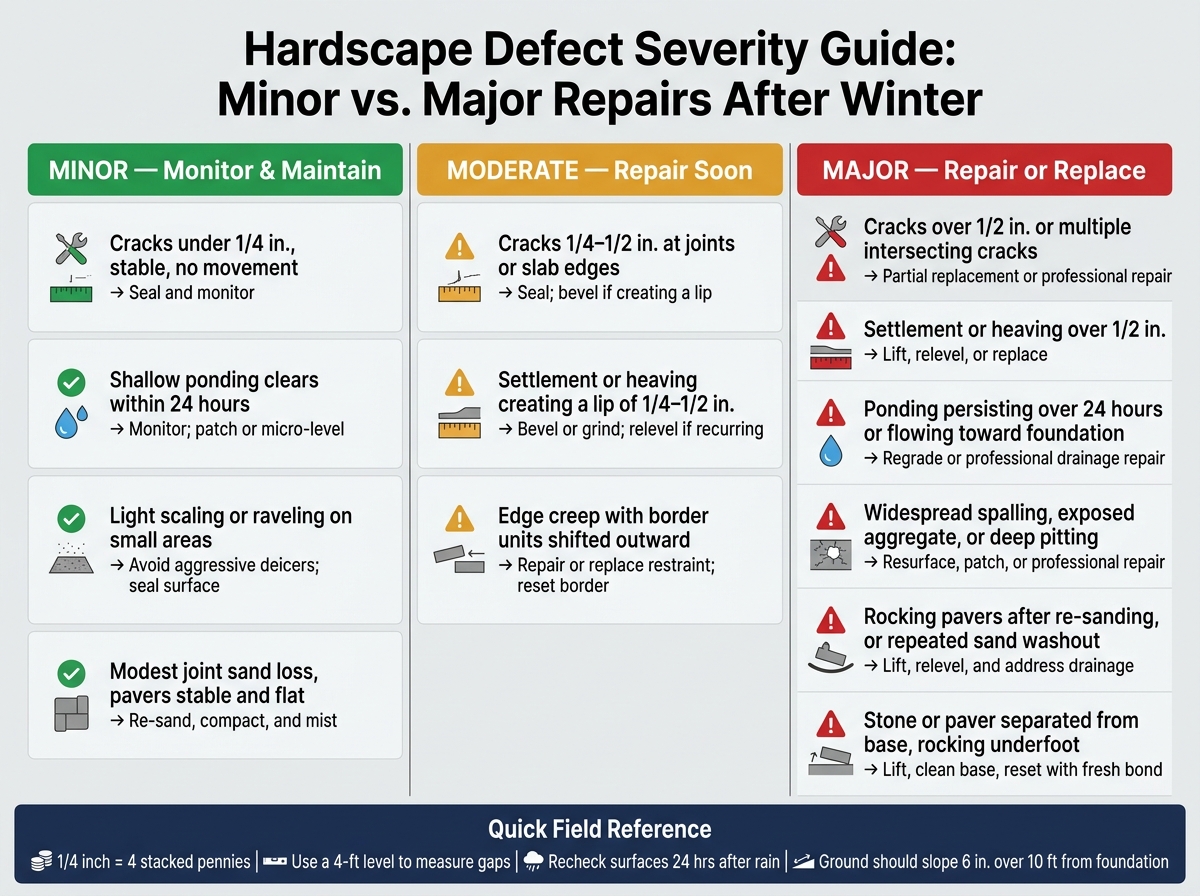
Use this table to sort what you found and figure out the next step.
| Defect | Severity | Likely Next Step |
|---|---|---|
| Cracks under 1/4 in., stable, no differential movement | Minor | Seal and monitor |
| Cracks 1/4–1/2 in. at joints or slab edges | Moderate | Seal; bevel if creating a lip |
| Cracks over 1/2 in. or multiple intersecting cracks | Major | Partial replacement or professional repair |
| Settlement or heaving creating a lip of 1/4–1/2 in. | Moderate | Bevel or grind; relevel if recurring |
| Settlement or heaving over 1/2 in. | Major | Lift, relevel, or replace |
| Shallow ponding that clears within 24 hours | Minor | Monitor; patch or micro-level |
| Ponding persisting over 24 hours or flowing toward foundation | Major | Regrade or professional drainage repair |
| Light scaling or raveling on small areas | Minor | Avoid aggressive deicers; seal surface |
| Widespread spalling, exposed aggregate, or deep pitting | Major | Resurface, patch, or professional repair |
| Modest joint sand loss, pavers stable and flat | Minor | Re-sand, compact, and mist |
| Rocking pavers after re-sanding, or repeated sand washout | Major | Lift, relevel, and address drainage |
| Edge creep with border units shifted outward | Moderate–Major | Repair or replace restraint; reset border |
| Stone or paver separated from base, rocking underfoot | Major | Lift, clean base, reset with fresh bond |
For major cracks, recurring washout, or drainage-related settlement, Pro Landscapes MD can assess repair, releveling, and drainage needs in central Maryland.
After you sort these findings, move on to walls and drainage paths, where water movement often drives the next round of damage.
Checklist 3: Retaining Walls, Drainage Paths, and Low Spots
After you check driveways and entry areas, move to walls and drainage. This is often where the next wave of damage starts. Retaining walls and drainage features tend to fail together after winter. Freeze-thaw cycles, snowmelt, and soaked soil can push walls out of place, change runoff patterns, and leave behind low spots. And in most cases, wall movement and low spots point to water movement, not random wear.
Check Retaining Walls for Leaning, Bulging, and Joint Separation
Stand at eye level and look straight along the wall face. Check it from the front, side, and top because a lean is often easier to catch from more than one angle. Press a long level or straight board flat against the wall face, mark any gaps with chalk, and take dated photos from the same spot each year so you can see whether the movement is getting worse or holding steady.
Watch for three crack patterns:
- Horizontal cracks across block or concrete faces
- Stair-step cracks along mortar joints
- Vertical cracks that widen toward the top, which can point to footing or settlement trouble
These cracks usually mean soil pressure and drainage trouble, not simple surface aging. Check the caps and joints too. Look for gaps, tilting, or missing mortar. If you see lean or bulging along with horizontal or stair-step cracks, treat it as a serious failure risk, especially near driveways, walks, or steps where a collapse could hurt someone.[7][8][10][11]
At the base of the wall, look for standing water or mud that is still there more than 24 hours after rain, water seeping through joints,[14][16][18] and white mineral deposits (efflorescence) on the wall face. Those deposits point to long-term moisture behind the wall.[8][9][10][12][13] Up top, check for soil depressions or erosion channels 2 to 6 ft. behind the wall cap. That can show runoff cutting toward the wall instead of away from it.[8][10][12][13]
Trace Water Flow Through Swales, Drains, and Downspout Discharge Areas
Drainage trouble often shows up first in the places where water is supposed to move away cleanly from hardscapes. A good time to check is shortly after a normal spring rain. Walk the property and follow the water path.
In swales, look for sections where water stops and ponds instead of continuing downhill. That often means sediment buildup, turf creeping in, or a low area that needs regrading. At French drain inlets and catch basins, check for leaves, silt, and debris. If a catch basin is more than one-third full, it needs cleaning.[17] At dry riverbeds, look for stones that have shifted or new side channels where water has started cutting around the planned route. At downspout discharge points, make sure splash blocks are lined up, extensions are attached, and the nearby soil or mulch has not washed out.
If water is still there 24 to 48 hours after rain, the drainage capacity or grading is falling short.[14][16][18] Write down the spot, the flow path, and the puddle depth.
Mark Low Spots Near Hardscapes and Foundations
Walk around every patio, walkway, driveway, and foundation wall while the ground is wet. Soft or squishy soil near the edge of a hardscape often gives away a dip that you won’t notice when the area is dry. Set an 8- to 10-foot board or contractor’s level across any area that looks suspicious. If you see a gap between the board and the ground, you’ve found a depression worth marking.
Check the direction of the slope too. Water should move away from the structure, not toward it. The ground should drop at least 6 in. over the first 10 ft. away from the foundation.[15] Anything less, or any reverse slope, is a grading problem. Mark those spots with landscape paint or small stakes, then add flow arrows and puddle locations to your site sketch.
Use those notes later in the repair-priority review. If wall movement or drainage trouble keeps coming back, Pro Landscapes MD can assess grading, drainage, and wall repair in central Maryland.
Conclusion: Sort Your Findings and Know When To Call a Pro
Sort what you found into a simple action plan before the next storm hits.
Group Findings Into Routine Maintenance, Needed Repairs, and Urgent Safety Issues
Put each issue into one of three buckets.
Routine maintenance covers smaller jobs you can handle on a regular schedule. That includes minor joint sand loss between pavers, light moss or algae buildup, light efflorescence on wall faces, and debris in drain grates or swales. These are the kinds of things you can clean, refill, or clear without much trouble.
Needed repairs are problems that may not be urgent today, but can get worse if you leave them alone. Think settled paver sections, ponding that sticks around more than a day after rain, or mortar joints that are crumbling even though the structure still feels stable.
Urgent safety issues need attention right away. If a walking surface has a vertical offset greater than about 1/2 inch, it usually needs repair or replacement.
If the same issue keeps coming back, move it into the pro column.
When To Bring In a Professional for Hardscape and Drainage Repair
Some problems are fine for DIY work. Others need a pro.
Bring in a professional if you’re dealing with recurring ponding near the foundation, widespread settlement across a large section of patio or driveway, any retaining wall that shows a lean or bulge, unstable steps at a high-traffic entry, or a drainage system – French drain, dry riverbed, or downspout outlet – that clearly isn’t doing its job.
For recurring settlement, wall movement, or drainage failure, Pro Landscapes MD can assess and repair the problem.
FAQs
What winter damage should I fix first?
Fix drainage first. Clear standing water, blocked outlets, and debris from drainage paths, weep holes, and drainage pipes. That helps cut down the risk of freeze-thaw cracking and hydrostatic pressure problems.
Next, look at retaining wall warning signs like large cracks, bulging or tilting, or water pooling at the base. Minor issues, such as loose stones, can wait until you’ve fixed the water flow problems.
Can I repair uneven pavers myself?
Minor upkeep, like cleaning permeable pavers, is usually pretty manageable.
But fixing uneven pavers is often a different story. When pavers start to sink, bulge, or feel unstable, the issue may go deeper than the surface. In many cases, it points to drainage trouble or problems in the base underneath.
If you notice major settlement, bulging, or movement, it’s smart to bring in pros like Pro Landscapes MD. They can figure out whether the fix is as simple as resetting a few pavers or if the area needs more extensive reconstruction.
When should I call a hardscape pro?
Call a professional if you notice major damage like cracks in retaining walls, bulging, leaning, or drainage problems that keep coming back.
You should also bring in an expert for structural repairs, permit-related work, or when the job just feels too big to handle on your own. Pro Landscapes MD can help with grading, drainage repairs, and stormwater management across central Maryland.
Chat with Us