









- bhavya gada
- No Comments
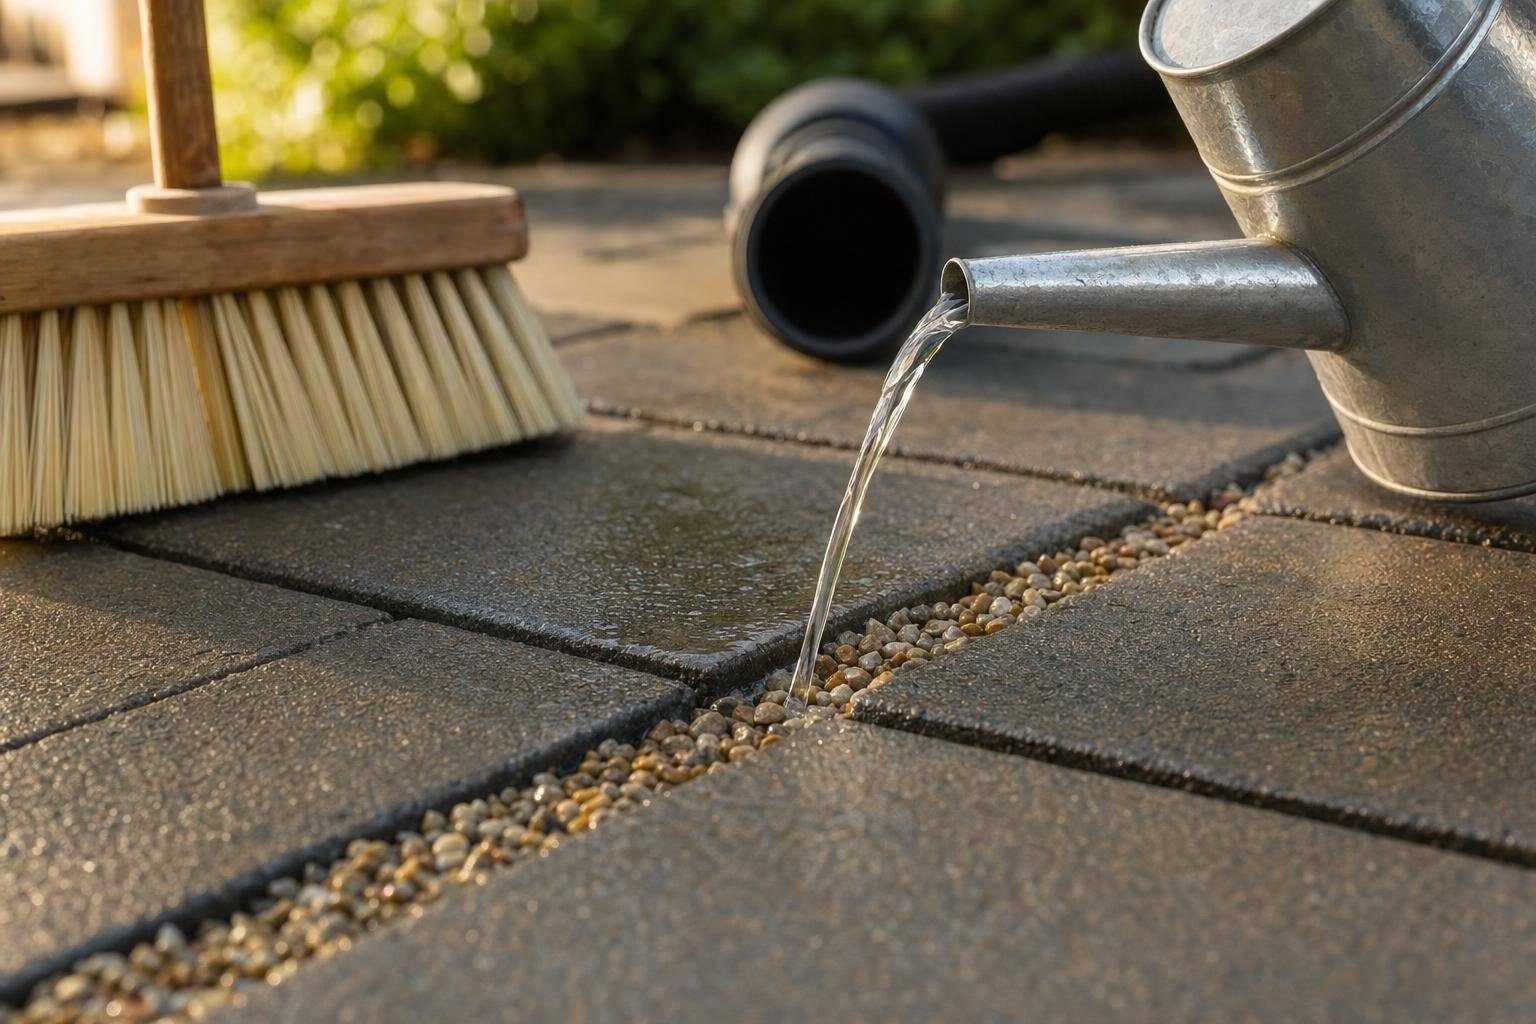
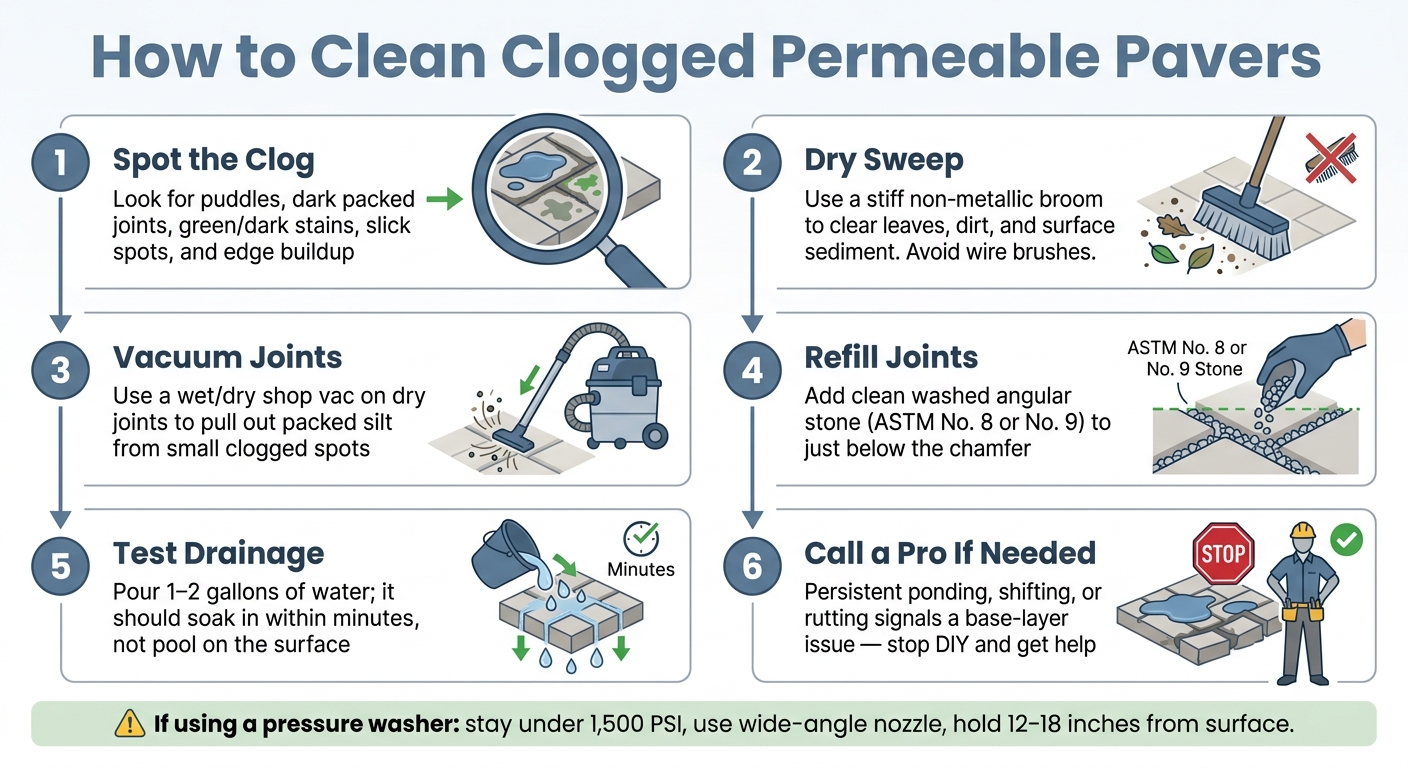
If water sits on top of your permeable pavers, the fix usually starts dry, not wet. I’d first sweep off debris, vacuum out packed sediment, refill joints with clean angular stone, and then test the area with 1–2 gallons of water.
Here’s the short version:
- Look for clogging signs: puddles, dark packed joints, green or dark stains, slick spots, and buildup near edges or downspouts.
- Start with dry cleanup: use a stiff non-metallic broom to remove leaves, dirt, and surface sediment.
- Vacuum small problem spots: a wet/dry shop vac can pull out dry silt from joints without forcing it deeper.
- Refill joints if needed: use washed angular stone, often ASTM No. 8 or No. 9, and fill to just below the chamfer.
- Test drainage: pour 1–2 gallons of water on the cleaned area. Water should soak in within minutes.
- Avoid damage: high-pressure washing and harsh cleaners can strip joint stone and push debris down.
- Call a pro if needed: if ponding, shifting, rutting, or repeat sediment keeps showing up, the issue may be below the surface.
A few numbers matter here. If a pressure washer is used at all, keep it under 1,500 PSI and hold the nozzle 12–18 inches from the surface. And if the same area keeps failing a simple water test after cleaning, that usually points to a deeper drainage problem, not surface dirt.
How to Clean Clogged Permeable Pavers: Step-by-Step Guide
How to: Clean Permeable Pavers
sbb-itb-843f8be
Quick Comparison
| Step | What I’d Do | What To Avoid | Goal |
|---|---|---|---|
| Check the surface | Look for ponding, dark joints, stains, slick areas | Ignoring edge buildup and low spots | Find clogged sections |
| Dry cleanup | Sweep with a stiff non-metallic broom | Wire brushes | Remove loose debris |
| Joint cleaning | Vacuum dry sediment from joints | Vacuuming wet sludge too deeply | Clear the top clogged layer |
| Refill joints | Add washed angular stone | Stone with fines | Restore joint fill |
| Drainage test | Pour 1–2 gallons of water | Testing before refilling | See if infiltration improved |
| Escalation | Get a pro for settling or base issues | More pressure washing | Stop surface damage |
So if I wanted the safe path, I’d treat clogged permeable pavers like a drainage job, not a stain-removal job: clean dry, refill the joints, test the surface, and stop if the problem runs deeper.
How To Spot Clogging Before You Start Cleaning
When sediment, leaves, soil, and grit fill the joints, water can’t soak through the surface the way it should. Instead, it starts moving across the top.
Signs That Your Permeable Pavers Are Clogged
The clearest signs are pretty easy to spot: joints that look sealed shut with debris and water that pools instead of soaking in. Take a close look at the joint lines. If they seem dark or packed with soil, infiltration has probably dropped.
You may also notice green staining or dark stains that keep showing up in the same places after rain, slippery patches in shaded spots, dark grime lanes where water drains, and tire marks that stick around even after rinsing [2]. It’s also common to see debris and sediment build up along the edges and in low areas, since runoff from nearby lawn spaces can wash loose soil into the joints.
If you see these signs, start with dry cleanup before you replace the joint stone.
Safety Checks And Basic Prep Before Cleaning
Before you begin, clear the area of furniture, pots, grills, and decorative items [1]. Close nearby windows and doors too. It’s best to clean on a dry day so loose debris lifts off the surface before it sticks and binds [1].
After the area is clear and dry, begin with dry cleanup before using any water-based method.
Start With Dry Cleanup And Targeted Vacuuming
Once the pavers are dry and clear, begin with dry cleanup. That’s the best way to keep sediment from getting pushed farther down into the joints.
How To Sweep Off Leaves, Dirt, And Packed Sediment
Use a stiff-bristle, non-metallic broom and sweep across the full surface to clear away loose leaves, everyday dirt, and other debris. Then switch to short scrubbing strokes along the joint edges to break up packed sediment, moss, and stuck-on grime.
Don’t use wire brushes. They can scratch the paver faces and leave behind metal residue that may turn into rust stains. After you loosen the debris, remove it fully from the paved area instead of just pushing it to the side. If organic material stays put, it can stain the stone and help weeds or moss take hold.
Pay extra attention to shaded areas, downspout zones, wheel paths, and low spots where water tends to pool. Those are usually the first places where buildup starts and drainage slows down.
How To Use A Shop Vacuum On Small Clogged Areas
Once the loose debris is gone, go after the packed silt and fine sediment still sitting in the joints. A wet/dry shop vacuum works well for smaller trouble spots, especially around downspout discharge zones, along wheel paths, and in ponding areas where a broom just doesn’t do enough.
Use short, controlled passes along the joint lines. Hold the nozzle just above the paver face, and stop when you see clean, angular joint stone. Going deeper can disturb the bedding layer.
Only vacuum when the joints are dry. Wet sediment tends to smear and sink farther down.
When To Use Vacuum Equipment On Larger Areas
If clogging covers most of the surface, a standard shop vacuum won’t be enough. In that case, use vacuum sweeping or a vacuum truck to remove only the clogged upper layer across the larger area.
| Cleaning Method | Best For |
|---|---|
| Stiff-bristle sweeping | Loose leaves, surface dirt, light packed sediment |
| Targeted shop vacuuming | Small clogged spots, downspout zones, wheel paths |
| Professional vacuum sweeping | Widespread clogging, large-scale restoration |
If drainage is still slow after dry cleanup and vacuuming, refill the joints with clean washed angular stone.
How To Replace Joint Stone And Test Whether Drainage Improved
How To Refill Joints With Clean Washed Angular Stone
If dry cleanup and vacuuming left some joints empty, refill them before you test drainage. The idea is simple: once you’ve vacuumed out the debris, put the joint stone back so the surface can work the way it was meant to.
Use clean, washed, angular stone in the size listed for the installed system, usually ASTM No. 8 or No. 9. Washed angular stone stays put better and helps keep fines to a minimum.
Pour the stone slowly along the joint lines, then brush it into the joints with a stiff non-metallic brush. Fill each joint to just below the chamfer.
How To Run A Simple Water Infiltration Test
After the joints are refilled, test only the area you cleaned. Pour 1 to 2 gallons of water over a few refilled sections and watch what happens. A system that’s working should take in the water within minutes, not leave puddles or send water running across the surface.
If water still ponds, the clog may sit deeper than the joints. Persistent ponding, sinking, shifting, or loose pavers can point to a base-layer problem. In Maryland, freeze-thaw cycles can make trapped moisture worse, so make sure downspouts aren’t dumping water near the paver base [3]. If water still lingers, the problem may be below the surface.
Comparison Table: Joint Stone Options For Permeable Pavers
| Joint Stone Option | Typical Size | Best For | Stability | Infiltration Performance |
|---|---|---|---|---|
| ASTM No. 8 Stone | 3/8" to 1/2" | Standard permeable paver joints | High; angular shapes lock together | Excellent; large voids allow rapid flow |
| ASTM No. 9 Stone | 1/8" to 1/4" | Narrow joints or pedestrian paths | Moderate; fits tighter spaces | Good; slightly slower than No. 8 |
Stay away from material with a high fines content. Those small particles can move through the system and lead to new clogging.
Pressure Washing Mistakes To Avoid And When To Call A Professional
Why High-Pressure Washing And Harsh Repairs Can Make Things Worse
After dry cleanup and joint refilling, pressure washing is usually a bad next move. It can wear away joint material, harm softer stone like sandstone, and force debris deeper into the system. That makes both stability and drainage worse.
If you have to use a pressure washer, be careful. Stay under 1,500 PSI, use a wide-angle nozzle, and keep the nozzle 12–18 inches from the surface [1].
If drainage still doesn’t improve, don’t keep turning up the pressure. Shift to a base-layer check instead.
Signs That You Need Professional Help
If gentle cleaning still leaves ponding or shifting, the clog likely isn’t just sitting on the surface anymore. When water keeps pooling after cleaning and refilling, or when pavers have settled, shifted, or formed wheel ruts, the issue is below the surface.
Water moving toward your home’s foundation needs attention right away. The same goes for sediment that keeps showing up in the joints again and again. At that point, you’re not dealing with simple debris.
In central Maryland, Pro Landscapes MD can evaluate deeper drainage and grading problems.
Comparison Table: DIY Cleaning Vs. Professional Maintenance
| Feature | DIY Cleaning | Professional Maintenance |
|---|---|---|
| Scope | Surface debris, light sediment | Deep clogging, base-layer shifting, drainage failure |
| Tools Needed | Broom, garden hose, low-PSI washer (<1,500 PSI) | Industrial vacuum extraction, grading tools |
| Risk Level | Low, if PSI limits and safe distances are followed | Higher – involves base material and structural integrity |
| Typical Results | Improved surface permeability | Restored infiltration rates and structural leveling |
| Best Use Case | Routine upkeep, minor spot cleaning | Routine inspections, persistent ponding, or wheel rutting [1] |
If the water test still fails, stop and get a professional evaluation.
FAQs
How often should I clean permeable pavers?
Clean permeable pavers on a set schedule: monthly for surface debris and about every three months for deeper joint cleaning. That simple routine helps keep water moving through the system instead of sitting on top.
It also pays to clean them after storms or heavy leaf drop. While you’re at it, check the surface for clogs or spots where water starts to pool. If you see standing water, that’s a sign the joints may need attention.
One thing to avoid: pressure washing. It can damage the joints and cut down how much water the pavers can absorb.
What causes permeable pavers to clog so quickly?
Permeable pavers can clog fast when debris and sediment collect in the joints. Weeds make the problem worse because they hold even more material in place. And when the joint stone wears down, it may stop filtering water the way it should.
You might also spot trouble when water starts pooling in low spots, especially near downspouts. That’s often a sign that drainage isn’t working well, which can lead to faster clogging.
A simple care routine goes a long way:
- Sweep on a regular basis
- Rinse with a hose once a month
- Check drainage after storms
These steps help limit buildup and make it easier to catch clogs early.
How do I know if the problem is below the surface?
If permeable pavers start to sink, bulge, or feel unsteady when you walk on them, the issue usually runs deeper than the surface. In most cases, those changes point to drainage trouble or trouble in the aggregate base underneath.
Steady water pooling, major settling, or sudden movement are strong signs that the sub-base below may need a professional inspection.
Chat with Us