









- bhavya gada
- No Comments
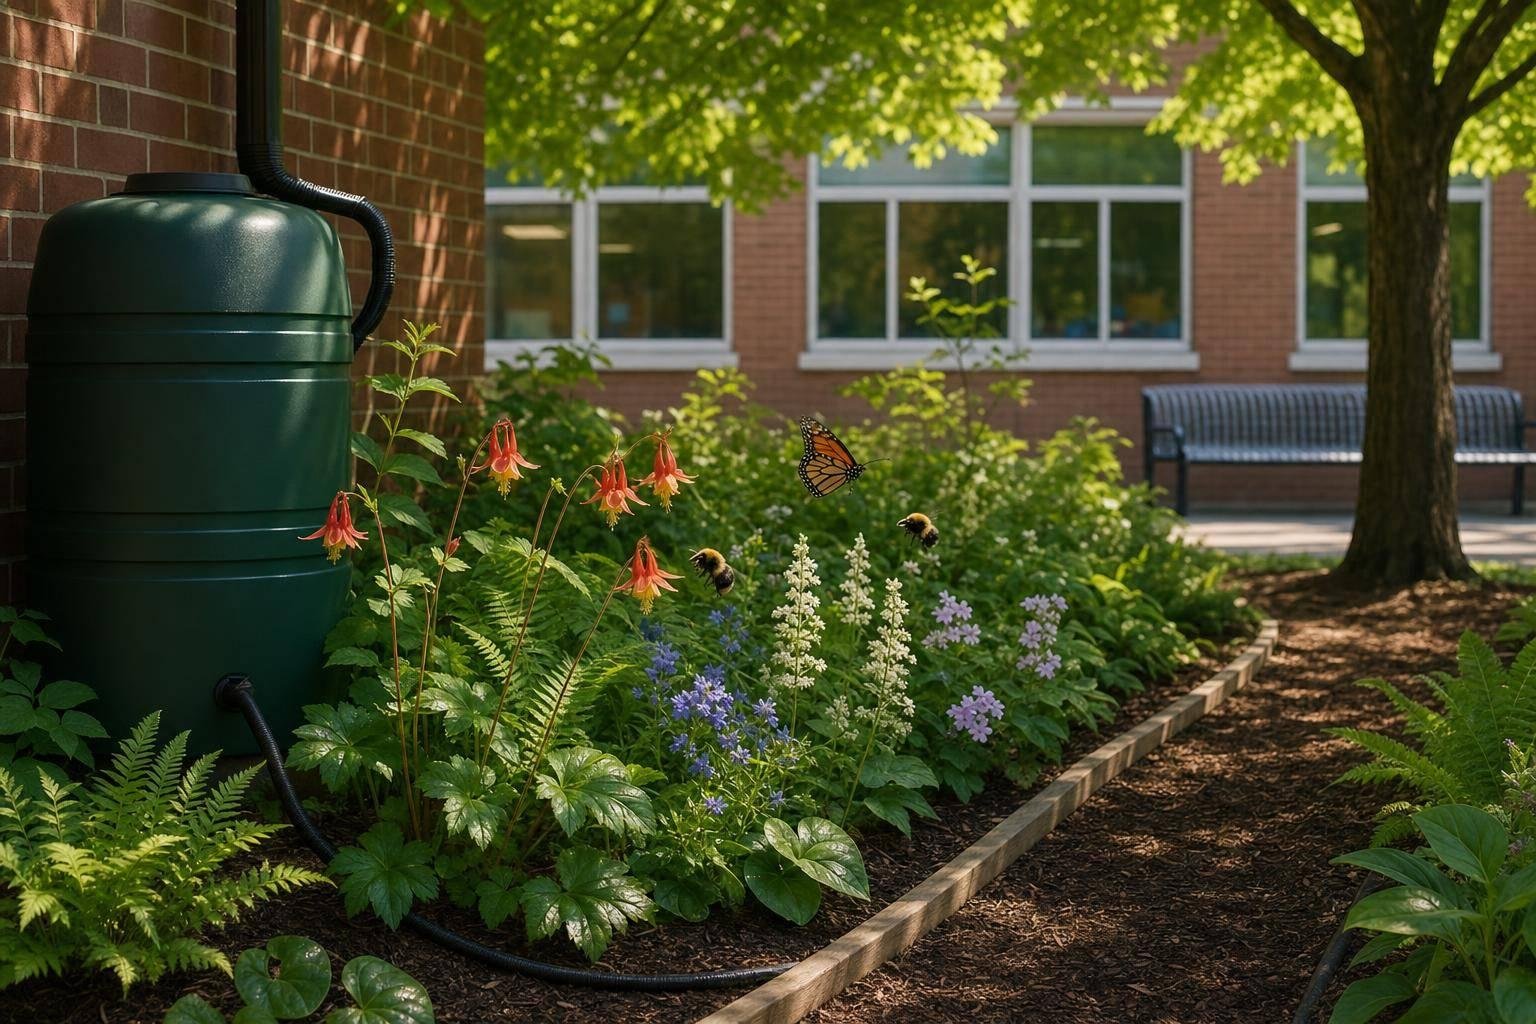
A school shade pollinator garden works when I keep four things simple: site, plants, access, and care. If I check sun and drainage first, use shade-loving native plants, leave clear paths, and plan watering early, the garden can support pollinators and give students a cooler place to learn.
Here’s the short version:
- Check the site first. I look at shade in the morning, midday, and afternoon.
- Watch water and soil. Wet spots, dry spots under trees, and compacted soil change what I can plant.
- Pick the right location. Near a classroom or sidewalk is easier for class use and supervision.
- Choose plants by layer. Perennials, shrubs, and groundcovers each do a different job.
- Spread bloom times. Flowers from spring through fall give pollinators food for more of the school year.
- Keep paths clear. A 36-inch path is the minimum for one wheelchair; 60 inches works better for groups.
- Mulch and water the right way. A 2- to 3-inch mulch layer and deep watering to 6 to 8 inches help new plants settle in.
- Plan summer care. If no one is assigned to water and weed, school gardens often slip.
A few numbers matter here. The article points to hotter summers and more heavy rain, which means shade, drainage, and access matter more than they used to. That’s the core idea: I don’t start with plants. I start with the site.
| Part | What I focus on | Why it matters in a school garden |
|---|---|---|
| Site check | Shade, soil, drainage, roots | Helps avoid plant loss and water issues |
| Planting | Shade-tolerant native layers | Supports pollinators across seasons |
| Layout | Paths, edges, teaching spot | Helps with safety and class use |
| Care | Mulch, watering, light upkeep | Keeps the garden usable over time |
In short: if I match the garden to the space and keep the layout easy to use, even a small shaded bed can become a pollinator garden and outdoor classroom.
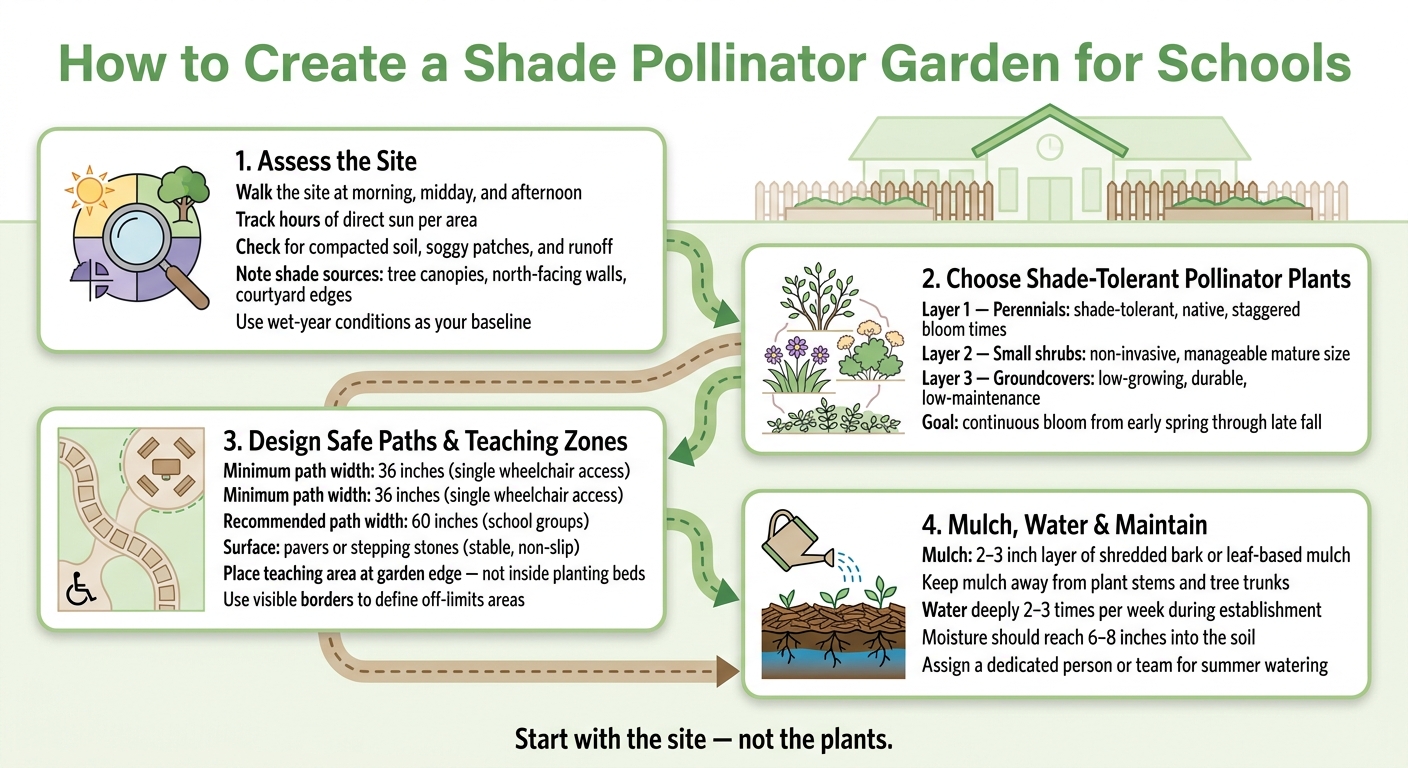
How to Create a Shade Pollinator Garden for Schools: 4-Step Guide
1. Assess the site before choosing plants
Measure shade, drainage, and soil conditions
Start by walking the site at three points in the day: morning, midday, and afternoon. Track how many hours of direct sun each area gets. That simple step tells you a lot.
Pay close attention to shaded areas under mature tree canopies, along north-facing walls, and at courtyard edges. These spots don’t act the same. Tree canopies block rain, which often leaves the soil drier than you’d expect. Courtyard edges and north-facing walls, on the other hand, often hold more moisture.
While you’re there, check the ground itself. Look for compacted soil, soggy patches after rain, and runoff coming from nearby buildings or slopes.
Use wet-year conditions as your baseline, not average rainfall, because heavy rain and flooding are increasing [1]. Once you’ve logged what the site is doing, you’ll have a much clearer sense of which plants make sense in the next step.
Pick a location that is visible and easy to reach
Choose a spot near a classroom entrance or sidewalk, but keep it away from active play areas such as sports fields and playgrounds. A garden that’s easy to see is easier for teachers to supervise during outdoor lessons.
It also helps to place the garden near a hose bib or rain barrel so watering is simple while plants get established. If the site includes mature trees, keep plantings outside the root zone.
Coordinate permissions, safety, and long-term care
Get administrators, facilities staff, and volunteers involved before any work starts. It’s much easier to solve problems on paper than after planting day. Allergy concerns should also be flagged before you lock in the plant list.
Those limits affect both plant selection and layout. If the site has drainage issues, slope, or tree-root conflicts, Pro Landscapes MD can help with root-sensitive garden planning and drainage correction in central Maryland. Match the plant list to the site’s shade, moisture, and root conditions.
sbb-itb-843f8be
Pollinator garden for shady yards – design
2. Choose shade-tolerant pollinator plants for Maryland school gardens
Use the shade, drainage, and soil notes from your site check to pick plants for each part of the garden. The goal is simple: build a plant mix that can hold up over time, fit the site’s shade, moisture, and root pressure, and still support pollinators from spring through fall.
Use layered planting for flowers, shrubs, and groundcovers
A layered planting plan gives the garden more than just flowers. Perennials, small shrubs, and groundcovers each do a different job. Together, they add nectar, pollen, shelter, and shape.
Focus on non-invasive plants that can handle Maryland shade, moisture, and competition from tree roots. Also make sure each plant’s mature size fits the space. That matters a lot in school gardens, where crowded beds can turn into a headache fast.
Once you have that structure in place, spread bloom times across the growing season so the garden keeps doing its job month after month.
Plan bloom times from spring through fall
Stagger bloom times from early spring through late fall so pollinators – and students – have something to watch across the school year. That range keeps the garden active without making the plan harder to manage.
Plant selection comparison table
| Plant layer | What to prioritize | School-garden benefit |
|---|---|---|
| Perennials | Shade-tolerant, native, staggered bloom times | Deliver nectar and pollen across multiple seasons |
| Small shrubs | Non-invasive, manageable mature size | Add vertical structure and shelter for pollinators |
| Groundcovers | Low-growing, durable, low-maintenance | Stabilize soil and fill gaps without crowding paths |
3. Design safe paths, teaching zones, and clear garden edges
Once you’ve picked the plant layers, the next step is shaping the space around them. A smart path layout and clear garden edges help protect plants, keep students safe, and make outdoor lessons much easier to manage.
Build paths that protect plants and support student access
Use a 36-inch minimum width for single-wheelchair access. For school groups, 60 inches is a better fit. Go with stable, non-slip surfaces like pavers or stepping stones. Keep paths outside existing tree root zones, and don’t cut them through planting beds.
Clear borders also do a lot of work here. They show students where not to step and make upkeep simpler for grounds crews. The border should be easy to see so the edge of the garden is obvious at a glance.
Set up teaching areas
Place a small teaching area near the garden edge so groups can watch pollinators without stepping into sensitive beds. Keeping this space at the edge lets students observe without entering planted areas. After the layout is in place, finish the beds with mulch and set up a simple watering plan.
Layout comparison table
| Layout element | Access | Plant protection | Upkeep |
|---|---|---|---|
| Primary path surface: pavers or stepping stones | Stable, non-slip, wheelchair-accessible | Keeps foot traffic off beds | Low; occasional resetting or replacement |
| Edge treatment: visible border | Clear entry and exit points | Defines off-limits areas for students | Low; periodic edging or resetting |
| Teaching-zone placement: garden edge | Easy group observation without crowding | Students stay out of planting beds | Minimal; no special surface needed |
When to get professional help with layout and drainage
If your site has a slope or poor drainage, professional layout work can help the garden hold up over time. Pro Landscapes MD supports school garden projects with grading, drainage correction, and hardscape installation across central Maryland.
4. Set up mulch, watering, and a simple maintenance routine
Once the beds are planted, the next job is pretty simple: mulch, water, and stay on top of basic care. That small bit of effort helps the bed look better and cuts down on extra work later.
Apply mulch without burying stems or tree roots
A 2- to 3-inch layer of shredded bark or leaf-based mulch works well in shaded beds. It helps the soil hold moisture and keeps weeds in check. Just don’t pile it up against plant stems or tree trunks. Leave a few inches of space around the base so stems and roots can breathe.
Water deeply during establishment and dry spells
New plantings need steady moisture while they get settled in. A good rule is to water deeply two to three times per week, making sure moisture reaches 6 to 8 inches into the soil. In dry spells, that deep soaking matters even more.
For school gardens, it helps to make watering one person’s job or assign it to a team during the school year and over summer breaks. If no one owns that task, it can slip fast.
Keep upkeep simple and add a maintenance comparison table
Once the plants are established, ease into a light routine. Pull weeds early, deadhead spent blooms, replace plants that didn’t make it, check paths after heavy rain, and add more mulch when needed.
| Approach | Typical tasks | Labor needed |
|---|---|---|
| Low-maintenance | Light weeding, occasional path checks, mulch refresh | Minimal; a few hours per season |
| Moderate-maintenance | Regular weeding, deadheading, plant replacement, path checks | A few hours per month in the growing season |
| High-maintenance | Frequent deadheading, replanting, mulch, and path upkeep | Regular weekly attention |
Conclusion: Build a shade garden that supports pollinators and learning
A shade pollinator garden works best when you match the site, plants, access, and upkeep. That simple framework fits both schoolyards and home learning spaces.
Across central Maryland, shaded yards and school grounds can support pollinators while also giving kids and adults a hands-on place to learn.
Some projects need more than plants and mulch. If you’re dealing with poor drainage, uneven grading, or built-in access paths, it may make sense to bring in a pro. Those issues can affect how well the garden works and how easy it is to use over time. In those cases, Pro Landscapes MD can handle planting, drainage solutions, grading, and hardscape access features for long-term use.
Start small. Even a small shaded bed can become an outdoor classroom.
FAQs
How much shade is too much for a pollinator garden?
There’s no hard cutoff for “too much” shade. What matters is matching native plants to the light your yard actually gets.
Check sun exposure over the course of the day:
- Full sun: 6+ hours
- Partial sun: 4–6 hours
- Shade: Less than 4 hours
And shade doesn’t mean a space is out of play. Even moist, shaded spots can support pollinators if you plant shade-tolerant natives like wild ginger, coral bells, and golden groundsel.
What are the best native plants for a shaded school garden?
Choose native plants that do well in lower light and still give pollinators a steady food source. For cooler, moister north-facing spots, wild ginger and coral bells are solid woodland picks.
For shaded groundcover, try golden groundsel, foamflower, Allegheny pachysandra, or green and gold. Virginia bluebells provide early-spring nectar, and wild geranium adds color later in the season. Group plants in clusters so pollinators can forage with less effort.
Who should care for the garden during summer break?
During summer break, a designated group of school staff, volunteers, or a maintenance team should care for the school pollinator garden throughout June, July, and August.
That care should include deep watering in the morning, refreshing water dishes for pollinators, and keeping up with pest checks and weeding so the habitat stays healthy while school is out.
Chat with Us