


- bhavya gada
- No Comments
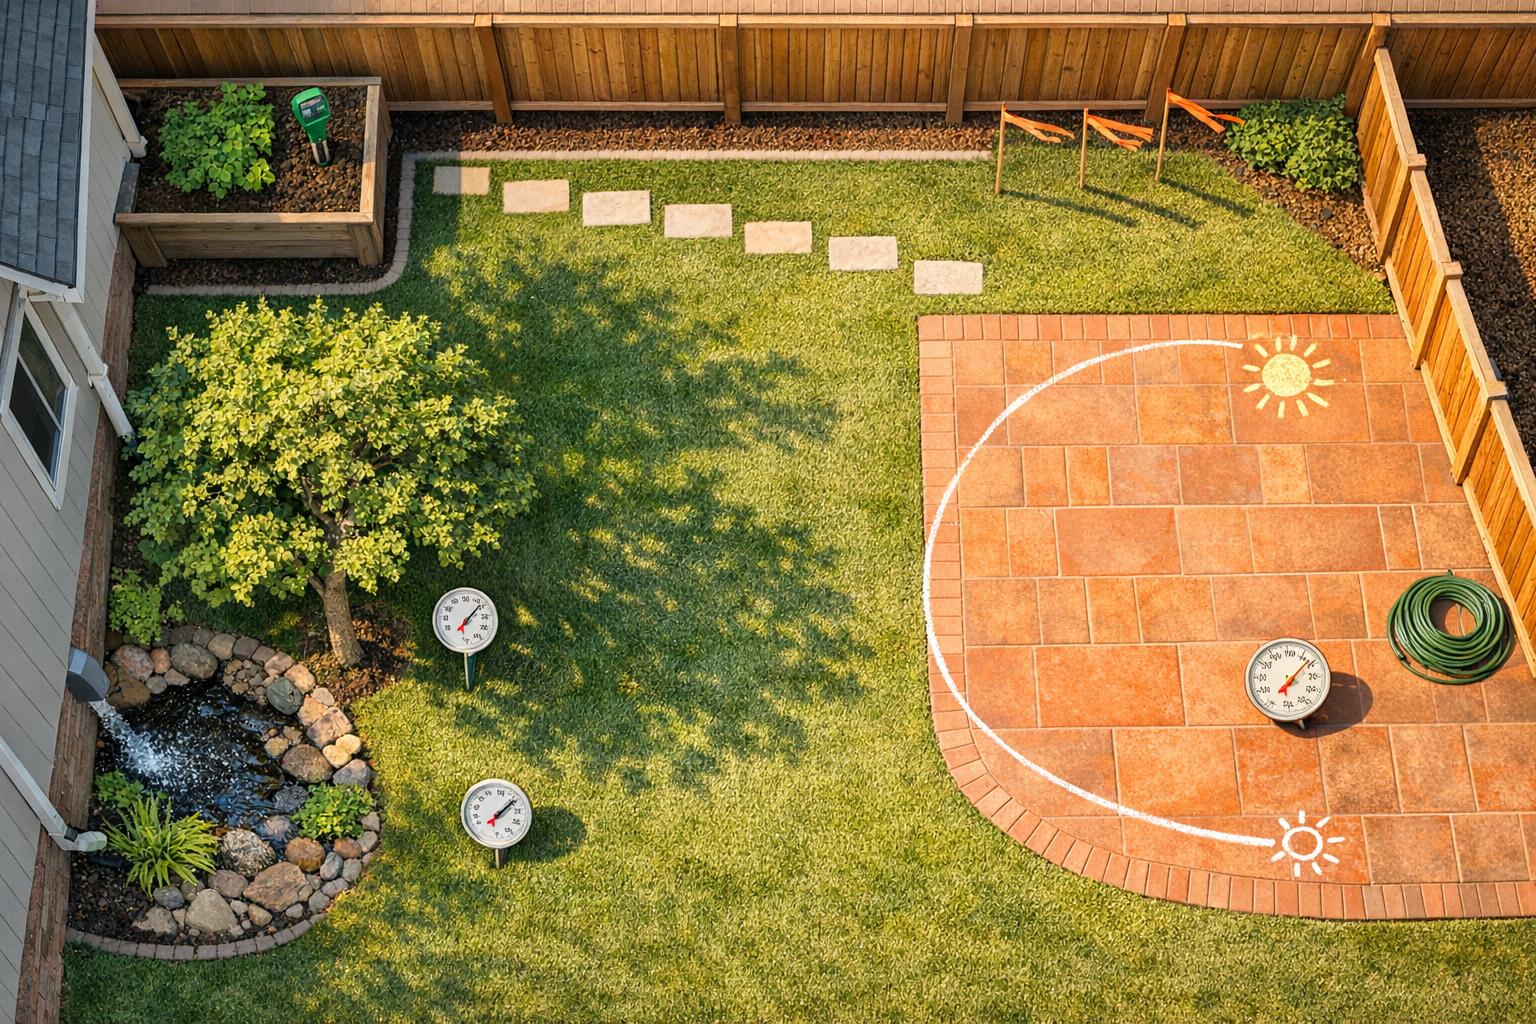
Every yard has unique microclimates that affect how plants grow and where outdoor spaces thrive. Microclimates are small areas with distinct conditions like sunlight, temperature, wind, and moisture. By mapping and observing these details, you can make better decisions for planting and landscaping.
Key Steps to Identify Microclimates:
- Map Your Yard: Sketch your yard, noting structures, slopes, and surfaces like driveways or patios.
- Track Sunlight: Observe how sunlight moves across your yard throughout the day and seasons.
- Measure Temperature: Use thermometers to find warm and cold spots, including frost-prone areas.
- Check Wind and Moisture: Identify windy zones and test soil drainage to spot wet or dry areas.
- Combine Data: Create a microclimate map to match plants and hardscaping to each zone.
Why it matters: A sunny spot near a south-facing wall might be perfect for tomatoes, while a shady, damp corner could support ferns. Understanding your yard’s microclimates saves time, money, and effort while helping your plants and outdoor spaces thrive.
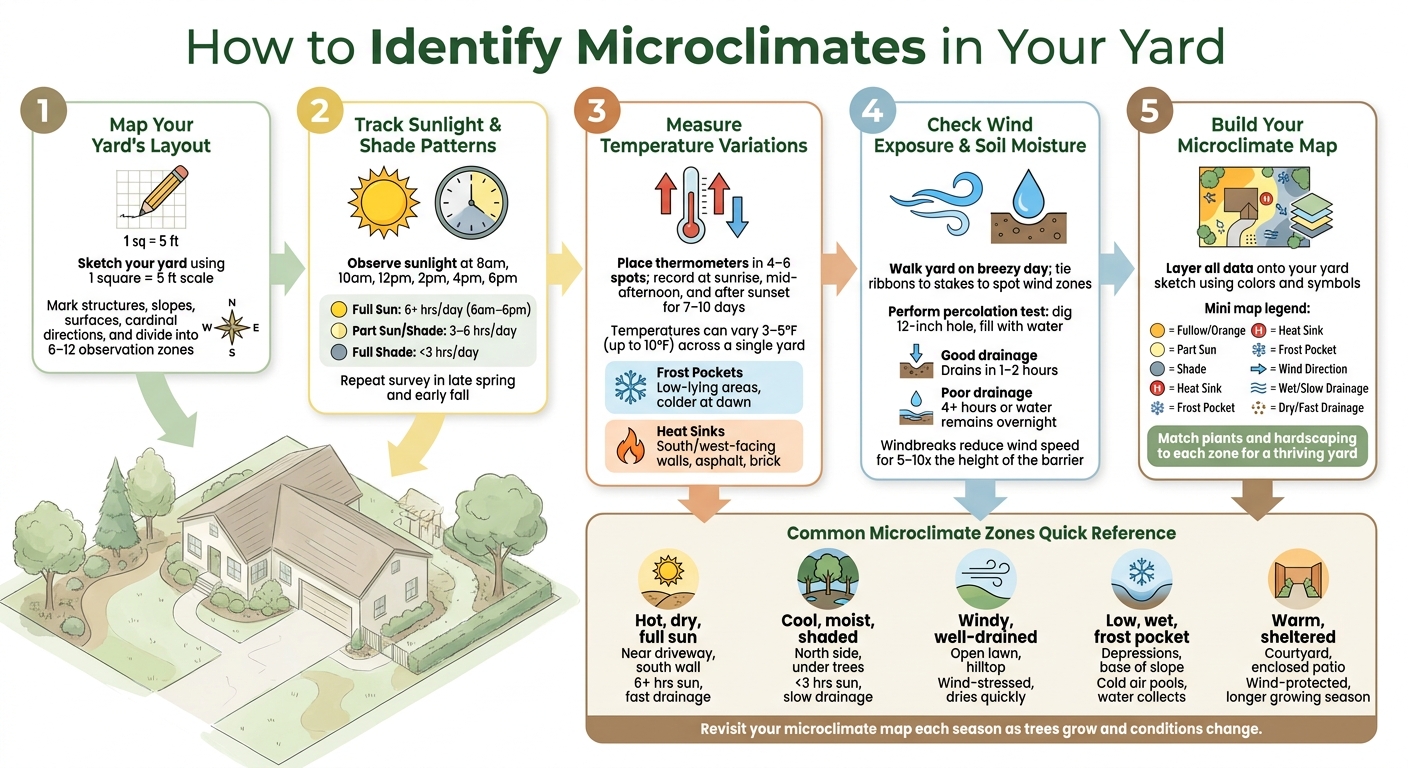
How to Identify Microclimates in Your Yard: 5-Step Guide
I Have 7 Different Climates in My Garden (And So Do You)
sbb-itb-843f8be
Step 1: Map Your Yard’s Layout
Start by mapping out your yard to create a clear reference point for tracking changes and conditions over time.
Sketch Your Yard
You don’t need to be an artist – a simple hand-drawn sketch on graph paper will do the job. Use a scale like 1 square = 5 ft to keep things proportional without overcomplicating it. Begin by outlining your house and any detached structures like a garage or shed. Then, add property boundaries, fences, driveways, patios, decks, walkways, trees, shrubs, garden beds, and any visible slopes or low spots. Don’t forget to include doors and large windows since they impact airflow and heat reflection.
Next, mark the cardinal directions. Use a compass app to find true north and label each side of your house accordingly. In the U.S., south-facing areas get the most direct sunlight, while north-facing walls tend to stay cooler and shaded. These details will come in handy when you start observing your yard’s conditions.
Pay close attention to features that influence microclimates. For example, concrete or asphalt surfaces absorb heat during the day and release it at night, making them warmer than nearby grass. A south-facing driveway, for instance, might stay a few degrees warmer than an open lawn. On the other hand, tall fences or solid walls block wind and create shaded, cooler areas. These variations can significantly affect plant growth and other yard conditions.
Once you’ve added all the key features, you’re ready to break the yard into smaller sections for more detailed observations.
Divide Your Yard into Observation Zones
Using your sketch, divide your yard into zones based on consistent environmental factors. Consider what influences each area: proximity to the house, surface materials, elevation, and the amount of shade. Practical names like "south patio," "under oak tree," or "driveway edge" are more helpful than generic labels because they immediately hint at the conditions in each zone.
For a typical suburban yard, you’ll likely end up with 6–12 zones. Label each zone directly on the map and create a corresponding notebook page for each one. Use these pages to track details like sunlight, temperature, wind, and moisture over time. Staying consistent with your labels will save you confusion later – especially if you decide to consult a professional.
For example, firms like Pro Landscapes MD often start projects by creating detailed site maps and analyzing zones. This information helps them plan everything from plant selection to drainage systems and hardscape layouts for properties in central Maryland.
Step 2: Track Sunlight and Shade Patterns
Now that you’ve mapped your yard, it’s time to track how sunlight moves across your zones. Light plays a huge role in shaping microclimates – two areas just 10 feet apart can have completely different conditions depending on how much direct sunlight they get throughout the day.
How Yard Orientation Affects Sunlight
Your yard’s orientation is key to understanding its light exposure. In the U.S., south-facing areas get the most sunlight, typically from late morning to late afternoon. These spots are perfect for growing vegetables, roses, and other plants that thrive in full sun. West-facing zones receive intense afternoon sunlight, which can heat up the soil quickly and stress plants that aren’t built for high temperatures. East-facing areas benefit from softer morning light and are shaded later in the day, making them ideal for plants that prefer moderate light. North-facing areas, on the other hand, get minimal direct sunlight and are best suited for shade-loving plants like hostas, ferns, and groundcovers.
Structures in your yard can amplify these effects. A south-facing wall, for example, can trap heat and create a warmer microclimate, while the north side of a tall building may stay cool and shaded all day. Even hardscapes like light-colored patios or stone paths can reflect sunlight, brightening and warming nearby planting areas.
How to Track Sun Exposure Over Time
To get an accurate picture of sun exposure, count how many hours each zone gets direct sunlight on a clear day. Walk your yard at regular intervals – such as 8 a.m., 10 a.m., noon, 2 p.m., 4 p.m., and 6 p.m. – and note whether each area is in full sun, partial shade, or full shade. Use abbreviations like FS (full sun), PS (partial shade), and SH (shade) to make your notes quick and easy. Add up the total hours for each zone and classify them using this table:
| Light Category | Direct Sun Per Day | Common Locations |
|---|---|---|
| Full sun | 6+ hours | Open lawn, south/west-facing beds, away from trees |
| Part sun / shade | 3–6 hours | East-facing areas, under open-branched trees |
| Full shade | Less than 3 hours | North-facing zones, under dense tree canopies, near tall fences |
Remember, sunlight patterns change with the seasons. The sun’s angle shifts significantly between summer and fall, meaning a full-sun area in June might only get partial shade by October. Deciduous trees also play a role – early in spring, they let sunlight through, but once their leaves grow in, they create deep shade. To account for these changes, repeat your sunlight survey twice a year: once in late spring or early summer and again in early fall. For an even clearer picture, take photos of your zones at noon and 4 p.m. to see how shadows move.
"A professional landscaper can help evaluate your yard and recommend the best plant selections for your landscape design." – Pro Landscapes MD [1]
If your yard has a complex layout – like multiple structures, large trees, or uneven ground – this kind of sun and shade analysis is essential. Experts, such as Pro Landscapes MD, use this data to plan everything from patios to planting designs. Placing features with sunlight patterns in mind from the start can save you from costly adjustments later. This information will also guide your plant and hardscape choices as you refine your yard’s microclimate map.
Step 3: Find Temperature Variations and Frost Zones
After observing sunlight patterns, the next step is to analyze temperature differences across your yard. Even in small spaces, temperatures can vary by 3–5°F between areas. This difference can mean the survival or loss of plants during frosty nights.
Measure Temperature Differences Across Your Yard
To get started, place identical digital thermometers in 4–6 strategic spots: a low-lying area, a higher elevation, near a south- or west-facing wall, on an open lawn, and close to a paved surface. Take readings at the same times every day – just before sunrise (the coldest time), mid-afternoon (the warmest), and a few hours after sunset. Do this for 7–10 days across different weather conditions to identify consistent patterns.
For instance, if you notice that a brick wall area is consistently 4°F warmer than other spots, you’ve identified a warm microclimate. Notes like "+4°F near patio" or "–3°F in shaded corner at dawn" will help you decide which plants thrive in specific areas.
Once you’ve logged these differences, compare them to pinpoint distinct temperature zones in your yard.
Spot Frost Pockets and Heat Sinks
Understanding how cold air and heat behave in your yard is key to identifying frost-prone and heat-retaining zones.
Cold air tends to settle in low spots, creating frost pockets. These areas can be several degrees colder than nearby slopes, especially on calm, clear nights. According to Colorado State University Extension, cold air drainage into depressions can significantly drop temperatures compared to higher areas on the same property.
To find frost pockets, look for frost that lingers after sunrise on a chilly, clear morning. Check for areas where frost is thicker, melts slower, or causes visible damage to plants while others nearby remain unaffected. A frost line on a slope – thicker at the bottom and clear at the top – is a classic indicator.
On the flip side, heat sinks absorb and release warmth, creating warmer microclimates. Surfaces like south- and west-facing stone walls, brick patios, and asphalt driveways soak up heat during the day and radiate it after sunset. You can often feel this warmth in the evening. These areas melt snow faster and warm up earlier in spring. When planning features like patios or retaining walls, consider how they might act as heat sinks. Design experts like Pro Landscapes MD take this into account to maximize the planting potential of each area.
| Zone Type | How to Spot It | Temperature Effect | Best Plant Choices |
|---|---|---|---|
| Frost pocket (low area) | Frost lingers longest, appears first | Colder at dawn | Cold-hardy shrubs, lawn, native groundcovers |
| South/west-facing wall | Warm to touch at night, early snowmelt | Warmer days and nights; heat sink | Tomatoes, peppers, borderline-hardy perennials |
| Open paved surface | Snow/ice melts early, warm after sunset | Warms nearby air overnight | Container plants, early-season herbs |
| North-facing or shaded bed | Frost lasts longer, slower to warm | Cooler and moister overall | Ferns, hostas, cool-season crops |
Use these temperature patterns to refine your earlier microclimate map and better match plants to their ideal spots.
Step 4: Check Wind Exposure and Soil Moisture
Now it’s time to assess wind exposure and soil moisture to refine your microclimate map. These two factors often go hand in hand – a windy spot tends to dry out quickly, while a low, sheltered area may stay damp long after the rain stops.
Find Exposed and Sheltered Areas
On a breezy day, walk around your yard to observe wind patterns. Look for signs like leaning branches, uneven leaf wear, or piles of mulch and leaves collecting behind barriers. These clues can help you identify areas that are windy versus those that are more protected.
Structures like houses, fences, or hedges create "wind shadows" on their downwind side, which are calmer and often slightly warmer. A dense hedge or tree line can reduce wind speed on its sheltered side for a distance of about 5–10 times the height of the barrier. However, narrow gaps between structures, like a fence and a wall, can funnel wind into powerful gusts that stress plants in those areas.
For a simple test, tie ribbons to stakes in different parts of your yard. Watch how they move to identify exposed, moderate, and sheltered zones. Mark these areas on your yard sketch for easy reference.
Test Soil Moisture and Drainage
After mapping wind exposure, it’s time to evaluate soil moisture. Start with a percolation test: dig a hole about 12 inches deep and 6–8 inches wide, fill it with water, and let it drain. Refill the hole and time how long the water takes to drain. If it drains within 1–2 hours, the area has good drainage. If it takes 4 hours or more, or if water is still sitting there the next morning, that spot likely has a drainage problem and may become waterlogged after heavy rain.
For a quicker check, grab some soil from about 6–8 inches deep and squeeze it in your hand. Clay soil will form a sticky ribbon, sandy soil will crumble, and loam will hold a soft shape. Understanding your soil type in each zone can explain why some areas stay wet while others dry out quickly.
"Poor drainage can lead to a variety of problems that can damage your landscape, home foundation, and overall property." – Pro Landscapes MD [2]
Chronic wet spots that remain muddy or grow moss for more than a day may need more than just plant adjustments. Solutions like French drains, dry riverbeds, or regrading can redirect water and prevent ongoing issues. If these problems are near your home’s foundation or involve steep slopes, consulting a professional is a good idea. Companies like Pro Landscapes MD specialize in drainage systems, grading, and yard leveling in the central Maryland and Washington, DC areas. They can ensure solutions are integrated into your landscape without causing new issues.
Combining wind and moisture data with sunlight and temperature observations gives you a complete understanding of each zone’s growing conditions.
| Zone Type | Key Signs | Likely Soil/Drainage Issue | Possible Fix |
|---|---|---|---|
| Chronically soggy low spot | Standing water 24+ hrs after rain, moss, yellowing plants | Poor drainage, clay soil, or low grade | French drain, regrading, dry riverbed |
| Fast-draining slope or sandy area | Soil dry within hours, wilting plants, cracked surface | Sandy or rocky soil, rapid runoff | Organic matter amendment, mulch, drip irrigation |
| Sheltered, moderate-moisture zone | Consistent soil feel, healthy plants, no pooling | Balanced loam, good drainage | Ideal for most plantings; no action needed |
| Wind-exposed dry zone | Blown mulch, wind-burned foliage, quick soil drying | Compounded by wind evaporation | Windbreak planting, mulching, drought-tolerant species |
Add these wind and moisture observations to your yard sketch. When combined with sunlight and temperature data, you’ll have a complete picture of your yard’s microclimate for better planting decisions.
Step 5: Combine Your Data to Define Microclimate Zones
Pull together sunlight, temperature, wind, and soil information to create a microclimate map. This map transforms scattered observations into a practical tool for making smarter planting and hardscaping decisions.
Build a Microclimate Map
With your observations from Steps 1–4 in hand, transfer everything onto your yard sketch. Layer your data using a simple system of colors and symbols to make patterns clear. For example:
- Use yellow/orange to mark full-sun areas (6+ hours of sunlight).
- Use light yellow for part-sun zones (3–6 hours).
- Use blue/gray for shaded areas (under 3 hours of sunlight).
- Add an "H" for heat sinks (e.g., near south-facing walls or asphalt).
- Place a snowflake symbol in frost-prone spots.
- Draw arrows to show prevailing wind direction, circle wind tunnels, and mark sheltered corners.
- Use wavy lines for slow-draining or moist soil and dots for fast-draining, dry areas.
Once you’ve added these overlays, look for clusters of similar conditions across sunlight, temperature, wind, and moisture. Draw soft boundaries around these clusters and label them with practical names. Here are some common zone types you might find in U.S. yards:
| Zone Label | Typical Location | Key Conditions |
|---|---|---|
| Hot, dry, full sun | Near driveway, south-facing wall | 6+ hrs sun, fast drainage, heat-reflective surfaces |
| Cool, moist, shaded | North side of house, under large trees | Under 3 hrs sun, slow drainage, stable temps |
| Windy, well-drained, full sun | Open lawn, hilltop | Exposed, dries quickly, wind-stressed foliage |
| Low, wet, frost pocket | Back corner, depression, base of slope | Cold air settles, water pools after rain |
| Warm, sheltered | Courtyard, enclosed patio, near masonry | Protected from wind, retains heat, longer growing season |
Research from UC Davis highlights just how much these zones matter. Temperatures within a single yard can vary by as much as 10°F between an exposed slope and a protected courtyard. That difference can make or break a plant’s success.
Use Your Microclimate Map to Plan Your Yard
With your map complete, you now have a clear guide for matching plants and hardscaping to the specific needs of each zone. For instance:
- Hot, dry, full-sun areas: Perfect for drought-tolerant plants like lavender, sedum, and ornamental grasses.
- Cool, moist, shaded zones: Ideal for hostas, ferns, and astilbe.
- Vegetable gardens: Choose the warmest, well-drained zone with at least 6 hours of direct sunlight. Crops like tomatoes and peppers thrive in these conditions.
Your microclimate map also helps with hardscaping decisions. Place patios and outdoor kitchens where sun and shade match the times you’ll use them – afternoon shade is key for summer dining areas. Fire pits should go in open spaces that aren’t too windy, so smoke doesn’t blow into seating areas. Pathways should avoid frost pockets or soggy spots to minimize ice and erosion risks.
For zones with persistent drainage issues, consider solutions like French drains, dry riverbeds, or regrading. These fixes not only address water problems but can also change the area’s microclimate, expanding your planting options. Companies like Pro Landscapes MD often include these features in their designs across central Maryland to enhance both functionality and aesthetics.
Conclusion: Put Your Microclimates to Work
Now that you’ve taken the time to map and observe your yard, you’re ready to make the most of its unique microclimates. Every yard is a collection of zones, each with its own combination of light, temperature, wind, and moisture. By understanding these factors, you can move away from guesswork and start making informed decisions about your landscaping.
When plants are matched to the right zone, they thrive with less effort. For example, a tomato planted in a sunny, warm spot will grow far better than one struggling in a shaded corner. Similarly, a well-placed patio in a sheltered area can stay cozy on breezy evenings, unlike one left exposed to the elements.
Keep in mind that microclimates are always evolving. As trees grow, new structures are added, or heavy rains alter drainage patterns, your zones can shift. It’s a good idea to revisit your map seasonally – especially after events like hard freezes or major storms – and tweak your planting and maintenance plans to reflect these changes. This ongoing attention ensures your yard continues to meet its changing needs.
For homeowners in Maryland, where clay soils, humid summers, and drainage problems are common, the challenges can be more complex. A low-lying frost pocket with poor drainage, for instance, can lead to repeated planting failures. Solutions like proper grading, French drains, or dry riverbeds can not only address these issues but also open up new possibilities for planting. If you’re in central Maryland or Washington, DC, Pro Landscapes MD offers services like drainage solutions, grading, hardscaping, and planting to help transform your microclimate insights into a practical, season-proof plan.
FAQs
What tools do I need to map microclimates in my yard?
To pinpoint microclimates in your yard, start by paying attention to sunlight, wind, and soil conditions. You don’t need fancy gadgets – though tools like moisture meters or pH testers can give you extra details, simple observation is often enough. Watch how sunlight moves across your yard during the day and throughout the year. Identify areas that are windy or naturally protected, and check how well the soil drains and its texture. If your yard is more complex, Pro Landscapes MD provides professional garden assessments and drainage solutions to help you out.
How do I find frost pockets and heat sinks on my property?
To identify frost pockets and heat sinks in your yard, pay close attention to temperature and moisture patterns throughout the year. Frost pockets typically develop in low-lying areas where cold air tends to settle, while heat sinks are often found near features like stone walls or patios that absorb and radiate heat. The horticulturists at Pro Landscapes MD can evaluate your yard’s layout, sunlight exposure, and drainage. They can recommend approaches such as grading or installing swales to help manage these temperature differences effectively.
When should I recheck my yard’s microclimates during the year?
Revisit your yard’s microclimates regularly throughout the year to stay in tune with seasonal changes. In spring, check how plants are growing and how well the soil is draining after winter’s impact. During summer, pay attention to sun exposure, soil moisture levels, and watering needs. Come fall, take note of leaf coverage and start preparing the soil for the colder months ahead. By keeping an eye on these factors, you’ll help your plants flourish and maintain a healthy yard all year long.
Chat with Us