









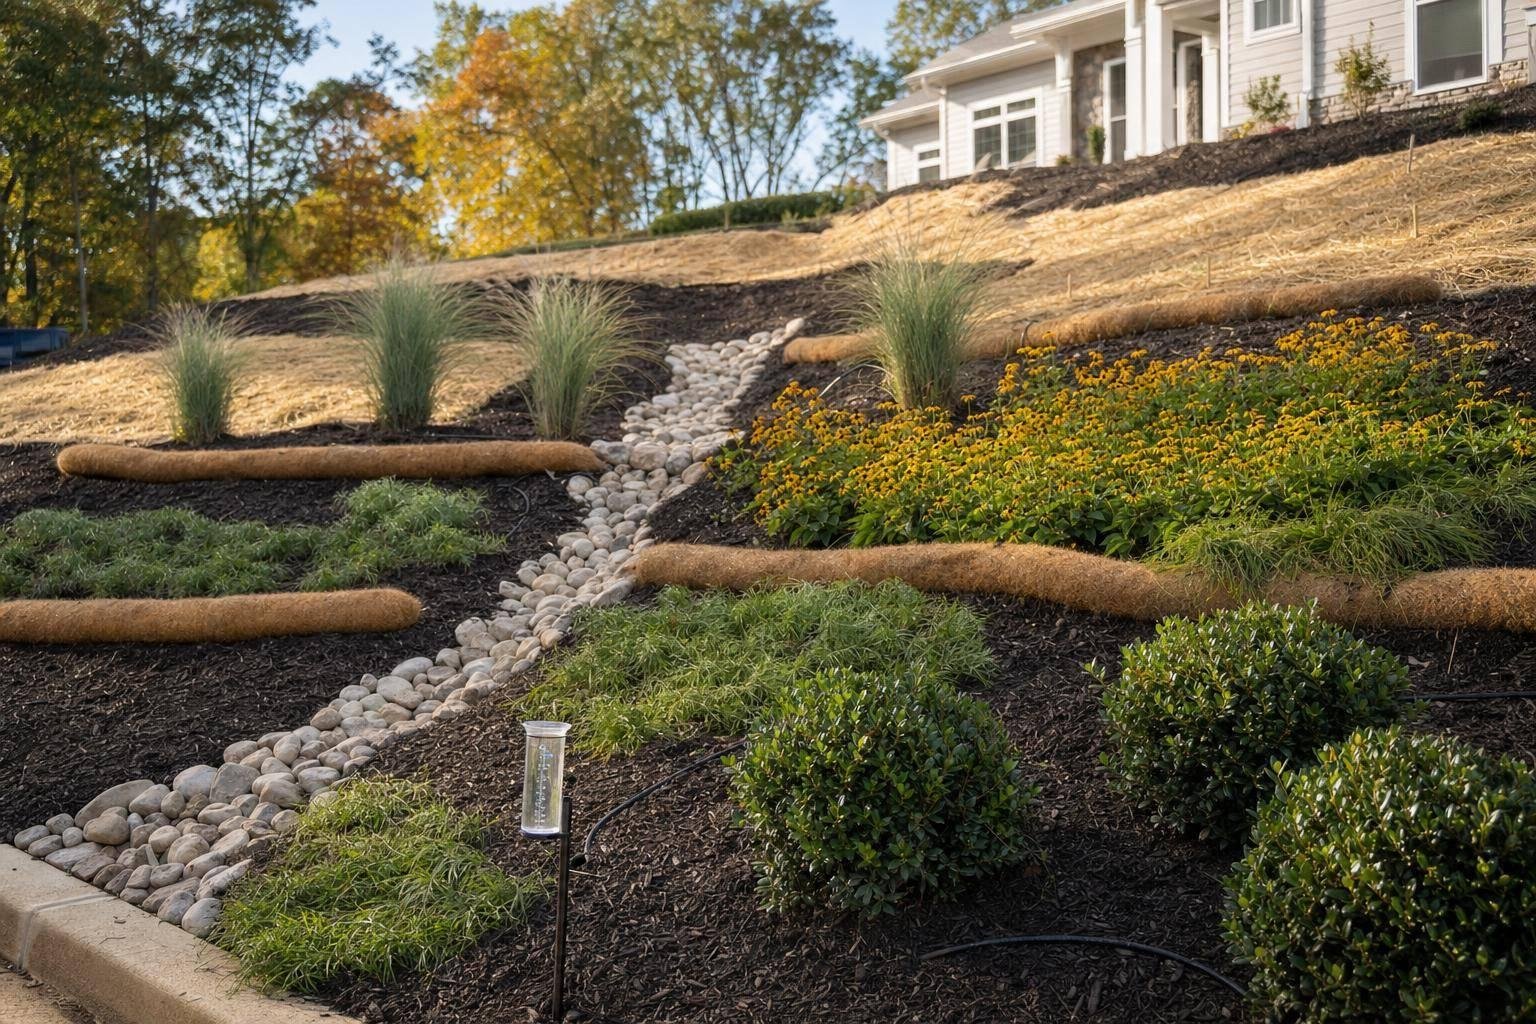
- bhavya gada
- No Comments
If water is running down your slope, plants alone will not stop erosion. I’d first check the slope grade, find where runoff starts, cover bare soil the same day I clear it, plant natives with tight spacing, mulch to 2–4 inches, and inspect after every storm of 0.5 inch or more.
Here’s the short version:
- I check whether the slope is steeper than 3:1
- I look for rills, bare patches, exposed roots, and soil buildup at the bottom
- I trace downspouts, sump discharge, driveway runoff, and walkway flow
- I fix drainage before planting
- I clear weeds in small sections of 100–200 sq. ft.
- I avoid clearing if heavy rain is likely in the next 24–48 hours
- I protect soil with straw, jute, or a biodegradable blanket right away
- I plant natives by sun, shade, and moisture needs
- I stagger plants to close bare soil faster
- I water to keep the top 4–6 inches of soil from drying out during early establishment
- I check the slope within 24 hours after heavy rain
If I saw runoff cutting the slope, water near the foundation, or washouts that keep coming back, I would stop planting and deal with grading or drainage first.
A quick snapshot:
| Step | What I’d focus on | Key number |
|---|---|---|
| Review | Slope, runoff, erosion signs | 3:1 limit |
| Prep | Weed removal and soil cover | 100–200 sq. ft. sections |
| Protect | Blanket or mulch setup | 6–8 in. trench at top |
| Plant | Native spacing and layout | 12–18 in. to 3–6 ft. |
| Water | Deep, slow soaking | 1 inch/week |
| Monitor | Storm checks | 0.5 inch rain trigger |
This checklist is about doing the work in the right order so the slope stays covered and the soil stays put.
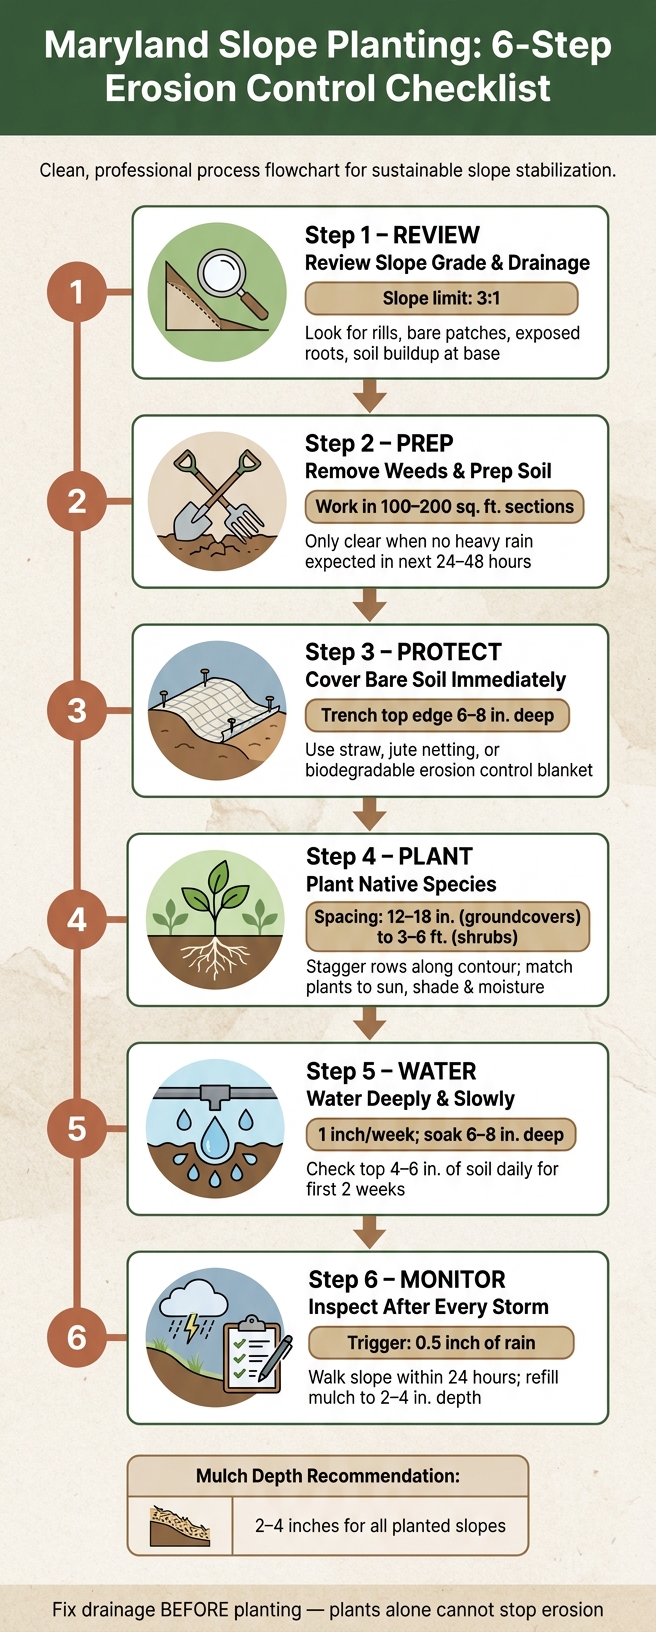
Maryland Slope Planting: 6-Step Erosion Control Checklist
1. Review Slope Grade and Drainage First
Start with a slope and drainage check before you buy any plants. Slope steepness, soil condition, and water flow decide whether new planting will stay in place or wash away.
Check Slope Shape, Steepness, and Eroded Areas
A 3:1 slope drops 1 foot for every 3 feet of run. A 4:1 slope drops 1 foot for every 4 feet and is easier to plant. Slopes steeper than 3:1, or slopes with soils that erode easily, often need erosion control blankets or turf reinforcement mats before planting[6].
Walk the entire slope and look closely for trouble spots. Watch for:
- Rills
- Washed-out patches
- Exposed tree or shrub roots
- Soil piled at the bottom of the slope
- Muddy water after storms
- Areas where turf won’t stay established
Rills and small gullies usually mean runoff is cutting through the soil. Exposed roots and missing soil can weaken plant health. And if soil keeps collecting at the toe of the slope, that’s a plain sign the slope is losing soil during storms[5][6].
After that, trace where the water starts and where it ends up.
Find Downspouts, Runoff Paths, and Drainage Problems
Map the house, driveway, walkways, downspouts, and the slope itself. Mark each downspout and note where it empties. Check whether the driveway or walkways tilt toward the slope. If they do, they’re sending runoff straight onto it. Find your sump pump discharge pipe too, and note where it drains during heavy rain.
Maryland residential code says the grade must drop at least 6 inches over the first 10 feet away from foundation walls, and any impervious surface within 10 feet of the foundation must slope at least 2% away from the building[1][2][4]. That matters because planting won’t solve a drainage problem.
Fix drainage first. During a moderate rain, walk the property and watch where surface runoff moves downhill. Those concentrated flow areas are the spots where swales, French drains, or dry riverbeds may need to go before you plant anything[5].
When to Bring in Pro Landscapes MD
If the slope keeps taking on runoff or washing out, stop and fix the site before moving forward. Call Pro Landscapes MD if erosion keeps coming back after planting, water pools near the foundation, the slope feels unstable, or runoff crosses a property line. They handle grading, drainage repair, French drains, dry riverbeds, and stormwater management before planting.
Once runoff is under control, move on to weed removal and soil prep.
sbb-itb-843f8be
2. Prepare the Slope Before You Plant
Remove Weeds and Unwanted Growth
Work in small sections, about 100 to 200 sq. ft. at a time. Clear each section and then cover or plant it that same day. The goal is simple: don’t leave bare soil sitting out any longer than you have to.
For turf, use a flat shovel or sod cutter. If the lawn is thick and well established, loosen the dead turf first, then remove roots and thatch before you plant.[18]
Dense weed patches often respond well to solarization. That means covering moist soil with clear plastic for several weeks, then removing the dead growth and planting or mulching right away.[20] For woody invasives like bush honeysuckle or English ivy, cut them at the base and treat the stumps to stop regrowth. Try not to disturb the soil more than needed.[16]
Only clear the area when no heavy rain is expected in the next 24 to 48 hours.[15]
After clearing, test the soil and put down temporary cover before planting.
Check Soil and Add Temporary Erosion Protection
About 24 to 48 hours after rain, push a garden fork 6 to 8 inches into moist soil. If it meets hard resistance or the soil drains slowly, compaction is likely the issue.[21][24][14]
On slopes flatter than 3:1, loosen the top 6 to 12 inches with hand tools and mix in compost at about 1 part compost to 2 parts soil in the planting zone.[22][23] Don’t deep-till steep slopes. On those, stick to surface cover instead.[13][15]
Native roots establish best in firm, protected soil with no open channels for runoff. So once a section is prepped, add temporary erosion cover before moving to the next one.
- On gentle slopes, straw mulch works well, but it should be anchored with netting or sod staples.[19]
- On steeper runs, use jute netting or a biodegradable erosion control blanket.[7][12][13]
Install blankets in three steps:
- Trench the top edge – bury the leading edge 6 to 8 inches deep at the top of the slope.[17]
- Overlap seams – unroll down the slope in the direction of water flow and overlap adjacent rolls by at least 4 to 8 inches.[10][11]
- Staple tight to the soil – pin through overlaps with U-shaped pins at least 6 inches long and keep the blanket flat against the soil to prevent undercutting.[8][9]
When it’s time to plant, cut an X in the blanket, set the plant in place, and press the edges snugly around the stem.[9] Biodegradable jute and coir blankets break down over time, while native roots gradually take over the job of holding the soil in place.[7][12][13]
Once the slope is cleared and covered, move to plant selection and spacing.
3. Plant Native Species With Correct Spacing and Mulch Depth
Choose Native Plants for Sun, Shade, and Root Coverage
Now that drainage is under control and the slope has some protection, it’s time to plant species that hold soil in place and fill open spots fast.
Pick native plants based on sun, moisture, slope angle, and deer pressure. Bad plant matches leave bare dirt behind, and bare dirt turns into runoff channels.
On sunny, drier upper slopes, native grasses such as little bluestem, switchgrass, and prairie dropseed tend to do well. For surface cover, moss phlox (Phlox subulata) spreads fast, and Montgomery County’s RainScapes program points to it as a strong option for erosion control on sunny slopes [26]. In partly shaded or moist spots, sedges, Christmas fern, foamflower (Tiarella cordifolia), and low shrubs like Virginia sweetspire are good fits. On shaded lower slopes, use woodland groundcovers.
For more structure and deeper root hold, add shrubs in clusters. Shrubs such as smooth hydrangea and blackhaw viburnum help with deeper anchoring [3].
A simple way to think about it:
- Groundcovers protect the soil surface
- Grasses and sedges add fibrous root cover
- Shrubs help anchor deeper soil layers
Space Plants to Close Bare Soil Fast
Stagger the plants instead of lining them up in straight rows. Offset each row so plants sit between the ones above it along the contour of the slope. That pattern interrupts water flow and helps nearby plants grow together sooner.
For spacing, groundcovers are often set about 12 to 18 inches apart, grasses and sedges about 18 to 24 inches apart, and shrubs about 3 to 6 feet apart based on mature size [27]. On steeper grades, closer spacing helps shade the soil sooner.
Apply 2 to 4 Inches of Mulch
After planting, add mulch to help the soil stay moist and covered as part of your landscape projects in Maryland.
Apply 2 to 4 inches of mulch across the slope. Resources focused on Baltimore and central Maryland slope erosion advise planting deep-rooted natives within two weeks of grading and then mulching with double-shredded hardwood to about 3 inches, because exposed clay loam crusts and sheds water [25]. Keep mulch away from stems and crowns.
Shredded hardwood and medium wood chips knit together and are less likely to move downhill. Straw can work as a short-term cover, but it should not be used by itself on slopes steeper than 3:1 – those need an erosion-control blanket instead [19][28].
| Mulch Type | Slope Stability | Washout Risk | Best Use |
|---|---|---|---|
| Shredded hardwood | High | Low | Most planted slopes, general use |
| Medium wood chips | High | Low | Shrub areas, moderate to gentle slopes |
| Straw | Low–Moderate | High | Temporary cover on gentle slopes only |
| Erosion-control blanket | Very High | Very Low | Steep or recently disturbed slopes |
On steep slopes, place mulch over the erosion-control blanket.
4. Water, Monitor, and Maintain the Slope After Planting
Water Deeply and Adjust for Maryland Weather
Once the slope is planted and mulched, the next step is simple: keep the roots moist enough to get established without sending soil downhill.
Water new plants right after planting. For the first 2 weeks, check moisture every day and water when the top 4–6 inches of soil are dry. Use drip irrigation, a soaker hose, or a slow hose trickle so water soaks 6–8 inches deep without pushing mulch out of place.[29][30][31][32][34]
For each new tree or shrub, build a small soil berm on the downhill side, about 1–3 inches high. That little ridge helps hold water in place long enough for it to soak into the root zone.[35] Aim for 1 inch of water per week total.[29][40]
From weeks 3–12, water based on soil moisture instead of following a set calendar. Check more often during hot, dry stretches, and less often as roots take hold.[30][36][38][39]
In Maryland, spring and early fall are usually the easiest times for plants to settle in. Summer is tougher. If heat or drought hits and plants start to show stress, water deeply 1–2 times per week.[35][36][39]
Once watering is underway, storm checks become your best early-warning system for erosion.
Inspect After Storms and Fill Bare Spots Quickly
Walk the slope within 24 hours after 0.5 inch or more of rain. Look for shifted mulch, small channels in the soil, exposed roots, standing water, and sediment collecting at drainage outlets.[41][42] Those are signs the slope is still losing soil and needs attention right away.
If you spot bare areas, bring mulch back to a steady 2–4 inch depth, reset any washed-out plants firmly, rebuild the downhill berm, and check that area again after the next storm.[37][43][44] If water keeps cutting through the same spot, the fix usually involves adding more deep-rooted plants or correcting drainage.[37]
During the first growing season, walk the slope every 2–4 weeks and pull young weeds before they go to seed.[33] As native groundcovers spread, they’ll help crowd out many weeds on their own. Even so, spot-weeding still matters when needed.
Conclusion: The Core Checklist for a Stable, Planted Slope
Use this final pass to turn the planting plan into a simple maintenance routine.
- Check grade and erosion
- Fix drainage first
- Clear weeds
- Prep soil and cover exposed areas
- Plant native species
- Mulch 2–4 inches
- Water by soil moisture
- Inspect after storms
For steep, fast-draining, or repeatedly eroding slopes in central Maryland, Pro Landscapes MD can handle grading, drainage, planting, and ongoing care.
FAQs
How do I know if my slope is too steep to plant without extra erosion control?
Check the slope’s grade first. As a general rule, slopes under 15% work well for many plants.
Once you get into the 15% to 30% range, things change a bit. These slopes usually do better with aggressive-rooted plants, and in some cases, terracing can help.
For slopes steeper than 30%, or with a 3:1 horizontal-to-vertical ratio or greater, plants alone usually aren’t enough at the start. You’ll need extra erosion control, such as erosion control blankets or retaining walls, while the plants get established.
What drainage problems should I fix before planting a slope?
Before you plant anything on a slope, deal with the problems under the surface first: poor drainage, compacted soil, and uneven grading. If you skip that step, plants often struggle from day one.
A simple way to check drainage is to dig a 12-inch hole, fill it with water, and look at it again after 24 hours. If water is still sitting in the hole, the soil drains poorly.
You should also check for active gullies or clear erosion paths where runoff collects and cuts through the slope. Pay close attention to spots where water is moving toward your foundation instead of away from it. That’s a red flag, and it needs attention before planting starts.
Which native plants work best for sunny, shady, and moist slopes in Maryland?
For sunny, dry slopes, go with drought-tolerant plants such as Fragrant Sumac, Eastern Red Cedar, Little Bluestem, Switchgrass, and Indiangrass. These plants handle heat and dry soil well, which makes them a smart fit for tough, exposed spots.
For shady, moist slopes, Spicebush, dogwood, and Virginia creeper are good picks. If you’re dealing with wet areas near water, Sweet Gale and Silver Maple can help hold soil in place thanks to their dense root systems.
Chat with Us