









- bhavya gada
- No Comments
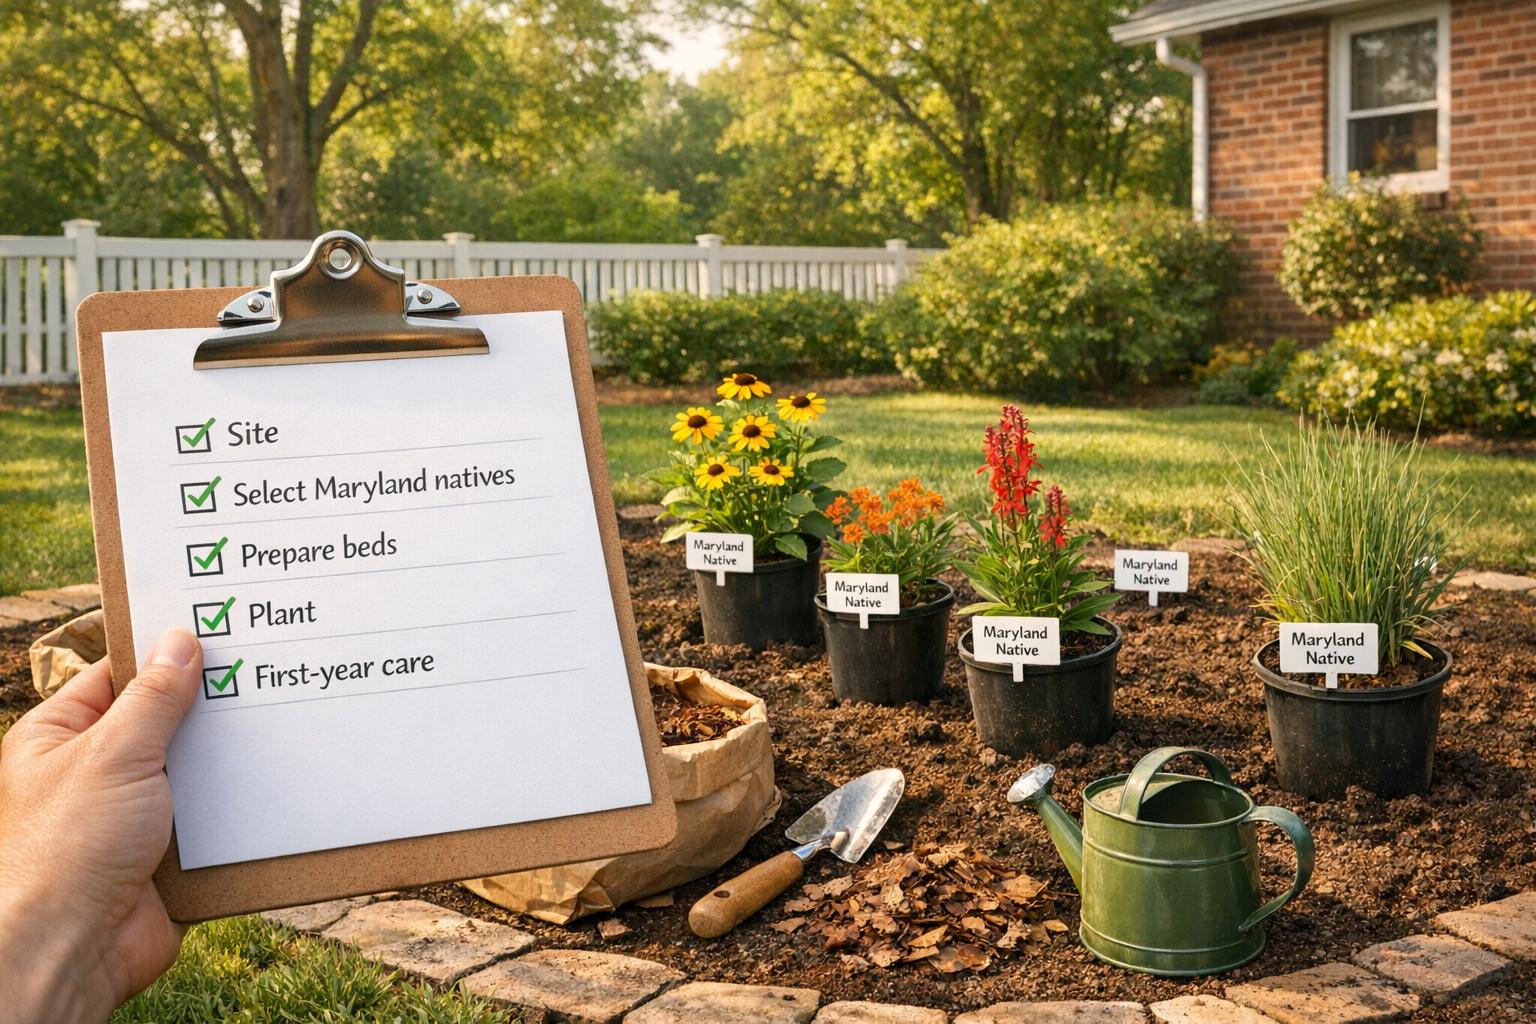
Planting native species in Maryland supports local ecosystems, reduces maintenance and landscape projects, and enhances wildlife habitats. With over 2,000 native plant species, Maryland gardeners can create thriving landscapes that align with the region’s climate and soil. Here’s how to get started:
- Site Assessment: Understand your yard’s sunlight, soil type, and moisture levels. Identify existing vegetation and ensure no underground utilities are in the way.
- Plant Selection: Choose species that match your site’s conditions and attract local wildlife like bees, butterflies, and birds. Use Maryland-specific resources for tailored recommendations.
- Preparation: Remove turf, test soil, and outline planting beds. Avoid fertilizers and focus on proper drainage.
- Planting: Best done in spring or fall. Space plants based on their mature size, water deeply, and use mulch to retain moisture.
- First-Year Care: Water weekly, control weeds, and avoid fertilizers. Monitor plant health and adjust as needed.
With proper planning and care, your native garden will flourish, benefiting both your property and Maryland’s natural environment. Start small, build gradually, and enjoy the transformation.
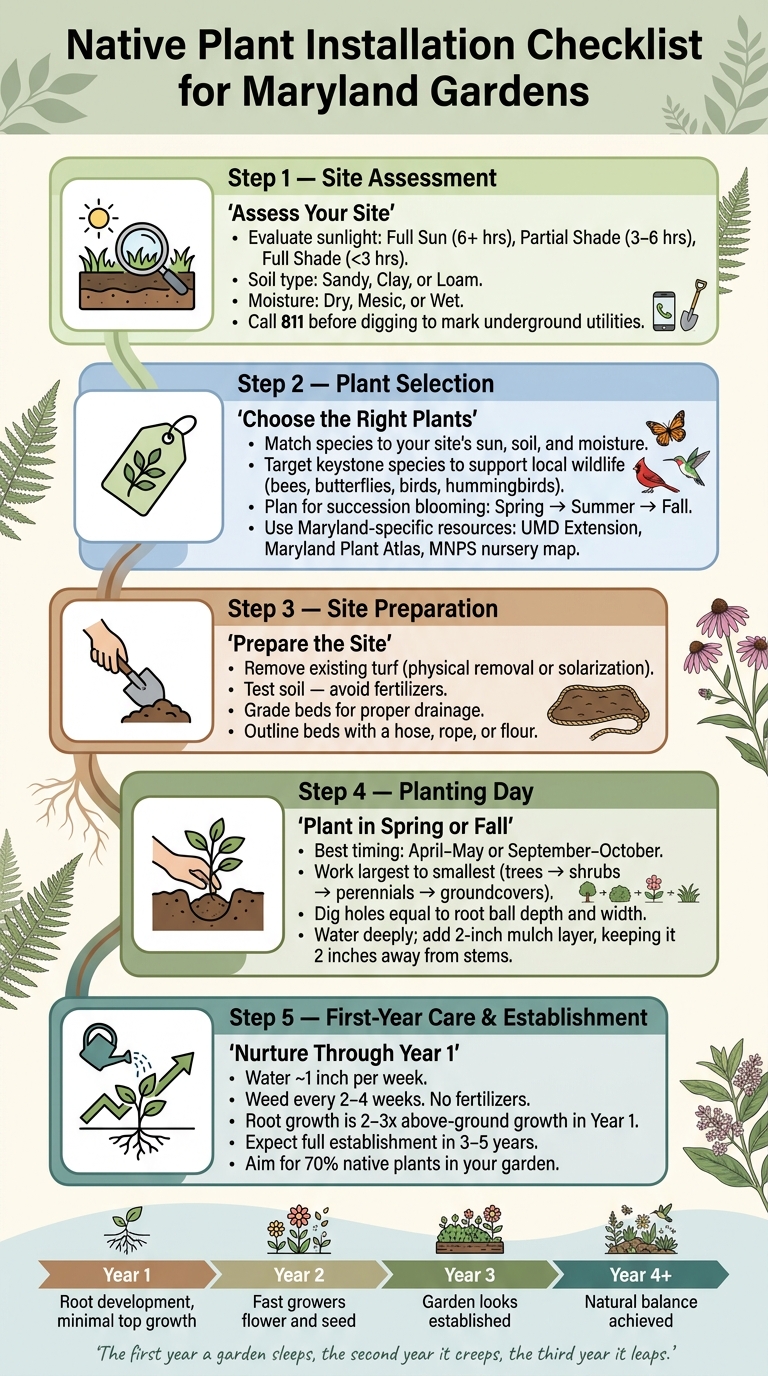
Native Plant Installation Checklist: 5 Steps to a Thriving Maryland Garden
Let’s Transform this Maryland Landscape with 100’s of Native Plants!
sbb-itb-843f8be
Site Assessment Checklist
Before you start planting, take a close look at your landscape. A detailed site assessment can mean the difference between a flourishing native garden and one that struggles from the start. Factors like sunlight, soil type, moisture levels, and existing vegetation all play a role in determining which plants will thrive in your space.
Sun, Soil, and Moisture Evaluation
Sunlight is a key factor in garden planning. Spend time observing your yard in the morning, at midday, and later in the afternoon. Note where shadows fall and how long they last. Areas with 6 or more hours of direct sunlight qualify as full sun. If an area gets less than 3 hours, it’s full shade, while anything in between counts as partial shade. Don’t forget that sunlight patterns change with the seasons, especially as trees gain or lose their leaves.
For soil, try a simple test: grab a handful of moist soil and squeeze it. Sandy soil crumbles immediately, clay soil forms a ribbon-like shape, and loam breaks apart loosely. For a deeper dive into your soil’s composition, consider using local soil testing services or checking your county’s soil atlas for broader insights into your property’s characteristics [1].
"Get to know a small number of plants really well… by really knowing your plants, you can envision how they fit into a legible, attractive design." – Roy Diblik, Author and Perennial Garden Designer [2]
Moisture is another critical element. After a heavy rain, check your yard 24–48 hours later. If water pools in certain areas, you’re dealing with wet soil. If water drains quickly, the soil is dry. Somewhere in between? That’s mesic soil. Matching plants to the right moisture conditions is just as important as aligning them with the light levels. You can also identify local weeds to get quick clues about your soil and moisture conditions [2]. Finally, take stock of existing vegetation and ensure there are no underground utilities before moving forward.
Existing Vegetation and Utilities
Take a close look at the plants already growing on your property. Some native species might be worth keeping, while invasive plants can choke out new additions. Use local identification guides to tell them apart, and remove invasive species promptly using methods like hand pulling, weed wrenches, or targeted herbicide application [1].
Before you dig, always call 811 or visit call811.com. This free service will mark underground utility lines – such as gas, electric, water, and cable – within a few business days. Ignoring this step can be dangerous and, in most states, it’s also illegal. Also, be mindful of distances from structures like your home, fences, and property lines. These factors influence what you can plant and how large it can grow.
Tools Needed for Site Assessment
Having the right tools can make your site assessment easier and more accurate. Here’s a handy list:
| Tool | Purpose |
|---|---|
| Marking paint or flags | Identify planting zones, utility lines, and problem areas |
| Soil knife or hand trowel | Dig small holes to check soil texture and layering |
| Shovel | Create deeper holes for drainage tests |
| Ruler or measuring tape | Measure distances from structures and property lines |
| Notepad or phone | Record sunlight, moisture levels, and plant observations |
Consider performing a percolation test (commonly called a "perc" test) to check drainage. Dig a hole about 12 inches deep, fill it with water, and let it drain. Then refill it and time how long it takes to empty. If water drains at about 1 inch per hour, your soil has good drainage. Slower drainage might point to compacted or clay-heavy soil that could need improvement.
Planning and Plant Selection Checklist
Turn your site assessment into a well-thought-out planting strategy. Choosing the right plants means aligning species with the site’s conditions and ecological goals.
Setting Goals for Wildlife and Ecosystem Benefits
Start by deciding which wildlife species you want to attract. Monarch butterflies, native bees, songbirds, hummingbirds, and fireflies each have unique habitat needs. One of the best ways to support them is by focusing on keystone plant species – plants that play an outsized role in supporting the local food web [4].
A good planting plan also incorporates a layered design, mimicking natural ecosystems. This includes canopy trees, understory shrubs, herbaceous perennials, groundcovers, and a ground layer made up of leaf litter or logs. This structure provides the essentials wildlife need: food, water, shelter, and nesting sites. For example, ground-nesting bees benefit from small, bare patches of soil, while logs and large stones can serve as pupation sites for insects and add a natural aesthetic to your garden.
"Native plants are pivotal in preserving local genetic diversity and offering support for wildlife." – Garden for Wildlife [4]
Plan for succession blooming, ensuring you have plants that flower from spring through fall. This way, pollinators always have access to food. Planting the same species in clusters, or mass plantings, makes it easier for pollinators to find food and enhances the garden’s visual appeal.
With a clear goal in mind, use Maryland-specific resources to refine your plant choices. Local guides can help ensure your selections are tailored to Maryland’s unique environment.
Using Maryland-Specific Native Plant Resources
Refine your plant list using tools specific to Maryland. The University of Maryland Extension provides native plant guides organized by EPA Level II ecoregions: Piedmont, Coastal Plain, and Mountain. Identifying your ecoregion is a crucial step in selecting plants suited to your soil and climate.
To confirm a plant’s native status, consult the Maryland Plant Atlas, managed by the Maryland Department of Natural Resources and the University of Maryland’s Norton-Brown Herbarium. When sourcing plants, the Maryland Native Plant Society (MNPS) offers a nursery map at mdflora.org/nurseries.html [5]. Always ensure that plants are nursery-propagated rather than taken from the wild. Wild-collected plants often fail to transplant well and their removal can harm local ecosystems [1].
"Diverse plantings that resemble the native plant community in your area are likely to have the most success and confer the most benefits." – USDA Forest Service [1]
Plant Types and Quantities
A diverse native planting should include a mix of canopy trees, shrubs, perennials, groundcovers, grasses, and vines. Use the table below to guide your selection process:
| Selection Factor | Categories to Consider |
|---|---|
| Sun Exposure | Full sun, part sun, full shade, light shade |
| Soil Type | Acidic, alkaline, clay, loam, sandy, rocky |
| Moisture | Dry, mesic, wet, riparian |
| Wildlife Target | Bees, birds, butterflies, hummingbirds |
| Bloom Season | Spring, summer, fall, winter |
Choose seeds for affordability, plugs for a balance of cost and establishment time, or larger potted plants for quicker results. Before planting, arrange everything on the ground to confirm spacing [3]. Keep in mind that native perennials often focus on root development in their first year. Their root systems can grow 2 to 3 times the height of the visible plant, so don’t judge their progress solely by what’s above ground [3].
Pre-Planting Preparation Checklist
Once you’ve finalized your plant list, it’s time to prepare the site. Proper groundwork is essential to avoid common issues like poor drainage, stubborn weeds, and compacted soil that can derail native plant installations.
Site Layout and Bed Preparation
Before anything else, make sure to check for underground utilities by contacting 811 or visiting call811.com. Safety first!
To outline your planting beds, use a garden hose, rope, or even sprinkle flour to sketch the shape directly on the ground. This allows you to tweak curves and proportions before committing. When planning for trees and shrubs, consider their mature canopy size, not just their current appearance. For instance, a young serviceberry may seem small now, but it can grow to a width of 15 to 25 feet. Make sure your bed is wide enough to accommodate both this growth and the natural ground layer beneath.
If there’s existing turf, you have two main options for removal:
- Physical removal: Use a sod cutter or flat spade to manually remove the turf.
- Solarization: Cover the area with clear plastic sheeting for an entire growing season to kill the root systems by trapping heat. While this method takes longer, it minimizes soil disturbance, which is crucial as tilling can bring dormant weed seeds to the surface.
Once the beds are outlined and cleared, the next step is to improve soil conditions.
Soil Amendment and Grading
With your bed boundaries set, it’s time to test and prepare the soil. A soil test from your local University Extension office or Soil and Water Conservation District will provide details on pH, organic matter, and texture. This helps determine if any adjustments are necessary for proper drainage and structure.
Avoid adding fertilizer. Native plants thrive in natural soil conditions, and adding fertilizer can disrupt this balance. As Prairie Restorations, Inc. explains, "Native plants don’t need to be fertilized in order to grow and thrive. In fact, adding fertilizer can actually do more harm than good since it can disrupt the natural balance of the soil." [3]
For areas with drainage problems – such as rain gardens – grade the bed so water flows away from structures and pools within the planting zone. This prevents water from collecting against foundations or walkways, which could cause damage.
Preparation Tools and Materials
Having the right tools and materials on hand makes site preparation much easier. Here’s a quick reference guide:
| Preparation Step | Tools / Materials |
|---|---|
| Utility marking | Call 811 (free service) |
| Bed layout | Garden hose, rope, flour, or sand |
| Vegetation removal | Flat spade, sod cutter, weed wrench, plastic sheeting |
| Soil loosening | Rototiller, spade, pick hoe, hand cultivator |
| Surface smoothing | Rake |
| Erosion control | Clean, seed-free straw or Little Bluestem straw |
| Mulching | Shredded wood mulch, wheelbarrow |
| Zone marking | Landscape flags |
For removing woody invasive plants, a weed wrench is a great tool. It allows you to pull out root systems cleanly without the need for herbicides. If you’re working on a large area, a rototiller can save time by speeding up soil loosening. However, for smaller beds, a simple spade and hand cultivator will get the job done just fine.
Installation Day Checklist
Timing and Weather Considerations
The best times to plant native species are spring (April–May) and fall (September–October). These seasons provide cooler weather and more consistent rainfall, which helps reduce transplant stress and gives roots a chance to establish before facing summer heat or winter frost.
Before heading out, check the weather forecast. Aim for a cloudy, mild day with little to no wind. Avoid planting before extreme conditions like heat waves or hard freezes. If rain is expected within a day or two, even better – it can save you some watering effort. Once the weather looks good, you’re ready to focus on plant placement.
Plant Placement and Installation Steps
Lay out your plants across the area according to your design plan. This step helps you visualize the spacing and make adjustments before digging. Be sure to follow spacing guidelines based on each plant’s mature size and growth habits.
Work from largest to smallest. Start with keystone trees and shrubs, then add herbaceous plants and groundcovers as part of our professional landscaping services. Proper placement ensures plants thrive, fill in naturally, and suppress weeds over time.
Group plants with similar light and moisture needs together. For example, shade-tolerant plants like low-growing sedges (Carex spp.) do well under the canopy of larger shrubs or trees [2]. When digging, make each hole the same depth and width as the root ball – planting too deep can suffocate roots, so take extra care here.
Watering and Mulching
Once your plants are in place, watering and mulching are key to helping them settle in. Pre-water each hole, place the plant, and then water deeply to remove any air pockets [6]. Use deep, infrequent watering instead of light daily sprinkling – this encourages roots to grow deeper into the soil [6].
To keep moisture where it’s needed, build a small circular soil berm around the edge of each planting hole. This creates a basin that directs water toward the roots. Add a 2-inch layer of mulch, such as shredded bark, wood chips, or leaves, but keep it at least 2 inches away from the plant’s stem or trunk to prevent rot [6]. Mulching helps retain moisture and suppress weeds. Most native plants won’t need additional watering after their first one or two growing seasons, once their roots are well-established.
Establishment and Maintenance Checklist
First-Year Care
The first growing season is the most critical for native plants – not because they’re delicate, but because their energy is focused on root development. In fact, during the first year, root growth is typically two to three times greater than what you’ll see above ground [3]. So, if your plants seem small or fail to bloom, don’t worry – that’s completely normal.
Your top priority during this period is consistent watering. Aim for deep watering, delivering about 1 inch per week, to promote strong root systems [3]. Weed control is equally important. Hand-pull weeds in smaller beds every 2–4 weeks or mow larger areas to a height of 6–12 inches to prevent weeds from seeding. Native seedlings, which tend to grow close to the ground, will remain unharmed by this approach [1][3].
"Low maintenance does not mean no maintenance. The first few growing seasons especially require maintenance." – U.S. Forest Service [1]
Avoid fertilizing your native plants. These species thrive in local soil conditions, and fertilizers can give weeds the upper hand [3]. If you’re dealing with deer or rabbits, consider using netting or physical barriers to protect vulnerable seedlings until they’re well-established [1][4].
After the initial phase, continue monitoring your plants to ensure they’re progressing as expected.
Monitoring Plant Performance and Making Replacements
Use the following timeline to track plant growth and identify any issues early:
| Year | Expected Growth | Key Tasks |
|---|---|---|
| Year 1 | Minimal top growth; roots developing underground | Deep watering; aggressive weed control |
| Year 2 | Fast-growing species (e.g., Wild Bergamot, Little Bluestem) flower and seed | Spot-mow weeds; monitor for invasive species |
| Year 3 | Increased diversity; garden starts to look established | Minimal weeding; assess plant density |
| Year 4+ | Natural balance achieved | Long-term care; dormant-season mowing |
If a plant isn’t thriving by the second year, it’s time to reassess its placement. For example, a sun-loving plant placed in a shaded area or a moisture-loving species in dry soil will struggle regardless of your efforts [4]. The key to long-term success lies in matching plants to their ideal conditions.
"By really knowing your plants, you can envision how they fit into a legible, attractive design. When you place plants in conditions where they are happy, they thrive." – Roy Diblik, Author/Designer [2]
It’s also normal for some early bloomers, like Black-eyed Susan, to decline by the third year as slower-growing perennials take over. This is a natural part of a healthy, dynamic planting [3].
As your plants mature, look for opportunities to integrate them seamlessly with your existing garden for a balanced, cohesive look.
Blending Native Plantings with Your Existing Landscape
Once your native plantings are underway, focus on creating a cohesive design that complements your existing landscape. Define clear bed edges along patios, walkways, or lawns to signal that the planting is intentional rather than overgrown. For a polished look, consider adding dense native groundcovers like sedges (Carex spp.) along the edges. These act as a "living mulch", filling gaps, blocking weeds, and softening transitions between formal and naturalistic areas [2][3].
Incorporate small habitat features like a flat stone or a small log within the planting. These elements support native bees and other beneficial insects while blending naturally into the garden [2].
As the planting matures, you may notice uneven growth – some areas filling in faster than others. Address this by dividing and transplanting clumps or adding new plugs to bare spots. Filling these gaps not only enhances the garden’s appearance but also prevents invasive species from taking hold. The ultimate goal is a garden that feels intentional, supports local wildlife, and becomes easier to maintain with time.
Conclusion
Planting native species requires careful planning – every step, from assessing the site to nurturing plants in their first year, plays a vital role in creating a landscape that aligns with Maryland’s climate and ecosystem.
While it may take about 3 to 5 years to fully see the benefits for wildlife and the environment [7], native plants offer significant advantages. They need less water, no chemical fertilizers, and minimal maintenance:
"The first year a garden sleeps, the second year it creeps, the third year it leaps." [7]
To support local birds, pollinators, and helpful insects, aim for at least 70% native plants in your garden [8]. You don’t need to tackle it all at once – start small, perhaps near your home’s foundation, and expand gradually. With this phased approach, you can create a thriving native garden over time.
If you want additional guidance, professional help can ensure long-term success. Pro Landscapes MD provides expert landscape design, planting, and restoration services across central Maryland, including Howard, Montgomery, and Baltimore Counties. Their team of experienced horticulturists can help you create a sustainable, native-focused landscape tailored to your property and goals.
FAQs
How do I pick the right native plants for my yard conditions?
To select native plants for your yard, start by evaluating key site factors like soil type, drainage, sunlight availability, and the existing vegetation. Regional plant lists can guide you toward species that match your specific conditions – whether your yard has dry or wet soils, full sun, or plenty of shade. For ideas, take a walk through local natural areas to see what thrives in your region. When purchasing, choose plants from local sources to ensure they’re well-suited to your environment. Finally, focus on proper site preparation and managing weeds to give your native plants the best chance to flourish.
What’s the easiest way to remove lawn before planting natives?
To get your lawn ready for native plants, the first step is clearing out the current vegetation. For smaller spaces, you can manually remove grass and weeds using tools like a shovel, hoe, or even by hand-pulling. If you’re dealing with a larger area, herbicides can be an option – just make sure to follow the label instructions closely to ensure proper use.
Once the lawn is cleared, the next step is preparing the soil. Use tools such as a rake or rototiller to loosen the soil and create a planting bed that’s ready for your native plants.
How long does it take for a native garden to look established?
A native garden typically takes 3 to 5 years to look fully developed. In this period, plants gradually spread, establish deep root systems, and begin to flower and produce seeds. By the third year, you’ll often see a clear transformation as the garden starts to flourish and reach its potential.
Chat with Us