









- bhavya gada
- No Comments
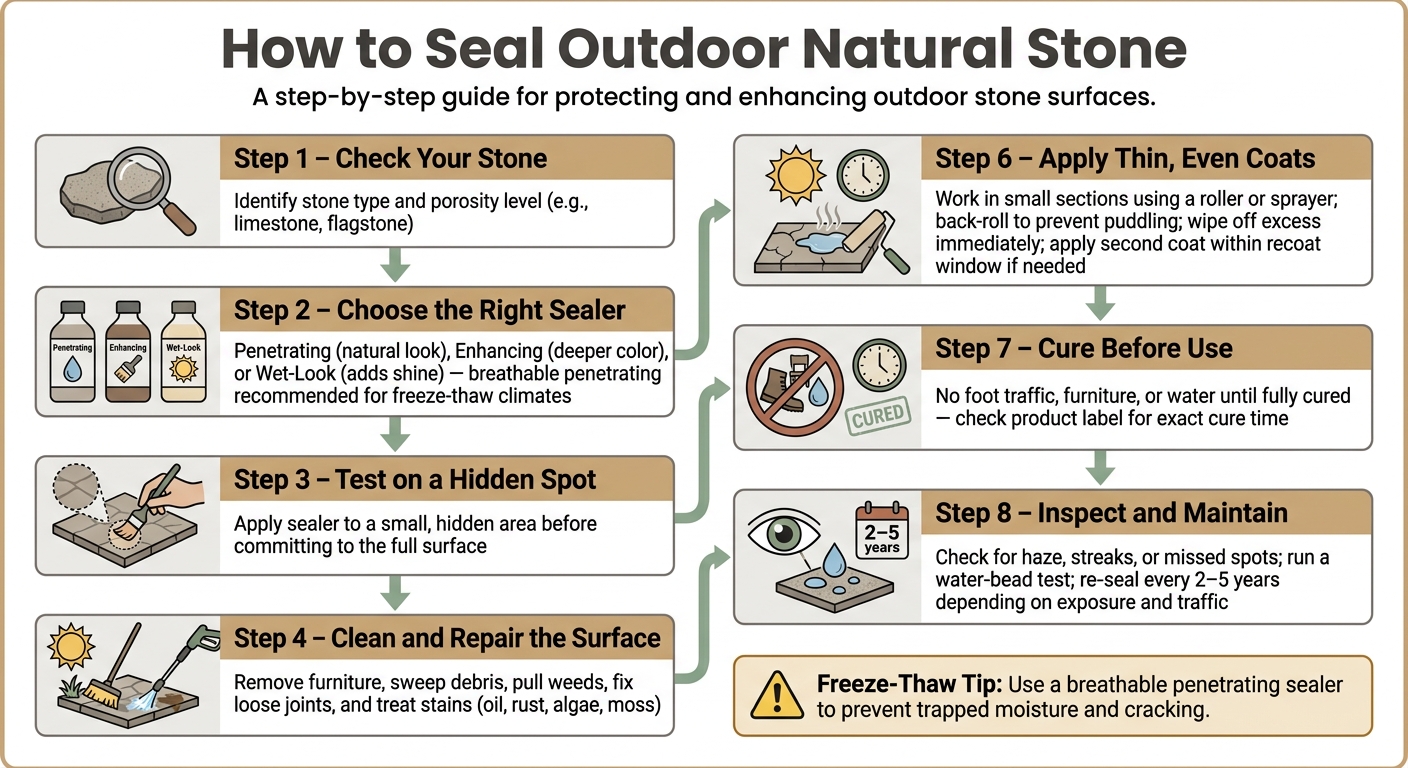
If I seal outdoor stone the right way, I cut down on water soak-in, stains, and winter damage. In most cases, that means I need to pick the right sealer for the stone, clean and dry the surface for 24 to 48 hours, apply thin coats, and wait for full cure time before use.
Here’s the short version:
- I check the stone type and how much water it absorbs
- I test the sealer on a hidden spot
- I clean the surface and fix loose joints, weeds, and stains
- I let the stone dry for 24 to 48 hours or more in humid weather
- I apply thin, even coats in small sections
- I wipe off extra product to avoid haze, streaks, and patchy spots
- I keep people, furniture, and water off the surface until it cures
- I test with water over time and plan to re-seal about every 2 to 5 years
One fact stands out: in places with freeze-thaw cycles, trapped moisture can lead to cracks over time. That’s why many outdoor stone surfaces do best with a breathable penetrating sealer that helps water stay out while letting the stone dry.
If I want the job to last, prep and dry time matter just as much as the sealer itself.
How to Seal Outdoor Natural Stone: Step-by-Step Guide
How to Seal Natural Stone (BEGINNER’S GUIDE)
sbb-itb-843f8be
Know Your Stone and Pick the Right Sealer
Once you know what kind of stone you’re working with, picking a sealer gets much easier. The two big things to look at are porosity and the finish you want.
Common Outdoor Stone Types and Porosity Levels
Some stones are more porous than others. That matters because porous stone pulls in more sealer.
Limestone is a good example. Some flagstones act the same way. These surfaces often absorb more product and may need a second coat to get even coverage.
Penetrating, Enhancing, and Wet-Look Sealers Compared
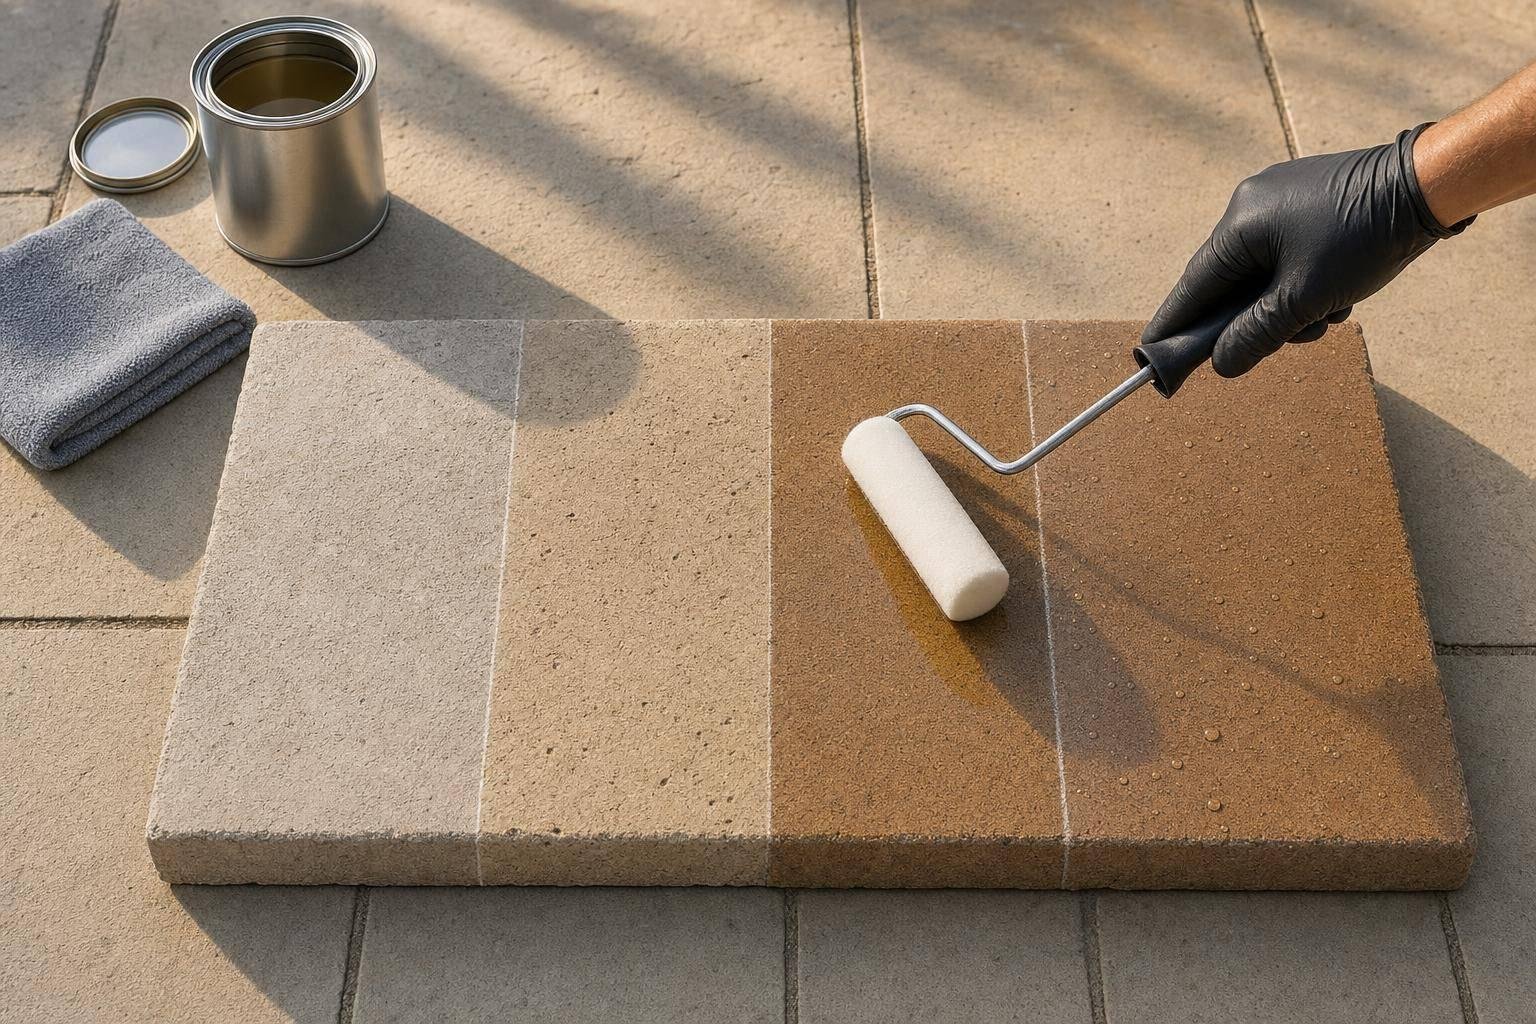
Penetrating sealers soak into the stone and keep the surface looking natural. Enhancing sealers make the color look deeper. Wet-look sealers add shine.
For outdoor stone in Maryland, breathable penetrating sealers are usually the safest pick. They help cut down on trapped moisture and lower the risk of stone damage during freeze-thaw cycles.
So the best choice comes down to a few simple things:
- The type of stone
- How porous it is
- The finish you want
Before you seal the whole area, test the product on a hidden spot first. It’s a small step, but it can save you from a finish you don’t like.
Prepare the Surface: Cleaning, Repairs, and Drying
Once you’ve picked the right sealer, the next step is prep. This part matters more than most people think. If the stone is dirty, damp, or falling apart at the joints, the sealer won’t bond evenly. And when that happens, the finish can look patchy and wear out sooner than it should.
Clear the Area and Clean the Stone
Start by moving furniture, grills, and planters off the surface. Then sweep away loose debris so you’re not sealing over dust, grit, or leaves.
Repair Joints and Remove Stains Before Sealing
Before you seal, pull weeds and fix any loose or crumbling joints. It’s also smart to deal with stains first, not after. Remove oil, rust, algae, moss, and food stains so they don’t get trapped under the sealer.
Let the Stone Dry Fully and Check the Forecast
Let the stone dry all the way before applying sealer. In many cases, that means waiting 24 to 48 hours after cleaning, as long as the weather stays dry. If the air is humid, it may take more time. Check the surface for any dark or damp patches before you start. Once the stone is fully dry, gather your tools and begin application.
How to Apply the Sealer Step by Step
Get your tools together before you open the sealer. That makes the job smoother and helps you move from one section to the next without the product drying where you don’t want it to.
Gather Your Tools and Read the Product Instructions
Set out everything first: a paint tray, a 3/8- to 3/4-inch nap roller, a low-pressure pump sprayer, applicator pads, nylon brushes, clean cloths, and protective gear.
When you’re ready, stir the sealer instead of shaking it. Shaking can add bubbles, and bubbles can mess with the finish. Then read the label closely for coverage, dwell time, recoat window, and cure time.
Once your setup is done, go straight into the job so each area stays workable.
Apply Thin, Even Coats in Small Sections
Start at one edge and work in small sections. That’s the best way to keep the finish even from side to side.
Apply thin, even coats. If you spray, back-roll the area right away to stop puddling. Wipe off any extra sealer as you go. If the product needs a second coat, put it on within the recoat window listed on the label.
Seal Edges, Steps, and Vertical Faces Without Drips
Handle the tricky spots before the sealer starts to set. Use a nylon brush on edges, step risers, seat walls, and stone veneer.
Keep the coat thin, and wipe away extra sealer before it runs. A little care here saves you from drips and streaks later.
Cure Time, Inspection, and Ongoing Care
Let the Sealer Cure Before Use
After the final coat, the last step is simple: let the sealer cure before you use the surface like normal.
That means no foot traffic, no furniture, and no water on the stone until the sealer has fully cured. If you rush this part, you can undo a lot of the work you just finished.
Cure time depends on the sealer and the weather, so check the label and follow the stated cure time.
Check for Missed Spots, Haze, or Uneven Finish
Once the surface has cured, inspect it in good light. Look for even coverage, residue, haze, streaks, or patchy areas.
An uneven sheen usually means one of two things:
- A spot was missed
- Too much product was left behind
A simple water test can help here too. Water should bead on the surface, not soak in.
If you notice a missed spot, a dull patch, or haze, follow the manufacturer’s instructions for cleanup or spot correction.
Set a Maintenance and Re-Sealing Schedule
After the surface passes inspection, keep an eye on it over time with periodic water-drop tests.
If water starts soaking in instead of beading, the sealer is wearing thin. That’s your sign the stone may need attention.
In Maryland, plan to re-seal outdoor natural stone every 2 to 5 years, depending on exposure, traffic, and the type of sealer used.
FAQs
How do I know if my stone needs sealing?
Try a simple water spray test. Spray a little water on the surface and watch what happens. If the water beads up and runs off, the seal is still doing its job. If it soaks into the stone, it’s time to reseal.
It also helps to keep an eye out for trouble spots like water stains, mold, mildew, efflorescence, surface cracks, or loose joints. A quick visual check in the spring and fall can help you spot these problems early.
What happens if I seal stone before it is fully dry?
Sealing stone before it’s fully dry can trap moisture inside the material. And because natural stone is porous, that water doesn’t just disappear.
It can sit in the stone and cause damage over time. In climates like Maryland’s, freeze-thaw cycles make the problem worse. Water gets trapped, temperatures shift, and the stone can crack or start to crumble.
Make sure the surface is clean and completely dry before you apply sealant.
Can I seal outdoor stone myself or should I hire a pro?
It comes down to two things: how comfortable you are with hands-on maintenance and what your stone needs.
If you have the right tools, know the prep work, and understand how to apply the product the right way, this can be a DIY job.
That said, hiring a professional can help you avoid mistakes during prep and application. That matters because good sealing work helps your stone hold up over time and guards against water damage, stains, and Maryland’s freeze-thaw cycles.
Chat with Us