









- bhavya gada
- No Comments
If you want a pergola that lasts in Howard County, start with footing depth, drainage, and safe spacing. In this area, footings often need to reach about 30 inches below grade, beam clearance usually works best at 7–8 ft, and most dining setups fit well in a 10×12 ft to 12×12 ft footprint.
Here’s the short version: I’d choose the pergola spot based on sun, traffic flow, and wet soil, not looks alone. Then I’d match the frame material to the yard and upkeep level, keep fire and grill areas at safe distances, and plan vines, lights, and fan wiring before the build starts.
What this guide covers:
- Where a freestanding pergola fits best in the yard
- Common sizes for dining, lounging, and mixed-use spaces
- Why Howard County frost depth and drainage matter
- How wood, vinyl, and aluminum compare
- Safe layout ideas near patios, fire pits, and grills
- Which vines work well in Maryland yards
- What to plan for lighting, outlets, and ceiling fans
A pergola can make a yard feel organized without closing it in. The best results come from getting the structure, site work, and spacing right from day one.
Planning Layout, Size, and Footings
Choosing the Right Spot and Footprint
Start with how people move through the yard and where the sun hits hardest – not looks alone. Keep the pergola out of the path between the house, patio doors, walkways, the grill, and other outdoor features. West- and southwest-facing spots get the strongest afternoon sun, so a pergola shading a south- or west-facing seating area is often the most practical setup.
Once you pick a general area, map out the furniture first. That makes it much easier to see whether people can pull chairs back, walk around the setup, and move through the yard without squeezing past a post. Plan for at least 3 ft of clear space between any furniture edge and the nearest post[4][6]. That extra room keeps the area from feeling tight and helps during get-togethers.
Common pergola sizes tend to match common backyard uses pretty well[4][6]:
| Footprint | Best Use | Notes |
|---|---|---|
| 8×8 ft | Small bistro or reading nook | Works on small patios |
| 10×10 ft | Small lounge or conversation set | Good for a casual seating area |
| 10×12 or 12×12 ft | Dining for 4–6 people | A common footprint for a main dining zone |
| 12×16 ft | Combined dining and lounge | Leave extra room for circulation between zones |
To square the layout, mark one edge parallel to your house wall or patio edge. Then use the 3-4-5 method to set the perpendicular sides at a true right angle. Check both diagonals too – if they match, the layout is square[4].
Height, Clearance, and Footing Depth for Maryland Conditions
After the footprint is locked in, the next pieces are height and footing depth.
Keep beam clearance at 7–8 ft above the finished surface. Most freestanding pergolas end up in the 8–10 ft overall height range, which gives you shade without making the structure feel heavy overhead. If you want a ceiling fan, pendant lights, or a chandelier-style fixture, aim for at least 9–10 ft. That gives hanging fixtures safe clearance and keeps the space comfortable. The extra height also helps heat and smoke move up and away from the seating area.
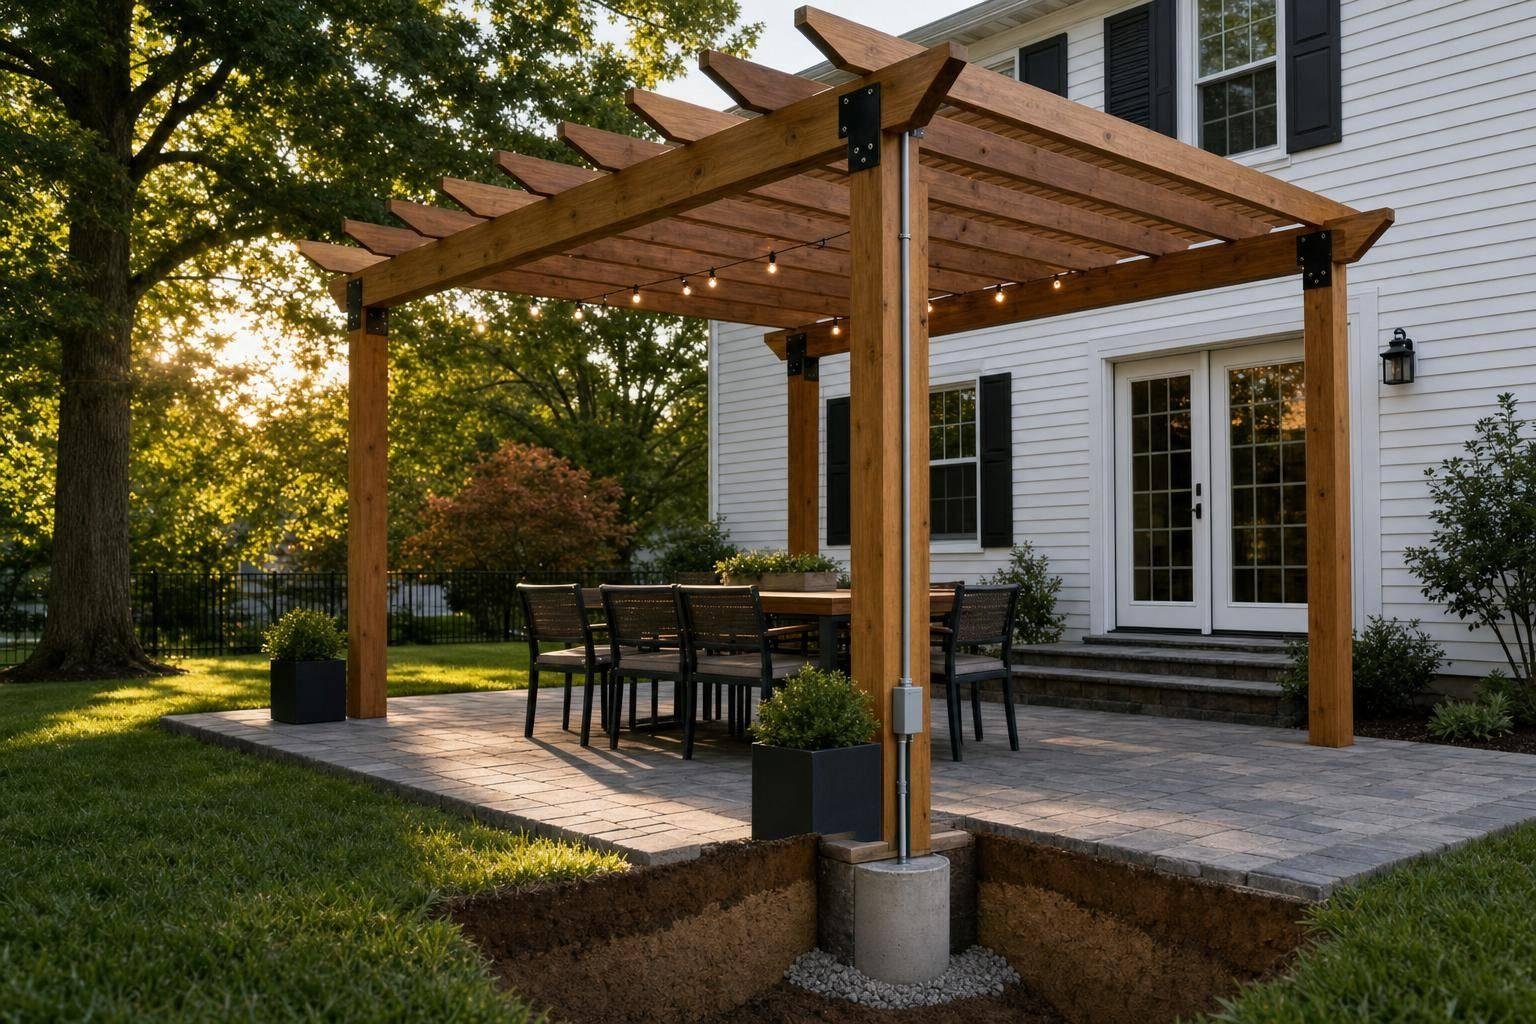
Footing depth is where many DIY pergola builds get tripped up. Maryland’s frost line is about 30 inches below grade, and footings that stop short of that depth can shift from frost heave – the freeze-thaw cycle that slowly tilts posts and cracks slabs over time. Howard County’s deck guidance points to footings at least 30 inches deep[3][7].
| Footing Approach | How It Works | Best For | Watch Out For |
|---|---|---|---|
| In-ground concrete (frost-depth, ~30 in) | Concrete piers bearing on undisturbed soil below the frost line | Most Howard County pergolas on soil or new patios; medium to large footprints with fans or lighting | Requires excavation |
| Surface-mounted brackets on a reinforced slab | Steel brackets anchored with expansion or epoxy bolts into an existing concrete patio | Small to medium pergolas (8×8, 10×10) where excavation isn’t practical | Slab must be thick and reinforced enough to resist uplift; slab itself can still shift with frost |
| Shallow in-ground footings (~12 in) | Concrete set above the frost line | Very small garden arches in mild climates | Not recommended for Howard County – high risk of frost heave over time |
County Rules, HOA Limits, and Drainage Checks
Before you set posts, make sure the layout works on paper as well as on the ground.
Check Howard County permit and footing rules for pergolas before building. Confirm the plan with the county’s Inspections, Licenses, and Permits division or through the Accela Citizen Access portal[8][3].
Setback and lot-coverage limits need a look before you lock in the footprint. HOAs often add another layer of rules for materials, colors, and height, and many require written approval before work begins.
Then check the site itself. If the area has standing water, soggy spots, or erosion, deal with that first. Wet or unstable soil can lead to uneven footing settlement. Grading changes, French drains, or dry riverbeds can move water away from the footing zone[1][2][5]. Also call utility location services before digging, since footings often reach depths where nearby utility lines may be running.
With the footprint and footing plan set, material choice becomes the next decision.
sbb-itb-843f8be
How to Build a Backyard Pergola From Scratch | From Scratch with @epicgardening Ep. 6
Choosing Materials and Finishes for Central Maryland Weather
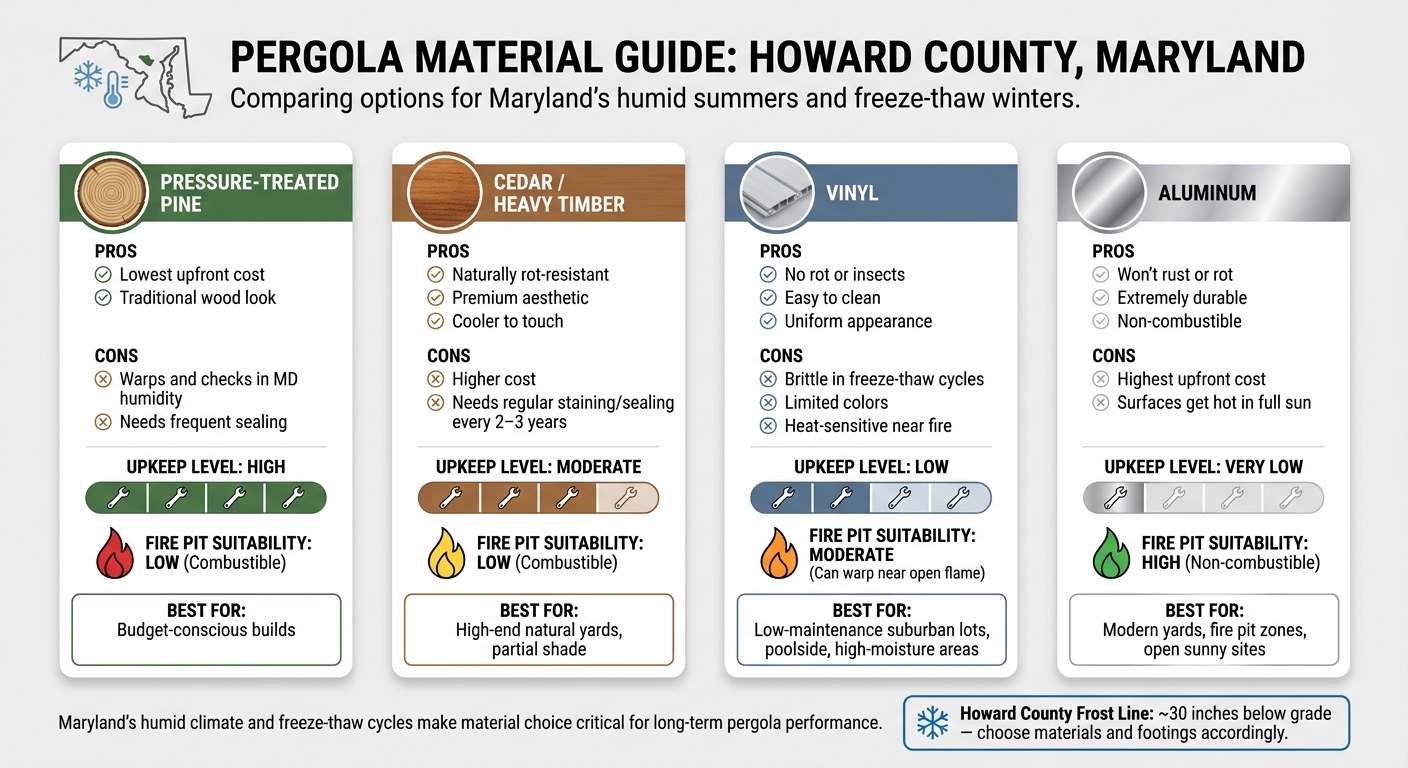
Pergola Materials Compared: Wood vs. Vinyl vs. Aluminum for Maryland Yards
Once the layout and footings are in place, the next big decision is the material. And that choice has a lot to do with how well your pergola stands up to Howard County weather.
This part of Central Maryland gets humidity, freezing winters, and repeated freeze-thaw cycles. That mix is hard on outdoor structures. Over time, moisture, sun, and temperature swings can wear down even a well-built pergola.
Wood, Vinyl, and Aluminum Compared
Wood, vinyl, and aluminum each come with tradeoffs. Some give you a warmer, more natural look. Others cut down on upkeep. Some handle weather and heat better than others.
Cedar and heavy timbers bring a warmer appearance and resist rot better than pressure-treated pine. Pressure-treated pine costs less up front, but in Maryland’s humid climate, it’s more likely to warp and check.
Vinyl holds up well against rot and insects and doesn’t ask for much upkeep. That said, it can crack at joints during freeze-thaw cycles, fade or chalk in strong sun, and in some systems, it relies on a PVC sleeve wrapped over wood framing.
Aluminum gives you the strongest weather resistance with the least upkeep. It also works well in open yards, especially when you choose lighter powder-coat colors to help cut surface heat on south-facing sites.
| Material | Pros | Cons | Upkeep | Fire Pit Use | Best-Fit Yard Conditions |
|---|---|---|---|---|---|
| Pressure-Treated Pine | Lowest upfront cost; traditional wood look | Warps and checks in MD humidity; needs frequent sealing | High | Low (combustible) | Budget-conscious builds |
| Cedar / Heavy Timber | Naturally rot-resistant; premium aesthetic; cooler to touch | Higher cost; needs regular staining/sealing to retain color | Moderate | Low (combustible) | High-end natural yards; partial shade |
| Vinyl | No rot or insects; easy to clean; uniform appearance | Brittle in freeze-thaw; limited colors; heat-sensitive near fire | Low | Moderate (can warp near open flame) | Low-maintenance suburban lots; poolside; high-moisture areas |
| Aluminum | Won’t rust or rot; extremely durable; non-combustible | Highest upfront cost; surfaces get hot in full sun | Very low | High (non-combustible) | Modern yards; fire pit zones; open sunny sites |
Stains, Sealers, and Long-Term Maintenance
For wood pergolas, the finish matters almost as much as the lumber itself.
Semi-transparent stains tend to hit the sweet spot between color and protection. Solid stains give stronger color coverage, but they can peel if moisture gets behind the coating. Clear sealers keep the most natural wood look, though they offer the least UV protection.
A good rule of thumb: plan for the first maintenance coat within 12–18 months, then recoat every 2–3 years. In between, wash the surface gently with a soft brush about twice a year to help keep dirt and mildew from building up.[9][10]
Vinyl is simpler. Most of the time, it just needs an annual wash, though pergolas under trees or in wooded areas usually need more rinsing. Aluminum is even lower effort and often only needs a seasonal rinse plus the occasional soap wash.
After the material is chosen, the next set of decisions usually comes down to vine load, lighting, and wiring.
Pairing Pergolas With Patios, Fire Pits, and Outdoor Kitchens
With the footprint and footing plan in place, the next step is pairing the pergola with the patio, fire feature, or kitchen it’s meant to serve. A pergola tends to work best when it’s part of a connected outdoor layout, not just a structure dropped into the yard. Think of it as an outdoor room with clear walkways, enough space for furniture, and nearby features that make sense together.
Pergola and Patio Layouts That Work
Start by matching the pergola size to how you’ll use it. For dining, 10×12 to 12×14 ft is a common range. For a lounge setup, 12×16 ft usually gives you more breathing room. [19]
On smaller lots, it often makes sense to place the pergola close to the house and a little off-center on the patio. On larger lots, it can work as a standalone feature tied back to the house with a walkway. In both setups, leaving about 2–4 ft of clear hardscape around the footprint helps the structure feel open instead of boxed in. [20]
Pavers or flagstone can define the footprint, and a border or pattern shift can mark the pergola zone without adding clutter.
Once the pergola footprint is set, safe spacing around heat sources becomes the next big item.
Using Pergolas Near Fire Pits and Outdoor Kitchens
Wood-burning fire pits should stay well away from pergola posts and remain in open air. Gas fire tables need to follow the manufacturer’s overhead and side-clearance rules. Around the fire feature, use non-combustible surfaces like concrete, stone, or pavers before the area transitions to lawn or planting beds. [16][17][13][14][11][12]
Cooking areas need the same kind of planning, with extra attention to airflow and movement. Keep 36–42 in of walkway width around active cooking zones so two people can pass while carrying trays or tools. Keep seating at least 4 ft from the grill. It also helps to place the grill at the open edge of the pergola, where the dining area can stay shaded while heat and smoke move out more easily. [15]
| Layout Type | Typical Size Range | Key Safety Notes | Best Fit in Howard County |
|---|---|---|---|
| Pergola + Dining Patio | Pergola: 10×12 to 12×14 ft; patio often 14×18 ft+ | About 3 ft of clearance around chairs; stable paver or flagstone surface [19] | Small suburban lots (Columbia, Ellicott City) |
| Pergola + Fire Pit Patio | Fire zone: about 10–12 ft diameter; pergola adjacent, not directly over pit [18] | Keep wood-burning pits well away from combustible structures; gas fire tables need manufacturer-specified clearances [16][17][13][14][11] | Larger yards (Clarksville, Dayton, West Friendship) |
| Pergola + Outdoor Kitchen | Pergola: 12×16 to 14×18 ft; 36–42 in walkways around grill [15] | Allow 36–48 in from cooking surface to lowest timber; keep seating at least 4 ft from the grill [15] | Medium to large lots across Howard County |
Coordinating Design and Site Work With Pro Landscapes MD

Pro Landscapes MD can coordinate pergola footprints with patios, walkways, grading, drainage, fire pits, and outdoor kitchens so the whole space works as one layout.
From there, vines and lighting finish the space.
Vines, Lighting, and Final Design Details
Climbing Vines That Work in Maryland Yards
Vines can make a pergola feel less bare and add shade as the season moves along. In Maryland yards, the best pick depends on the vine’s mature size and the kind of support your pergola can handle. The University of Maryland Extension recommends trumpet honeysuckle (Lonicera sempervirens), American wisteria (Wisteria frutescens), and Virginia creeper (Parthenocissus quinquefolia) for Maryland structures.[21] Skip Chinese and Japanese wisteria. UMD Extension warns that these invasive vines can turn into large, heavy woody growth that may damage structures over time.[30][31]
It helps to match the plant to the frame. Woody climbers like American wisteria need strong support because mature vines can add a lot of weight, especially when they’re wet or covered with snow.[21][23][24] Lighter options, like clematis or trumpet honeysuckle, put less strain on the pergola and are simpler to keep in check. If you’re planting flowering vines, timing matters:
- Prune spring-blooming vines right after they flower.
- Prune summer- and fall-blooming vines in late winter or early spring.
Yearly pruning also helps air move through the plant and cuts down on moisture sitting on the frame.[21][22]
Lighting, Fans, and Wiring Details
Once the vine plan is set, think through lighting and fan support before the pergola is built. That early planning saves a lot of hassle later. A layered setup usually works best: integrated LED strips along beams for ambient light, task lighting over dining or prep areas, and post-mounted lanterns to define the edges. You can also add accent lighting, recessed fixtures, lanterns, sconces, ceiling fans, and outlets for string lights.
For safety and long-term use, choose fixtures rated for wet locations. Run wiring through concealed conduit along posts or under beams, and make sure the circuit has GFCI protection.[26][27] Want a ceiling fan? Plan for it from the start. Fans should mount to a structural beam with blocking sized for the fan load, and the fan itself needs to be rated for outdoor use.[29] Low-voltage, dimmable LED systems are a smart fit because they stay subtle during the day and can be adjusted as vine coverage gets thicker.[25][28]
Conclusion: Key Choices That Shape a Successful Pergola
At this stage, the job is tying the pergola into the rest of the yard so it feels like it belongs there. The best pergolas account for vine size, lighting, and structure from day one. Use outdoor-rated lighting, concealed wiring, and GFCI protection so the space stays usable and safe after dark.[25][26][27][28] If a fan is part of the plan, build in the support early.[29]
In Howard County’s humid, freeze-thaw climate, support, drainage, and upkeep matter just as much as looks. Pro Landscapes MD can coordinate the pergola with the patio, fire pit, kitchen, drainage, and grading.
FAQs
Do I need a permit for a freestanding pergola in Howard County?
It depends on your local zoning rules and the conditions on your site. Howard County may have its own requirements, including stricter setback rules, especially if your property sits in a floodplain or a historic district.
Before you start, check with the local building department to confirm zoning and permit requirements and make sure your plans meet county standards.
Can a pergola be installed on an existing patio slab?
It depends on the slab’s structural integrity. A heavy freestanding pergola needs a base that can handle the extra weight and hold anchors firmly in place.
Poor anchoring can lead to wobbling, cracking, or damage to the hardscaping. So before installation, have a professional inspect the slab’s thickness and overall condition.
Which pergola material is best for low maintenance in Maryland?
The information provided doesn’t say which pergola material is best for low maintenance in Maryland.
It also doesn’t give any details about pergola materials or the upkeep each one needs.
Chat with Us