









- bhavya gada
- No Comments
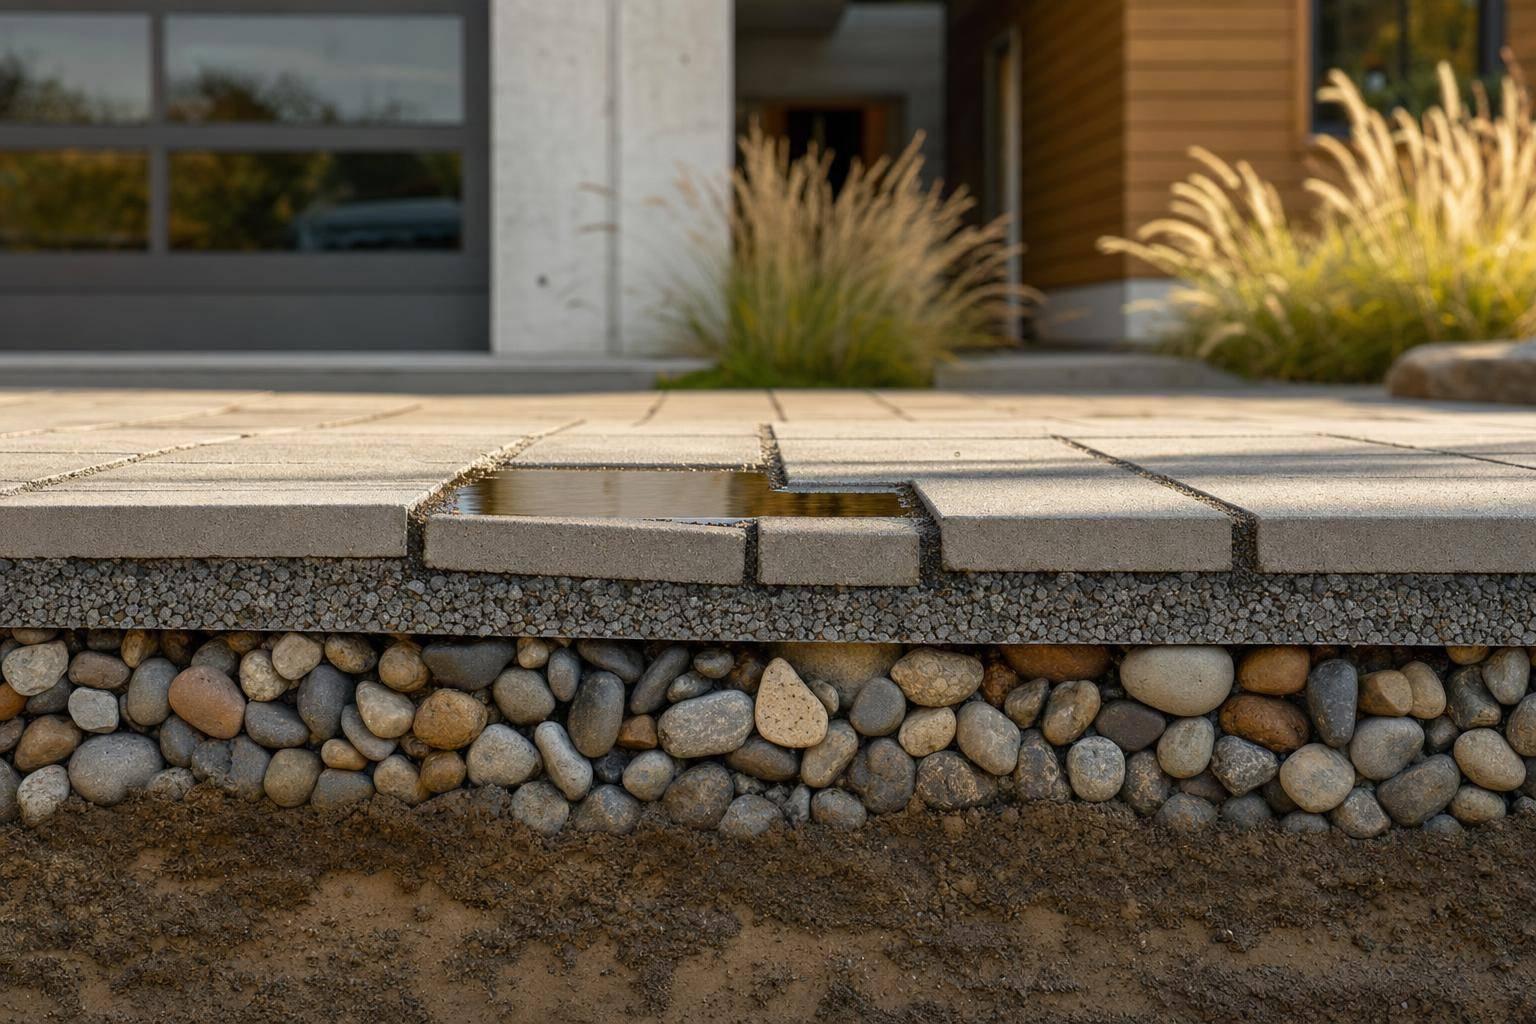
Most permeable paver failures start below the surface, not on top. If I had to boil this down, the main causes are bad site checks, wrong stone base work, and surface details that block water flow.
If you want this system to last, I’d focus on four things right away:
- Test the soil at the planned dig depth
- Use the right open-graded stone layers
- Build a deep enough base, often 12 to 18 inches
- Keep joints open and clean after install
The article makes one point clear: these systems are not just hardscapes. They are drainage systems that must store water, move it, and support traffic at the same time. When that balance is off, the first trouble often shows up in 12 to 24 months as pooling water, shifting units, settlement, or winter heave.
A few numbers matter most:
- Slopes over 5% can lead to downhill ponding and edge failure
- In slow-draining soils, water should drain out within 48 hours
- Base layers are often compacted in 6-inch lifts
- Field infiltration should meet 100 inches per hour or more before normal use
Here’s the short version: if you skip site testing, use dense stone, install a shallow base, fill joints with the wrong material, or ignore maintenance, you increase the odds of early failure. If you match the design to the lot, use the right aggregate, and check drainage after storms, you cut down on those problems fast.
That’s the whole story in plain terms: good drainage starts under the pavers, and small install mistakes can turn into costly repairs.
Permeable Paving Installation Tips | Avoid These Common Mistakes
sbb-itb-843f8be
Skipping Site Evaluation Causes Drainage Problems
A lot of permeable paver failures start before the first shovel hits the ground. The issue is skipped site testing.
In Maryland, soil, slope, and groundwater can change a lot from one property to the next. So if you guess, water problems usually follow. Poor-draining soil or a high water table can hold water under the system instead of letting it move through.
The first mistake is skipping soil testing, slope review, and groundwater checks.
Overlooked Soil, Slope, and Water Table Conditions
Heavy clay soils are one of the most common trouble spots on Maryland properties. Water can move into the stone reservoir faster than the native soil can take it in. If there’s no percolation test at the planned excavation depth, the base may end up too shallow or too small. Then you get standing water, a weaker base, and pavers that start to shift.
Slopes over 5% bring a different problem. Water tends to collect at the low end of the system. That can lead to ponding, erosion, and edge failure. And if the reservoir is too close to the seasonal water table, it may not drain all the way. In winter, that trapped water can heave.
Fix: Match the Design to the Site
The fix is simple: design the system around the site, not the other way around.
Test the site before excavation starts. A percolation test at the planned excavation depth – not a map estimate – shows whether the site can handle full infiltration or if it needs underdrains.
In clay soils, use underdrains to help the system drain within 48 hours. [1] On sloped sites, internal barriers inside the stone reservoir slow water movement and spread storage more evenly. Near foundations, keep a 10-foot setback or line the structure side with a 30-mil PVC or HDPE barrier.
| Site Condition | Risk If Ignored | Recommended Fix |
|---|---|---|
| Clay soil (low infiltration) | Saturation, base failure | Underdrains + increased stone reservoir depth |
| Steep slope (>5%) | Downhill ponding, edge failure | Subgrade terracing + internal barriers |
| High seasonal water table | Frost heave, no infiltration capacity | Raise system profile or elevated underdrain |
| Near building foundation | Seepage, structural damage | 10-foot setback or 30-mil impermeable liner |
Incorrect Base Construction Causes Ponding and Settlement
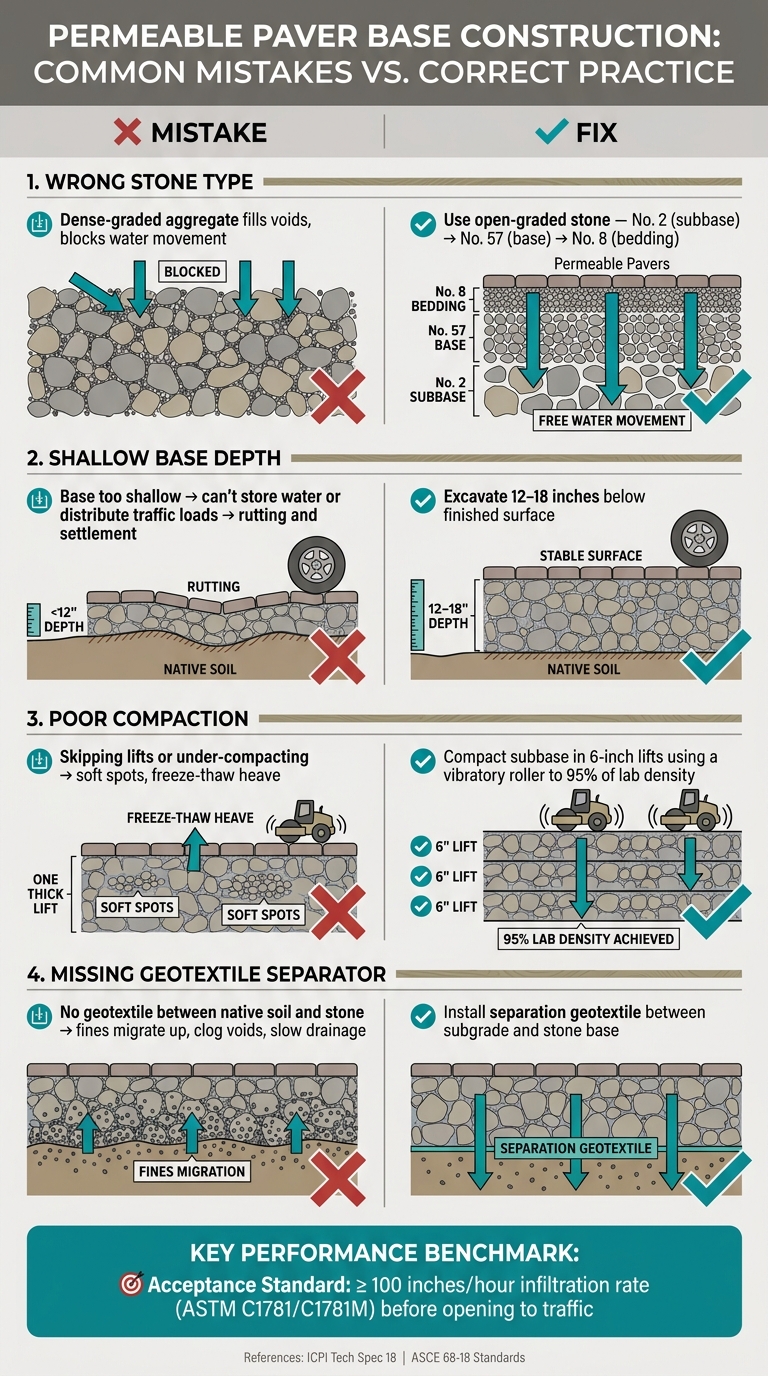
Permeable Paver Installation Errors: Symptoms, Causes & Fixes
Even when the site is chosen well, the base can still make or break the system. Most ponding and settlement problems start under the surface in the stone layers, which is why they often go unnoticed at first. Then the warning signs show up: pavers start to dip, traffic areas sink, or water begins to sit where it should drain.
Wrong Stone, Shallow Base, or Poor Compaction
The stone mix matters more than many installers think. Permeable pavement needs clean, open-graded stone so water can move through the base. Dense-graded aggregate does the opposite. It fills the gaps that the system depends on. Use No. 2 stone for the subbase, No. 57 for the base, and No. 8 for bedding. [2]
Base depth is just as important. In most cases, a permeable system needs 12 to 18 inches of excavation below the finished surface. If the base is too shallow, it can’t store enough water during heavy rain. It also won’t spread traffic loads well, which can lead to rutting and settlement. [2]
Compaction has to be done the right way too. The subbase should go in 6-inch lifts and be compacted with a vibratory roller to 95% of lab density. Skip the lifts, or cut corners on compaction, and soft spots can show up later, especially after freeze-thaw cycles. [2]
There’s another issue that gets missed all the time: fines migration from the subgrade. If there’s no separation geotextile between the native soil and the stone, fine particles can move up into the base and plug the voids. That slows drainage and can set off bigger problems down the line. A separation geotextile helps keep the base open. [2]
Mistake-Cause-Fix Comparison Table
The table below connects the most visible symptoms with the base-construction mistakes that usually cause them.
| Visible Symptom | Likely Installation Mistake | Root Cause | Recommended Fix |
|---|---|---|---|
| Ponding / Pooling Water | Dense stone or clogged voids | Dense-graded stone or missing geotextile allowed fines to clog voids | Remove and replace with clean, open-graded aggregate; install geotextile barrier |
| Deep Rutting / Sinking | Base too shallow | Base too thin to support traffic loads or store water volume | Re-excavate to proper depth; rebuild base with proper stone lifts |
| Uneven Pavers / Settlement | Base not compacted in lifts | Base not compacted in lifts or subgrade not stabilized | Lift pavers; re-compact base in 6-inch lifts using a vibratory roller to 95% density |
| Sinking Spots | Organic matter left in subgrade | Organic material left in soil beneath the base | Remove all organic matter and compact subgrade to engineering standards |
Surface Assembly Errors Block Infiltration and Weaken the Pavement
A strong base alone doesn’t make the system work. If the surface joints are built the wrong way or the edge restraints are too weak, the whole setup can fail.
Clogged Joints and Dense Bedding Materials
Polymeric sand can clog permeable joints and stop water from moving through the surface. For permeable pavement, use clean, open-graded bedding stone and clean joint aggregate with no fines, binders, or stabilizers.
Incorrect geotextile placement can also block water movement between layers. That might sound like a small install detail, but it can choke drainage where the system is supposed to stay open.
Weak Edge Restraints and Vehicle Loading
The perimeter does a lot of the heavy lifting. It helps keep the surface locked together when traffic rolls over it. Without solid edge restraints, pavers can shift sideways under load. Once that starts, joint aggregate spills out, spacing turns uneven, and the open structure needed for drainage starts to fall apart.
Use edge restraints rated for the expected load. Driveways need stronger restraint than walkways.
Installation Standards and Maintenance That Prevent Repeat Problems
Once the base and surface are built the right way, the next job is simple: stick to the standards and keep up with maintenance. That’s what helps a permeable paver system keep working instead of turning into a repeat repair job.
Follow ICPI Tech Spec 18 and ASCE 68-18, then confirm performance with an ASTM C1781/C1781M infiltration test before the surface is opened to normal traffic. The installation also needs to match the specified open-graded stone profile from the base design. For finished permeable interlocking pavers, the standard acceptance rate is at least 100 inches per hour [2]. If the first test comes in below that mark, review the installation before putting the surface into regular use.
Routine Maintenance That Protects Drainage Performance
After installation, sediment control becomes the main line of defense against clogging. Soil that washes in from nearby planting beds or bare ground slowly fills the joints and cuts infiltration. In plain terms, a clean surface drains. A dirty one starts to choke.
Keep debris and soil runoff off the surface to help preserve infiltration.
After heavy storms, walk the area and look for water that isn’t draining away. Standing water that sticks around after the rain ends can signal that the joints are starting to clog. A six-month inspection should also be part of the plan so you can check for settling joints and reset shifted units [2].
Final Checklist for a Successful Permeable Paver Project
Use this short checklist to help protect performance after installation:
- Inspect joints every six months and clear sediment buildup
- Check for pooling after storms and spot clogged areas early
- Keep nearby planting beds and bare soil from washing onto the surface
- Reset shifted or sunken units before small issues turn into bigger ones
- Plan maintenance from day one
FAQs
How do I know if my soil is suitable for permeable pavers?
Have on-site infiltration testing done to see how fast your soil takes in water. If the infiltration rate is below 0.6 inches per hour, the site will usually need a professional design, such as a perforated underdrain, to handle water the right way.
You should also confirm that the site has at least 2 feet of clearance above the seasonal high water table. Pro Landscapes MD offers professional soil evaluation and drainage services in central Maryland.
What happens if the wrong stone base is used?
Using the wrong stone base can weaken a permeable paver system and cut down its drainage. These systems need clean, open-graded aggregate that can hold weight while still letting water pass through.
When the base has fines, or when it doesn’t fit the site conditions and expected loads, problems can show up fast. You may end up with sinking spots, loose pavers, and an uneven surface.
How often do permeable pavers need maintenance?
Residential permeable pavement driveways need regular upkeep, but the routine is pretty simple.
You should vacuum the surface with a heavy-duty wet/dry vacuum twice a year, usually in spring and fall. That helps clear out fine debris before it clogs the pavement.
Day-to-day care also means:
- Removing leaves and other debris
- Keeping sediment and grass clippings off the surface
- Checking drainage after heavy storms, especially after 3 inches of rain in 24 hours
- Replenishing joint material as needed for interlocking concrete pavers
The goal is to keep water moving through the surface instead of letting dirt and organic matter build up.
Chat with Us