


- bhavya gada
- No Comments
If I want a garden bed that needs less work later, I have to get four things right from the start: site, soil, plant spacing, and first-year care.
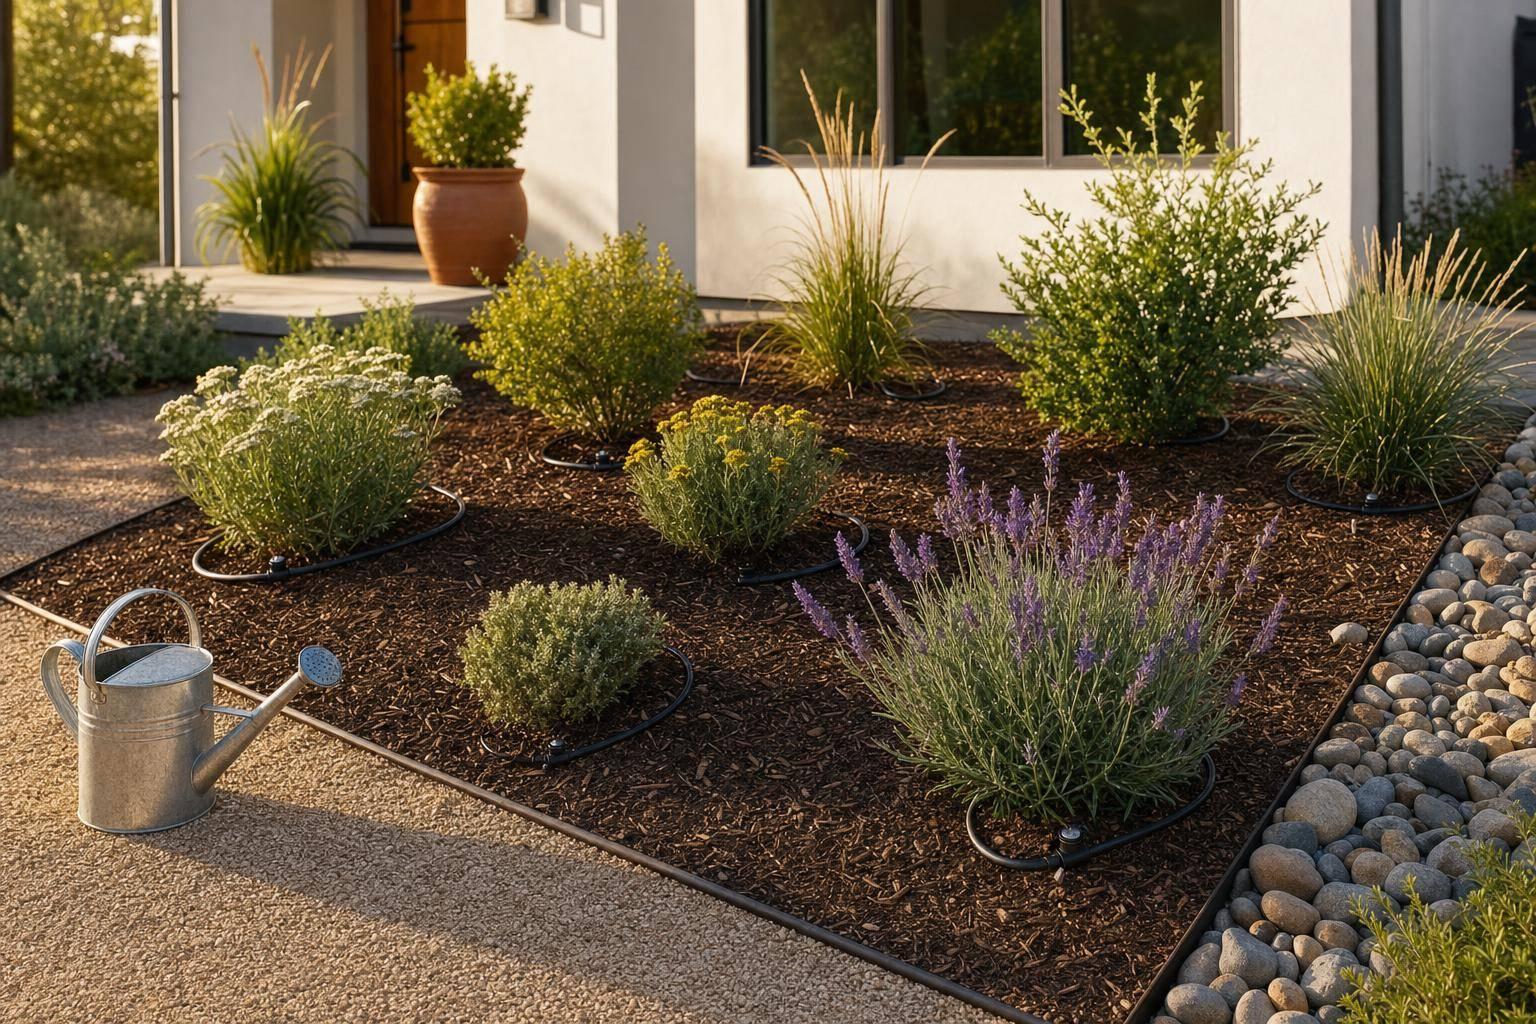
A bed like this is not about adding more plants. It is about matching plants to the spot, fixing drainage problems before planting, spacing for full size, and using 2–3 inches of mulch to hold down weeds. In Maryland, yard maintenance and landscape projects matter even more because summers are hot and humid, rainfall can swing from wet to dry, and many yards have clay soil.
Here’s the short version:
- Check sun first: full sun = 6+ hours of direct light
- Sort moisture: dry, medium, or wet areas
- Prep the whole bed: remove turf, weeds, and debris; add compost across the bed
- Fix drainage early: standing water will keep causing problems if I ignore it
- Space for mature width: many perennials fill in over about 3 years
- Mulch after planting: keep mulch 4 inches away from stems and trunks
- Water deeply in year one: about 1 inch per week during dry spells
- Go light on fertilizer: only use it if a soil test shows a problem
The main idea: if the site fits the plants, the bed usually needs less watering, pruning, weeding, and replacing later.
This checklist keeps the focus on the steps that cut down on work after planting.
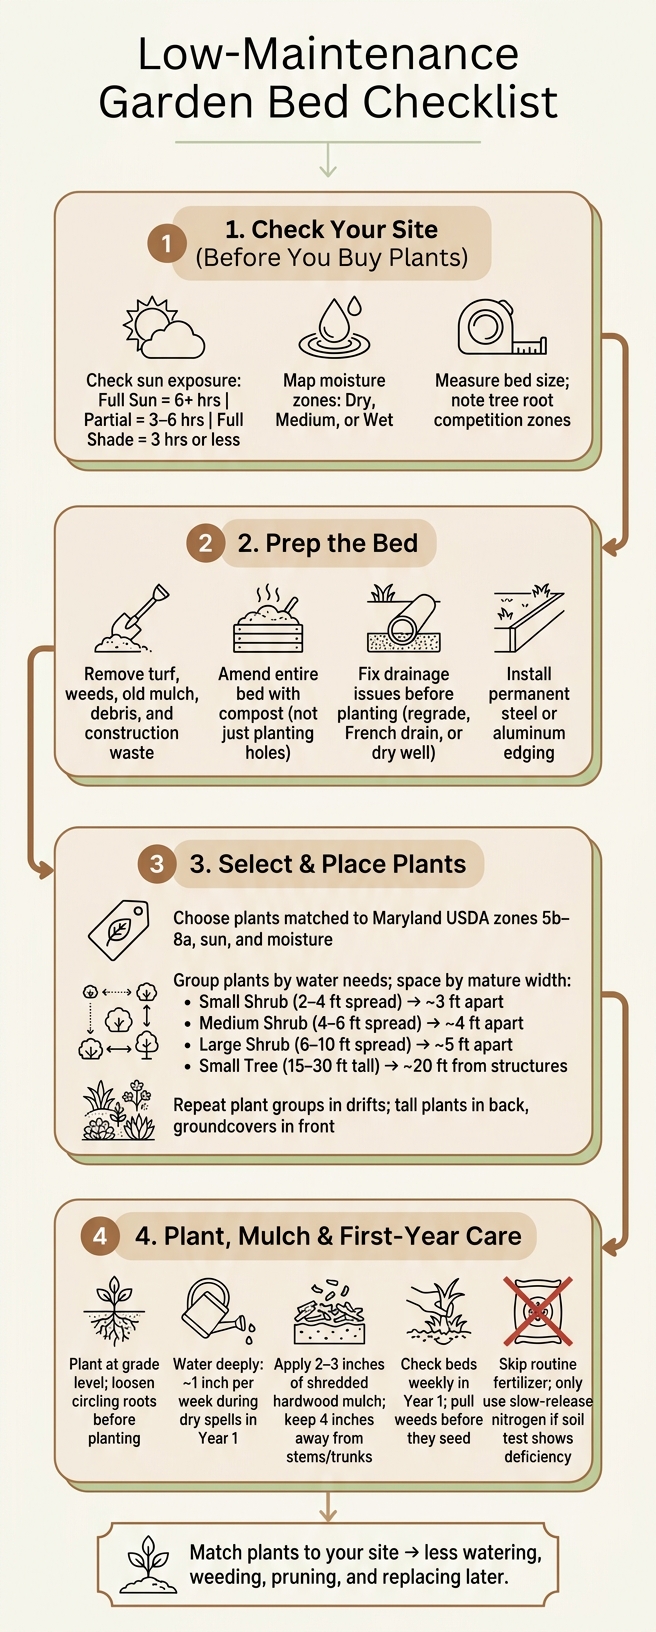
Low-Maintenance Garden Bed Checklist: 8 Steps Before & After Planting
Easy Garden Plan For A Low-Maintenance Landscape
sbb-itb-843f8be
Site Conditions to Check Before You Plant
Check site conditions before you buy plants. That one step shapes how much work the bed will need later.
Check Sun, Shade, and Heat Exposure
Start with light. On a sunny day, check the bed every two hours and write down how much direct sun it gets [10]. Here’s the simple breakdown: full sun means 6 or more hours of direct light, partial sun/shade means 3 to 6 hours, and full shade means 3 hours or less [7][5].
Then look at what’s around the bed. Spots near south-facing brick, concrete, patios, or foundations tend to dry out faster because of reflected heat [5]. A bed can look fine on paper, then turn into a hot, dry pocket by midafternoon. That matters when you pick plants.
Test Soil, Drainage, and Moisture Levels
Many central Maryland soils are heavy in clay, drain slowly, and compact easily [2]. Test the soil before planting, then mix organic matter through the entire bed, not just the planting holes [5][1][9]. It also helps to note low spots, runoff paths, and places that dry out fast [2][9].
Maryland gets about 35 to 45 inches of rain each year, but it doesn’t fall evenly through the season [2]. Because of that, it helps to sort the bed into dry, medium, or wet moisture zones before you choose plants [5][9]. It’s a simple move, but it makes plant selection much less of a guessing game.
Measure Bed Size and Account for Root Competition
Measure the planting area in square feet, then space plants by their mature spread, not by how small they look at the nursery [5][4]. That’s where a lot of beds go wrong: plants go in tiny and end up packed together two seasons later.
If the bed is near mature trees, surface roots may compete with new plants for water and nutrients [5][7]. In those areas, a 3-inch layer of mulch or groundcovers like native sedges (Carex) often works better [2]. Plan with mature size in mind. Most perennials need about three years to reach it [7]. Once the site is mapped, move to bed prep.
Garden Bed Preparation Checklist
Once you’ve mapped the site, prep work is what makes a bed easier to care for over time.
Remove Grass, Weeds, and Debris First
Clear the area before you touch the soil: turf, weeds, old mulch buildup, large stones, and any construction debris left behind [1][6].
After you pull or cut out weeds and grass, lay cardboard right on the cleared soil. Then add 2–3 inches of mulch on top to smother seeds still sitting in the ground [1][7].
Improve Soil and Fix Drainage Only Where Needed
Handle drainage before planting so the bed stays workable over the long haul.
Amend the bed, not the whole yard. Work compost through the full planting area so the soil structure improves evenly [5][8].
Fix drainage before planting. If you see standing water or pooling after rain, regrading, French drains, or dry wells can solve the problem at the source [3].
Define Bed Edges and Plan Mulch Before Planting
Set the bed lines before planting. Steel or aluminum edging creates a permanent, clean barrier between the lawn and the bed, which cuts down on re-edging season after season [11][8]. Stone edging also works well, especially for beds near patios or walkways.
Plan mulch after planting. Keep mulch away from plant stems and tree trunks – piling it against them causes more harm than good [11][2].
With the bed edged and prepared, plant selection becomes a matter of matching plants to the site.
Plant Selection and Layout Checklist
Use the sun, drainage, and space notes from your site check to narrow down your plant list.
Choose Plants Suited to Maryland Conditions
Pick plants that fit Maryland’s climate, your USDA zone, and the bed’s sun and moisture levels. As you compare options, focus on four things: drought tolerance after establishment, disease resistance, hardiness for your USDA zone, and a mature size that fits the space without constant pruning.
Maryland spans USDA zones 5b to 8a, depending on where you live, so it’s smart to check hardiness before you buy [2][5]. Good low-maintenance picks include black-eyed Susan, inkberry holly, switchgrass, and eastern redbud.
Group Plants by Water Needs and Mature Size
Once you’ve picked your plants, placement matters just as much as the plant list itself. Group plants with similar water needs together so drought-tolerant plants don’t get too much water [5][6].
Also, space plants based on their mature width, not how small they look in the nursery pot. That one step can save you a lot of trimming later. Use these spacing guidelines as a starting point [5]:
| Plant Category | Mature Spread | Recommended Spacing |
|---|---|---|
| Small Shrub | 2–4 ft | ~3 ft apart |
| Medium Shrub | 4–6 ft | ~4 ft apart |
| Large Shrub | 6–10 ft | ~5 ft apart |
| Small Tree | 15–30 ft tall | About 20 ft from structures |
Planning for mature size helps avoid overcrowding, extra pruning, and later thinning [5].
Repeat Plant Groups for a Cleaner, Easier Bed
A simple plant palette is easier to maintain than a bed packed with one of everything. Instead of sprinkling in single plants here and there, repeat the same plants in clusters or drifts. That gives the bed a cleaner look and makes care simpler [5][7].
Set taller plants toward the back, or in the center if the bed is viewed from all sides. Place medium shrubs in the middle and low groundcovers along the front edge so plants stay visible and easy to reach [7]. Groundcovers like Moss Phlox or Wild Ginger can fill gaps between larger plants and help crowd out weeds once established [5].
After the layout is set, our professional landscaping services can help you plant at the right depth and water deeply to help roots get established.
Planting, Watering, and First-Year Maintenance Checklist
Plant at the Right Depth and Water Deeply at the Start
Once your layout is locked in, the next step is getting each plant in the ground the right way. Set every plant so the top of the root ball sits level with the surrounding soil. If the roots are packed tight and circling inside the pot, loosen them before planting so they can spread out and grow into the soil.
In the first year, deep watering matters a lot. During dry spells, give plants about 1 inch of water per week, ideally early in the morning [2].
Keep Mulch Deep, Pull Weeds Early, and Limit Fertilizer
After planting, mulch and weed control help finish the job. Add 2 to 3 inches of shredded hardwood or wood chip mulch after planting [1]. Keep the mulch 4 inches away from stems and trunks [2].
During the first growing season, check the beds every week and pull weeds as soon as you see them, before they go to seed. That step pays off later. Every weed that drops seed adds to the soil’s long-term weed seed bank, which makes future seasons tougher [8].
When it comes to fertilizer, less is better. Too much fertilizer pushes weak, fast growth that’s more prone to disease [2]. Use a slow-release nitrogen fertilizer only if a soil test shows a specific deficiency. If not, skip routine fertilization.
Conclusion: The Core Checklist for a Bed That Stays Easy to Maintain
A low-maintenance bed starts with a few smart calls before and during planting. Match plants to your site’s actual sun, soil, and moisture conditions. Prepare soil across the entire bed, not just the planting holes. Space plants based on mature width, mulch right after planting, and water deeply through the first year. Once established, native plants usually need less water and little to no fertilizer [3].
For help designing or installing a low-maintenance garden bed in central Maryland, Pro Landscapes MD offers planting and landscape design services.
FAQs
How do I know if my bed has poor drainage?
Look for spots where water sits or forms puddles after rain, along with areas that stay soggy for too long. You can also spot drainage issues by watching your plants. Stress, sparse foliage, or patchy growth often point to trouble below the surface.
Pro Landscapes MD recommends testing your soil to see how well it drains and how compacted it is. If the problem sticks around, adding organic matter, using raised beds, or bringing in a drainage expert can help protect your landscape.
What if my garden bed is under mature trees?
Choose shade-loving plants like ferns, hostas, and astilbe. Mature trees change sun and shade patterns over time, so it helps to plan for that. And if you’re planting under conifers, expect more acidic soil.
Add a deep layer of mulch to help hold moisture and keep weeds down. If you need help planting under trees, Pro Landscapes MD offers horticultural services across central Maryland and Washington, DC.
When will a low-maintenance bed fill in?
A low-maintenance garden bed doesn’t fill out overnight. In the first year, it can look a little sparse. In many cases, it still looks thin in the second year too.
By the third year, perennials usually reach their mature size, and the bed starts to look the way you pictured it. By the fifth year, they often multiply and give the space a fuller look.
The main thing is to give plants the right spacing from the start and choose varieties that fit the bed well. That helps everything fill in on its own without turning the space into a chore to manage.
Chat with Us