









- bhavya gada
- No Comments
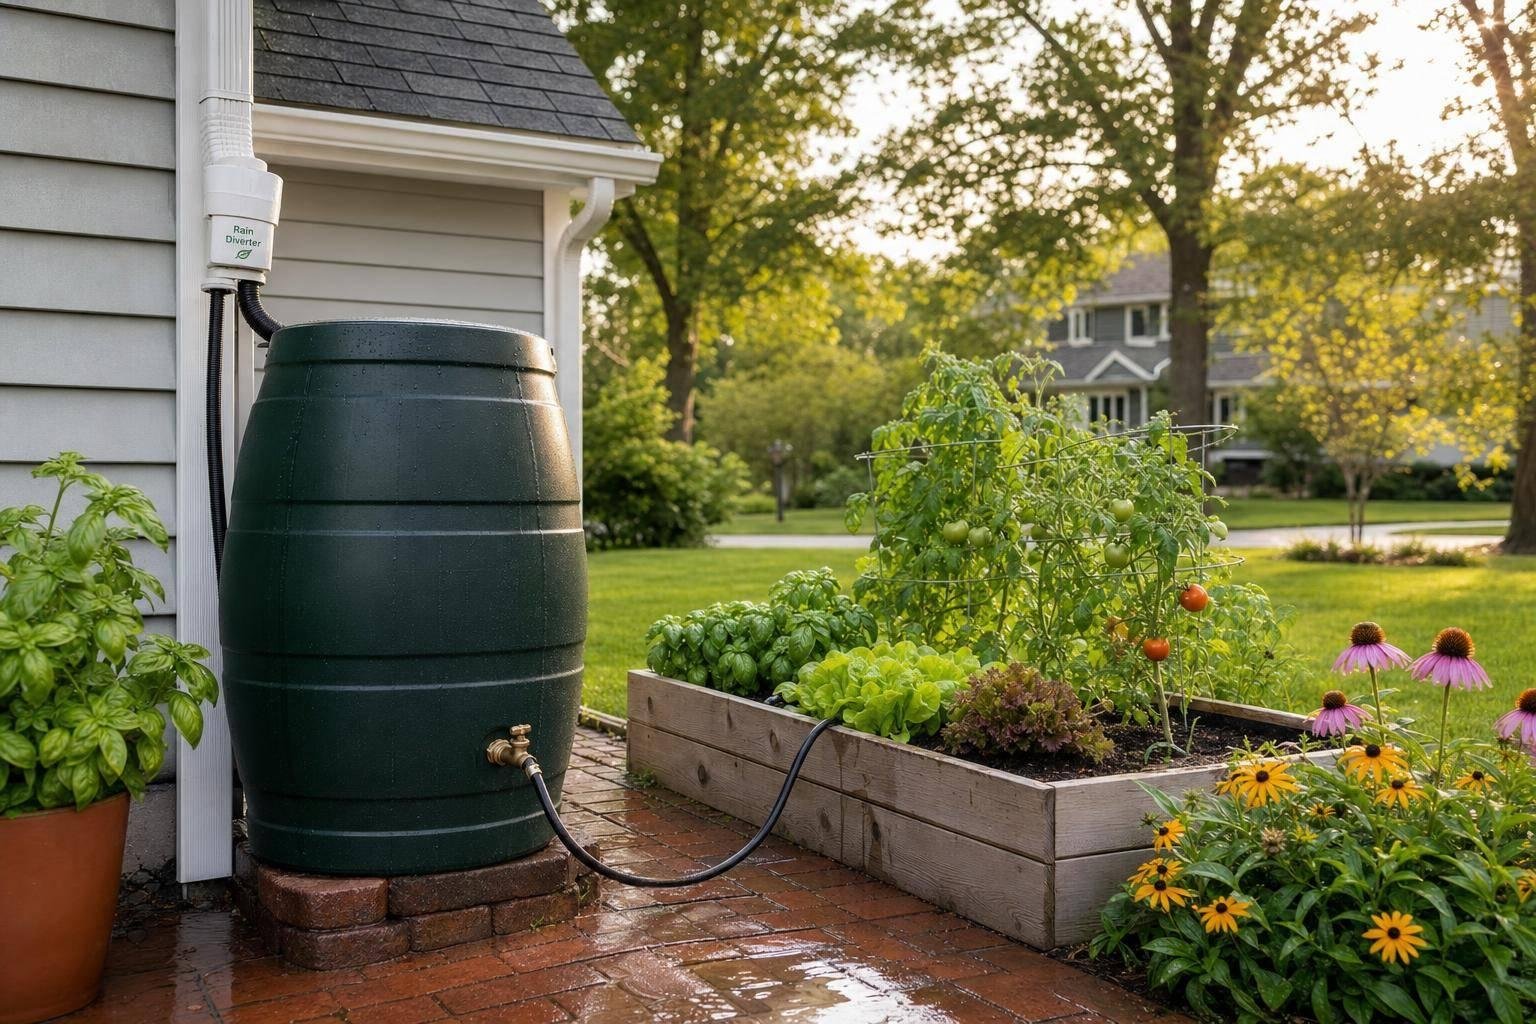
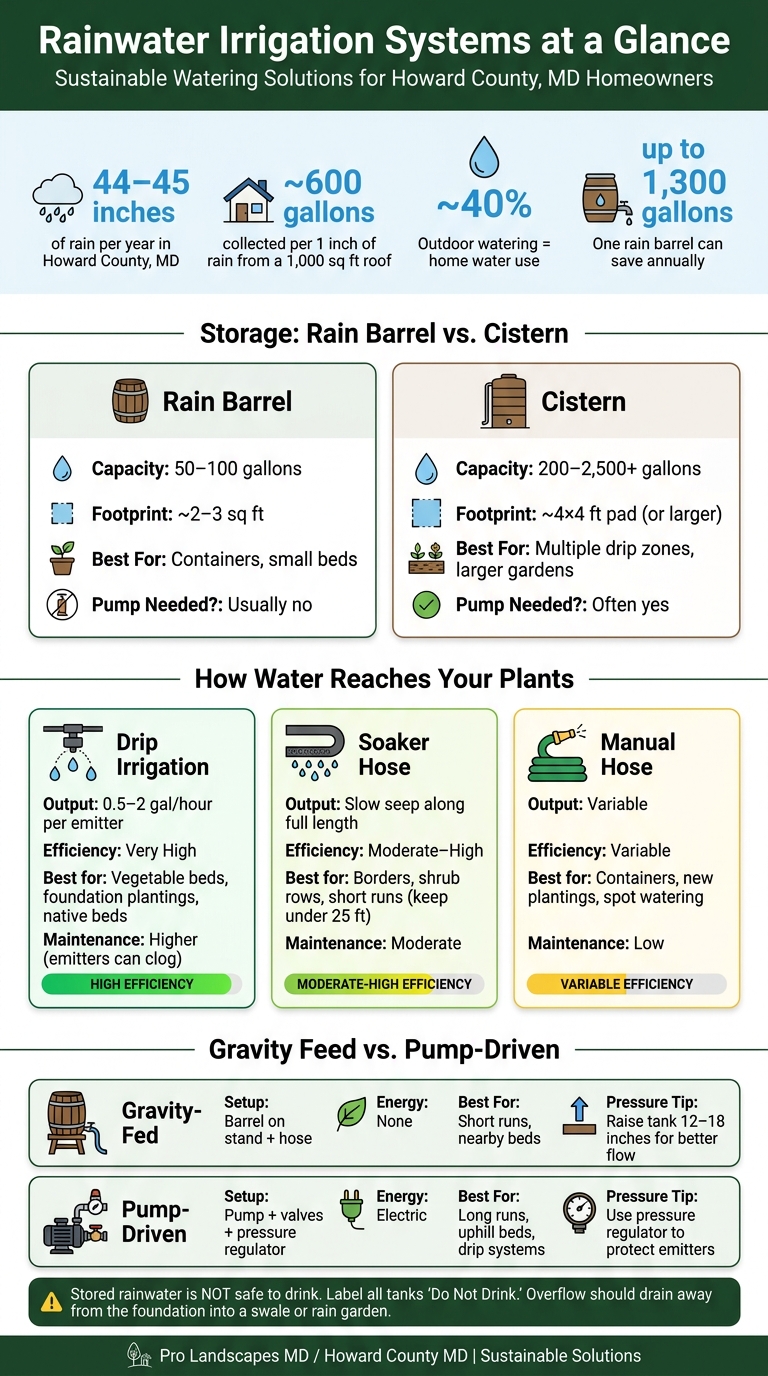
A simple rainwater system can cut outdoor tap-water use, lower runoff, and keep plants alive during dry spells. In Howard County, homes get about 44–45 inches of rain a year, and a 1,000 sq. ft. roof can collect about 600 gallons from just 1 inch of rain. That means even a small setup can store water for beds, shrubs, and vegetable gardens when summer heat dries the soil.
Here’s the short version:
- I use gutters, downspouts, storage, filters, and an overflow path to move roof runoff into the yard.
- A rain barrel fits small spaces and light watering.
- A cistern works better for larger beds, more zones, or drip lines.
- Gravity feed is fine for short runs near the tank.
- A pump helps with longer distances, uphill beds, and drip systems.
- Filters and first-flush parts help keep dirt and roof debris out of hoses and emitters.
- Stored rainwater is not safe to drink and should be labeled “Do Not Drink.”
- Overflow should go away from the house into a planted area such as a swale or rain garden.
A few numbers matter here. Outdoor watering can make up close to 40% of home water use, and one rain barrel may save up to 1,300 gallons over time. In peak summer, a small food garden can use 40–100 gallons per day, so tank size, plant zones, and watering method all shape how long stored water will last.
Rainwater Irrigation Systems: Storage, Delivery & Watering Methods Compared
The Ultimate Rain Barrel Irrigation System
sbb-itb-843f8be
Quick comparison
| Item | Best for | Typical size/use | What to know |
|---|---|---|---|
| Rain barrel | Containers, small beds | 50–100 gallons | Good for short hose runs |
| Cistern | Larger gardens, multiple zones | 200–2,500+ gallons | Better for more storage and pump setups |
| Gravity-fed | Beds near the tank | Short distance | Works best with a tank on a stand |
| Pump-driven | Drip lines, uphill beds, larger yards | Longer distance | Needs power, valves, and pressure control |
| Drip irrigation | Vegetables, shrubs, planting beds | 0.5–2 gallons/hour per emitter | Uses water slowly at the root zone |
| Soaker hose | Borders and short rows | Keep under 25 ft. when possible | Less exact than drip |
| Manual hose watering | Pots, new plantings, spot watering | As needed | Good when you want direct control |
The bottom line: if I place the tank on a solid base, keep the filters clean, and send overflow into a planted area, our landscaping services can help a rainwater irrigation system work well in a Howard County yard without adding drainage trouble.
Core Parts of a Residential Rainwater Irrigation System
A basic rain barrel turns into a working irrigation system when storage, pressure, and filtration all do their jobs together.
Collection and Storage: Roofs, Gutters, Downspouts, Rain Barrels, and Cisterns
Water starts at the roof, moves through gutters and downspouts, and ends up in storage. A 1,000 sq ft roof can collect about 600 gallons per inch of rain, which is why small barrels fill fast and larger roofs often call for cistern storage.[21][22]
At the gutter, leaf guards and coarse inlet screens act as the first filter. That matters a lot if you have mature trees nearby. Without protection at the roof edge, small inlet screens can clog in no time. Below the downspout, a first-flush diverter sends the first runoff away from the tank. That first bit of water usually carries the most dust, pollen, and droppings, so cleaner water reaches storage after that.[9][10][18][19]
From there, water enters a rain barrel or a cistern. The better fit depends on how much water you want to hold and how much of the yard you plan to irrigate.
| Feature | Rain Barrel | Cistern |
|---|---|---|
| Typical capacity | 50–100 gallons (55-gallon size is most common) | 200–2,500+ gallons |
| Space needed | About 2–3 sq ft next to a downspout | Roughly a 4×4 ft pad for some upright tanks; larger tanks need site planning |
| Best yard uses | Containers and small beds | Multiple drip zones and larger beds |
Both options need an overflow outlet that sends extra water away from the foundation. Good discharge points include a vegetated swale, rain garden, or another planted area.[14][16][17]
Water Delivery: Pumps, Gravity Feed, Pressure Regulators, and Hose Connections
Your tank choice shapes how much pressure you get, how far water can travel, and how many zones you can run. Gravity feed works best for short runs close to the tank. Pumps are better for longer distances, uphill beds, and drip systems.[10][13][15]
Pump setups also need a pressure regulator so drip tubing and emitters don’t get damaged by too much pressure. Shutoff valves matter too. Put them at the tank outlet and at key junctions so you can isolate zones or stop flow during maintenance.[11][12]
| Feature | Gravity-Fed | Pump-Driven |
|---|---|---|
| Complexity | Barrel on stand, hose outlet, short hose run | Pump, valves, filter manifold, pressure regulator |
| Energy use | None | Electric |
| Best use cases | Nearby foundation beds, containers, raised beds adjacent to tank | Multiple drip zones, uphill beds, longer hose runs, larger Howard County lots |
For hose connections, the usual starting point is a brass or heavy-duty plastic hose outlet threaded into the tank. Quick-connect couplers make life easier. They let you switch between a garden hose, soaker line, or drip manifold without re-threading fittings every time. Before freezing weather hits, fully drain exposed lines and disconnect hoses.
Water Quality Protection: Screens, Filters, Strainers, and First-Flush Devices
Filtration works in layers, and each layer handles a different kind of debris. Gutter guards and inlet screens stop leaves, seed pods, and roof granules before they get into the tank. The first-flush diverter deals with finer material like pollen, dust, and airborne debris that builds up on the roof between storms. For a 1,000–2,500 sq ft roof, first-flush volumes usually range from several gallons up to tens of gallons, depending on roof area and the water quality you want.[18][19]
After the tank, an inline sediment filter catches the fine particles that get past the earlier screens. For drip irrigation, this step is a must. Drip emitters often have openings smaller than 1 mm, so even a little silt or organic matter can block flow. Design guides call for 100–200 mesh filters for most landscape drip systems, with installation in an easy-to-reach spot so they can be flushed several times during the growing season.[10][13][15][20]
With storage and filtration set up, the next piece is getting water through hoses, drip lines, and yard zones.
How Water Reaches Plants: Drip Lines, Hose Links, and Yard Zones
Once storage and filtration are set up, the next step is simple: get water to the plants that need it most. The best method depends on what you’re watering, how far those plants are from the tank, and whether the system runs on gravity or a pump. In most yards, the main options are drip irrigation, soaker hose, or manual hose watering.
Drip Irrigation and Soaker Hoses for Beds, Borders, and Gardens
Drip irrigation delivers water right at the root zone through small emitters. Most emitters put out about 0.5–2 gallons per hour per emitter. That makes drip a good match for foundation plantings, vegetable beds, and native beds. It also uses water far more efficiently than overhead sprinklers, with much less waste.[30][31][32][33]
Soaker hoses work a bit differently. Instead of feeding water to one point at a time, they let it seep out slowly along the full length of the hose. That makes them a better choice for long borders, shrub rows, or rain garden edges where you want moisture spread across a strip of soil. They’re easier to install, but they’re not as exact. It’s best to keep runs under 25 feet.[26][27]
| Method | Efficiency | Installation Effort | Maintenance Sensitivity | Best Yard Locations |
|---|---|---|---|---|
| Drip irrigation | Very high | Moderate; needs tubing, emitters, and zone layout | Higher; emitters can clog if filters are not maintained | Vegetable beds, foundation plantings, native beds, rain garden edges |
| Soaker hose | Moderate to high, but less precise | Low to moderate; simple to lay and connect | Can kink, clog, or water unevenly on long runs | Curved borders, mulch beds, and short rows |
| Manual hose watering | Variable; depends on technique | Minimal; hose attached to cistern spigot | Low; check connections and tank outlet | Containers, new plantings, scattered shrubs and trees |
A simple trick helps both drip lines and soaker hoses: cover them with mulch. That cuts evaporation and helps shield the tubing from UV exposure.[28][29]
Manual Hose Watering for Containers, New Plantings, and Small Areas
Sometimes the plain old hose is the best tool. A hose connected to the cistern spigot works well for containers, new shrubs, and young trees. If the setup is gravity-fed, putting the tank on a 2–3-foot stand can improve flow to nearby beds.[2][25]
If you have a larger cistern or the planting areas are spread out, adding a small pump at the outlet gives you better flow and more control. That makes it easier to use a watering wand or trigger nozzle without fighting weak pressure. On Howard County lots, this kind of layout tends to work best when the tank is close to foundation beds, side-yard borders, or backyard gardens.
When watering by hand, the goal is to go slow and soak the soil at the base of each plant until moisture reaches 6–8 inches deep. That’s what helps roots grow downward instead of hovering near the surface. Early morning watering also cuts evaporation loss. If the tank level starts dropping, water the high-priority plants first: new plantings, stressed trees, and anything growing in containers. Established ornamentals and native shrubs can usually go longer between waterings.[24][25] From there, it makes sense to split the yard into zones so stored water goes where it’s needed first.
Setting Up Watering Zones Based on Plant Needs and Tank Capacity
Zones are just plant groups with similar water needs, each served by its own valve or line. A simple setup might look like this:
- High-demand vegetables and herbs on drip
- Moderate-demand ornamentals on drip or soaker hose
- Low-demand native plants and established shrubs on occasional hand watering[24]
Shutoff valves for each zone give you control when water is tight. During a dry spell, you might shut off the native shrub zone, since those plants usually handle drought better once established, and keep the tank water for vegetables or new plantings that can’t wait.
A simple schedule helps too. Watering vegetables every 2–3 days instead of every day, and doing it in the early morning, can stretch the cistern supply a lot farther between storms.[24][25] A kitchen garden drip zone may use about 40–100 gallons per day at peak summer. Native shrub and tree beds, by contrast, may need a deep soak only once every week or two during dry periods. Those numbers matter because they show, in plain terms, how far your stored water will go.[23]
Placement matters too, especially in a small yard where the tank, planting beds, and overflow all have to fit together.
Best Locations and Local Stormwater Considerations in Howard County Yards
Where Rainwater Irrigation Systems Fit Best on Residential Properties
Once you’ve planned the tank and irrigation zones, the next step is picking the right spot. Put the tank where roof runoff already collects and where planting beds are close enough for short hose or drip-line runs. Side yards often work well, especially when there’s a clear downspout and shrub or perennial beds along that side of the house. Rear corners near vegetable gardens or raised beds can also be a good match, mainly when the planting area sits downslope and overflow can move away from the house.[3][4][6]
A full 55-gallon barrel weighs more than 450 pounds, so it needs a stable, level base. That base should also be raised 12 to 18 inches to give a gravity-fed system enough pressure.[3] Patios, decks, and side yards near planters are also solid options because stored rainwater can cover containers and small beds without the hassle of long hose runs.[3][4]
Some spots are best left alone:
- Tanks placed right against a basement or crawlspace wall can hold overflow too close to the house and lead to moisture issues.[3][8]
- Steep slopes can make a heavy tank harder to secure and can turn overflow into an erosion issue.
- Narrow side yards used for maintenance access are often awkward for tanks.
- Soft or uneven soil may not support the weight safely.[3][8]
Overflow shouldn’t just leave the tank without causing damage. It should move into a landscape feature that can soak it up. A rain garden planted with native grasses and perennials can take in overflow and drain within 24 to 48 hours.[6][8] These gardens should be at least 10 feet from the building foundation, set on a gentle slope of less than about 12%, and kept out of places that already hold standing water after storms.[38][39][40]
For more involved setups, such as cisterns paired with patios, retaining walls, or grading work, it’s smart to coordinate placement with a landscape and drainage professional. That helps prevent clashes between the tank, current swales, and storm drain connections. Pro Landscapes MD can tie cisterns, overflow routing, and planting beds into one drainage plan.
Maryland Non-Potable Use and Stormwater Management Basics
Once placement is set, local rules shape how the water can be used and how the system should be cared for. In Maryland, harvested roof water is non-potable. That means it should be used only for irrigation, not for drinking, cooking, pools, fishponds, or birdbaths.[3][7][2] If you use harvested rainwater on a vegetable garden, wash the produce with tap water before eating it. Storage tanks should also be clearly labeled Do Not Drink so there’s no mix-up.[3][2]
Maryland treats rainwater harvesting as an Environmental Site Design (ESD) stormwater practice.[36][37] When homeowners use stored rainwater on planting beds and gardens during dry weather, that water goes back into the landscape instead of leaving the property all at once.[8] If a cistern is meant to count toward stormwater credit, it usually needs to be emptied within about 72 hours after a storm so it’s ready for the next rainfall.[1][5]
Maryland does not have a statewide ban on residential rainwater harvesting. That said, HOA rules, landlord requirements, and any permits tied to pump electrical work or storm drain connections may still apply.[34] Howard County also puts the duty for private drainage systems on the property owner. So the tank, its overflow route, and any connected drainage need to be kept in good shape so they don’t cause runoff or nuisance issues for nearby properties.[35]
Integrating Rainwater Irrigation With Landscape Design
Coordinating Cisterns, Drainage, Planting Beds, and Hardscaping
Once the delivery system is set, the next job is making it fit the yard cleanly. A rainwater irrigation system works best when it’s part of the landscape plan from the start. That means planning the cistern, overflow path, planting beds, grading, and hardscaping together.
Start with grading. Patios, walkways, and driveways should drain toward planted or pervious areas, not storm drains or neighboring lots.[41][42][43][44] In Howard County, that often means using side yards, rear patios, and bed edges to move runoff to places where plants can use it.
Each part of the yard can help direct runoff and support irrigation:
| Feature | Irrigation Support | Runoff Control | Landscape Function |
|---|---|---|---|
| Cisterns / Rain Barrels | Store roof runoff for active irrigation via pumps, hoses, or drip lines | Reduce immediate runoff by capturing part of each storm | Can be screened with plantings |
| Rain Gardens | Provide passive irrigation through infiltration and soil moisture storage | Capture, slow, and infiltrate runoff from roofs and hardscapes | Native planted feature that improves habitat and soil health |
| Dry Riverbeds | Guide overflow to infiltration areas and lower beds | Manage concentrated flows and prevent erosion | Naturalistic feature that defines circulation and visual structure |
| Permeable Pavers | Allow water to infiltrate into the base layer near plant roots | Minimize runoff from patios, walks, and driveways | Functional outdoor surfaces that support stormwater management |
Howard County’s CleanScapes program may reimburse 50% of rain garden installation costs, up to $1,200, when the design meets program criteria.[6] Pairing a rain garden with cistern overflow routing is one of the most practical ways to qualify. Here’s why: the cistern handles active irrigation, while the rain garden takes care of overflow. That setup can also cut the cost of the rain garden.
For more complex grading and drainage layouts, Pro Landscapes MD can coordinate drainage installation, French drains, dry riverbeds, grading, and environmental paver systems in Howard County. The goal is simple: place the cistern well, route overflow where it should go, and shape planting beds as part of one plan.
Key Points for Howard County Homeowners
Match the cistern size, overflow routing, and hardscaping so the system supports irrigation without creating runoff trouble. Good grading and smart overflow routing help keep rainwater available for irrigation and away from the foundation zone.
FAQs
How much tank storage do I need?
Tank size comes down to three things: how much water you want to use, the size of your roof, and how much rain your area gets.
For smaller tasks, like watering garden plants or washing off patios, driveways, or other surfaces, rain barrels in the 50 to 100 gallon range are often enough. If you want water for larger irrigation needs or even household use, you’ll usually need a cistern that holds hundreds to several thousand gallons.
Here’s a simple way to think about it: 1 inch of rain falling on a 1,000-square-foot roof can collect about 620 gallons of water. That adds up fast.
Pro Landscapes MD can help size a system that fits your property and your water-use goals.
Do I need a pump, or will gravity work?
Gravity can work for simple setups. A basic rain barrel can water nearby plants, especially if you place it on a stable, level base to help the water flow better.
But once your system covers more ground, gravity often isn’t enough. If you need steady pressure for drip lines or sprinklers, you’ll usually need a pump.
Where should overflow from a rain barrel go?
Rain barrel overflow should drain to a safe spot where water won’t collect near your home’s foundation.
Good places include a rain garden, an existing drainage system, or an open part of the yard where water can spread out and soak into the ground without washing soil away. Use an overflow pipe or adapter to guide water away from buildings and steep areas, and keep the discharge spot clear so water can keep moving without getting blocked.
Chat with Us