









- bhavya gada
- No Comments
If you want a patio or walkway that feels softer, grips well when wet, and needs less care, recycled rubber pavers are a strong option. I’d sum it up this way: they can last 20+ years, yearly upkeep is often about $0.30 to $0.50 per sq. ft., and the job goes best when the base is compacted, level, and sloped 1/4 inch per foot away from your home.
Here’s the short version:
- I’d use them most often for patios, walkways, pool areas, and play spaces
- I’d only use them for driveways if the product is rated for vehicle loads
- I’d plan for 4 to 6 inches of excavation on ground installs
- I’d add 3 to 4 inches of compacted gravel plus a 1-inch leveling layer
- I’d order 5% to 10% extra material for cuts and mistakes
- I’d let the pavers sit on-site for at least 24 hours before install
- I’d avoid petroleum-based cleaners and harsh solvents
What stands out most is simple: you get a surface that is easier on your feet, has strong traction in wet weather, and can handle Maryland freeze-thaw swings better than hard, rigid options. But the base still does most of the work. If the base drains poorly or shifts, the surface will too.
How to Install Stomp Stone recycled rubber pavers

sbb-itb-843f8be
Quick comparison
| Feature | Recycled Rubber Pavers | Concrete Pavers | Natural Stone |
|---|---|---|---|
| Feel underfoot | Soft | Hard | Hard |
| Wet grip | High | Medium | Varies |
| Winter cracking risk | Lower | Higher | Medium |
| Upkeep | Low | Medium | Medium |
| Install difficulty | Lower | Medium | Higher |
| Lifespan | 20+ years | 15 to 30 years | 30+ years |
So if I were choosing based on comfort, slip resistance, and lower day-to-day care, rubber pavers would be near the top of my list. The main thing is to match the paver to the job and not cut corners on grading, drainage, or compaction.
Main Benefits of Recycled Rubber Pavers
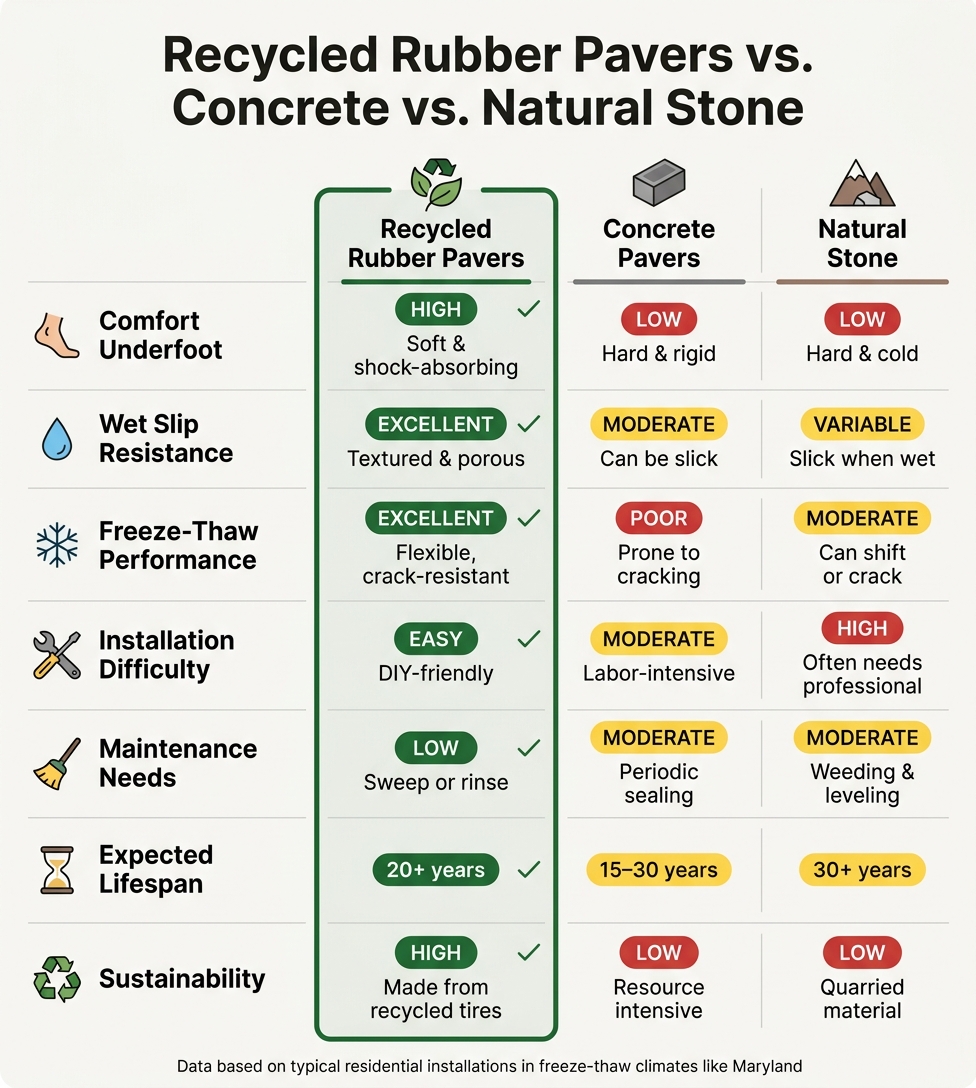
Recycled Rubber Pavers vs. Concrete vs. Natural Stone: Full Comparison
Recycled rubber pavers stand out for three big reasons: safety, long life, and low upkeep. That matters a lot in Maryland, where rain, snow, and freeze-thaw swings can be rough on hard surfaces.
Comfort, Slip Resistance, and Safety
Rubber pavers feel softer underfoot than concrete or natural stone. They give a little when you walk or stand on them, which helps absorb impact and cut down on fatigue during long periods on your feet. That extra cushion can also help children and older adults by softening impact.
Slip resistance is another strong point. The textured surface grips wet feet much better than smooth concrete or stone. That makes rubber pavers a smart fit for pool decks, patios, and walkways that stay damp after rain.
Durability, Drainage, and Low Maintenance
Well-made rubber pavers can last 20+ years [3][4]. They hold up well against chipping, UV fading, and heavy foot traffic. And because rubber flexes with temperature swings instead of cracking [2], it tends to handle Maryland winters better than rigid materials.
Drainage is built into the setup. Water moves through the joints and into the base below, which helps limit puddles on the surface and can cut down on rainwater runoff [2][1].
Day-to-day care is simple. In most cases, upkeep just means:
- Sweeping
- Using a leaf blower
- Rinsing with a garden hose
Annual upkeep usually runs about $0.30 to $0.50 per square foot [4]. One thing to watch: avoid petroleum-based cleaners and harsh chemical solvents, since they can break down the rubber compound over time [2][4].
Next comes site preparation, because even flexible pavers still need a stable base.
Recycled Rubber Pavers vs. Concrete and Natural Stone
For a side-by-side look, here’s how they compare.
| Feature | Recycled Rubber Pavers | Concrete Pavers | Natural Stone |
|---|---|---|---|
| Comfort | High – shock-absorbing and soft | Low – hard and rigid | Low – hard and cold |
| Slip Resistance | Excellent – textured and porous | Moderate – can be slick | Variable – can be slick when wet |
| Freeze-Thaw Performance | Excellent – flexible and resistant to cracking | Poor – prone to cracking | Moderate – can shift or crack |
| Ease of Installation | Easy – DIY-friendly | Moderate – heavier and more labor-intensive | Very high – professional installation often needed |
| Maintenance Needs | Low – sweep or rinse | Moderate – periodic sealing | Moderate – weeding and leveling |
| Expected Lifespan | 20+ years [3][4] | 15–30 years | 30+ years |
| Sustainability | High – made from recycled tires | Low – resource intensive | Low – quarried material |
For Maryland homeowners, rubber pavers are an easy-to-install, low-upkeep choice that tends to handle winter weather better than rigid surfaces.
Planning the Project and Preparing the Site
Good prep work is what helps a paver surface last longer and resist shifting, puddling, or sinking. Before you order a single paver, take time to check the site with care.
How to Measure the Area and Check Slope
Start with the basics: measure the length and width, then multiply those numbers to get the square footage. After that, order 5% to 10% extra material to cover cuts and mistakes [2][3].
To make sure your corners are square, use the 3-4-5 triangle method. Measure 3 feet along one edge and 4 feet along the edge that meets it. The diagonal between those two points should be exactly 5 feet [4]. If it isn’t, the layout needs to be adjusted.
Slope matters just as much as size. The surface should drop at least 1/4 inch per foot away from the house or any other structure [4][3]. That slight pitch helps water move away from the foundation instead of pooling next to it. Use a 4-foot spirit level or a laser level to check this while you prep the base.
How to Prepare Soil, Gravel Base, or Existing Concrete
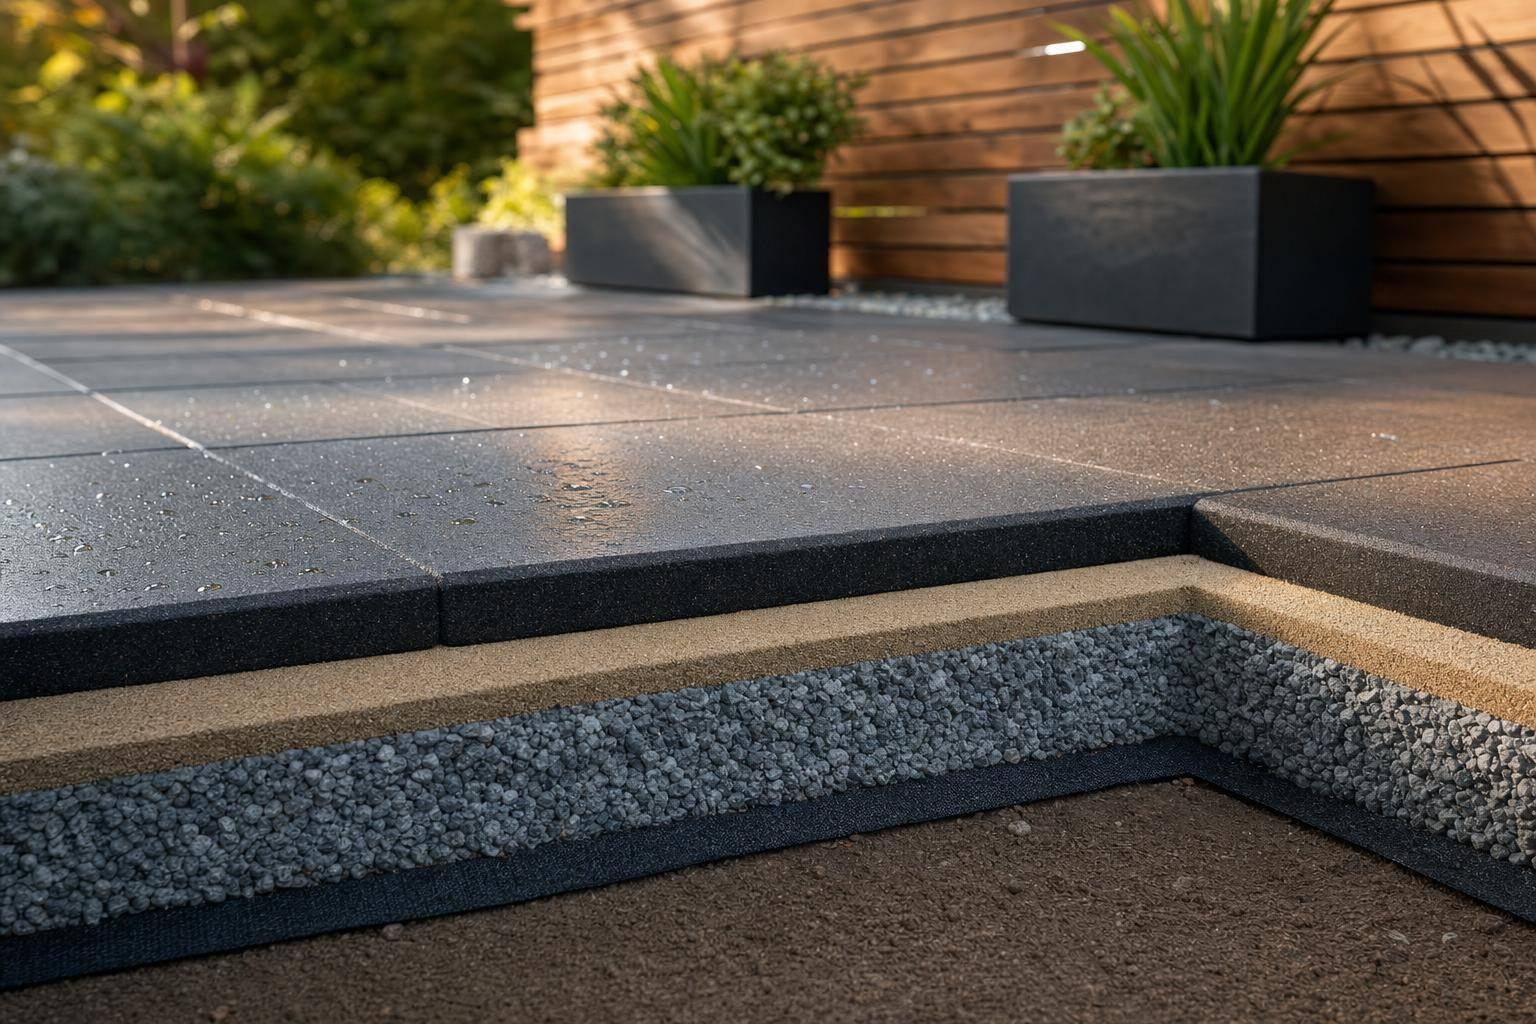
For ground installs, begin with excavation and base layers. Clear out all vegetation and dig 4 to 6 inches deep. Then lay heavy-duty geotextile landscape fabric over the exposed soil to help block weeds and keep the gravel from sinking into the soil below. Add 3 to 4 inches of compacted crushed stone or gravel, then finish with a 1-inch leveling layer of coarse sand or stone dust [2][1][5].
That compacted base does a lot of the heavy lifting. It helps prevent settling and shifting over time. If you’re working on a larger area, rent a plate compactor and run it in several passes from different directions to get rid of soft spots.
If you’re installing over existing concrete, clean the slab first. Then level high spots, fill low spots, and apply polyurethane construction adhesive to a dry, level surface [3][1][4].
Tools, Materials, and Drainage Checks
Have your tools and materials on-site before you start. You’ll want:
- tape measure
- flat shovel
- rake
- wheelbarrow
- plate compactor or hand tamper
- 4-foot level
- chalk line
- utility knife with extra blades
- rubber mallet
- rigid edge restraints
Drainage problems need to be fixed before any pavers go down. If the area holds standing water after rain, pavers will only trap that moisture underneath. Take care of the issue first with regrading or added drainage [3][5].
Before installation, let the rubber pavers sit on-site for at least 24 hours [4]. Rubber expands and contracts with temperature, so skipping this step can lead to gaps or buckling later. With the site prepped, you’re ready to move into layout and installation.
Step-by-Step Installation for Patios, Walkways, and Driveways
Follow the sequence below.
Base Preparation, Layout, and First Course
Once the base is compacted and dry, install the edge restraints first. You can use plastic edging, treated lumber, or concrete curbs. Putting these in before the sand bedding helps keep the layout locked in while you work [2][6].
Next, place two lengths of 1-inch PVC pipe on the base to act as screed rails. Drag a straightedge board across the pipes to make a level 1-inch sand layer [2]. Don’t step on the screeded bed or you’ll mess up the surface you just leveled.
After that, start the first course from a fixed corner. Use a string line to keep each row straight. Set each paver straight down into place instead of sliding it across the sand bed, since sliding can disturb the bedding layer [2].
Setting Pavers, Cutting Edges, and Securing the Border
Fit each paver snugly against the next one and tap it level with a rubber mallet. Work row by row and keep checking your line as you go. A small shift early on can throw off the rest of the pattern.
For edge pieces, cut any pavers that won’t fit at full size. Use a sharp utility knife for straight cuts, or a jigsaw with a fine-tooth blade for curves and angles [2][3]. Cut away from your body. Rubber can catch the blade before it goes all the way through.
Once all the pavers are down, sweep joint sand into the gaps and mist it lightly to lock the joints in place [1][2][5].
Load Requirements for Patios, Walkways, and Driveways
Use the right paver type and base depth for the job. A patio doesn’t deal with the same stress as a driveway, so the setup needs to match the load.
| Application | Base Requirement | Paver Type |
|---|---|---|
| Walkways and patios | Compacted gravel base plus sand layer | Standard pedestrian-rated pavers [2] |
| Driveways | Heavily compacted aggregate base [2] | Vehicle-rated pavers [2] |
| Over existing concrete | Use only on a clean, dry slab | Adhesive-set installation |
Driveways need vehicle-rated pavers and a well-compacted base so they can handle vehicle weight and turning friction [2].
Do not install over frozen ground or saturated soil [2].
Maintenance, Repairs, and Final Takeaways
Routine Cleaning and Seasonal Care
Once the pavers are in, keeping them in good shape is pretty simple. Regular cleaning goes a long way. For tougher dirt or stains, use mild soap and warm water. If you use a pressure washer, stick to a low-pressure setting.
Winter care matters too. For snow removal, use a plastic shovel. Skip metal blades and ice picks, since they can gouge or tear the surface. The good news is that rubber pavers can stay in place through winter.
How to Fix Settlement, Shifting, or Adhesive Problems
When a paver shifts or sinks, don’t just patch the top and hope for the best. Fix the base first. If you spot a low area or a paver that rocks underfoot, lift that unit, relevel the base, and reset it with a rubber mallet[5][6].
If the edging starts to separate, check the border spikes. They may have lifted over time. Reset them or reinforce the restraint as needed[2][6]. For pavers installed on concrete, remove the old adhesive, clean the area, and apply fresh polyurethane construction adhesive to the back of the unit before pressing it back into place[3][1]. Then sweep new joint sand into any open gaps and mist lightly with water[5][1].
A compacted base is your best protection against uneven settling and shifting.
Key Points for a Longer-Lasting Installation
Match the paver to the job. Use load-rated pavers for the space, especially on driveways where vehicle-rated rubber pavers are required[2]. Keep border restraints secure so the field doesn’t creep outward. Good base prep, secure edging, and routine cleaning help the installation last longer.
If your project also involves drainage, grading, or other hardscape work, Pro Landscapes MD can work recycled rubber pavers into the larger project plan.
FAQs
Are recycled rubber pavers worth the cost?
Yes. Recycled rubber pavers are generally worth the cost because they offer long life, low upkeep, and solid long-term value.
The upfront price is often higher than concrete, usually around $7 to $15 per square foot. But over time, they can save money because they need less upkeep and fewer replacements. They also hold up well against cracking, fading, and harsh weather, which helps them last longer.
Can rubber pavers be installed over old concrete?
Yes. You can install rubber pavers directly over existing concrete, which often means less digging and less prep work than with standard pavers.
Start by cleaning the concrete well. Remove dirt, grease, and any loose debris so the pavers sit flat and stick properly. If you want a permanent install, use a high-quality, outdoor-rated polyurethane construction adhesive.
Some thicker rubber pavers can be loose-laid. But in most cases, bonding them down is the better call for stability.
What causes rubber pavers to shift or sink?
Rubber pavers usually shift or sink for one simple reason: the base underneath them isn’t stable.
This often starts with poor base prep or weak drainage. If organic soil stays in place, the gravel and sand base isn’t compacted well, or geotextile fabric is skipped, the pavers can settle unevenly over time.
Missing edge restraints can make the problem worse. Without them, pavers can drift out of place little by little. Standing water adds even more stress because it can weaken the foundation underneath.
Chat with Us