


- bhavya gada
- No Comments
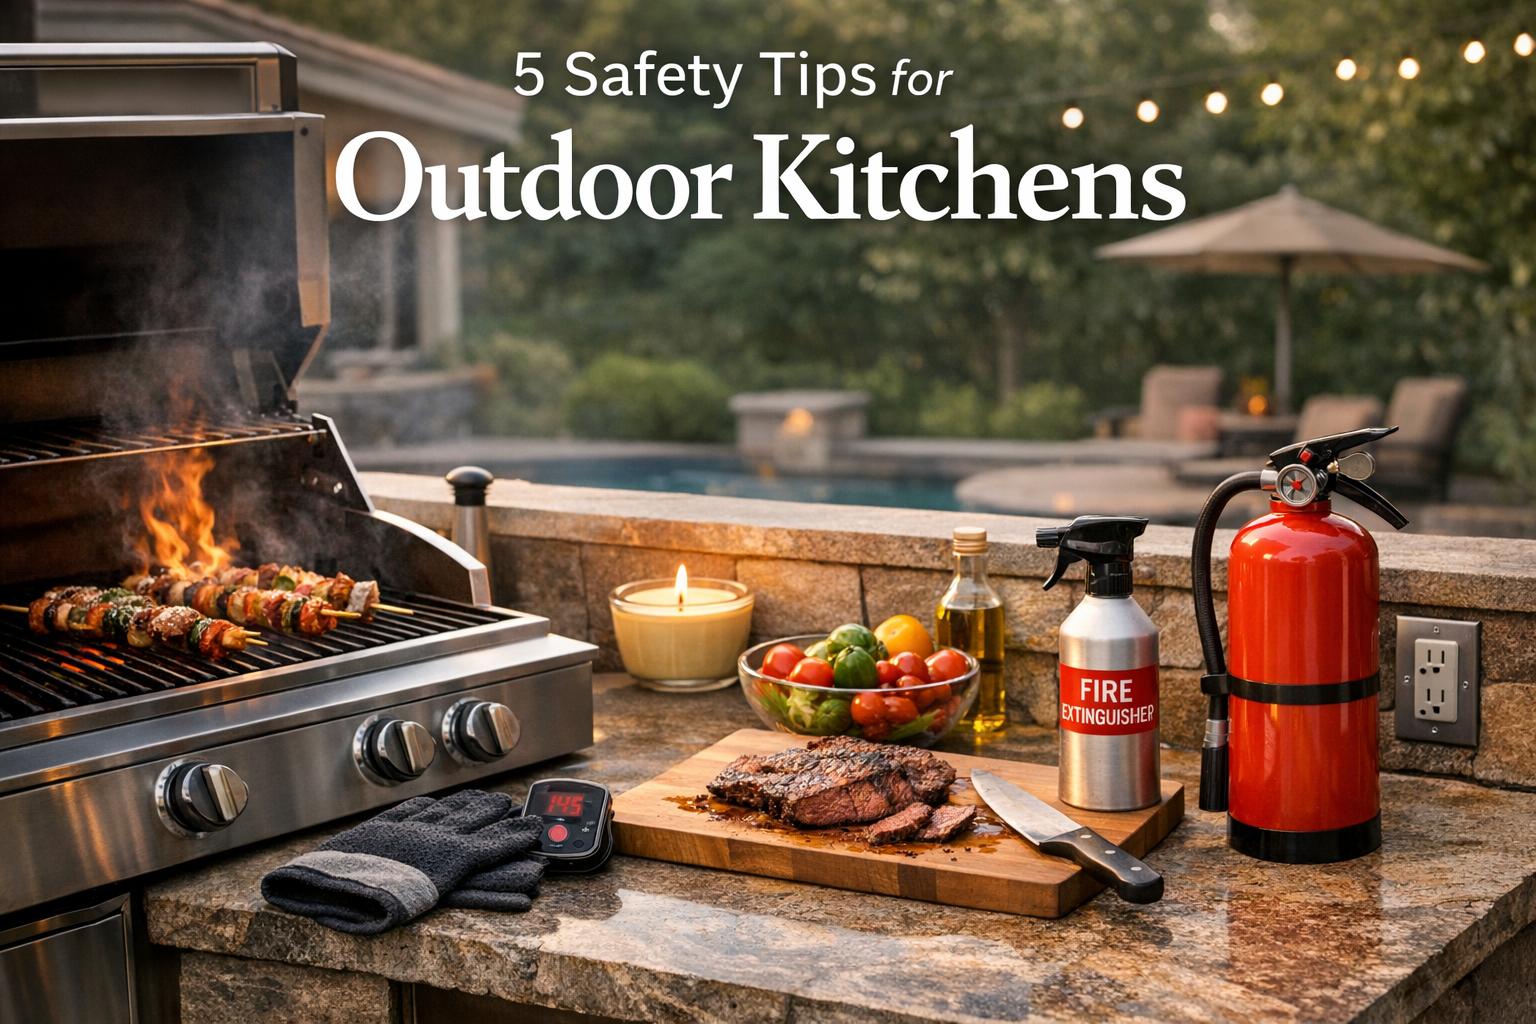
Outdoor kitchens can turn your backyard into a great space for cooking and entertaining, but they come with risks like fires, gas leaks, and poor ventilation. Here’s how to keep your outdoor kitchen safe:
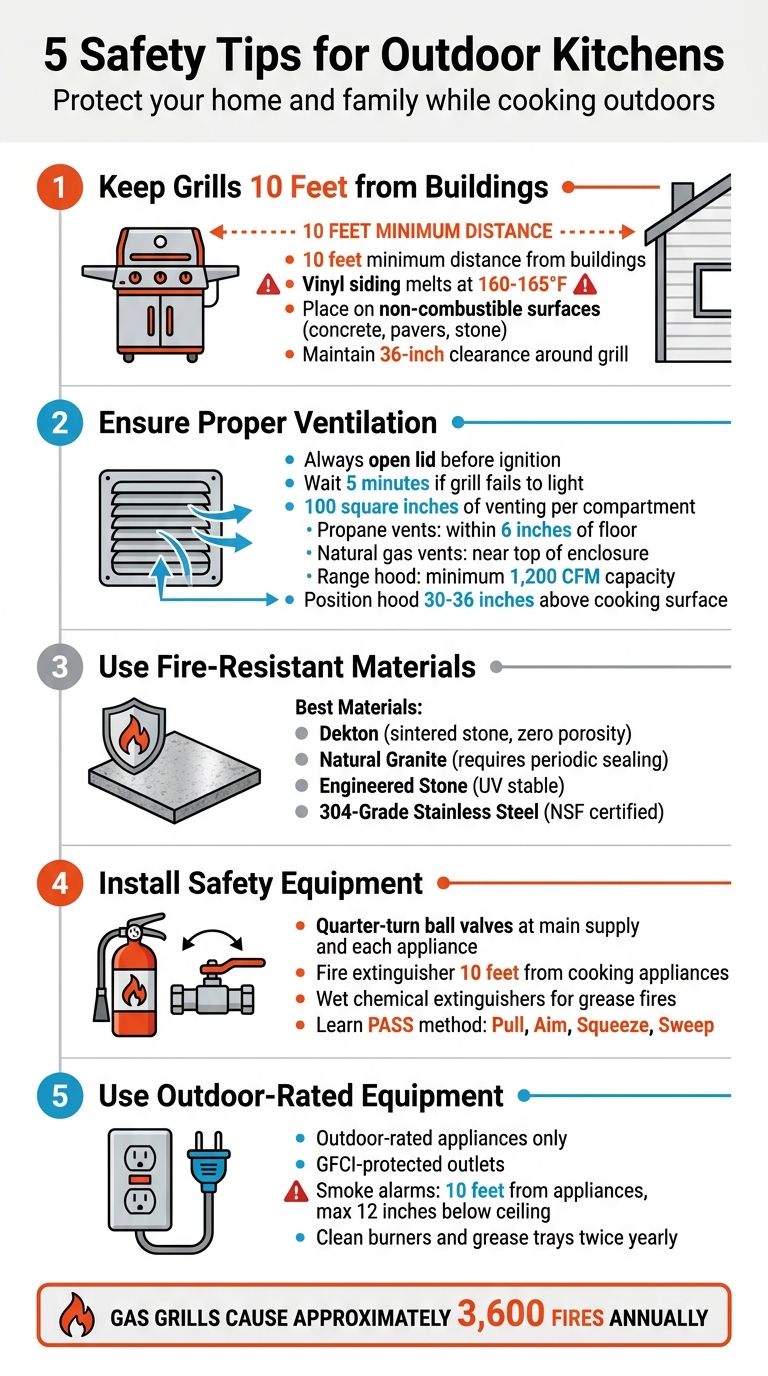
- Keep grills 10 feet from buildings: Prevent fires and protect your home’s exterior from heat damage.
- Ensure proper ventilation: Avoid gas buildup and carbon monoxide risks by using vent panels and outdoor-rated vent hoods.
- Use fire-resistant materials: Choose heat-resistant countertops like granite or stainless steel to reduce fire hazards.
- Install gas shut-off valves and fire extinguishers: Quick access to these can stop emergencies from escalating.
- Use outdoor-rated appliances and GFCI outlets: Designed to handle outdoor conditions, these reduce electrical hazards.
5 Essential Safety Tips for Outdoor Kitchens
1. Keep Grills at Least 10 Feet from Buildings
Fire Prevention
Fire safety experts and the Consumer Product Safety Commission recommend keeping grills at least 10 feet away from buildings to reduce the risk of fires [2]. This distance helps protect combustible materials like wood fences, deck railings, and nearby plants from intense heat or sudden flare-ups, which can ignite these surfaces in moments.
Vinyl siding is especially at risk, as it can warp or melt at temperatures as low as 160°F to 165°F [2]. Even without direct flames, the radiant heat from a grill can damage your home’s exterior [2]. While some grill manufacturers suggest a 3-foot minimum clearance, this distance often isn’t enough to prevent damage during unexpected flare-ups, which can extend several feet beyond the grill [2]. Maintaining a 10-foot buffer not only minimizes fire hazards but also ensures better airflow around the grill.
Proper Ventilation
Placing a grill too close to eaves or covered patios can trap smoke, which may seep into your home through open windows or doors [2][3]. To avoid this, pay attention to wind direction and make sure smoke doesn’t drift toward guest seating areas or your house’s entry points [2].
If you need to use a grill in a covered area, consider installing an outdoor-rated vent hood. Look for one with a capacity of at least 1,200 CFM and position it 30-36 inches above the cooking surface for efficient smoke removal [2].
Emergency Preparedness
Distance alone isn’t enough – being prepared can make all the difference in an emergency. Check your local fire codes and HOA regulations before setting up your grill, as these rules may require stricter distances than the manufacturer’s guidelines [2].
Whenever possible, place your grill on non-combustible surfaces like concrete, pavers, or stone instead of wooden decks. Also, maintain a 36-inch clearance around the grill to ensure proper airflow and safe operation [2].
sbb-itb-843f8be
2. Provide Adequate Ventilation and Airflow
Proper Ventilation
Managing gas buildup is a key part of fire safety in your outdoor kitchen. One simple but crucial habit: always open your grill lid before ignition. Why? If the grill doesn’t light right away, gas can collect under the hood. Trying to ignite it again without clearing the gas can result in a flash-off or even an explosion [1].
"When lighting the gas grill, make sure to keep the lid open to avoid a flash-off from gas buildup." – Bay Area BBQ Islands [1]
If your grill fails to ignite on the first attempt, turn off the gas and wait at least 5 minutes before trying again. This waiting period allows unignited gas to dissipate safely [1].
Fire Prevention
For enclosed grill islands, vent panels are essential to prevent trapped gas. The placement of these vents depends on the type of gas you’re using. Propane, being heavier than air, settles near the ground, so vents should be installed within 6 inches of the cabinet floor. Natural gas, on the other hand, rises, requiring vents near the top of the enclosure [5][7]. Safety guidelines recommend at least 100 square inches of venting per island compartment [7].
"A gas leak inside an unvented outdoor kitchen island can reach explosive concentrations within minutes, making vapor release venting a non-negotiable requirement, not a design preference." – Konzept Garden [7]
To ensure proper airflow, place vents on two opposing walls of the grill island. If your outdoor kitchen is under a fixed roof, pergola, or pavilion, consider installing an outdoor-rated range hood with a minimum capacity of 1,200 CFM to handle smoke and heat efficiently [6][7]. Regular maintenance of your ventilation system is critical to keeping these safety measures effective.
Emergency Preparedness
Routine upkeep is essential for safety. Clean the burner box and inspect burner ports every season to prevent carbon buildup and blockages [1]. When installing smoke alarms, place them at least 10 feet away from cooking appliances to avoid false alarms while ensuring they’re effective. Position them no higher than 12 inches from the ceiling for early fire detection [1]. Regular checks and cleaning can make all the difference in preventing accidents.
3. Use Fire-Resistant Materials for Countertops and Surfaces
Fire Prevention
Fire-resistant countertops and surfaces act as a crucial barrier, containing flames and stopping heat from spreading to nearby cabinetry or structures. These materials are especially helpful during flare-ups, keeping heat and sparks under control.
Grease fires are a common risk in outdoor kitchens. Cooking oils, butter, and shortenings ignite quickly due to their low smoke points. Fire-resistant surfaces can help prevent these flames from catching on countertops or cabinets, creating a safer buffer between flammable cooking supplies and heat sources.
Durability of Materials
When selecting countertop materials, it’s important to find a balance between fire resistance and durability. Here are a few options:
- Dekton: This sintered stone is a top choice for areas near high-heat appliances. It handles extreme temperature changes without losing stability and has zero porosity, protecting against moisture-related heat damage. Plus, it comes with a strong warranty.
- Natural Granite: For a more traditional look, granite offers excellent heat resistance and holds up in all weather conditions. However, it does require periodic sealing to maintain its performance.
- Engineered Stone: This material combines heat resistance with UV stability, requiring less upkeep compared to natural stone.
- 304-Grade Stainless Steel: A professional-grade option, this non-combustible and corrosion-resistant material is perfect for food prep areas. It resists rust in all weather conditions and is NSF certified for food safety, making it ideal for outdoor kitchens.
For outdoor kitchens in central Maryland, Pro Landscapes MD can help you select and install the best fire-resistant materials tailored to your cooking setup and local climate.
Emergency Preparedness
Fire-resistant surfaces are just one part of a comprehensive safety plan. To further reduce fire risks:
- Regularly clean burner boxes, grates, and grease trays to remove food residue.
- Clear away dry leaves and vegetation, especially during fire season.
- Store extra charcoal in airtight metal containers, keeping it away from heat or open flames.
- Always dispose of cooled ashes in metal receptacles rather than plastic bins or wooden surfaces.
Using fire-resistant materials and following these safety practices can make your outdoor kitchen both safer and more durable.
Avoid Disaster: Key Things to Know for a Safe Outdoor Kitchen Build
4. Install Gas Shut-Off Valves and Fire Extinguishers Within Reach
Adding quick-access shut-off valves and fire extinguishers to your setup is essential for handling emergencies effectively.
Emergency Preparedness
Install corrosion-resistant quarter-turn ball valves at both the main gas supply and each appliance. These valves act as emergency kill switches in case of a gas leak. One valve should be placed where the gas line enters your home, with additional valves installed directly at each appliance, such as your grill or outdoor pizza oven.
Opt for quarter-turn valves with lever-style handles instead of traditional round knobs. To shut off the gas instantly, turn the lever perpendicular to the pipe. Ensure these valves aren’t blocked by cabinets or outdoor decor, so they’re easy to reach in an emergency. For outdoor setups, particularly in Maryland’s changing weather, brass or stainless steel valves offer excellent durability and resistance to corrosion.
Fire Prevention
Gas grills are responsible for about 3,600 fires annually, making fire extinguishers a must-have safety feature [1]. Wet chemical extinguishers are the best choice for grease fires, which are common in kitchen settings. Avoid using dry chemical or CO₂ extinguishers on grease fires, as they can make the situation worse [1].
| Extinguisher Type | Best For | Avoid Using On |
|---|---|---|
| Wet Chemical | Grease fires (Class K) | N/A (Ideal for kitchens) |
| Dry Chemical | Electrical appliances, flammable liquids, and solids | Grease fires |
| Carbon Dioxide (CO₂) | Flammable liquids and energized equipment | Trash or grease fires |
Position your fire extinguisher about 10 feet away from cooking appliances [1]. This placement ensures it’s accessible but far enough to avoid being engulfed if flames spread. Familiarize yourself with the PASS method: Pull the pin, Aim at the base of the fire, Squeeze the handle, and Sweep side to side [4]. If a grease fire occurs, turn off the gas at the shut-off valve, cover the pan with a lid to cut off oxygen, and never use water – it will only spread the fire [1].
Incorporating these safety measures during installation ensures your outdoor cooking area is both functional and secure. Pro Landscapes MD includes gas shut-off valves and strategically placed fire extinguishers in their designs, creating a safe and enjoyable outdoor kitchen space.
5. Use Outdoor-Rated Appliances and GFCI Outlets
After addressing shut-off systems and fire extinguishers, another key step in kitchen safety is using outdoor-rated appliances and ensuring proper electrical protections like GFCI outlets.
Selecting appliances designed specifically for outdoor use – and pairing them with GFCI-protected outlets – helps reduce the risk of electrical hazards. Indoor appliances often aren’t built to handle the challenges of outdoor conditions, making this an important consideration for both safety and durability.
Durability of Materials
Outdoor-rated appliances are engineered to endure the elements. For instance, wind-driven flames and debris, such as spider webs, can clog burners, leading to unsafe conditions. Spiders, surprisingly, are a common culprit in blocking burner tubes, which can disrupt gas flow and cause uneven flames. To avoid these issues, regularly clean burners with a wire brush and clear any obstructions.
Propane tanks also require attention. Inspect tanks carefully for visible damage before use. Damaged tanks are a safety risk, especially since outdoor tanks face exposure to temperature fluctuations and moisture – conditions that indoor equipment never encounters.
Fire Prevention
Did you know gas grills are responsible for five out of every six grill fires? That’s why choosing the right equipment and maintaining it properly is so important [1]. Regularly clean the burner box, cooking grates, and grease trays to minimize the risk of flare-ups. When inspecting grill components, always turn off the gas at the source first. To keep everything in top shape, deep clean and perform routine maintenance at least twice a year.
Emergency Preparedness
For added safety, install smoke alarms at least 10 feet away from appliances and no more than 12 inches below the ceiling [1]. Outdoor kitchens can also benefit from fire sprinklers designed to activate only when exposed to heat. These sprinklers are especially effective in open-air environments where smoke might not trigger traditional alarms. Companies like Pro Landscapes MD incorporate these safety features into their outdoor kitchen designs, prioritizing compliance and family safety.
Conclusion
Creating a safe outdoor kitchen involves more than just aesthetics. It requires attention to details like proper clearances, adequate ventilation, fire-resistant materials, outdoor-rated appliances, and having emergency equipment on hand. These steps not only protect your investment but also ensure peace of mind every time you light up the grill.
Taking these precautions lays the groundwork for a secure and functional outdoor cooking space. Pairing these measures with expert advice can make all the difference. With nearly five decades of experience, Pro Landscapes MD specializes in designing outdoor kitchens that prioritize safety, resilience, and style.
Reach out to professionals to craft an outdoor kitchen that’s not only visually appealing but also built to last.
FAQs
Do I need a vent hood for a covered outdoor kitchen?
Yes, installing a vent hood is a smart choice for covered outdoor kitchens, especially if you’re cooking under a roof, pergola, or any overhead structure. It helps clear out smoke, heat, and grease, ensuring better air quality and preventing the buildup of cooking byproducts in these semi-enclosed spaces.
What’s the safest way to relight a gas grill that won’t ignite?
If your gas grill isn’t igniting, start by turning off the gas supply and waiting about 5 minutes. This allows any built-up gas to disperse safely. Once that’s done, open the lid and try lighting it again. This step helps avoid any potential flare-ups caused by gas accumulation. If the grill still won’t ignite, inspect the gas lines for possible leaks or blockages. If you can’t identify the issue, it’s best to reach out to a professional for assistance.
Which countertop materials handle grill heat best outdoors?
Porcelain countertops are a fantastic choice for outdoor kitchens. They can handle intense heat from grills without damage and are resistant to UV rays, ensuring they stay durable and maintain their appearance over time.
Chat with Us