









- bhavya gada
- No Comments
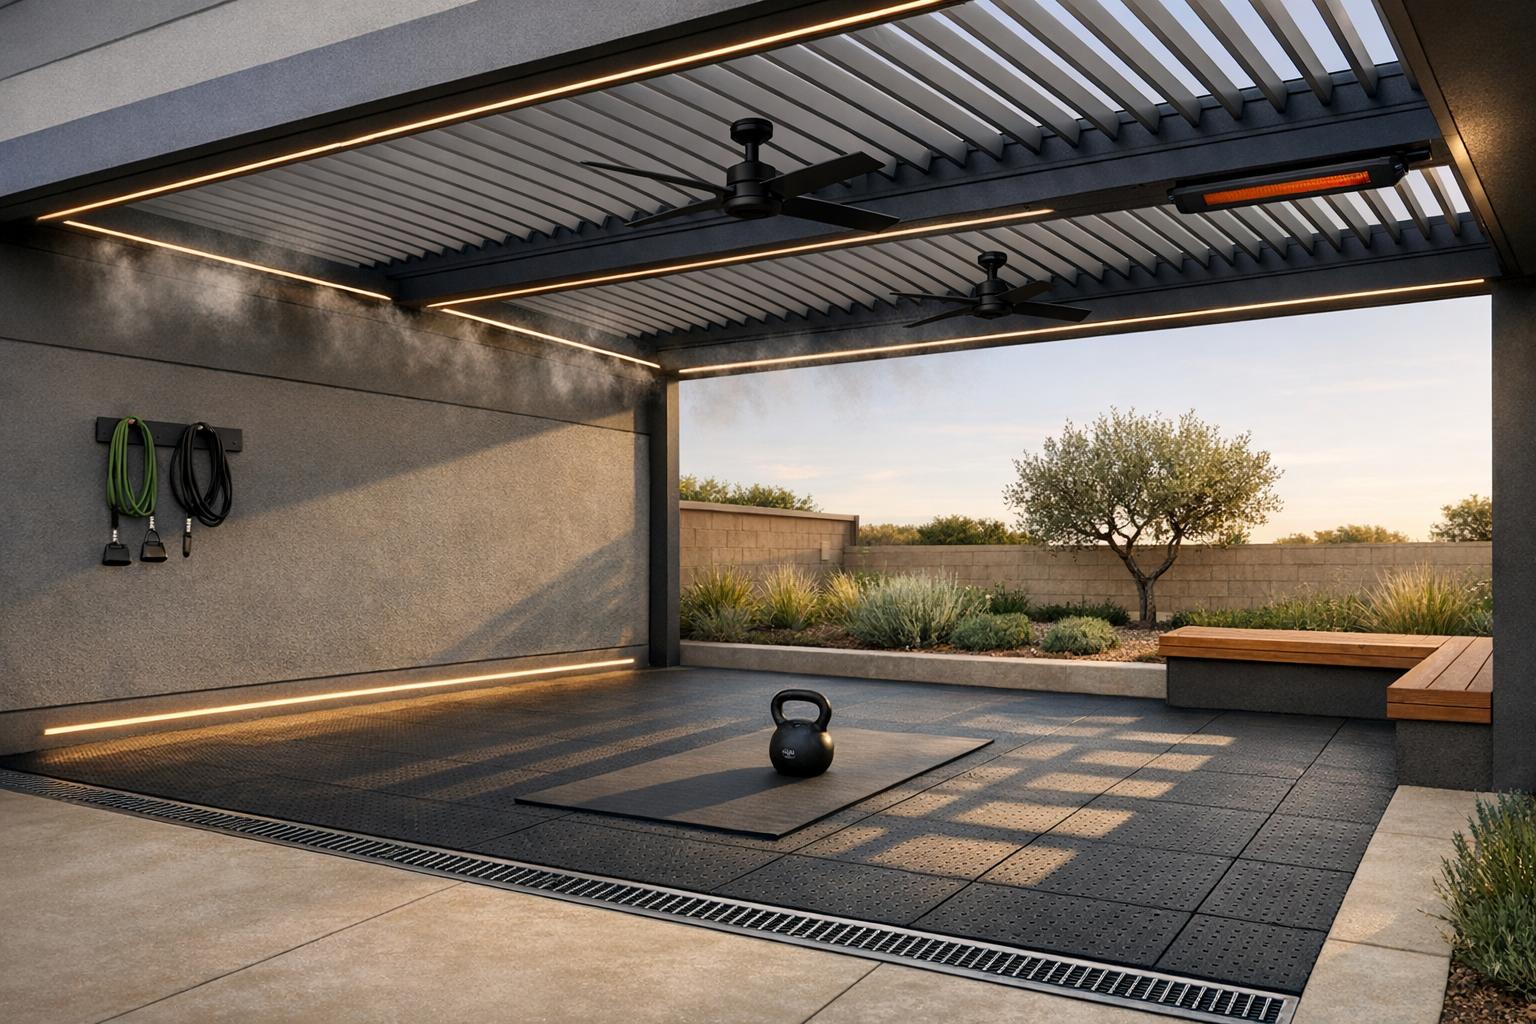
Creating a shaded outdoor workout space that works year-round requires careful planning. Start by assessing your yard for sun exposure, drainage, and wind patterns. Choose durable shade structures like cantilever designs, pergolas, or shade sails to keep workouts cool and equipment protected. Opt for weather-resistant flooring, such as UV-resistant rubber or artificial turf, to ensure safety and proper drainage. Incorporate climate control features like fans, misting systems, and heating options for seasonal comfort. Don’t forget functional lighting for visibility and safety.
Key tips:
- Space requirements: 200–300 sq. ft. for small setups; 500–1,000+ sq. ft. for larger gyms.
- Shade options: Cantilever structures, shade sails, or pavilions.
- Flooring: Non-slip, UV-resistant rubber or turf with drainage.
- Climate control: Fans, misting systems, and heating elements.
- Safety: Ensure proper drainage, secure equipment, and install adequate lighting.
Consult professionals for local regulations, permits, and installation to ensure a functional, safe, and durable setup. Regular maintenance, like clearing debris and inspecting anchors, will keep your space in top condition.
Custom Backyard Fitness Center – Convert your basketball court into a gym
sbb-itb-843f8be
Assess Your Space and Fitness Requirements
Setting up an outdoor workout zone starts with understanding your space and fitness needs. Begin by measuring your yard and observing its conditions throughout the day. Pay attention to sun exposure, areas prone to puddles, and breezy spots. For instance, in Maryland, summer winds generally blow from the southwest to the northeast, while winter winds shift to the northwest [4]. These wind patterns can influence where you place shade structures or workout equipment. These observations will help you plan your layout and equipment placement effectively.
Measure and Evaluate Your Outdoor Area
The amount of space you need depends on your setup. A basic workout area with 4–6 stations typically requires 200–300 square feet, while a more advanced setup with 8–12 or more stations might need 500–1,000+ square feet [3]. Each station should have enough clearance around it to ensure safety and prevent users from bumping into each other [2].
Also, check the slope of your yard. For patios, a 1% to 2% grade sloping away from your house is ideal to avoid water pooling during heavy Maryland thunderstorms [4]. Even minor dips in the ground can lead to puddles.
"I have designed and built outdoor living areas across Montgomery and Howard counties long enough to see what survives, what fails, and what homeowners actually use after the first season." – Hometown Landscape [4]
Don’t forget to check for soil stability and drainage patterns. If your yard has low spots, you may need to add fill dirt to level the ground before installing equipment [2]. For elevated decks, consider adding scuppers or guttered edges to prevent water from running off and causing erosion around your landscaping [4].
Identify Your Workout Activities and Equipment
The type of equipment you choose will determine how much space you need. Strength stations typically require more room than compact cardio or functional fitness setups [1][2]. For example, pull-up bars need posts that are about 2.7 to 3 meters (9–10 feet) tall to ensure proper clearance [1]. If you’re working with limited space, opt for versatile tools like adjustable dumbbells or resistance bands, which offer a variety of workout options without taking up much room [1].
To make your workout flow smoother, organize your equipment by function. Group upper body stations, cardio machines, and functional fitness setups together [2]. If you’re sharing the space with kids, consider creating separate zones for adult workouts and play areas [2].
Review Local Zoning Laws and HOA Requirements
Once you’ve planned your space and activities, check local regulations to ensure compliance. In Montgomery County, for example, attached roof structures often require building permits and a zoning review to confirm setbacks [4]. Maryland inspectors may also require footings designed for a 30-inch frost depth [4].
If you’re part of a neighborhood with a homeowners association (HOA), it’s a good idea to consult them early in the process. HOAs often have specific rules about roof colors, railing styles, and fence heights, so submitting material samples upfront can help you avoid costly changes later [4]. For advanced setups that include lighting or motorized shade systems, plan for dedicated outdoor circuits with GFCI/AFCI protection during the design phase [4].
Choose Your Shade Structures
Now, it’s time to pick a shade structure that provides comfort throughout the year. This choice plays a key role in maintaining the climate control we discussed earlier. A well-designed shade structure can lower temperatures under the canopy by as much as 25°F [5].
Compare Shade Structure Options
Cantilever structures are an excellent option for fitness areas. Their offset support design places columns to one side, leaving the workout space free from interior posts and potential trip hazards [7]. This is especially useful for activities like HIIT or plyometrics, where open floor space is essential. For larger setups, modular multi-bay systems can connect several units, offering broad coverage without cluttering the area with extra support columns [7].
"Cantilever shade structures are one of the most flexible ways to add large-area coverage without placing posts in the middle of high-traffic zones." – Outdoor Workout Supply [7]
Shade sails, made from high-density polyethylene (HDPE) fabric, are another flexible option. These sails stretch between anchor points, making them ideal for irregularly shaped spaces [5]. HDPE fabric blocks 80%–95% of UV rays [7], promoting airflow and reducing heat buildup. If rain protection is a priority, pavilions with solid roofs are a better choice. They provide full coverage from both sun and rain, making them perfect for year-round use [5]. In tighter spaces, commercial umbrellas work well to shade individual pieces of equipment [2][7].
When selecting materials, focus on durability. Galvanized steel finishes can help your structure withstand year-round conditions [6]. For fabric canopies, HDPE is great for breathability in hotter climates, while PVC-coated fabric offers a sleeker, more modern appearance [7]. Keep in mind that cantilever structures require larger engineered footings to handle their offset loads, but this trade-off is worth it for the unobstructed space they provide [7].
Ultimately, choose a shade structure that not only meets your functional needs but also enhances the overall look of your outdoor space with our landscaping services.
Match Design with Function
Once you’ve chosen a shade structure, ensure its design aligns with your workout needs. The structure should blend seamlessly with your landscape while offering adequate coverage for your activities. For a classic and natural aesthetic, pergolas with open roofs and crossbeams are a great option. These work particularly well for stretching or yoga areas [5]. You can even customize them with lighting or climbing plants to integrate them into your yard’s design. For a more permanent solution, pavilions offer sturdy protection, shielding both users and equipment from damage caused by prolonged sun exposure [5].
Keep seasonal sun angles in mind – proper orientation is just as important as canopy size for effective coverage [7]. Make sure the structure is tall enough for overhead movements like pull-ups or presses [7]. Also, double-check that post placement doesn’t block circulation paths or violate ADA compliance [7]. Fabric canopies might need occasional tension adjustments and cleaning, while steel frames should be inspected regularly for signs of hardware corrosion or coating wear [7].
Add Climate Control Features
Incorporating climate control features ensures comfort and safety during Maryland’s humid summers and cooler autumns. As Marygrove highlights, "Extreme heat can cause fatigue, dehydration, and heat stroke during humid days" [8]. Keeping your outdoor workout space comfortable is about more than convenience – it’s about creating a safe and enjoyable environment.
Install Cooling and Heating Elements
Outdoor fans are a great starting point, but placement matters. Install them in shaded areas to avoid circulating hot air. Pair these fans with misting systems for an extra cooling boost. These systems spray a fine mist that evaporates quickly, lowering the surrounding temperature. To avoid over-saturating your equipment or flooring, choose systems with adjustable nozzles and timers.
For colder months, fire rings and retractable covers like awnings or louvered pergolas can help maintain warmth. Adding smart technologies such as Wi-Fi-enabled fans and automated shades enhances convenience by adjusting to temperature and sunlight changes automatically. To complement these mechanical solutions, strategic landscaping can further improve airflow and comfort.
Use Landscaping to Improve Airflow and Comfort
Natural landscaping can work hand-in-hand with your climate control systems. Keeping healthy trees intact provides natural shade, improves air quality, and creates a calming atmosphere. For high-intensity workout stations, placing them under tree canopies can make exercise more comfortable and motivating.
Water features like fountains or small ponds also contribute to cooling by promoting natural evaporation. To maximize shade, plant a mix of tall trees and shrubs that reflect heat away from the area. Protect tree trunks with grates or small fencing to avoid accidental damage, and ensure the space isn’t overcrowded with equipment or structures, allowing natural breezes to flow freely. These thoughtful additions create a balanced environment for all seasons.
Plan for Year-Round Use
Designing an outdoor workout area that works year-round means anticipating Maryland’s seasonal weather. Use light-colored or reflective flooring to reduce heat absorption in summer and avoid the "baked patio" effect. Proper sloping of the site is essential to prevent water from pooling, which could freeze in winter.
Store equipment in weather-resistant containers, and cover larger items with waterproof materials to protect them from the elements. Early in the day, deploy awnings or shade sails to block the sun as temperatures rise. These simple adjustments ensure your outdoor gym remains functional and inviting regardless of the season.
For Maryland homeowners looking to create a lasting outdoor workout space, consulting professionals like Pro Landscapes MD can help bring these ideas to life with expert precision and care.
Select Safe and Durable Flooring
Choosing the right flooring is key to creating a safe and stable workout environment. Materials like UV-resistant rubber flooring and outdoor-rated artificial turf with perforated backing are excellent options, especially for Maryland’s unpredictable weather. These materials offer superior traction while efficiently managing drainage [1][9]. Gym designer Matt Morley emphasizes their versatility:
"Rubber gym flooring emerges as the champion of versatility and durability, catering to a wide range of environments from bustling commercial gyms to tranquil home workout spaces" [9].
Pick Non-Slip Flooring Materials
The thickness of your flooring plays a bigger role than you might think. For activities like cardio and stretching, flooring between 3/8-inch and 5/8-inch provides a good balance of comfort and stability [9][10]. If weightlifting is part of the plan, you’ll need thicker protection – rubber tiles measuring 30mm to 43mm can handle drops of up to 660 pounds [9]. Interlocking rubber tiles are a great choice for easy installation and flexibility.
However, steer clear of horse stall mats. While cheaper, they tend to absorb moisture, release strong odors, and expand or contract significantly with temperature changes [10]. Instead, opt for tiles with a studded or grooved base to allow moisture to flow underneath, preventing surface pooling [1][11]. If you’re installing over concrete, use a 6-mil polyethylene vapor barrier to keep ground moisture from getting trapped beneath the flooring [10]. Regular maintenance, like dust mopping and occasional cleaning, will keep the floor in top condition [1][9].
Once you’ve chosen non-slip materials, the next step is to ensure proper moisture management with an effective drainage system.
Install Proper Drainage Systems
Good drainage is crucial for protecting your equipment and maintaining safe, non-slip surfaces – especially in Maryland, where heavy spring rains and freeze-thaw cycles are common. Always install flooring with a slight slope to direct water away from buildings and equipment [12]. A 4-inch reinforced concrete pad offers a stable base and typically costs between $6 and $9 per square foot [13]. For rooftop or elevated setups, 2-inch rubber rooftop pavers designed specifically for drainage are your best bet [12].
Before installation, inspect the site for low spots where water might pool. If drainage issues exist, you may need to install French drains or regrade the area before laying the flooring. Annual inspections of drainage channels, especially before the rainy season, help ensure they stay clear and functional [12]. For a seamless and ADA-compliant surface, consider poured-in-place rubber surfacing. Though more expensive – ranging from $12 to $18 per square foot – it provides reliable water flow and durability [13].
Install Lighting and Safety Features
Having the right lighting can make a huge difference in extending your outdoor workout sessions into the early mornings or evenings. Proper illumination helps eliminate shadows and reduces the risk of tripping. For recreational gym spaces, aim for 30 to 40 foot-candles of brightness at about 2.5 feet above the ground. If you’re focusing on heavy lifting, 40 foot-candles is ideal [15].
Add Lighting for Visibility
To ensure even lighting, distribute it from at least four points across a 200‑ft² area to avoid dark spots [15]. Place lights directly above key workout zones – like squat racks or benches – so that shadows don’t interfere with your equipment [15]. For a bright and natural look, go with LED fixtures rated between 5000K and 6500K [15]. Also, check that the fixtures have UL 1598 or ETL certifications to meet North American safety standards.
Light-colored or white surfaces nearby can reflect 20% to 30% of the light back into the space, boosting overall brightness. If your ceiling is higher than 9 feet, increase the lumens by 10% to 15% per additional foot to maintain consistent lighting [15]. For convenience, consider adding motion sensors so the lights turn on automatically when you enter the area.
Once your lighting is set up, it’s just as important to incorporate safety features to create a secure workout environment.
Include Safety Elements
Good lighting paired with thoughtful safety measures can significantly reduce risks. Start by adding secure railings to any stairs leading to your exercise area, and ensure stair treads are in good condition and free of clutter [14]. Anchor your equipment firmly to prevent tipping [16][17].
For outdoor spaces, mark hazards like exposed roots or steep slopes with warning signs or barriers. Make sure the workout area is level and free of holes, ruts, or other tripping hazards [14]. Regular inspections are key – clear away debris such as bee nests, broken glass, or trash to keep the area safe.
Each piece of equipment should feature durable and legible signage that includes exercise instructions, age restrictions (typically for users aged 13 and older), and the manufacturer’s contact details. When buying equipment, ask for third-party test reports to ensure compliance with ASTM F3101 standards [17].
Set Your Budget and Compare Materials
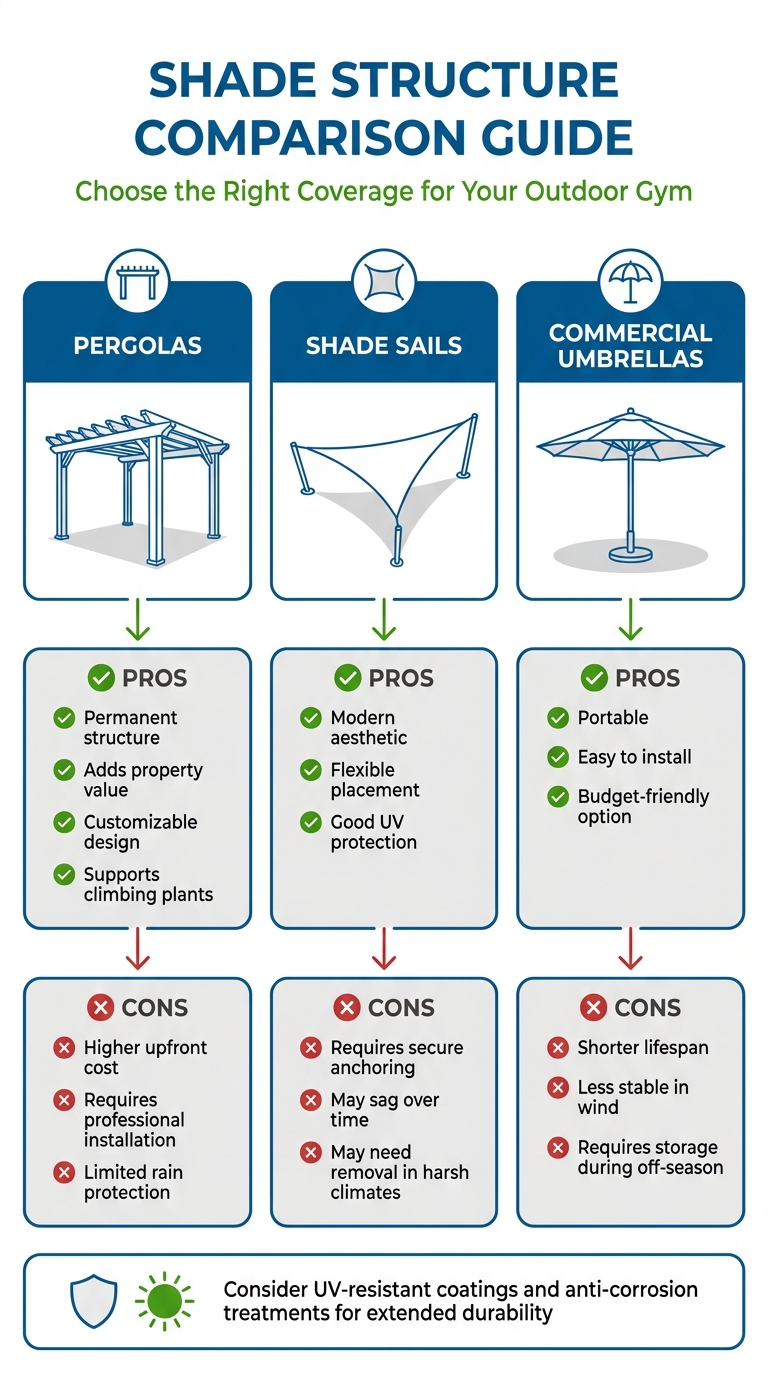
Shade Structure Comparison for Outdoor Gyms: Costs, Pros and Cons
Once you’ve mapped out your design and safety plans, it’s time to focus on your budget. A well-defined budget is essential to keep your project on track. As Wabash Valley highlights:
"A budget is one of the most important aspects of the project. It will determine the size and amount of equipment you can fit into an outdoor gym" [2].
Your budget should include all major expenses like site preparation (leveling, fill dirt, and drainage), shade structures, flooring, equipment, and safety additions such as fencing and lighting.
For reference, a smaller setup with 4–6 stations (200–300 sq. ft.) typically takes 3–5 days to install [3]. If you’re planning a larger gym with 8–12 or more stations, expect to allocate 500–1,000+ sq. ft. and 7–10 days for installation [3]. Using heavy-duty galvanized steel with UV-resistant coatings ensures the equipment can withstand harsh weather.
Don’t forget to budget for extras like weather-resistant deck boxes, benches, trash receptacles, and drainage systems. Deck boxes with a capacity of 90 to 120 gallons are ideal for keeping smaller items safe from the elements. Proper drainage systems are also crucial to prevent water pooling. Once you’ve accounted for these essentials, you can move on to selecting the right shade structures to balance cost and quality.
Compare Shade Structure Costs and Features
The shade structure you choose should match your budget, available space, and how you plan to use the gym. Each type has its own strengths and weaknesses when it comes to durability, installation, and maintenance.
| Shade Structure | Pros | Cons |
|---|---|---|
| Pergolas | Permanent; adds property value; customizable design; supports climbing plants | Higher upfront cost; requires professional installation; limited rain protection |
| Shade Sails | Modern aesthetic; flexible placement; offers good UV protection | Requires secure anchoring; may sag; may need removal in harsh climates |
| Commercial Umbrellas | Portable; easy to install; budget-friendly option | Shorter lifespan; less stable in wind; requires storage during off-season |
When comparing options, look for features like UV-resistant coatings and anti-corrosion treatments to extend the life of your structure. For permanent installations, use concrete anchoring to ensure stability. Also, make sure the site is sloped properly to direct water away from the structure, avoiding drainage issues down the line.
Complete and Install Your Design
Work with Professional Installation Services
Once you’ve finalized your budget and chosen materials, it’s time to bring in the pros to handle the technical aspects. As highlighted during your site assessment, ensuring proper footing depth and slope is critical for both safety and durability. A slope of 1%–2% is ideal for water runoff, and in frost-prone areas like Burtonsville, Maryland, footings often need to be at least 30 inches deep to meet inspection requirements [4].
If your design includes features like attached roof structures, you’ll need to navigate building permits, zoning reviews for setbacks, and electrical inspections [4]. In central Maryland, companies like Pro Landscapes MD can handle these complexities, ensuring compliance with local regulations. Their services cover everything from paver patios and retaining walls to French drains and land leveling. They also coordinate utility planning, such as installing outdoor circuits with GFCI/AFCI protection for lighting and heaters, and properly sizing gas lines [4].
Before finalizing the installation, temporarily mark your layout and observe how shadows and wind patterns affect the area over a week. This step can help identify potential issues [4]. When anchoring structures and equipment, use stainless steel fasteners and concrete mix to ensure everything stays secure [1].
Once the professionals have completed the installation, it’s time to test how well your space works under real-world conditions.
Test and Adjust Your Setup
After the installation is complete, spend time evaluating the space’s comfort and functionality at different times of the day. Pay attention to air circulation and ensure shade sails are properly tensioned to avoid flapping in the wind. As Hometown Landscape points out:
"Outdoor living ideas that read well on a mood board often fail in the breeze" [4].
Check that roof runoff is effectively directed away from landscaping and equipment to prevent erosion [4]. If you’ve installed motorized louvered roofs, confirm they seal tightly and redirect rainwater into their built-in gutters. For lighting, aim for warm tones (2,700–3,000 Kelvin) to create a relaxing atmosphere without excessive glare. Ceiling fans should run at low speeds to circulate air safely [4]. Finally, verify that all equipment meets safety standards like EN 16630:2015 to reduce the risk of injuries [3].
Once you’re satisfied with the functionality, focus on keeping your setup in top shape through regular maintenance.
Plan Regular Maintenance
Keep a detailed log of repairs, service dates, and equipment performance – this can also help maintain warranty coverage [1]. Clean gutters at least twice a year and rinse louver pivot points to prevent debris buildup. In spring, wash pollen off screens and fabrics using mild soap. Regularly inspect equipment posts for any signs of flex under heavy use and check that anchors remain stable. With consistent upkeep, your shaded outdoor workout space will stay safe, functional, and ready to use all year long.
Conclusion
This checklist walks you through the essential steps to create an outdoor workout space that’s shaded and climate-controlled.
Start by assessing your site. For basic setups, you’ll need around 200–300 sq. ft., while more advanced layouts may require 500–1,000+ sq. ft. [3]. Plan your space around the activities you prioritize, incorporate shade solutions that balance UV protection with airflow, and ensure proper drainage with a 1%–2% site slope to avoid water pooling [2][4].
Safety and durability are key. Choose weather-resistant equipment with UV coatings, install non-slip flooring with effective drainage, and securely anchor components to meet EN 16630:2015 standards [3]. For Maryland-based projects, remember that local codes require footings to reach 30 inches and may involve permit reviews for attached structures [4].
Consider working with professionals like Pro Landscapes MD. They can help with local code compliance, utility planning, drainage installation, and hardscaping to keep your space functional and secure.
Finally, don’t overlook regular maintenance. Clear out gutters, inspect equipment anchors, and keep a log of service dates [1]. These steps will help ensure your outdoor workout area stays comfortable, safe, and built to last.
FAQs
What is the best shade option for wind and storms?
Steel-reinforced outdoor shades or structures crafted from powder-coated steel or rust-resistant aluminum are excellent choices for handling wind and storms. These materials are built to endure high tension and strong wind loads, providing reliable, long-term performance even in tough weather conditions.
How do I plan electrical for fans, lights, and heaters?
To set up electrical connections for fans, lights, and heaters in your shaded outdoor workout area, here’s what you need to do:
- Position outlets close to your equipment and shaded zones for convenience.
- Install GFCI outlets in areas prone to moisture to enhance safety.
- Allocate dedicated circuits for high-power appliances like heaters to prevent overloading.
- Hire a licensed electrician to ensure everything meets code requirements and is installed correctly.
This approach helps create a safe and efficient setup for your space.
What’s the best way to fix drainage before flooring?
To prepare for outdoor flooring installation, addressing drainage issues is crucial. Start by ensuring the area is graded correctly to direct water away, preventing unwanted pooling. Opt for shock-absorbing materials like rubber or loose-fill surfaces, which can help manage runoff effectively. For additional water management, consider solutions like French drains or land grading techniques. These steps not only protect the flooring from water damage but also reduce safety risks caused by water accumulation.
Chat with Us