









- bhavya gada
- No Comments
If I rush spring cleanup in a Maryland pollinator bed, I can compact wet clay, bury plant crowns, and disturb insects still hiding in stems and leaf litter. The better plan is simple: I inspect first, test soil before adding anything, topdress with only 1/2 to 1 inch of compost, keep mulch at 2 to 3 inches, water by soil feel instead of a fixed schedule, and fix spacing before summer humidity turns crowded plants into a disease problem.
Here’s the whole article in plain English:
- I wait until soil is workable, not sticky or smeared
- I check for compaction, heaved roots, erosion, and spots that stay wet 24–48 hours after rain
- I test soil in late winter or early spring, then add amendments only if the lab says to
- I use finished compost and keep it off stems and crowns
- I refresh mulch only where needed and leave some bare ground for ground-nesting bees
- I water new plants deeply when the top few inches are dry, but I avoid overwatering heavy clay
- I flag crowded clumps, thin gaps, and airflow issues before growth fills in
- I aim for bloom coverage from early spring to late fall with at least three species in bloom across the season
A few numbers matter here: Maryland soil tests often cost about $9 to $20 per sample, lime should not exceed 50 lbs. per 1,000 sq. ft. in one application, and many container-grown perennials start at 12–18 inches on center.
If I follow that order, I solve small spring issues before they turn into summer drainage, weed, or mildew problems.
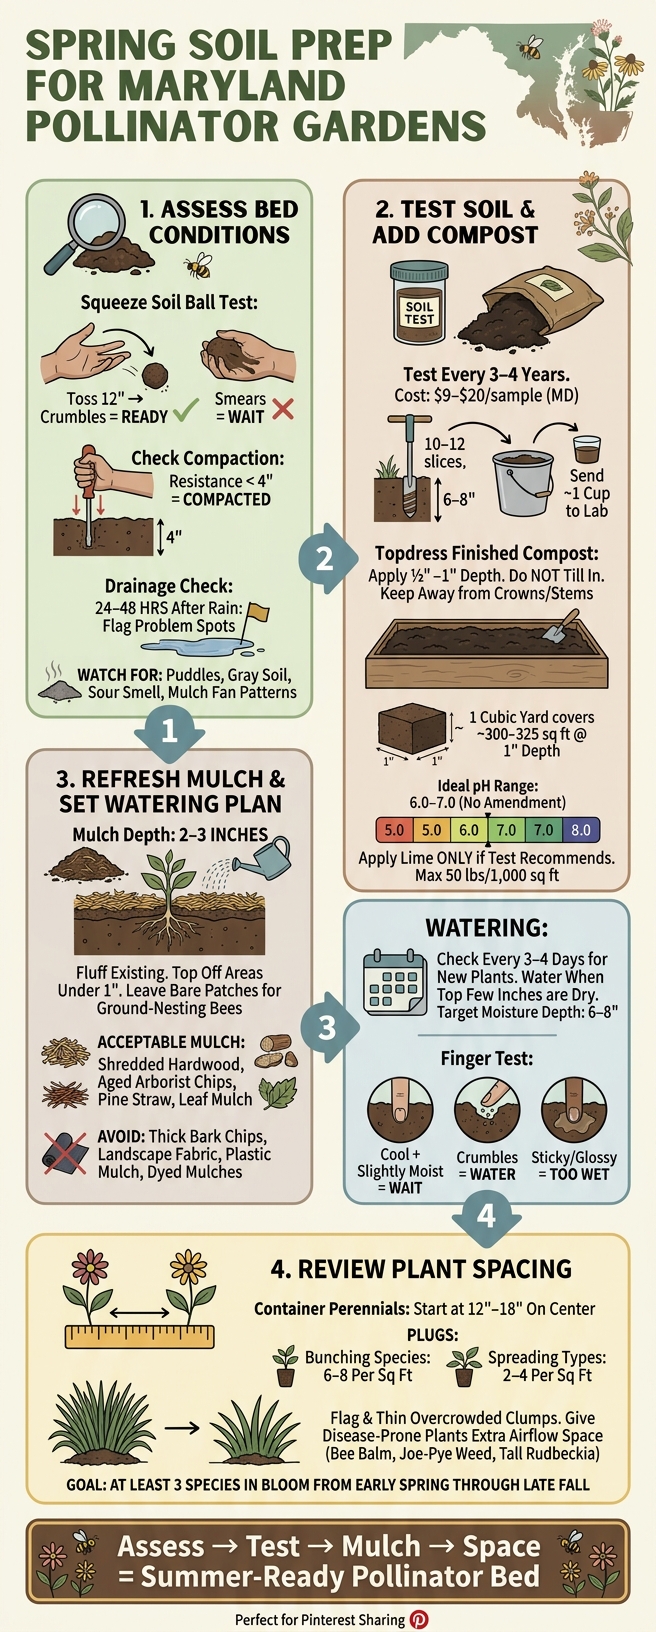
Spring Soil Prep Checklist for Maryland Pollinator Gardens
Preparing Soil for Successful Native Plants
sbb-itb-843f8be
Step 1: Assess Bed Conditions Before Disturbing the Soil
Before you add compost or start moving plants around, take a close look at the bed. That first check can show winter damage fast, and it helps you avoid one of the easiest spring mistakes: working wet soil. It also gives you a better sense of where soil test results, compost, and drainage work will matter most.
Check Soil Moisture, Compaction, and Winter Damage
Start with the most basic question: is the soil ready to be worked at all? In central Maryland, clay-heavy beds compact fast when they’re wet. Once that happens, you’re making life harder for roots before the season even gets going.
A simple field test can tell you a lot. Grab a handful of soil, squeeze it into a ball, and gently toss it about 12 inches into the air. If it falls apart when it lands, you’re good to go. If it stays in a slick, smeared clump, give the bed more time.[5][6]
Next, check the bed edges first. Those spots often show compaction early because they get stepped on the most. Look for a hard, crusty surface that sheds water instead of soaking it in. Then try a screwdriver or soil probe in moist soil. It should slide in without much trouble. If it hits strong resistance before about 4 inches, the soil is compacted and needs attention before you pile anything on top.[1][4]
While you’re there, scan for winter damage. Freeze-thaw cycles can push roots or crowns upward, so look for any that are exposed. Also check the base of slopes for erosion channels where meltwater may have cut through the bed over winter.
If you need to step into the bed during this check, lay down a plank or use stepping stones. It’s a small move, but it helps protect soil structure.
Mark Drainage Problem Spots After Spring Rain
Drainage problems show up best after rain, not when everything looks fine on a dry afternoon. Come back to the bed 24–48 hours after a good spring rain and see what the water is telling you.[3][2]
Watch for puddles that are still hanging around, soil that still smears underfoot, or patches with gray soil and a sour smell. Those are classic signs of drainage trouble, and they usually don’t fix themselves.
Pay extra attention to spots near:
- Roof downspouts
- Patio edges
- Sloped lawn areas that push runoff into the bed
These areas often give themselves away. You may see mulch washed into fan shapes, scoured channels, or water that pools in the same place after every storm. Mark each trouble spot with a small flag or labeled stake. That way, when you move into later prep steps, you won’t be guessing where the trouble started.
If the same areas stay wet across more than one storm, treat them as drainage problems. Mark those wet spots for later drainage repair or grading.
Leave the flags in place for the soil test and compost step.
Step 2: Test Soil and Add Compost Based on Results
Once the soil passes the workability check, test it before you add anything. That gives you a starting point for pH and nutrient levels. The aim here is simple: build healthier soil with as little disruption as possible for pollinator plants.
Take Soil Samples in Late Winter or Early Spring
Late winter through early spring is the right window to sample Maryland pollinator beds. That timing lets you make changes before spring planting begins, and it helps avoid readings thrown off by drought or recent fertilizer use.[8][9][19][20]
For established in-ground beds, testing every 3 to 4 years is usually enough unless changes in plant health or drainage point to a problem.[12][17]
Treat each bed area as its own sample. Use a clean trowel or spade and take 10 to 12 thin slices from around the bed, going 6 to 8 inches deep. Mix those in a clean bucket, remove debris, and send about 1 cup to the lab in the container it asks for.[9][10]
A basic soil test usually includes:
- pH
- phosphorus
- potassium
- calcium
- magnesium
In Maryland, that kind of test usually costs $9 to $20 per sample.[13][25] Write down the date, the bed location, and what you’re growing there so you can compare results later.
Topdress with ½ to 1 Inch of Finished Compost
After the soil has thawed and is no longer soggy, spread ½ to 1 inch of finished compost over the bed. If you go with a 1-inch layer, 1 cubic yard will cover about 300 to 325 square feet.[7][11][14][26][27][29]
Use compost that is dark, crumbly, and odor-free. If it isn’t fully finished, it can tie up nitrogen and bring in weed seeds.[7][11][14]
Spread the compost evenly, keep it away from crowns and stems, and don’t till it in. Topdressing helps protect soil structure and avoids disturbing helpful soil life and overwintering insects.[11][16][7][18][14][28][31][30]
After that, let the soil test tell you whether pH needs any correction.
Apply Lime or Other Amendments Only If the Test Recommends Them
Skip fertilizer unless the soil test says you need it. Extra nitrogen can lead to weak growth and more weeds.[18][20]
If your soil test shows a pH between 6.0 and 7.0, you don’t need a pH amendment. Stick with compost and mulch.[24][22][23] If the lab calls for lime or sulfur, use the rate it recommends.
For lime, do not apply more than 50 lbs of limestone per 1,000 square feet at one time. If the recommendation is higher, split it into two applications about six months apart.[21][23] And don’t add lime without a test. It can push pH too high and put stress on plants.[15][18]
Once pH and nutrients are in line, you’re ready for mulch and early watering.
Step 3: Refresh Mulch and Set an Early-Season Watering Plan
After compost, move to surface care: mulch, moisture, and bed spacing.
Refresh Mulch Without Smothering Pollinators or Plants
Before you add new mulch, check what’s already there. Push a ruler or trowel into the mulch in a few spots around the bed. If it’s already 2–3 inches deep, don’t pile on more. Just fluff it up. If some areas are under 1 inch, top those off. If others are over 3 inches, rake some back, especially around plant crowns.[34][43][45]
If the mulch feels packed down, loosen it first with a hand fork. That helps air move through and lets water reach the soil instead of sitting on top.[32]
Leave a few small bare patches for ground-nesting bees. Bed edges work well. So do spaces between larger clumps or sunny spots that won’t be disturbed. Try to keep those areas free from frequent digging and foot traffic.[35][38][44]
Here’s a simple guide:
- Depth: 2–3 inches for most beds; keep mulch away from crowns and stems
- Acceptable types: Shredded hardwood, aged arborist chips, pine straw, leaf mulch, or a thin compost topdressing[33][34][35][36][39]
- Avoid: Thick bark chips, landscape fabric, plastic mulch, and colored or dyed mulches – these can block ground-nesting bees and limit soil gas exchange[36][38]
Plan Spring Watering Around Rainfall and Soil Drainage
Newly planted perennials and shrubs need steady moisture while roots settle in. During dry spring stretches, check the soil about every 3–4 days. Water deeply when the top few inches are dry, making sure moisture reaches 6–8 inches below the surface.[40][41][42] Light, frequent watering may seem helpful, but it keeps roots near the top instead of encouraging them to grow down.
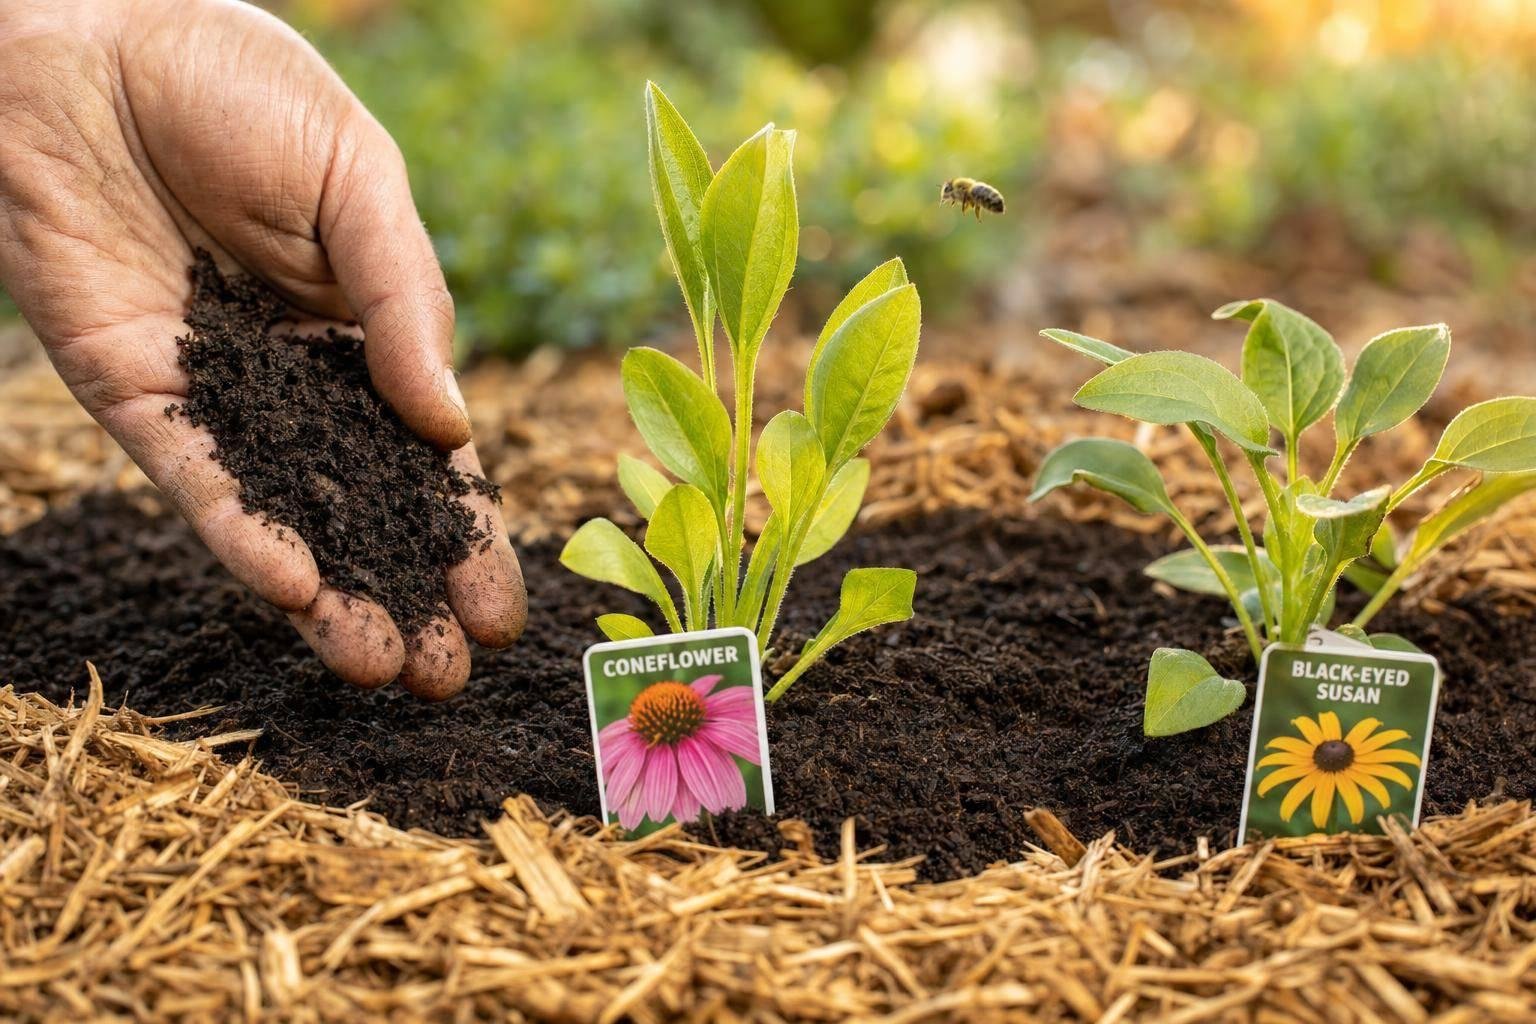
Established natives usually need less water. Plants like black-eyed Susan and purple coneflower, once settled into Maryland clay loam, often don’t need extra watering unless the dry spell drags on. In heavy clay, too much spring watering is a common mistake.[37]
A quick hand check can tell you a lot. Push a finger or small trowel 2–3 inches into the soil in a few places. If it feels cool and slightly moist and holds in a loose ball, wait. If it crumbles apart, water deeply. If it feels sticky or glossy, it’s too wet, and more water can stress roots by cutting off oxygen. Always check below the mulch layer. The top can look dry while the soil underneath still has plenty of moisture.[34][37]
Use the drainage flags from Step 1 to keep an eye on soggy spots first. If the same areas stay wet, leave them flagged so you can deal with drainage later.
Once moisture is dialed in, check spacing and airflow before spring growth starts filling everything out.
Step 4: Review Plant Spacing and Finish the Bed Prep Plan
After you handle soil and drainage, check the plant layout before spring growth covers up spacing trouble. This last pass can be the difference between a bed that looks nice in spring and one that struggles by summer.
Flag Overcrowded Clumps, Thin Gaps, and Airflow Issues
Start with last year’s photos or notes, then walk the bed and look for clumps that spilled into paths, leaned toward the sun, or cast too much shade on shorter plants. Then look for the other problem: bare spots that stayed open deep into the season and ended up growing crabgrass or other weeds instead of flowers. Those are your thin gaps.
Dense, tall species like bee balm, Joe-pye weed, and tall rudbeckia often cause trouble in Maryland beds. When they grow too close together, air can’t move well through the stems. In Maryland’s humid summers, that can set the stage for powdery mildew and leaf spot. Give disease-prone perennials a bit more space than the catalog minimum so leaves dry faster after rain.[47][48][50]
The aim is simple: create a canopy that shades most of the soil by mid-season to help hold moisture and slow weeds, while still leaving enough room between plant masses for air to move through.[46][49] For container-grown perennials, start at 12–18 inches on center; mature plants should just touch, not crowd.[49] For plugs, use 6–8 per square foot for bunching species and 2–4 for spreading types.[49]
Divide or transplant on cool, overcast days when the soil is moist. Replant at the same depth and water deeply.
Once spacing is set, use open gaps to improve bloom coverage across the season. As you lock in placement, keep at least three species blooming from early spring through late fall to extend nectar availability for pollinators.[51][52] If your notes show a color gap after spring bulbs fade, or a lull in late summer, that’s a good place to add mid-season bloomers like coreopsis, salvias, or native penstemon.
Conclusion: A Short Spring Checklist That Prevents Bigger Summer Problems
The steps in this checklist build on each other: assess the bed first, test soil before adding anything, topdress lightly with compost, refresh mulch without burying crowns, flag drainage problems after rain, water by soil feel instead of by schedule, and adjust spacing before growth hides the issues. Done in that order, these tasks help head off a much longer list of summer problems.
If drainage, grading, or bed restoration is beyond a shovel-level fix, Pro Landscapes MD can address the underlying issues so spring prep lasts.
FAQs
When is Maryland soil dry enough to work in spring?
Work Maryland soil in spring when it feels crumbly, not wet or soggy. A simple rule: wait 3 to 5 days after a good rain before you dig or prep beds.
If you jump in too early, you can compact the soil and make it harder to work with. Give it a little time, and the texture stays looser and much easier to handle.
Do I need a soil test before adding compost or lime?
Yes. A soil test should come first before you add lime because it shows your soil’s pH, nutrient levels, and structure.
Only use lime if the test shows the pH is below 5.5. Compost can still be part of your spring bed prep, but the test helps you pick the right amendments for your pollinator garden.
How do I fix soggy spots in a pollinator bed?
Watch for spots where water pools or drains slowly after a heavy rain. That simple check tells you a lot about what’s happening in the soil.
For small trouble spots, add compost to help the soil take in water better and improve its structure. If packed-down soil is the main issue, core aeration can help, especially when the soil is moist.
Bigger drainage problems may call for French drains, swales, dry riverbeds, or regrading. And if an area stays wet for more than 24 hours, it may be smarter to work with the site instead of fighting it. In that case, plant moisture-loving natives like swamp milkweed, cardinal flower, or blue flag iris.
Chat with Us