









- bhavya gada
- No Comments
Preparing soil on slopes is essential for managing erosion, supporting vegetation, and ensuring stability. Here’s what you need to know:
- Why It Matters: Proper soil preparation encourages root growth, reduces water runoff, and supports landscape projects like retaining walls.
- Site Assessment: Evaluate slope steepness, soil type, and signs of erosion before starting. Steeper slopes (over 20%) often need structural solutions.
- Soil Testing: Test for pH (ideal: 6.0–7.0), organic matter (target: above 2%), and drainage (1–4 inches per hour is optimal).
- Preparation Steps:
- Grade and shape the slope, adding terraces if needed.
- Manage water flow with swales, rain gardens, or drainage systems.
- Roughen the soil surface to reduce erosion.
- Amendments: Add organic matter, adjust pH with lime or sulfur, and use mulch for protection.
- Erosion Control: Use erosion blankets, straw mulch, or wattles to stabilize soil while plants establish.
- Plant Selection: Choose deep-rooted grasses, shrubs, and ground covers for stability. Native plants like switchgrass and creeping juniper work well.
Addressing these steps ensures long-term slope stability and reduces erosion risks. For steep or complex slopes, professional help may be necessary.
Stop Hillside Erosion WITHOUT a Retaining Wall (Step-by-Step)
sbb-itb-843f8be
Assessing Site and Soil Conditions
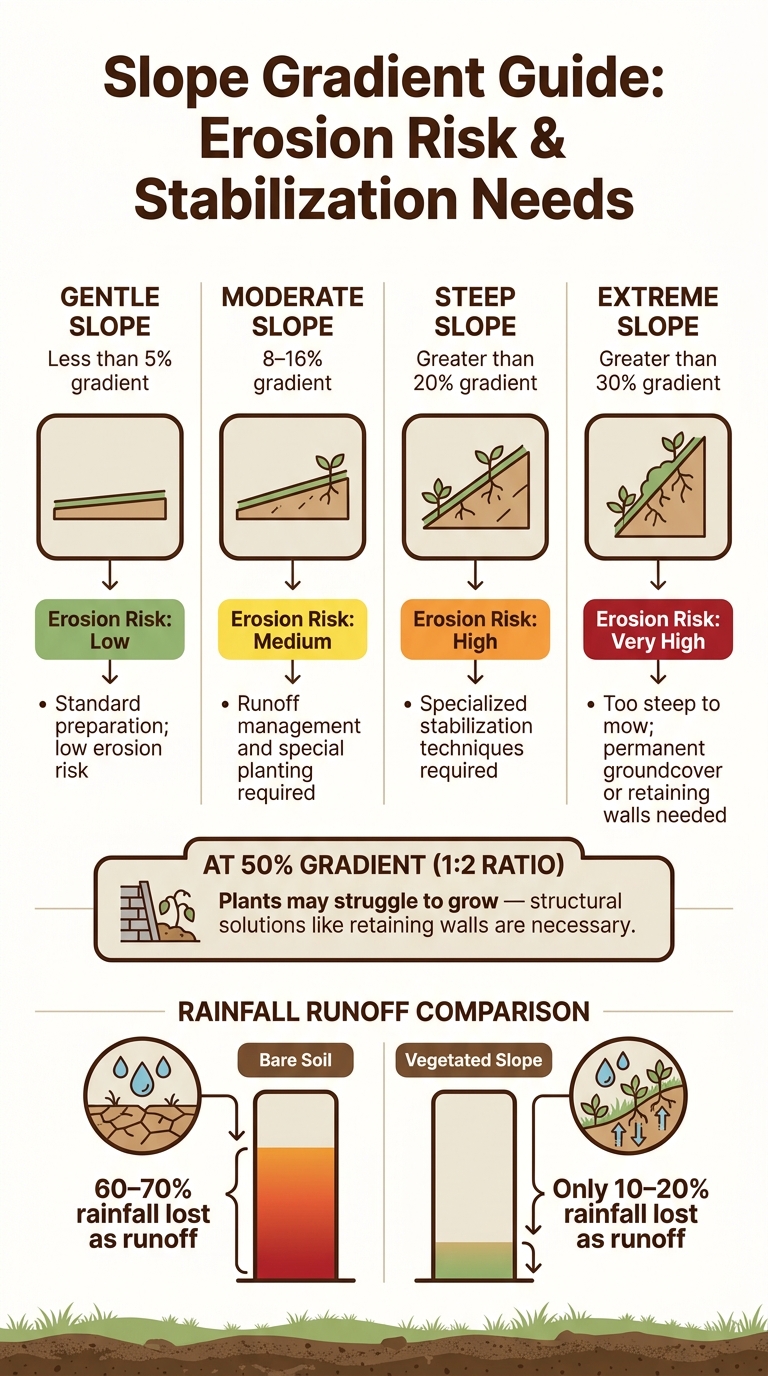
Slope Gradient Guide: Erosion Risk & Stabilization Needs
Before diving into slope work, it’s crucial to take a step back and evaluate the conditions you’re dealing with. A slope that looks stable at first glance might behave unpredictably depending on its steepness, soil type, and water flow. Spending time on this assessment upfront can save you from expensive errors down the road.
Understanding Slope Types
Slope steepness is expressed as a percentage, calculated by dividing the vertical rise by the horizontal run. For example, a 10% slope means the elevation increases 1 foot for every 10 feet of horizontal distance. This measurement plays a bigger role than you might think.
"The potential for erosion depends on the degree of slope and factors like soil type, vegetation cover, and the amount of surface water coming from the top, among other things." – Aaron Steil, Iowa State University Extension [3]
Here’s a breakdown of slope categories and what they require:
| Slope Category | Gradient | Preparation Needs |
|---|---|---|
| Gentle | Less than 5% | Standard preparation; low erosion risk |
| Moderate | 8–16% | Needs runoff management and special planting |
| Steep | Greater than 20% | Requires specialized stabilization techniques |
| Extreme | Greater than 30% | Too steep to mow; needs permanent groundcover |
Once you hit a 50% gradient (1:2 ratio), you’ve reached the point where plants may struggle to grow [3]. At this stage, structural solutions, like retaining walls, might be necessary to stabilize the slope effectively. This assessment will shape the stabilization strategies you’ll need to implement.
Identifying Existing Soil Conditions
Take a walk along the slope and look for telltale signs of erosion. Features like small surface channels (rills), deeper grooves (gullies), or exposed tree roots indicate that water is already moving quickly enough to carry soil away [8]. These visual clues can help you decide whether detailed soil testing is needed.
Soil type plays a major role in how a slope performs. A quick feel test can give you some insight – rub moist soil between your fingers to identify its texture. Clay feels sticky, silt feels smooth, and sand feels gritty [4]. Clay-heavy soils, which are common in parts of Maryland, drain poorly, leading to waterlogged areas at the slope’s base while the upper sections stay dry due to rapid runoff. On the other hand, loam – a mix of sand, silt, and clay – offers better drainage and nutrient retention, making it ideal for slope stabilization.
Don’t overlook compaction either. Compacted soil restricts root growth and prevents water from soaking in, increasing runoff. If you notice water pooling on the surface instead of being absorbed, compaction is likely a problem [8].
Soil Testing Basics
While visual assessments are helpful, laboratory testing provides a deeper understanding of your soil. These tests can reveal important details like pH, organic matter levels, and nutrient availability, including nitrogen (N), phosphorus (P), and potassium (K), as well as calcium, magnesium, and Cation Exchange Capacity (CEC) [6].
Soil pH is especially important because extreme acidity or alkalinity can trap nutrients, making them inaccessible to plants even if they’re present [7]. Most plants thrive in a pH range of 6.0 to 7.0 [6]. For organic matter, aim for levels above 2%, which usually indicate healthy, functional soil [6].
For accurate results, consider using your county’s Cooperative Extension office. They can provide tailored recommendations for lime and fertilizer based on your soil’s specific needs [5]. If you’re worried about drainage, a percolation test can help. Here’s how to do it:
- Dig a hole 12 inches deep.
- Fill it with water and let it drain.
- Refill it the next day and measure how quickly the water drains.
An ideal drainage rate is 1–4 inches per hour. Anything slower than 1 inch per hour points to compaction or a high clay content [6].
Preparing the Slope for Stabilization
Once you’ve assessed your slope’s soil conditions and steepness, it’s time to physically prepare the site. This involves shaping the land, managing water, and readying the soil so that whatever you plant or install has the best chance to thrive.
Grading and Shaping the Slope
Start by stripping and stockpiling the topsoil. Once grading is complete, redistribute this topsoil in a 4–6 inch layer to create a suitable rooting medium.
To manage water flow effectively, consider breaking long slopes into terraced sections. Here’s a quick guide to terrace types:
| Terrace Type | How It Works | Best For |
|---|---|---|
| Contour | Aligns with the slope’s natural curves | Uneven or irregular slopes |
| Parallel | Features ridges and channels running parallel | Reducing interference with equipment |
| Parallel Tile Outlet (PTO) | Incorporates subsurface drains to control runoff | Settling sediment before water exits |
Terracing is most effective on slopes with less than an 8% grade and long, consistent runs. If your slope includes existing trees, terrace around them and support the grade changes with retaining walls. Avoid grading too close to trees, as severing roots can harm their health.
Once the slope is shaped, it’s crucial to address water management to protect your efforts.
Controlling Water Flow
Managing water flow is a priority before planting. If there’s uncontrolled runoff from above, install a diversion at the upper edge of the slope to intercept it before it reaches your prepared area.
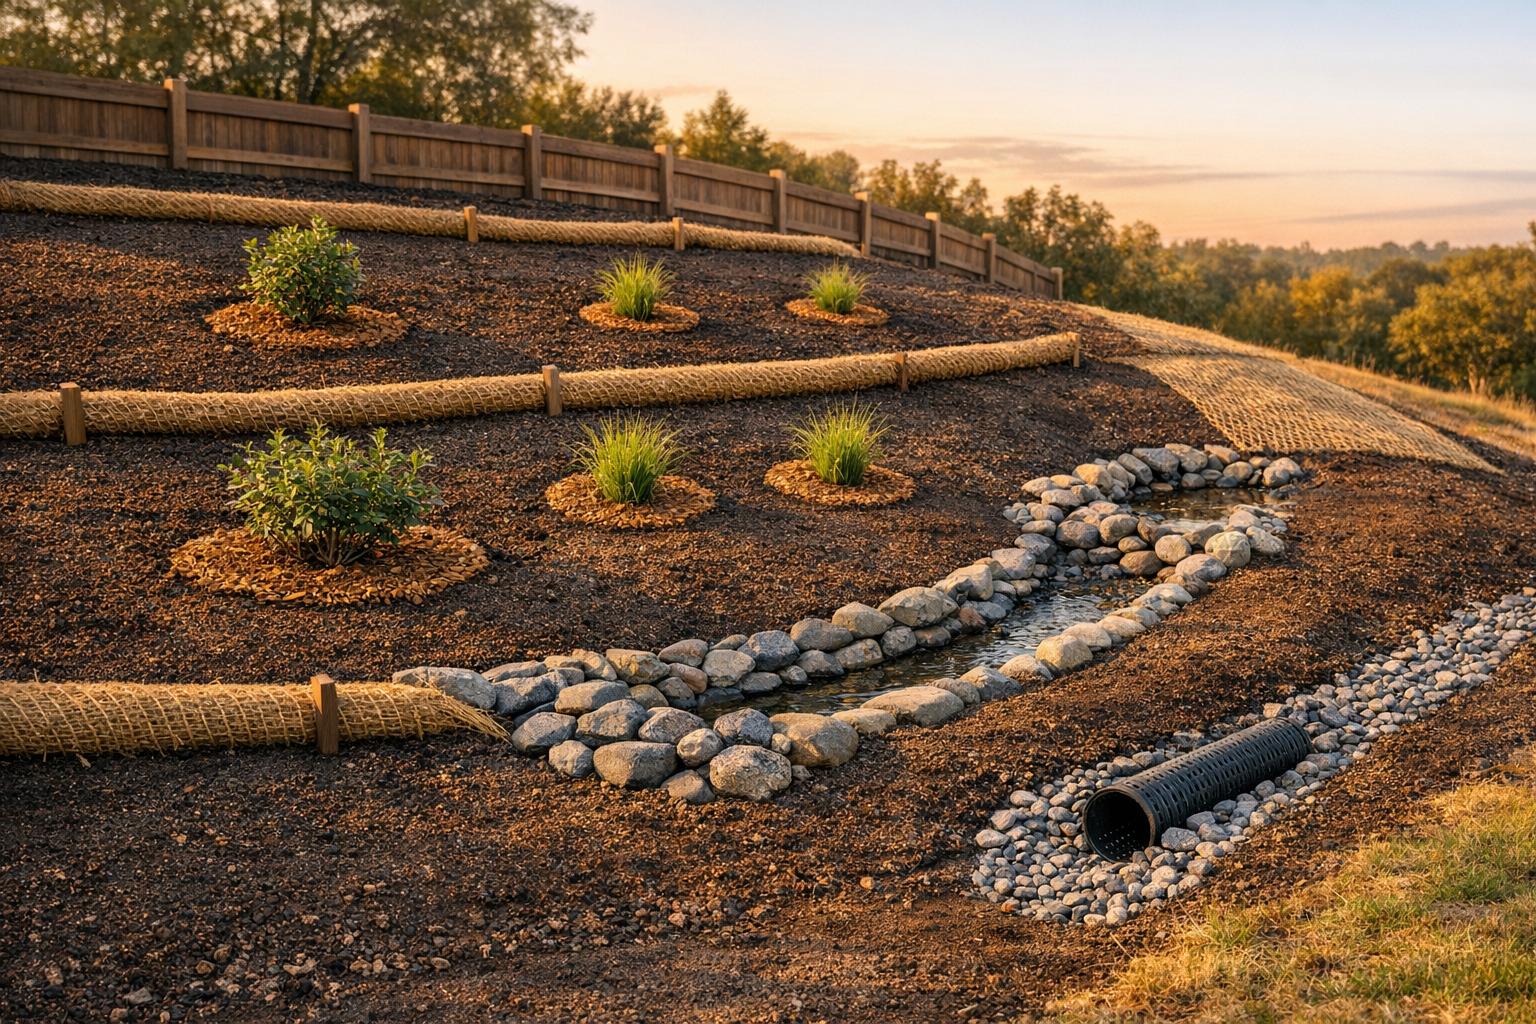
On the slope itself, features like swales or dry riverbeds can direct runoff into controlled pathways, preventing it from carving random channels. For slopes that drain toward flat areas, a rain garden at the base can capture and filter water, reducing pooling or downstream damage [1]. In cases of heavy water flow, subsurface drainage systems like box or pipe drains are essential. Installing these systems before terracing ensures they’re ready to handle runoff immediately [1].
Roughening the Soil Surface
A smooth, compacted surface is more prone to erosion, while a roughened one improves seed contact and moisture retention. Roughening the soil is a key step in securing seeds and reducing erosion risks.
For broadcast seeding, lightly roughen the soil and apply mulch to protect the seeds. If you’re planting woody stock on gentler slopes, drill 3-inch-wide, 4-inch-deep holes. Adding a slow-release fertilizer capsule to each hole reduces seed requirements and encourages growth. For contour wattles (bundles of plant material placed in shallow trenches), start at the toe of the slope and work upward. Compact the soil back into each trench, leaving about 80% of the wattle buried [2].
These preparations create the foundation for effective planting and erosion control, setting your slope up for long-term stability and success.
Amending Soil for Better Stability
Once your slope is graded and the surface is roughened, the next step is to improve the soil’s fertility and structure. This is crucial for supporting long-term stabilization. Bare or disturbed slopes often lack nutrients and strength, so amending the soil helps create a solid foundation for plant growth.
Adding Organic Matter
Organic amendments can make a big difference. They help sandy soils retain water and reduce compaction in clay-heavy soils, which encourages healthier root growth. If you stockpiled topsoil during grading, reapply it by spreading 4 to 6 inches across the slope. This restores the soil’s organic content and biological activity [8]. To further enhance stability, consider adding legumes to your seed mix – anywhere from 10% to 50%. Legumes naturally fix nitrogen in the soil, which can reduce the need for supplemental fertilizers over time [8].
Adjusting pH and Nutrient Levels
Most grasses and ornamentals grow best in soil with a pH between 5.8 and 6.5. Outside of this range, key nutrients like nitrogen, phosphorus, and potassium are less accessible to plants.
"Soil pH is among the most important environmental factors affecting plant growth because it directly influences nutrient availability." – Clemson University Home & Garden Information Center [9]
To raise soil pH, apply agricultural limestone. Pulverized lime works faster, but granular or pelletized lime is easier to spread evenly across a slope. To lower pH, elemental sulfur offers a gradual change over 3–6 months, while aluminum sulfate works faster but needs careful application to avoid damaging roots [9][10]. For best results, lime or sulfur should be incorporated 6 to 8 inches deep before planting. Once vegetation is established, top-dressing is far less effective [10].
If you don’t have a soil test, a general rule of thumb is to apply about 10 pounds of balanced fertilizer (like 10-10-10 or 13-13-13) per 1,000 square feet. For established slopes, splitting the fertilizer into smaller doses over several years can protect plant roots and minimize runoff during rain [8][10]. Once the soil is amended, improve its protection further with mulch.
Using Mulch to Protect Soil
Mulch acts as a shield for bare soil, reducing the impact of raindrops that can hit at speeds up to 20 mph and cause splash erosion [8]. Spread straw mulch at a rate of two square bales per 1,000 square feet over seeded slopes. For steep or hard-to-reach areas, hydroseeding can be a great option. This method combines seed, mulch, water, and fertilizer in one application [2]. After mulching, water the area until the grass grows to about 2 inches. At this stage, the developing roots will start stabilizing the slope effectively.
Erosion Control Techniques for Slopes
Once you’ve stabilized the soil, the next crucial step is to protect it from erosion, especially during the early stages of plant growth. This is a critical period when the soil is most vulnerable, and taking immediate action can safeguard your efforts.
Temporary Surface Protection
After mulching and seeding a slope, the soil remains exposed until vegetation takes hold. This gap is when the risk of erosion is highest. Using erosion control blankets can be a game-changer. These blankets keep mulch and seed in place, minimize the impact of raindrops, and help the soil retain moisture.
If blankets aren’t a feasible option, anchored straw mulch is another reliable choice. Additionally, including a nurse crop in your seed mix can provide temporary protection. For instance, adding annual rye grain at about 10% or less of the mix ensures quick germination, stabilizing the surface while slower-growing perennial grasses establish themselves [8]. This two-step approach provides immediate coverage without interfering with long-term plant growth. But protecting the surface is only part of the equation – managing water flow is equally important.
Slowing and Redirecting Runoff
Bare soil can lose a staggering 60–70% of rainfall as runoff, compared to vegetated slopes, which retain 80–90% [8]. Until plants are fully established, physical barriers can help control the flow of water and reduce erosion.
Wattles, also known as fiber rolls, are an effective tool for slowing runoff. These straw-filled bundles are staked horizontally across the slope to interrupt water flow. When installing wattles, always start at the bottom of the slope and work upward to the top – never the other way around [2]. To ensure stability, bury about 80% of each wattle in a trench and compact the soil firmly around it [2]. This method reduces water velocity and sediment movement, protecting the slope while vegetation takes root.
Sequencing Planting and Erosion Controls
Timing is everything when it comes to erosion control. A common misstep is waiting too long to implement these measures, often after damage has already occurred. The best practice is to prepare the soil, seed it immediately, and secure the area with mulch or erosion blankets right away [2][8].
For live stakes and container plants, aim to plant during dormant seasons – fall or spring – when survival rates are higher, and root growth is more active [2]. If you’re introducing trees alongside ground cover, establish the grass layer first. Grass provides faster surface stabilization, reducing erosion risks during the early months, while trees offer deeper, long-term reinforcement as they mature [8]. Proper sequencing ensures that plants and erosion controls work together effectively, creating a stable and resilient slope.
Choosing Plants for Slope Stabilization
Securing a slope requires more than just soil preparation and erosion control measures. Selecting the right plants plays a key role in stabilizing the area and preventing further erosion.
Plants That Anchor Slopes and Reduce Erosion
The best plants for slopes are those with deep, spreading root systems that hold the soil together. In Maryland, native grasses like switchgrass (Panicum virgatum) and big bluestem (Andropogon gerardii) are excellent choices. These grasses develop extensive roots that anchor even steep or unstable terrain. For ground-level coverage, options like creeping juniper (Juniperus horizontalis) and wild ginger (Asarum canadense) spread laterally, forming a dense mat that protects topsoil from washing away. Shrubs such as Virginia sweetspire (Itea virginica) and inkberry (Ilex glabra) are also effective, as they tolerate varying moisture levels and establish fibrous roots that stabilize mid-level soil layers.
On the other hand, avoid using shallow-rooted ornamental plants on active slopes. While they might add visual appeal, they lack the structural support needed to secure the soil.
Planting Layouts for Better Coverage
A thoughtful planting layout can make a big difference in slope stability. Using a staggered, contour-based arrangement slows water flow and prevents erosion channels from forming. Instead of planting in straight rows, offset the plants to better distribute root coverage and reduce runoff impact.
Layered vegetation works best for slopes. Combine groundcovers for surface protection, shrubs for mid-level reinforcement, and trees for deep anchoring. This approach ensures that root systems overlap at various depths, creating a more stable slope overall. Pay special attention to the upper portion of the slope, as it’s most prone to runoff. Tighter plant spacing in this area helps prevent excessive erosion.
When to Call a Professional
Some slopes require more than just planting to achieve stability. If structural elements like retaining walls or complex drainage systems need to be integrated, professional assistance is essential. Slopes with steep grades, active erosion, or hardscaping features such as rain gardens or dry riverbeds demand a coordinated approach.
"Retaining walls offer essential structural support while enhancing design." – Pro Landscapes MD [1]
In these cases, the combination of proper grading, drainage, and plant selection is critical. A misstep in any of these areas can undermine the entire stabilization effort. Companies like Pro Landscapes MD specialize in slope stabilization across central Maryland, offering solutions that blend hardscaping, drainage systems, and targeted planting to tackle erosion comprehensively.
Conclusion
Addressing slope stabilization effectively starts long before planting begins. It involves assessing factors like gradient, soil type, water flow, and surface preparation. Research highlights that vegetated slopes significantly reduce runoff – down to 10–20%, compared to 60–70% on bare soil [8]. This reduction plays a critical role in preventing erosion and maintaining slope stability.
Unstable or neglected slopes can lead to property damage and financial loss. By combining proper soil preparation with the right mix of plants and hardscaping, you can protect your property while also increasing its overall value [1].
"Hardscaping adds both functionality and beauty to your outdoor space. It can prevent soil erosion, create usable living areas, and increase your property value." – Pro Landscapes MD [1]
In some cases, professional assistance becomes essential. Steeper slopes, active erosion, or projects requiring retaining walls and integrated drainage systems demand expert intervention. Pro Landscapes MD serves homeowners throughout central Maryland, including Howard County and Montgomery County, offering tailored solutions like grading, drainage management, and planting services to combat slope erosion effectively.
FAQs
How do I measure my slope grade at home?
To figure out your slope grade, take the elevation change (the rise), divide it by the horizontal distance (the run), and multiply the result by 100 to get a percentage. Here’s how you can do it:
Use a level to measure the elevation difference, then measure the horizontal distance. Plug those values into the formula.
For instance, if the elevation change (rise) is 2 feet and the horizontal distance (run) is 20 feet:
2 ÷ 20 = 0.1, then 0.1 × 100 = 10% slope grade.
What’s the fastest way to stop erosion before plants fill in?
Retaining walls are one of the fastest ways to manage erosion before plants have a chance to take root. These hardscape features offer immediate stability to soil on slopes or in disturbed areas. Built from materials like natural stone, brick, or concrete, they not only provide durability but can also be tailored to suit different landscapes. By installing retaining walls, you get a reliable, long-term solution to keep erosion in check while vegetation establishes itself.
When does a slope need a retaining wall or drainage system?
A slope may need a retaining wall or drainage system when there’s a chance of soil erosion or instability. Problems like these often arise due to factors such as gravity, water runoff, or soil that doesn’t provide enough support. Taking the right precautions can help avoid landslides and maintain the stability of the landscape.
Chat with Us