









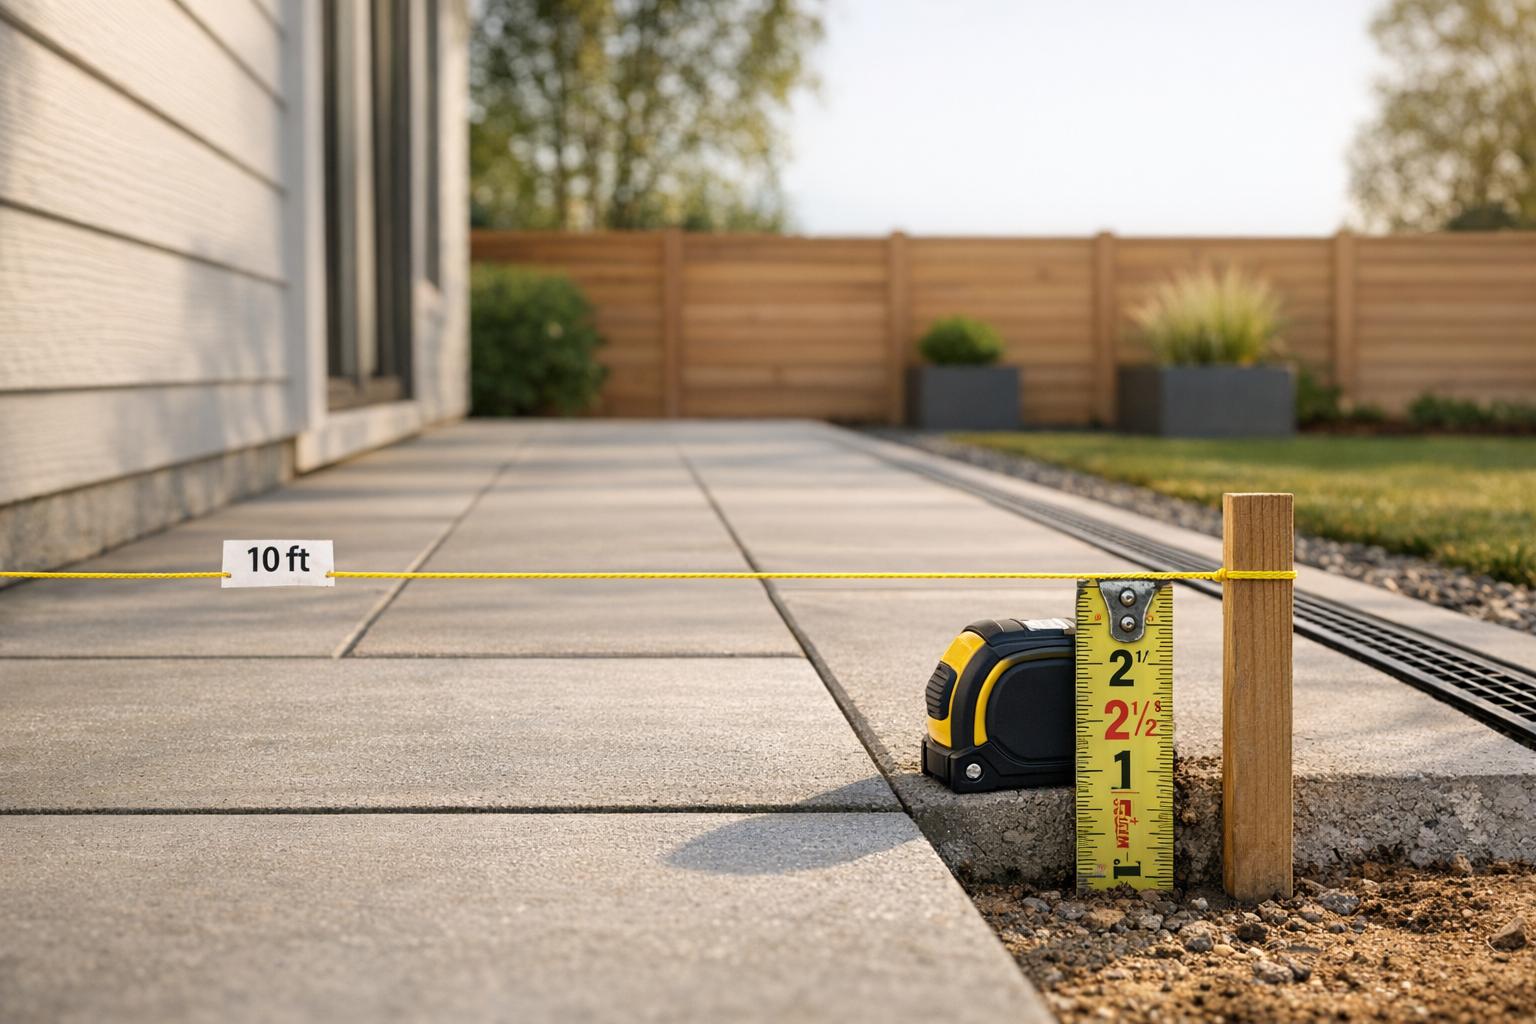
- bhavya gada
- No Comments
A patio needs a slight slope to ensure proper drainage and prevent water from pooling near your home. The standard recommendation is a 2% grade, which equals a 1/4 inch drop per foot of horizontal distance. For example, a patio 10 feet wide should slope downward by 2.5 inches from the edge closest to the house to the far edge. This prevents water damage, slippery surfaces, and foundation issues.
Key Points:
- Standard Slope: 2% (1/4 inch drop per foot).
- Minimum Slope Distance: Extend at least 10 feet away from the house.
- Material Impact: Concrete patios rely entirely on surface runoff, while paver patios can allow some water to seep through joints.
Why It Matters: Without proper slope, water can pool, damage materials, and create safety hazards. Too much slope, however, can make the patio uncomfortable to use. Always slope away from the house to avoid foundation damage.
If site conditions make achieving the ideal slope difficult, consider adding drainage systems like French drains or channel drains for extra water management.
Standard Patio Slope Guidelines
Accepted Slope Measurements
The standard slope for patios is a 2% grade, which translates to 1/4 inch of vertical drop per foot of horizontal distance. For example, a patio that spans 12 feet in width should have an outer edge that is 3 inches lower than the edge closest to the house.
This guideline is supported by the International Residential Code (IRC) – referenced in the 2009, 2012, and 2015 editions – and ENERGY STAR‘s Single-Family New Homes recommendations. Both specify a minimum slope of 0.25 inch per foot for all impervious surfaces [1]. To ensure proper drainage, this slope should extend at least 10 feet away from the foundation, resulting in a total vertical drop of about 2.5 inches over that distance.
| Measurement Type | Standard |
|---|---|
| Percentage grade | 2% |
| Drop per foot | 1/4 inch (0.25") |
| Total drop over 10 feet | 2.5 inches |
| Minimum slope distance | 10 feet from foundation |
These measurements are critical for ensuring effective water drainage and protecting your property.
Why Patios Should Slope Away from the House
Materials like concrete, stone, and pavers are nonporous, meaning water can’t seep through them. Without a proper slope directing water away, it will flow toward the foundation. This can lead to serious issues, including structural damage, moisture problems, mold growth, and even pest infestations. Fixing a patio with a "negative slope" after installation is both challenging and costly – it often involves adding footing drains, moisture barriers, or completely replacing the surface [1]. Starting with the correct slope is much simpler and avoids these headaches.
Local Codes and Regulations
In addition to general standards, local building codes may impose specific requirements. For instance, the Maryland Building Code 2021, Section 1804.4, mandates:
"Impervious surfaces within 10 feet of the building foundation shall be sloped not less than 2 percent away from the building." [3]
Maryland also requires a stricter 5% slope for non-impervious ground (like bare soil) near foundations [3]. Some local jurisdictions, such as Baltimore County or Montgomery County, may have additional rules, so it’s a good idea to check with your local building department before starting any work. Depending on factors like patio size or attachment to the house, you might also need a permit [4].
Adhering to these standards not only helps prevent water-related damage but also ensures your patio functions effectively for years to come.
sbb-itb-843f8be
How to Measure and Achieve the Right Slope
How to Measure Slope Accurately
To calculate slope, divide the vertical drop by the horizontal distance, typically measured in inches per foot. Start by placing a carpenter’s level on the highest point of the surface. Mark a spot 12 inches from one end of the level, then measure the vertical drop at that mark [7].
For longer distances, use a straight 2×4 as a guide. Lay the board across the surface, place the level on top of it, and measure. This method helps smooth out irregularities and gives a more precise reading. Once you’ve measured the vertical drop at various points using a tape measure, you’ll have the data needed to determine and adjust the slope accurately [7].
Tools and Methods for Creating Slope
After measuring, it’s time to translate those numbers into a proper base setup. Start by incorporating the desired slope into the base. Laser levels are particularly helpful here, projecting a consistent reference line across stakes at each corner. This makes it easier to mark the proper height at every point [5]. If you don’t have a laser level, string-line levels can work too, provided you set them up carefully.
Once the corners are marked, compact the gravel base in layers of 2 to 4 inches using a plate compactor. This step is crucial to prevent uneven settling over time [6]. For the sand bedding layer, use 3/4-inch or 1-inch conduit as screed guides. Slide a straight board along the conduits to ensure the layer matches your target grade [5].
Slope Formats and Conversions
Slope can be expressed in several ways, and the table below highlights the most common formats using a 10-foot patio as an example:
| Slope Format | Measurement | Total Drop Over 10 Feet |
|---|---|---|
| Minimum slope | 1/8" per foot | 1.25 inches |
| Standard slope | 1/4" per foot | 2.5 inches |
| Ratio format | 1" drop per 4–8 feet | 1.25 to 2.5 inches |
For residential patios, a slope of 1/4 inch per foot is typically recommended. To calculate the total drop for any patio, multiply the patio’s length (in feet) by 0.25. For instance, a 16-foot patio would require a total drop of 4 inches from the high edge near the house to the lower outer edge [5].
Choosing Paver Patio Slope for Drainage
Slope Requirements for Paver and Concrete Patios
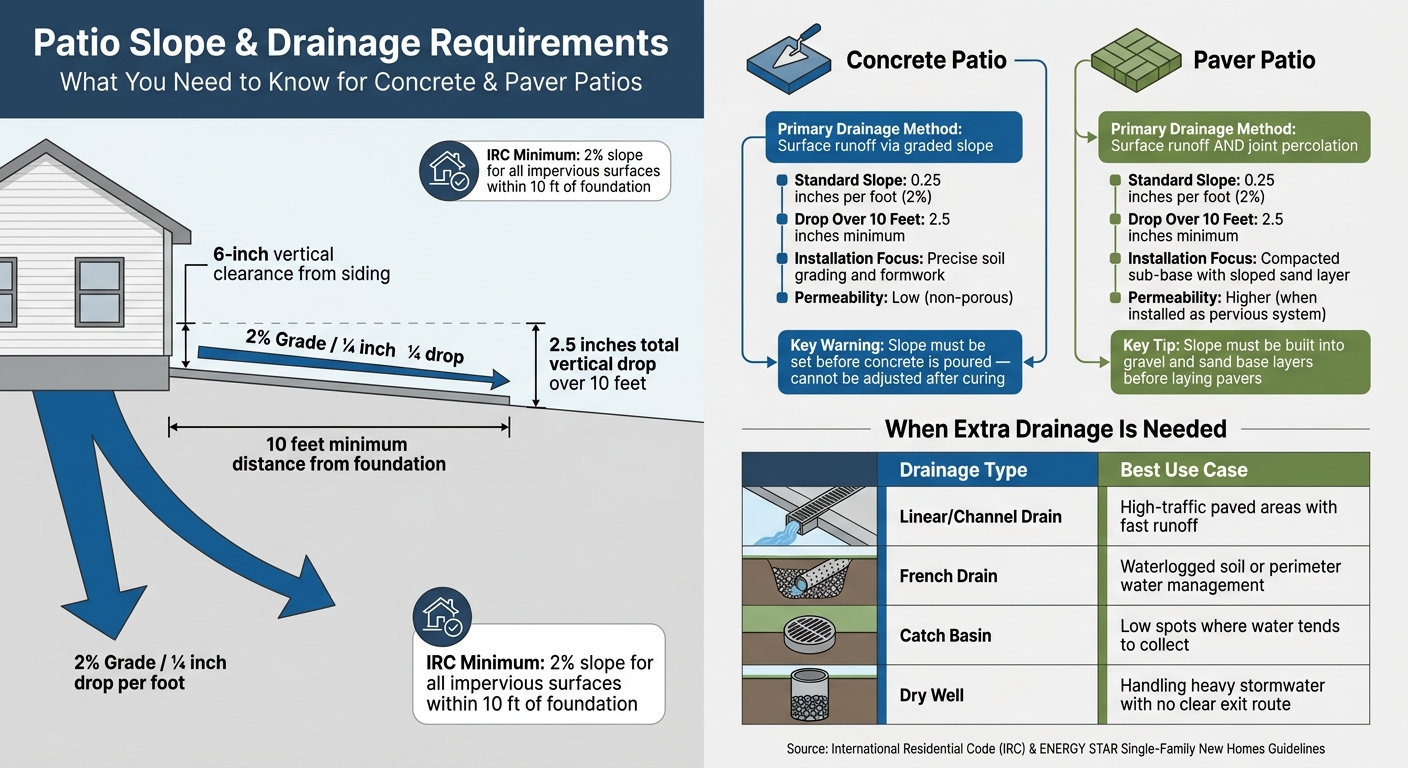
Patio Slope Requirements: Concrete vs. Pavers Drainage Guide
The type of patio material you choose plays a big role in how drainage is managed. Since water interacts differently with pavers and concrete, the methods for achieving the right slope vary based on the material.
Paver Patios: Managing Slope Through Joints and Base Layers
Paver patios have an advantage when it comes to drainage because the gaps between individual pavers allow water to seep into the ground below. When installed as a pervious system, pavers can help water absorb more efficiently into the soil compared to solid concrete. However, relying on permeability alone isn’t enough, especially near a home’s foundation.
To ensure proper drainage, the slope must be built into the compacted gravel and sand base layers before laying the pavers. If the base isn’t graded correctly, the surface won’t drain properly, even if it looks level. This is particularly crucial within 10 feet of the house, where the base should follow the standard slope of 0.25 inches per foot. In colder regions, good drainage is even more important – standing water between pavers can freeze, creating slippery and unsafe conditions.
Concrete patios, on the other hand, require a different approach to achieve proper drainage.
Concrete Patios: Grading and Slope Precision
Unlike pavers, concrete is non-porous, meaning water can’t seep through – it has to flow off the surface entirely. This makes precise grading during the formwork stage critical, as there’s no way to adjust the slope once the concrete sets. According to the International Residential Code, all solid surfaces within 10 feet of a building must have a minimum 2% slope, or 0.25 inches per foot, to direct water away from the foundation.
Here’s a quick comparison of the two materials:
| Feature | Concrete Patio | Paver Patio |
|---|---|---|
| Primary Drainage Method | Surface runoff via graded slope | Surface runoff and joint percolation |
| Standard Slope | 0.25 inches per foot | 0.25 inches per foot |
| Drop Over 10 Feet | 2.5 inches minimum | 2.5 inches minimum |
| Installation Focus | Precise soil grading and formwork | Compacted sub-base with sloped sand layer |
| Permeability | Low (non-porous) | Higher (when installed as a pervious system) |
When slope alone isn’t enough – due to site constraints or heavy rainfall – additional drainage systems like French drains, swales, or catch basins can be added. These features work with the slope to move water away from your home, protecting the foundation and ensuring long-term durability.
For professional help with creating the perfect slope and drainage system, reach out to the experts at Pro Landscapes MD. They specialize in custom hardscaping solutions tailored to your needs.
What Happens When Patio Slope Is Wrong
An improperly sloped patio can lead to problems with drainage, safety, and even structural integrity. Whether the slope is too shallow or too steep, both scenarios can make the space less functional and potentially hazardous. This highlights why accurate grading is so important, as discussed earlier.
Too Little Slope: Standing Water and Foundation Risks
When a patio doesn’t have enough slope, water can pool on the surface. This not only creates slippery areas but can also damage the materials over time. Even worse, water may start flowing toward your house, leading to more serious issues. If water accumulates beneath the surface, it can cause hydrostatic pressure against basement walls, which might result in bowing or cracking. Additionally, standing water attracts pests, turning your patio into an unpleasant and problematic space.
"Water laying against your house will cause any number of problems… water sitting there for any period of time will cause rot, mold, bugs, all variety of things you don’t want." – user558, Home Improvement Stack Exchange [8]
Here’s a real-world example: In June 2013, a homeowner named Brian discovered that his poorly graded concrete pad had caused his basement wall to bow by 3 inches due to hydrostatic pressure. Fixing the problem required breaking up the entire slab, regrading the soil beneath it, and installing new patio pavers. This situation underscores how essential it is to get the slope right from the start [8].
Too Much Slope: Safety and Usability Problems
On the other hand, a patio with too much slope can be just as problematic. A steep pitch makes it uncomfortable to walk on and can cause furniture to slide, turning your outdoor space into a less inviting area. The ideal slope for a patio is a 2% grade (0.25 inches per foot). This provides enough incline to direct water away without making the surface feel uneven or unsafe. Exceeding this standard doesn’t improve drainage but does create usability challenges [2]. If the natural slope isn’t enough to manage water effectively, additional drainage solutions may be required.
When to Add Drainage Features
Sometimes, achieving the perfect slope isn’t possible due to site conditions. For example, your yard might sit higher than the patio, the soil might be heavy clay that resists water absorption, or roof downspouts could direct water straight onto the patio. In these cases, adding drainage features can help. These systems work alongside proper slope design to manage water more effectively, especially for patios made of different materials like pavers or concrete. Here are some options to consider:
| Drainage Option | Best Use Case |
|---|---|
| Linear/Channel Drain | High-traffic paved areas with fast runoff |
| French Drain | Waterlogged soil or perimeter water management |
| Catch Basin | Low spots where water tends to collect |
| Dry Well | Handling heavy stormwater with no clear exit route |
No matter which system you choose, it’s essential to direct water several feet away from your home. Simply moving water off the patio surface isn’t enough if it ends up pooling near your foundation. Persistent issues like standing water, uneven settling, or erosion around the patio are signs that the current setup isn’t working. Addressing these problems sooner rather than later can save you from bigger headaches down the road.
If you’re seeing these kinds of issues, it’s a good idea to have your patio evaluated by professionals. The team at Pro Landscapes MD can provide expert advice on regrading and drainage solutions to keep your outdoor space safe and functional.
Key Takeaways for Getting Patio Slope Right
A proper slope is critical for managing water effectively on your patio. Industry guidelines recommend a 2% slope (¼ inch per foot) as the minimum standard [1]. This ensures water drains efficiently and helps prevent pooling or damage. Additionally, make sure your patio slopes away from your house for at least 10 feet and maintains a 6-inch vertical clearance from siding to avoid moisture-related issues [1].
Material choice also plays a big role in drainage. For example:
- Solid concrete and standard pavers depend entirely on surface runoff.
- Pervious pavers allow water to seep into the soil, offering better drainage in some cases.
If achieving a clean 2% slope isn’t possible due to site constraints like lot lines or walls, you can incorporate drainage solutions such as French drains or swales [1].
"If lot lines, walls, slopes, or other physical barriers limit the ability to achieve 6 inches of slope within 10 feet of the foundation, provide drains or swales to carry water away from the structure." – ENERGY STAR [1]
For uneven or complex sites, it’s wise to call in professionals. Companies like Pro Landscapes MD specialize in patio grading and drainage. They can guide you through material selection and work with premium brands like Techo-Bloc, Belgard, and Unilock. Serving central Maryland and the Washington, DC area, they even offer free hardscaping proposals. If your project requires expert solutions, Pro Landscapes MD is a reliable choice to ensure your patio is built to last.
FAQs
How do I calculate the total drop for my patio?
To figure out the total drop for your patio, you just need to multiply the slope ratio by the patio’s length. Here’s an example: if the gradient is 1:80 and the patio is 12 meters long, the rise per meter equals 12.5 mm (calculated as 1/80). Multiply that 12.5 mm by the patio’s 12 meters, and you get a total drop of 150 mm. This slight slope helps ensure water drains properly, avoiding any pooling issues.
What’s the easiest way to check my patio slope?
To check the slope of your patio, grab a level along with a straightedge or a string line. Start by placing the level directly on the patio surface to pinpoint any spots where water might collect or flow incorrectly. Another method is to stretch a straight board or string line across the patio, then use the level to confirm the slope directs water away from your house and toward designated drainage areas. This method gives you a clear and simple way to visually assess the slope.
When should I add a drain instead of more slope?
When grading alone isn’t enough to redirect water – like in areas with flat terrain or poor drainage – adding a drain becomes essential. This helps manage water effectively and prevents problems like pooling or erosion.
Chat with Us