









- bhavya gada
- No Comments
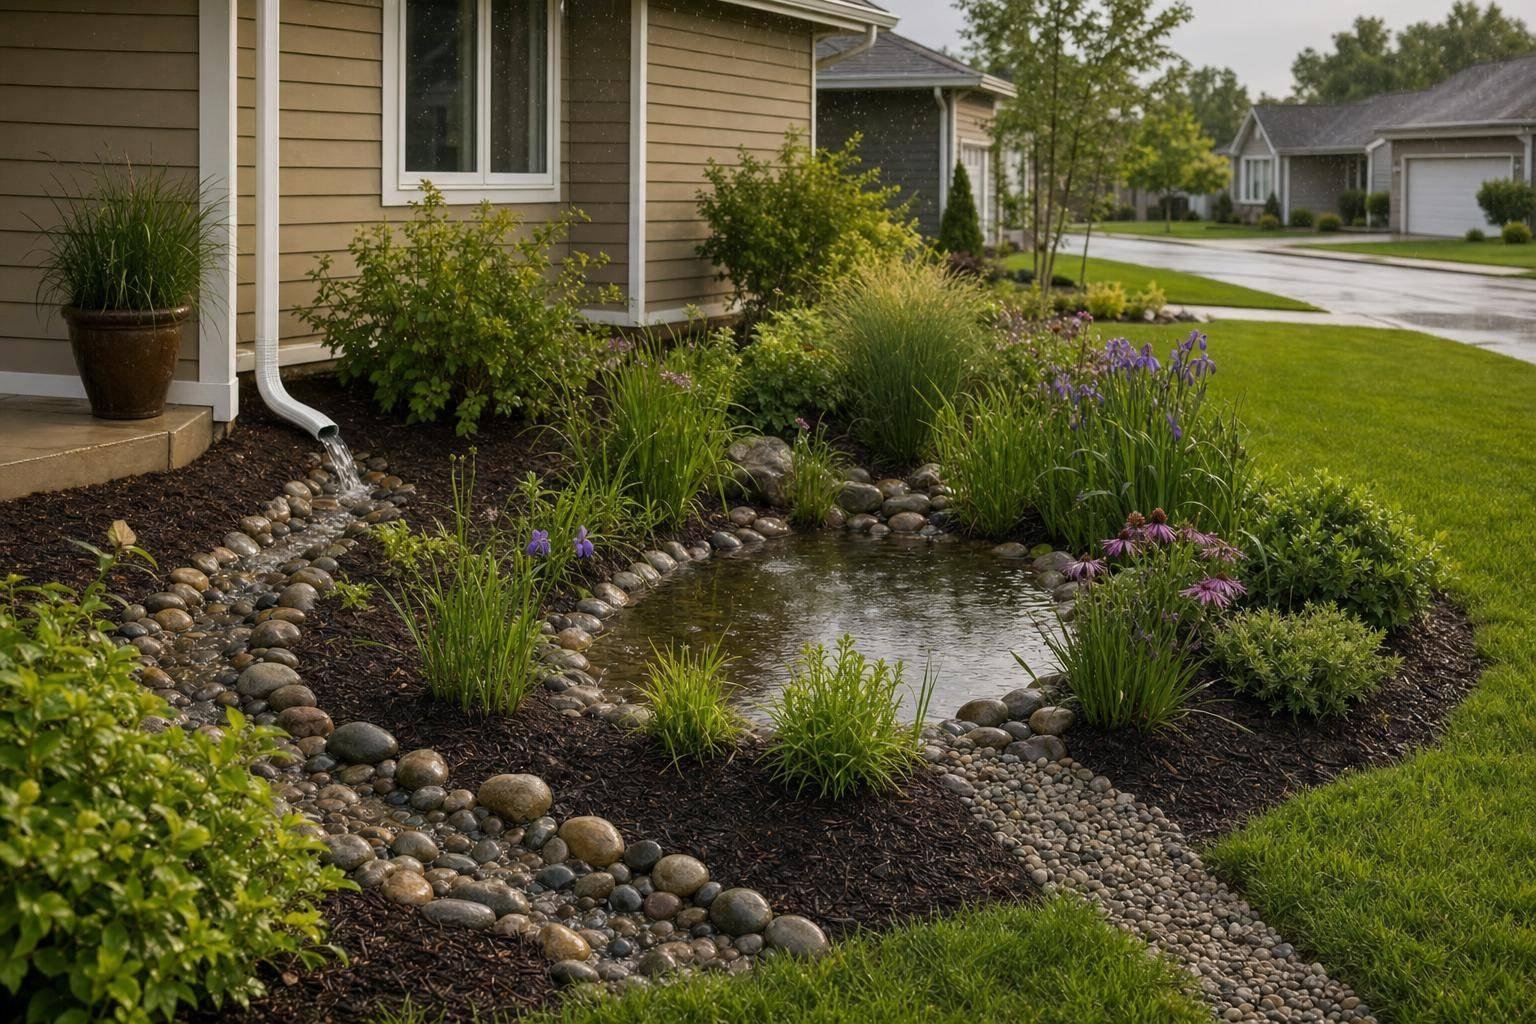
A rain garden works best when I put it in the right spot, test the soil first, and send overflow away from the house. In many Maryland yards, that means placing it at least 10 feet from the house, sizing it for about 20% to 30% of the roof area draining to it, and checking that water drains within 24 to 48 hours.
If I want a short version, it comes down to this:
- Pick a downhill spot away from the house, septic areas, wells, utilities, and big tree roots.
- Test the soil on site instead of guessing from a map.
- Route each downspout away from the house with solid pipe, a swale, or a stabilized surface path.
- Build a shallow basin about 4 to 8 inches deep with gentle side slopes.
- Plant by moisture zone so the wet center and drier edges each get plants that fit.
- Cut a stone-lined overflow path so extra water leaves the garden without running back toward the house.
A few numbers matter most. A 1,000-square-foot roof section can send about 83.3 cubic feet of water into the yard during a 1-inch storm. And because Maryland gets about 35 to 50 inches of precipitation a year, this is not just a one-storm fix.
The main idea is simple: I treat the rain garden like a drainage feature first and a planting bed second. That helps me keep runoff away from the house and lower the chance of standing water in the yard.
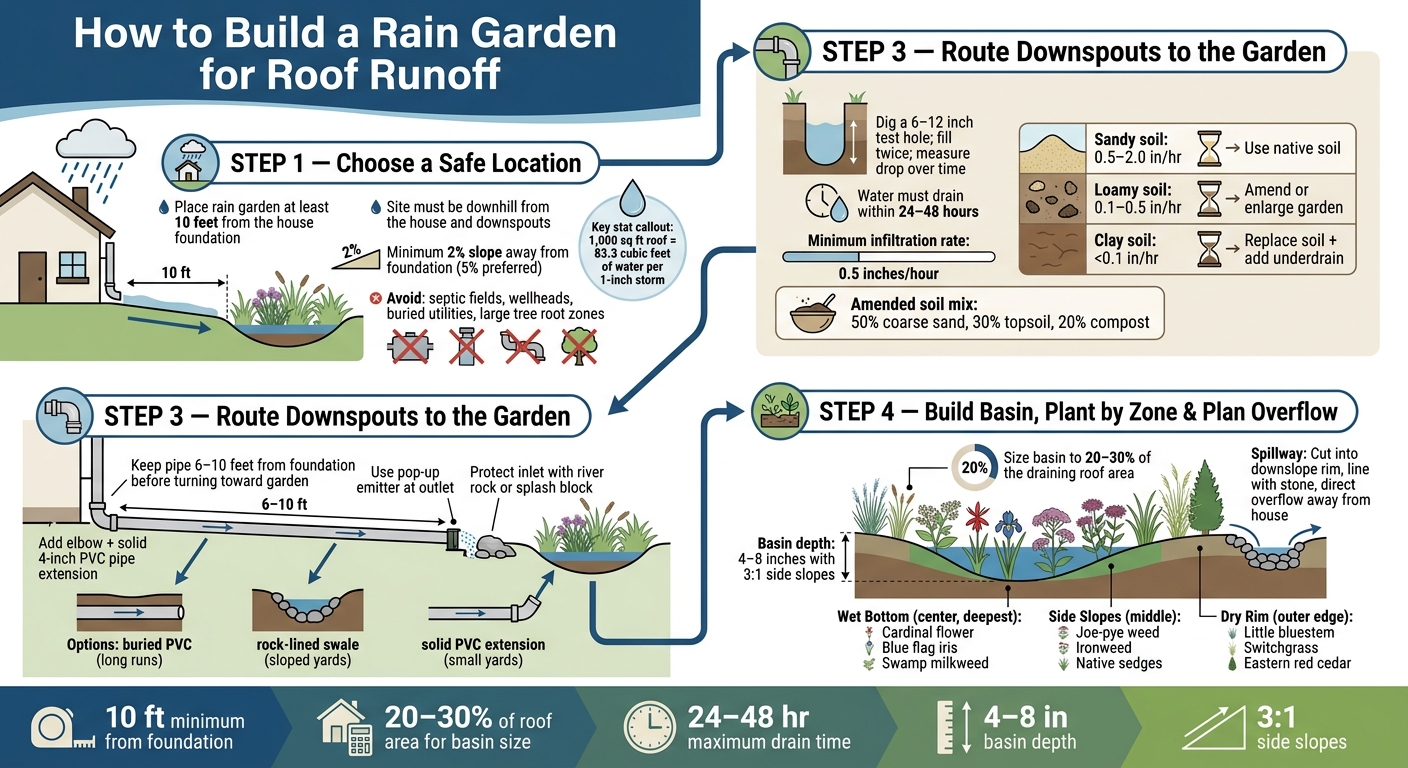
How to Build a Rain Garden for Roof Runoff: 4-Step Guide
How To Create a Rain Garden | Ask This Old House

Step 1: Choose a safe location for the rain garden
Put the rain garden at least 10 feet from your home’s foundation, and place it downhill from the house and the downspouts that feed it. That way, runoff can move into the basin by gravity, which helps cut basement moisture and eases stress on the foundation[1][3].
Skip spots over septic fields, near wellheads, over buried utilities or easements, in areas that stay soggy, or under the root zones of large trees. Digging near big trees can damage major roots, and that can turn into a headache fast[1].
Before you dig, contact your local utility marking service so underground lines are marked first[1][2].
Map roof runoff from each downspout
Follow each downspout back to the section of roof it drains. You’ll need that roof area to size the basin the right way[1][3]. As a rule of thumb, a 1,000-square-foot roof section sheds about 83.3 cubic feet of water during a 1-inch storm[3].
It also helps to check the flow during, or right after, a heavy storm. That gives you a clear picture of where the water actually goes from each downspout[1].
Check slope and setbacks before digging
Pick a site with at least a 2% slope away from the foundation[1]. If your lot allows it, a 5% grade works better[1]. On steeper ground, route water through a swale with 3:1 side slopes to help limit erosion[1].
Also check county drainage rules before you change runoff paths near streets or easements.
| Setback or Specification | Minimum Requirement | Why It Matters |
|---|---|---|
| House foundation | 10 feet[1][3] | Reduces basement moisture and foundation stress |
| Wellhead | 5–10 feet[3] | Protects drinking water sources |
| Site fall away from the house | 2% (1/4 inch per foot)[1] | Encourages positive drainage toward the garden |
| Swale side slopes | 3:1 ratio[1] | Reduces erosion in channels leading to the basin |
Once you’ve picked the spot, test how fast the soil takes in water before you lock in the basin size.
Step 2: Test soil drainage and confirm the site will absorb water
Don’t trust county soil maps to tell you how your yard drains. Maryland soils can change a lot from one spot to the next, and construction often compacts subsoils in ways maps don’t show [1][2]. A site test tells you what you’re dealing with on the ground – and whether the area can take roof runoff safely.
Run a simple infiltration test on site
Dig a hole 6 to 12 inches deep at the proposed site [3]. Fill it twice. The first round lets the soil soak up water. The second round is the one you measure: track how far the water level drops over a set number of hours [3]. Then divide the drop in inches by the number of hours to get the infiltration rate [3].
For a residential rain garden, the water should drain within 24 to 48 hours after a storm. In most cases, the minimum acceptable infiltration rate for standard placement is 0.5 inches per hour [3]. If water is still sitting there after 48 hours, that’s a red flag. The site likely needs an underdrain or major soil replacement [1].
Compare soil results and decide next steps
What you see in that test hole will shape the rest of the design. Sandy soil usually drains fast and often works with little or no adjustment. Loamy soil falls somewhere in the middle. It can work well, but if drainage is a bit slow, you may need a larger garden footprint or a soil amendment. Clay soil is usually the tough one, since it drains much more slowly and often needs heavier fixes.
| Soil Type | Infiltration Rate | Use | Recommended Action |
|---|---|---|---|
| Sandy | 0.5 – 2.0 in/hr | High | Use native soil; standard design works well [3] |
| Loamy | 0.1 – 0.5 in/hr | Moderate | Amend soil or increase garden surface area [3] |
| Clay | Less than 0.1 in/hr | Low | Replace native soil with prepared mix; add underdrain [1][3] |
If the native soil drains too slowly, use a prepared mix of about 50% coarse sand, 30% topsoil, and 20% compost [1]. On sites with very heavy clay, adding an underdrain along with that amended mix can help stop water from sitting too long [1].
Once you know the site’s drainage rate, you can route each downspout into the basin without sending water back toward the house.
sbb-itb-843f8be
Step 3: Route downspouts into the garden without directing water toward the house
Once you’ve confirmed the site can soak in water, the next job is simple: get roof runoff from the downspout to the rain garden without letting it sit near the foundation. Move the water downslope and away from the house before it reaches the garden inlet.[1] After that, set up the route so the basin takes in runoff without sending it back toward the house.
Choose the downspout path and inlet treatment
Start by adding an elbow so the downspout turns horizontal. Then run a solid 4-inch PVC extension, either above ground or buried. Solid 4-inch PVC is the better pick over corrugated pipe because it flows better, clogs less, and holds up better under pressure.[2]
If the run is long, bury the PVC line so water moves underground to the garden.[2] At the outlet, a pop-up emitter can release water into the garden while helping keep debris out.[2]
The inlet matters just as much as the pipe. If water dumps onto bare mulch, it can dig a hole fast and wash material away. To slow things down and protect the soil, place river rock or a splash block where the water enters the garden.[1]
Downspout routing options compared
| Routing Option | Best Use Case | Pros | Limits | Foundation Protection |
|---|---|---|---|---|
| Buried PVC Pipe | Moving water long distances through the yard | Durable, handles high volume, resists clogs | Requires trenching and restoration | High |
| Rock-Lined Swale | Sloped yards where surface flow is visible | Slows water velocity, prevents erosion, natural look | Requires periodic sediment removal | Moderate |
| Shallow Vegetated Channel | Driveway edges or areas with sheet flow | Lower cost; uses vegetation to filter runoff | Can overflow during extreme storms | Moderate |
| Solid PVC Extension | Small yards with positive slope away from the house | Low cost, easy to install | Can be a tripping hazard and may scour soil if not stabilized | Good |
Check inlets, swales, and channels twice a year and after major storms. Clear out sediment before it blocks the flow.[1] With the route set, the next step is to shape the basin, plant by moisture zone, and plan the overflow.
Step 4: Build the basin, plant by moisture zone, and plan overflow
Once the downspout route is in place, shape the basin so water spreads out instead of rushing to one spot. Dig it 4 to 8 inches deep and use 3:1 side slopes. That helps limit erosion and gives the basin time to drain within 24 to 48 hours.[1] Then fill the basin with a soil mix of 50% coarse sand, 30% topsoil, and 20% compost.[1]
Match Maryland plants to wet bottom, side slopes, and dry rim
Planting by moisture zone makes the garden easier to care for. It also helps each part of the basin do its job, from soaking up runoff to holding soil in place.
Rain garden planting zones compared
| Zone | Moisture Pattern | Recommended Maryland Natives | Placement Purpose |
|---|---|---|---|
| Wet Bottom | Periodic ponding; stays wet longest | Cardinal flower (Lobelia cardinalis), Blue flag iris (Iris versicolor), Swamp milkweed (Asclepias incarnata), Buttonbush (Cephalanthus occidentalis) | Captures and filters the first flush of runoff in the deepest area |
| Side Slopes | Moderately moist; drains within hours | Joe-pye weed (Eutrochium purpureum), Ironweed (Vernonia spp.), Native sedges (Carex spp.) | Stabilizes slopes and handles fluctuating water levels |
| Dry Rim | Mostly dry; wet only during heavy rain | Little bluestem (Schizachyrium scoparium), Switchgrass (Panicum virgatum), Eastern red cedar (Juniperus virginiana) | Softens the edge of the basin and helps prevent rim erosion |
Set the overflow route before the first storm
Before the first heavy rain, set the overflow path. Cut a spillway into the downslope rim before planting.[1][3] This gives extra water a clear way out during larger storms. Line the spillway and outlet channel with stone so soil stays put.[4]
Send overflow to a storm drain, roadside ditch, or vegetated area, not toward the foundation, hardscape installations, or neighboring lots.[1][3] That one step can save you a big headache later.
With the spillway in place, the rain garden can handle day-to-day roof runoff and move extra water out safely during major storms.
Conclusion: Key steps for a rain garden that handles roof runoff safely
Start with the location. Put the basin at least 10 feet from the foundation, size it to about 20% to 30% of the roof area draining into it, and test how well the soil absorbs water before you build. Maryland soils can change a lot from one yard to the next, so on-site testing is worth doing before you lock in the spot. [1][3]
Once the site is set, match plants to each moisture zone: the wet bottom, the side slopes, and the dry rim. Then route each downspout to the rain garden with solid 4-inch PVC, keeping that line 6 to 10 feet from the foundation. [2]
One last piece matters just as much: the spillway. Set the overflow so extra water moves downslope and away from the house. [1][3]
For grading, drainage, or rain garden installation in central Maryland, Pro Landscapes MD can help.
FAQs
Do I need a permit for a rain garden?
It depends on where you live in Maryland. A small rain garden at a home often doesn’t need a complicated permit. But local county or city stormwater rules may still come into play if the project includes major grading, changes how water drains on the site, or sends water toward a public street, sidewalk, or other right-of-way.
Before you start digging, check with your local county permitting office or Soil Conservation District. Pro Landscapes MD can also help review permit needs and drainage conditions for your property.
What if my yard has heavy clay soil?
Heavy clay soil usually drains very slowly – often at less than 0.1 inches per hour. That can change how you plan a rain garden.
In this case, a careful site check helps you figure out whether the design needs extra drainage help. That might mean adding an underdrain system or using a soil mix with about 50% coarse sand, 30% topsoil, and 20% compost to help water soak in more easily.
How much maintenance does a rain garden need?
A rain garden needs regular upkeep, but it’s usually pretty manageable. Check it twice a year and after major storms to look for debris, sediment, and signs of erosion.
Routine care includes:
- Removing built-up sediment
- Cleaning catch basins
- Rebuilding eroded spots with topsoil and seed
- Replacing dead plants
- Controlling invasive species
Steady maintenance helps the garden keep soaking water into the ground the way it should. It also helps prevent clogs and avoids long-term failure.
Chat with Us